
Witch Hat Cookies are more than just a seasonal treat; they are a delightful emblem of autumn festivities and spooky charm. I find immense joy in crafting these whimsical confections, as they instantly evoke a sense of nostalgic delight and celebratory spirit. This enchanting dessert holds a special place in many hearts, particularly during the Halloween season, where their iconic shape and vibrant decoration perfectly capture the playful essence of tricks and treats. My own memories are filled with the laughter and excitement of friends and family gathered to create these edible masterpieces, making them a cherished tradition in my home.
Why Witch Hat Cookies Cast a Spell on Everyone
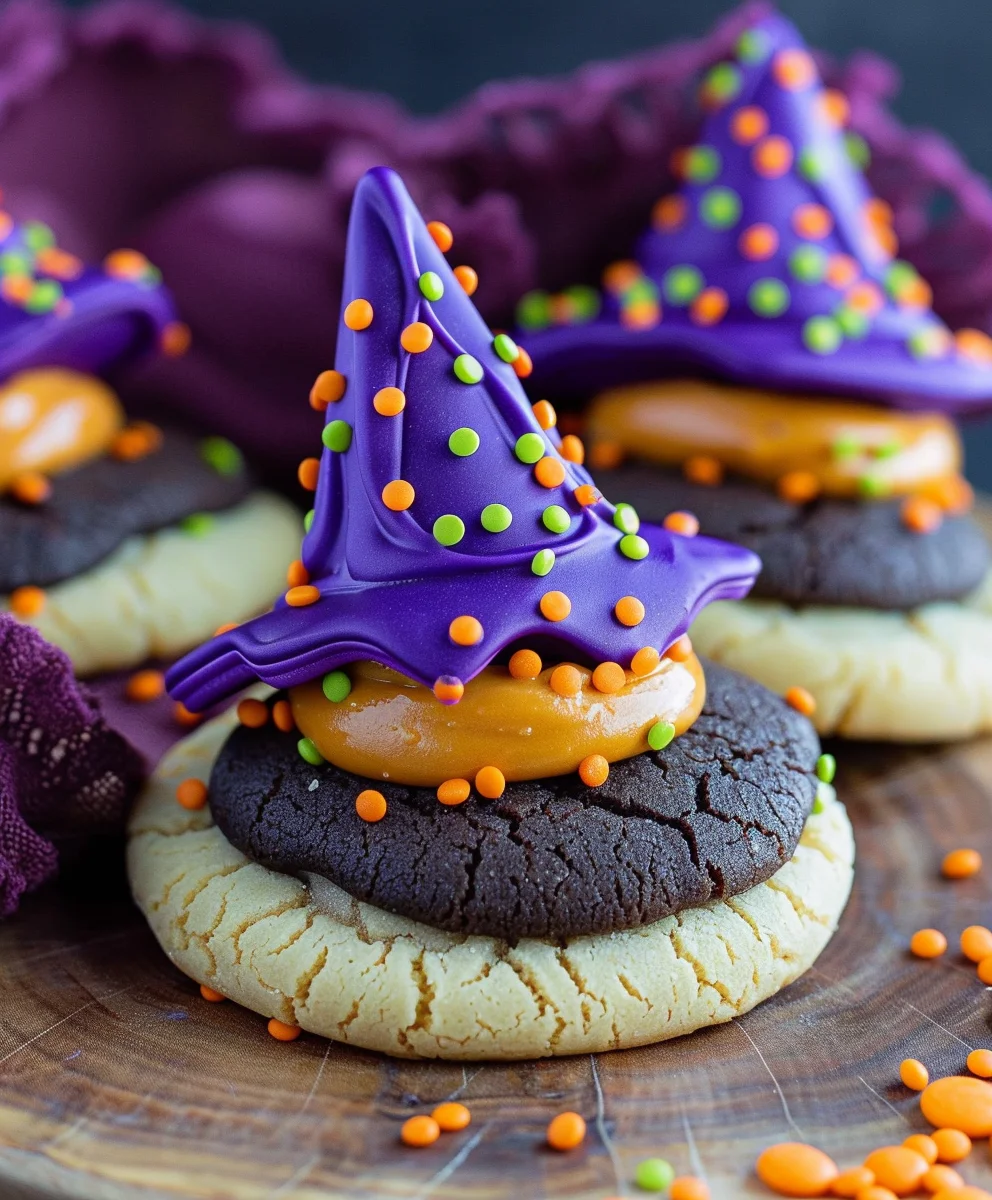
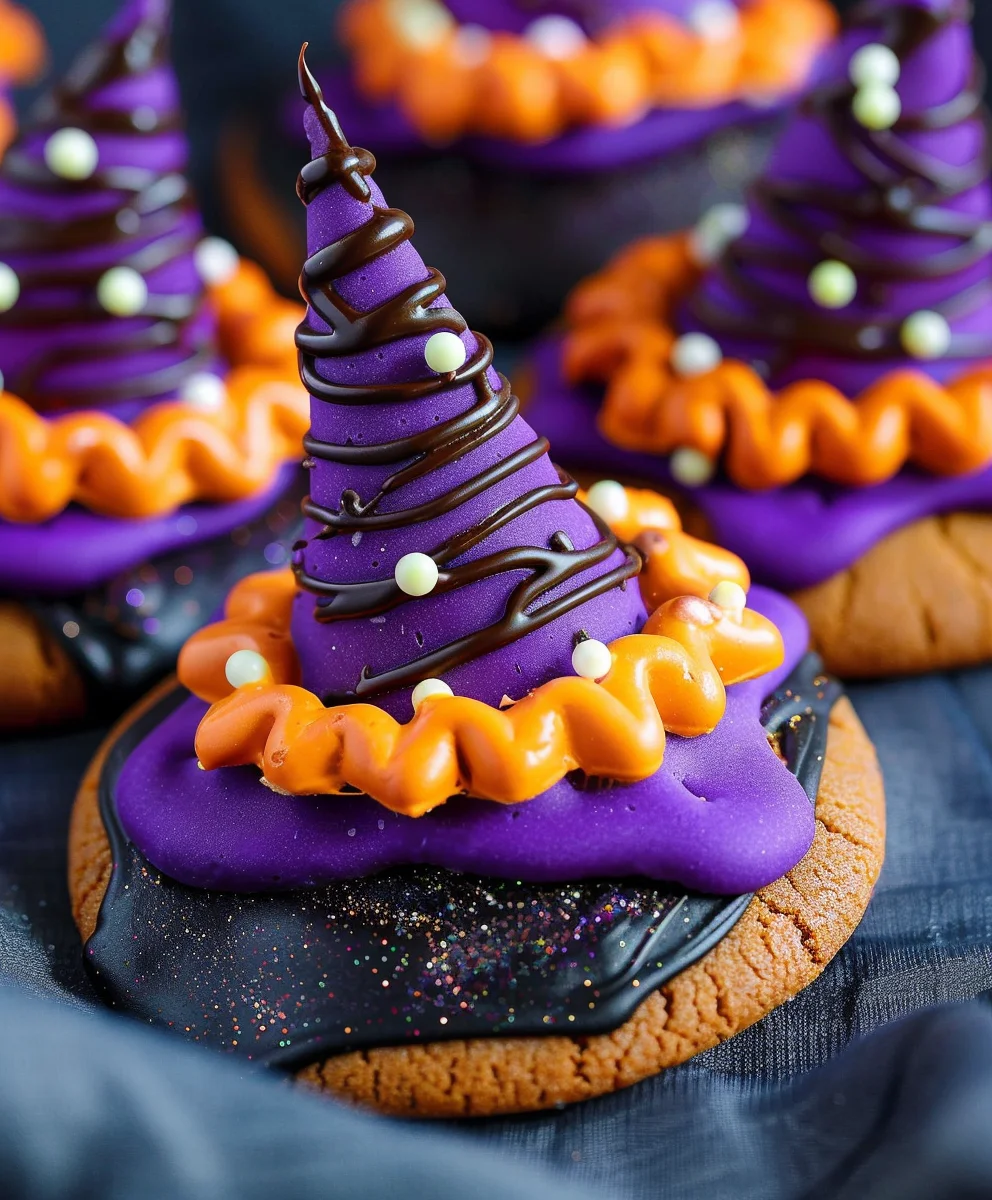
People absolutely adore these Witch Hat Cookies for a multitude of reasons. Beyond their undeniable visual appeal, which makes them a showstopper on any dessert table, lies a delicious blend of textures and flavors. Typically featuring a delightful cookie base, often combined with a rich chocolate kiss and a vibrant frosting “brim,” they offer a perfect harmony of crisp, smooth, and sweet in every bite. Their relative ease of assembly also makes them a fantastic activity for all ages, transforming baking into a fun, interactive experience. Whether you’re hosting a grand Halloween party or simply seeking a charming, tasty indulgence, these cookies promise to deliver both whimsy and wonderful flavor.

Witch Hat Cookies Recipe
Ingredients
For the Sugar Cookie Base:
- 2 ½ cups (300g) all-purpose flour, plus more for dusting
- 1 teaspoon baking powder
- ½ teaspoon salt
- 1 cup (226g) unsalted butter, softened to room temperature
- 1 ½ cups (300g) granulated sugar
- 1 large egg
- 2 teaspoons pure vanilla extract
For the Chocolate Witch Hat Toppers:
- 18-24 pointed ice cream cones (small sugar cones work best)
- 12 ounces (340g) dark or milk chocolate melting wafers or chips
- Assorted Halloween sprinkles or sanding sugar
For the Royal Icing “Glue”:
- 2 cups (240g) powdered sugar, sifted
- 2 tablespoons milk (dairy or non-dairy), plus more if needed
- ¼ teaspoon vanilla or almond extract
- Black or purple gel food coloring (optional)
Instructions
Preparing the Cookie Base
- Whisk flour, baking powder, and salt in a bowl.
- Cream butter until smooth, then add sugar and beat until fluffy.
- Mix in egg and vanilla.
- Gradually add flour mixture, mixing until just combined.
- Divide dough into 2 discs, wrap, and chill at least 1 hour.
- Preheat oven to 375°F (190°C). Line baking sheets.
- Roll dough ¼-inch thick, cut into 2.5–3 inch circles.
- Bake 8–10 minutes until edges are golden. Cool completely.
Making the Witch Hat Toppers
- Melt chocolate (microwave in intervals or use double boiler).
- Dip cones ⅔ in chocolate, let excess drip.
- Decorate immediately with sprinkles.
- Place on parchment paper and let harden.
Royal Icing “Glue”
- Whisk powdered sugar, milk, and extract until smooth.
- Adjust consistency (aim for thick toothpaste-like texture).
- Add food coloring if desired.
- Transfer to piping bag or zip-top bag.
Assembling the Witch Hat Cookies
- Pipe icing onto center of cooled cookies.
- Press chocolate-dipped cone onto icing. Hold gently.
- Repeat with all cookies.
- Let sit 1–2 hours until icing is firm.
- Optional: Pipe buckles, webs, or extra details.
Tips
- Chill dough before baking to prevent spreading.
- Don’t overbake — remove when edges are just golden.
- Use quality chocolate for smooth dipping.
- Ensure tools are dry when handling chocolate.
- Sift powdered sugar for smooth icing.
Storage & Variations
- Store in airtight container at room temperature for 5–7 days.
- Try chocolate sugar cookie dough for a darker look.
- Use colored candy melts for festive hats.
- Add edible glitter, pearls, or extra icing designs for flair.
Conclusion:
And there you have it, my dear fellow bakers and dessert enthusiasts! As we wrap up this delightful journey, I truly hope you’re feeling as inspired and excited as I am about creating these magical treats. These aren’t just any ordinary cookies; they are an invitation to infuse a little whimsy and wonder into your day, a simple yet profoundly rewarding project that promises smiles and satisfied taste buds. I know that sometimes the idea of baking something visually impressive can feel daunting, but I promise you, these cookies are incredibly forgiving and fun, making them an absolute must-try for bakers of all skill levels. From the moment you start mixing to that final, perfect placement of the “hat,” every step is designed to be enjoyable, leading to a confection that’s as charming to look at as it is utterly delicious to eat. They possess that perfect balance of sweetness and texture, a comforting bite that instantly transports you to a world of culinary enchantment.
Elevate Your Serving Experience and Explore Creative Twists
Now that you’ve mastered the basic recipe, let’s talk about how you can take these fantastic treats even further. While these Witch Hat Cookies are undeniably spectacular on their own, served simply with a tall glass of cold milk or a warm mug of cocoa, there are so many ways to customize and present them for different occasions. Imagine arranging them on a tiered dessert stand as the whimsical centerpiece for a Halloween party – they’ll be the star of the show! For a sophisticated touch, consider pairing them with a rich, dark coffee or even a festive spiced tea. Think beyond just the holiday: with a change of colors and decorations, they can easily transform into wizard hats for a fantasy-themed birthday, or even simple, elegant conical cookies for a whimsical bridal shower. You could experiment with different cookie bases; perhaps a chocolate shortbread for an even richer flavor, or a vibrant red velvet base for a striking contrast. For the chocolate lovers, consider dipping the bottom of the “hat” in melted white chocolate and sprinkling with iridescent edible glitter before placing it on the cookie. Want to introduce more flavors? A hint of almond extract in the cookie dough or a touch of orange zest in the frosting can create entirely new taste experiences. Don’t be afraid to play with various candy textures for the “buckle” – maybe mini M&M’s for a pop of color, or even a tiny piece of edible gold leaf for a touch of luxury. For those with dietary considerations, feel free to experiment with gluten-free cookie flour blends or dairy-free chocolate alternatives for the hats; the core concept is wonderfully adaptable.
Your Culinary Adventure Awaits!
This recipe is more than just instructions; it’s a canvas for your creativity. It’s an opportunity to gather loved ones, perhaps even the little ones, for a delightful baking session filled with laughter and sticky fingers. The joy isn’t just in the eating, but in the making, the shared experience, and the proud moment when you present your edible works of art. I truly believe that every time you bake something from scratch, you’re not just creating food; you’re creating memories, you’re spreading happiness, and you’re adding a unique, personal touch to the tapestry of your life. So, I wholeheartedly encourage you to roll up your sleeves, preheat your ovens, and embark on this delicious adventure. Don’t hesitate to put your own spin on these cookies, whether it’s through unique flavor combinations, elaborate decorations, or simply by adding an extra sprinkle of your favorite topping. And when you do, please, please, please share your creations with me! I absolutely adore seeing your magnificent bakes and hearing about your experiences in the kitchen. Drop a comment below, or even better, snap a photo and share it on your favorite social media platform, tagging me if you can! I can’t wait to see the incredible, imaginative Witch Hat Cookies you bring to life. Happy baking, everyone!
Witch Hat Cookies: Spooky Fun & Easy Halloween Treat!
These delightful Witch Hat Cookies are a festive and easy treat perfect for Halloween. Featuring a soft peanut butter cookie base topped with a chocolate kiss ‘hat’ and a vibrant purple ‘brim’ of glaze adorned with sprinkles, they offer a playful essence of spooky charm.
Ingredients
-
1 ½ cups all-purpose flour
-
2 teaspoons cornstarch
-
½ teaspoon baking soda
-
¼ teaspoon baking powder
-
⅛ teaspoon fine sea salt
-
½ cup unsalted butter, softened
-
1 cup granulated sugar
-
1 large egg
-
¾ cup creamy peanut butter
-
1 teaspoon vanilla extract
-
Purple gel food coloring
-
Halloween sprinkles or purple sanding sugar
-
33 Chocolate kisses or Hugs candies, unwrapped
Instructions
- Step 1
Preheat oven to 375°F (190°C) and line baking sheets with parchment paper. In a medium bowl, whisk together the flour, cornstarch, baking soda, baking powder, and fine sea salt. - Step 2
In a large bowl, cream the softened unsalted butter and granulated sugar until light and fluffy. Beat in the large egg, creamy peanut butter, and vanilla extract until well combined. - Step 3
Gradually add the whisked dry ingredients to the wet mixture, mixing on low speed until just combined and no streaks of flour remain. Avoid overmixing. - Step 4
Roll dough into 1-inch balls and place about 2 inches apart on the prepared baking sheets. Bake for 8-10 minutes, or until the edges are lightly golden. Do not overbake; cookies will set as they cool. - Step 5
Immediately after removing cookies from the oven, gently press one unwrapped chocolate kiss or Hug candy into the center of each warm cookie. Allow cookies to cool completely on a wire rack. - Step 6
In a small bowl, combine 2-3 tablespoons of the granulated sugar, 1-2 teaspoons of water (or milk if preferred), and a few drops of purple gel food coloring. Whisk until smooth to form a thick, pipeable glaze. Adjust consistency as needed with more sugar or liquid. - Step 7
Transfer the purple glaze to a small piping bag or a sturdy zip-top bag with a tiny corner snipped off. Pipe a small circle or ‘brim’ of purple glaze around the base of each chocolate kiss. Immediately add Halloween sprinkles or purple sanding sugar to the wet glaze. Allow glaze to set completely for at least 30-60 minutes before serving or storing.
Important Information
Nutrition Facts (Per Serving)
It is important to consider this information as approximate and not to use it as definitive health advice.
Allergy Information
Please check ingredients for potential allergens and consult a health professional if in doubt.
Leave a Comment