
Vanilla Pecan Pralines – the very name conjures images of Southern hospitality, sweet indulgence, and handcrafted perfection. Have you ever experienced that moment when a confection melts in your mouth, leaving behind a symphony of buttery sweetness, crunchy nuts, and fragrant vanilla? That’s precisely the enchanting experience these delightful candies offer. Tracing their lineage back to 17th-century France, where they were almond-based, pralines found their true home and transformation in the American South, particularly New Orleans. Here, the readily available pecans replaced almonds, and the candy evolved into the creamy, melt-in-your-mouth discs we adore today.
People fall head over heels for this classic Southern treat not just for its exquisite taste, but for the comforting nostalgia it evokes. The combination of rich vanilla, toasted pecans, and a sugary, slightly grainy texture creates an unparalleled flavor profile that’s both elegant and utterly satisfying. Preparing a batch of Vanilla Pecan Pralines isn’t just baking; it’s an act of preserving a beloved culinary tradition, ensuring that every bite carries a piece of history and a whole lot of love. Get ready to embark on a sweet journey that will captivate your senses and leave you craving just one more.

Ingredients:
Creating truly delicious Vanilla Pecan Pralines requires a precise balance of ingredients and a little bit of patience. Here’s what you’ll need to gather to embark on this sweet journey:
- For the Pralines:
- 2 cups granulated sugar: This is the backbone of our pralines, providing the essential sweetness and structure.
- 1 ½ cups light brown sugar, packed: The brown sugar adds a wonderful depth of molasses flavor that complements the vanilla and pecans beautifully, giving our Vanilla Pecan Pralines that signature richness.
- 1 ½ cups heavy cream: This provides the creamy base for the candy, ensuring a smooth and luxurious texture. Don’t substitute with milk or half-and-half; heavy cream is crucial for richness.
- ½ cup (1 stick) unsalted butter: We’ll use this for flavor, richness, and to help prevent crystallization, contributing to that melt-in-your-mouth quality of homemade Vanilla Pecan Pralines.
- 2 teaspoons pure vanilla extract: This is a star ingredient, infusing our pralines with that classic, comforting vanilla aroma and taste. Make sure it’s pure vanilla for the best flavor.
- 2 cups pecan halves, lightly toasted: The pecans are integral to the name and the crunch of our Vanilla Pecan Pralines. Toasting them briefly enhances their nutty flavor significantly.
- ½ teaspoon salt: A small amount of salt balances the sweetness and brings out all the other flavors, making the pralines more complex and utterly irresistible.
Equipment You’ll Need:
Having the right tools on hand makes the process of making Vanilla Pecan Pralines much smoother and more enjoyable. Think of these as your trusty companions in the kitchen:
- A large, heavy-bottomed pot (at least 5-quart capacity): This is essential because the mixture will bubble up quite a bit. A heavy bottom helps distribute heat evenly and prevents scorching, which is critical for good candy.
- A candy thermometer: Absolutely non-negotiable for candy making! Accuracy in temperature is key to perfect pralines. You’re aiming for a specific soft-ball stage, and a reliable thermometer ensures you hit it every time.
- Parchment paper or silicone baking mats: You’ll need to line your countertops or baking sheets with these. The pralines will be dropped onto this surface to set, and these materials prevent sticking and make cleanup a breeze. Wax paper is not recommended as the hot candy can melt the wax.
- Two large wooden spoons or heat-proof spatulas: One for stirring the mixture while it cooks, and another for beating the mixture once it cools slightly. Wooden spoons are preferred as they don’t conduct heat as much as metal, making them comfortable to hold.
- A pastry brush and a small bowl of water: This is a secret weapon for preventing sugar crystallization on the sides of your pot.
- Measuring cups and spoons: For accurately measuring all your ingredients. Precision is important in candy making.
- Baking sheets or ample counter space: To lay out your parchment paper for dropping the pralines.
- A small saucepan for toasting pecans (optional): If you’re toasting your pecans yourself, a separate small pan is handy.
Preparing Your Workspace for Vanilla Pecan Pralines:
Before you even think about turning on the stove, let’s get our environment ready. This step is often overlooked but is absolutely crucial for candy making, especially when crafting delicate Vanilla Pecan Pralines. Candy making is a race against time once the mixture is off the heat, so being prepared means success!
- Prep Your Pecans: If you haven’t already, lightly toast your pecan halves. You can do this by spreading them in a single layer on a baking sheet and baking in a preheated oven at 300°F (150°C) for about 8-10 minutes, or until fragrant. Alternatively, toast them gently in a dry skillet over medium-low heat, stirring frequently, until they smell nutty and are slightly darker. Be careful not to burn them! Once toasted, set them aside to cool completely.
- Line Your Surfaces: Lay out several sheets of parchment paper or silicone baking mats across your clean countertop or on baking sheets. You’ll need plenty of space for dropping the pralines, as they set fairly quickly. Make sure you have at least 2-3 feet of lined surface ready. This is a critical step because once you start dropping the hot praline mixture, you won’t have time to stop and prepare more space.
- Gather All Ingredients: Measure out all your sugars, cream, butter, vanilla, salt, and toasted pecans. Have them all ready and within arm’s reach of your stove. This practice, known as ‘mise en place,’ is incredibly helpful, particularly when making candy where timing is key. You don’t want to be scrambling for an ingredient while your sugar syrup is at its critical stage.
- Prepare Your Candy Thermometer: Ensure your candy thermometer is clean and ready to be clipped to the side of your pot. If it’s a standard glass thermometer, ensure it’s positioned so the bulb is submerged in the mixture but not touching the bottom of the pot. This ensures an accurate temperature reading of the syrup, which is paramount for achieving the perfect texture for your Vanilla Pecan Pralines.
- Have Your Tools Ready: Keep your wooden spoons or spatulas, pastry brush, and a small bowl of water (for brushing down the sides of the pot) right by the stove. Once the cooking starts, you’ll need everything readily accessible.
Crafting the Perfect Vanilla Pecan Praline Base:
Now that our workspace is immaculate and our ingredients are prepped, it’s time to begin the magical transformation of simple ingredients into exquisite Vanilla Pecan Pralines. This phase is all about careful heating and precise temperature control.
- Combine Wet and Dry Ingredients (Mostly): In your large, heavy-bottomed pot, combine the granulated sugar, light brown sugar, heavy cream, butter, and salt. Stir these ingredients together gently with one of your wooden spoons until they are well mixed and the butter is roughly incorporated. Do not add the vanilla extract or pecans at this stage; they will be added later.
- Heat to Dissolve Sugar: Place the pot over medium heat. Stir constantly, but gently, until the sugar is completely dissolved. You’ll know it’s dissolved when you can no longer feel any gritty sugar crystals against the bottom of the pot with your spoon. This initial stirring is crucial because undissolved sugar crystals can lead to a grainy texture in your finished Vanilla Pecan Pralines. Be patient here; it might take 5-7 minutes.
- Clean the Sides of the Pot: Once the sugar is dissolved, stop stirring. Attach your candy thermometer to the side of the pot. Now, dip your pastry brush into the small bowl of water and gently brush down any sugar crystals that may have splashed onto the sides of the pot above the syrup line. These rogue crystals can act as “seeds” for crystallization, potentially ruining the smooth texture of your pralines. Repeat this step periodically if you see more crystals forming as the mixture boils.
- Bring to a Rolling Boil: Increase the heat slightly to medium-high and bring the mixture to a strong, rolling boil. You’ll see large, persistent bubbles breaking on the surface. From this point forward, do not stir the mixture again until it reaches the desired temperature. Stirring during this phase can encourage crystallization and result in crumbly, rather than creamy, pralines.
- Cook to Soft-Ball Stage (238°F – 242°F): Let the mixture boil undisturbed, monitoring the temperature with your candy thermometer. We are aiming for the “soft-ball stage,” which is typically between 238°F and 242°F (114°C – 116°C). For Vanilla Pecan Pralines, I personally aim for 240°F (116°C), as I find it yields the perfect balance of firmness and creaminess. The time it takes to reach this temperature can vary significantly depending on your stove, pot, and even the humidity in the air, but it usually takes about 15-25 minutes from the start of boiling.
- Understanding the Soft-Ball Stage: If you don’t have a thermometer or want to double-check, you can perform the “cold water test.” Drop a small amount of the hot syrup into a cup of very cold water. If it forms a soft, pliable ball that can be flattened easily between your fingers, you’ve reached the soft-ball stage. It won’t hold its shape when removed from the water. This is the moment when the sugar concentration is just right for our Vanilla Pecan Pralines.
- Remove from Heat: As soon as your mixture reaches 240°F (116°C), immediately remove the pot from the heat.
Achieving the Right Praline Consistency:
This stage is where the magic truly happens, transforming the clear, hot syrup into the creamy, opaque, and spoonable consistency we desire for our Vanilla Pecan Pralines. This is a delicate and crucial part of the process, demanding your full attention.
- Add Vanilla and Pecans: Once the pot is off the heat, carefully stir in the pure vanilla extract and the toasted pecan halves. Stir just enough to combine them thoroughly into the hot sugar syrup. The vanilla will instantly release its beautiful aroma into the mixture, and the pecans will be evenly distributed, ready to be encased in the creamy praline goodness.
- Allow to Cool Without Stirring: This is arguably the most critical step for achieving the ideal texture of your Vanilla Pecan Pralines. Let the mixture sit undisturbed in the pot for about 5-10 minutes, or until its temperature drops to approximately 200°F – 210°F (93°C – 99°C). You can gently check this with your candy thermometer, being careful not to agitate the mixture too much. During this cooling period, the sugar crystals are allowed to begin forming without interference, which is essential for a smooth, creamy texture later. If you start beating too early, the crystals won’t be uniform, leading to a grainy praline. The surface of the candy will start to form a very thin, almost imperceptible skin during this cooling phase.
- Begin the Beating Process: Once the mixture has cooled to the recommended temperature range (around 200°F-210°F), it’s time to start beating. Using a clean, sturdy wooden spoon or heat-proof spatula, begin stirring and beating the mixture vigorously and continuously. You’ll be surprised at how quickly the transformation begins to happen.
- Observe the Transformation: As you beat, you’ll notice several changes:
- Loss of Sheen: The mixture will gradually lose its glossy, translucent appearance and become more opaque.
- Thickening: It will thicken considerably, moving from a syrupy liquid to a much more viscous, almost fudge-like consistency.
- Change in Color: The color will lighten slightly, taking on a more caramel-beige hue due to the crystallization of the sugars and the incorporation of air.
- Gritty Sensation: You might feel a slight resistance or a subtle sandy texture against your spoon as the sugar crystals rapidly form and grow. This is exactly what you want! The key is to beat until these crystals are very small and evenly distributed, resulting in a creamy praline rather than a crumbly one.
This beating process is crucial for the perfect Vanilla Pecan Pralines texture. It encourages the formation of tiny, uniform sugar crystals, which results in a smooth, melt-in-your-mouth candy. If you don’t beat it enough, the pralines will be too soft and sticky, possibly even runny. If you beat it too much, they will become dry, crumbly, and seize up in the pot, making them impossible to drop.
- Know When to Stop Beating: Continue beating vigorously until the mixture is thick enough that when you lift your spoon, it begins to lose its shine and hold a soft, dollop-like shape for a moment before slowly slumping back. It should be opaque and no longer look like syrup. It will become noticeably stiffer and harder to stir. This is the precise moment you need to stop beating, as it indicates the perfect crystallization has occurred, making it just right for forming your Vanilla Pecan Pralines. You must work quickly from this point forward. The entire beating process can take anywhere from 5 to 15 minutes, depending on the temperature, humidity, and how vigorously you beat. Trust your eyes and your arm!
Forming and Setting Your Vanilla Pecan Pralines:
You’ve done the hard work of cooking and beating! Now comes the fun part: shaping your glorious Vanilla Pecan Pralines. This step requires speed and confidence, as the mixture will continue to set quickly.
- Work Swiftly: Immediately after you stop beating, begin dropping spoonfuls of the praline mixture onto your prepared parchment paper or silicone mats. Use two spoons if that’s easier for you – one to scoop the mixture from the pot and another to help push it off onto the paper.
- Form Even Drops: Aim for roughly 2-inch wide circles, or whatever size you prefer for your Vanilla Pecan Pralines. Don’t worry about them being perfectly round; the charm of homemade pralines often lies in their rustic, irregular shapes. Try to include a few pecan pieces in each drop. Work as quickly and efficiently as possible, because the mixture in the pot will continue to set. If it becomes too stiff to drop, you can gently reheat the pot over very low heat for a minute or two, stirring constantly, just until it becomes pliable enough to drop again. Be extremely careful not to overcook it or melt it back into a syrup.
- Allow to Set and Cool: Once all the pralines are dropped, leave them undisturbed to set and cool completely. This usually takes about 30 minutes to 1 hour, depending on the ambient temperature and humidity. As they cool, the pralines will firm up and develop their characteristic texture. You’ll know they’re ready when they are solid, no longer sticky, and can be easily lifted from the parchment paper without losing their shape.
- Admire Your Creation: Once fully set, your beautiful Vanilla Pecan Pralines are ready to be enjoyed! They will have a slightly crumbly yet creamy texture, with a rich caramel-vanilla flavor and the delightful crunch of toasted pecans.
Tips for Praline Perfection and Troubleshooting:
Making Vanilla Pecan Pralines is an art and a science. Here are some extra pointers and common pitfalls to help ensure your success every time:
-
Humidity is Your Enemy:
Candy making, especially sugar-based candies like pralines, is highly sensitive to humidity. On a rainy or very humid day, sugar has a tendency to absorb moisture, which can prevent the candy from setting properly or result in a sticky, gooey mess. If possible, choose a dry day to make your Vanilla Pecan Pralines. If you must make them on a humid day, sometimes adding an extra minute or two to the cooking time (aiming for 242°F instead of 240°F) can help, but it’s not a foolproof solution.
-
Don’t Scrape the Pot:
When pouring the mixture from the pot or when you’re almost done dropping, resist the urge to scrape the bottom and sides of the pot. The very bottom and edges are often where the sugar crystals are largest and most likely to cause a grainy texture in your finished pralines. Leave that last bit behind to ensure the smoothest results for your Vanilla Pecan Pralines.
-
Crystallization Prevention is Key:
We’ve talked about this a lot because it’s so important! Always ensure your sugar is fully dissolved before the mixture comes to a boil. Brush down the sides of the pot with water to remove any stray sugar crystals. Avoid stirring once the mixture is boiling until it’s off the heat and has cooled slightly. These steps are your best defense against grainy pralines.
-
Calibrate Your Thermometer:
A faulty candy thermometer can ruin your batch. To check its accuracy, place it in a pot of boiling water. It should read 212°F (100°C) at sea level. If it doesn’t, adjust your target temperature accordingly. For example, if it reads 210°F, then you should aim for 238°F instead of 240°F for your Vanilla Pecan Pralines.
-
The Importance of Patience in Cooling:
Resist the urge to start beating the mixture too early. Letting it cool to around 200°F-210°F (93°C-99°C) before beating allows the formation of smaller, more uniform sugar crystals, which translates to a creamier, smoother praline. Beating when it’s too hot can lead to large, gritty crystals and a crumbly texture.
-
Don’t Overbeat or Underbeat:
This is the trickiest part. Overbeating will cause the mixture to seize up in the pot, becoming too stiff to drop and resulting in dry, hard pralines. Underbeating will leave your pralines too soft, sticky, and possibly unable to hold their shape, feeling more like a very thick sauce than a solid candy. You’re looking for that sweet spot where it’s opaque, thick, loses its shine, and just begins to hold its shape when dropped from a spoon. Practice makes perfect when it comes to the art of beating for your Vanilla Pecan Pralines.
-
Storage:
Store your finished Vanilla Pecan Pralines in an airtight container at room temperature for up to a week. If it’s very warm or humid, they might soften, but they’ll still be delicious! You can also store them in the refrigerator, but allow them to come to room temperature before serving for the best texture and flavor. They do not typically freeze well due to their delicate crystalline structure.
-
Enjoy the Process:
While candy making can seem intimidating, it’s also incredibly rewarding. Take your time, follow the steps, and don’t be afraid to learn from any mistakes. The satisfaction of creating homemade Vanilla Pecan Pralines from scratch is truly unmatched!
Conclusion:
Well, my friends, we’ve reached the sweet finale of our culinary journey, and I genuinely hope you’re feeling as excited as I am about what we’ve just explored. This isn’t just another dessert recipe; it’s an invitation to create something truly magical, a confection that embodies warmth, comfort, and an undeniable touch of Southern charm. If you’ve been on the fence about trying your hand at homemade candies, let me assure you, this recipe is your golden ticket. It transforms simple ingredients into an extraordinary treat that will undoubtedly become a treasured addition to your baking repertoire.
Why is this a must-try, you ask? Because the moment you bite into one, you’ll understand. The exquisite balance of rich, buttery caramel melting in your mouth, followed by the satisfying crunch of perfectly toasted pecans, is simply unparalleled. Then, there’s that delicate whisper of vanilla, elevating every single note and leaving a lingering sweetness that begs for just one more. It’s a sensory experience that delivers far beyond its humble origins. I’ve seen faces light up, eyes widen, and immediate requests for the recipe from everyone who’s ever tasted them. They are surprisingly easy to master once you get the hang of a few key steps, and the reward for your minimal effort is truly magnificent. The aroma alone as they cool on your counter is enough to make your kitchen the most popular room in the house!
Now, let’s talk about enjoying these delightful morsels. While they are utterly perfect on their own, perhaps with a strong cup of coffee or a comforting mug of tea, their versatility might surprise you. Imagine crumbling a few over a scoop of vanilla bean ice cream – a simple dessert elevated to gourmet status with minimal effort. Or, for an even more decadent treat, consider finely chopping them and sprinkling them over warm bread pudding or a creamy cheesecake for an added layer of texture and flavor. They make an absolutely stunning edible gift; arrange them in a beautiful box lined with parchment paper, tie it with a festive ribbon, and you have a thoughtful, homemade present that will surely impress. Think about them for holiday gifts, hostess gifts, or just a sweet surprise for a neighbor or friend. You could even break them into smaller pieces and use them as a delightful topping for pancakes or waffles on a special weekend brunch. The possibilities truly are endless.
For those of you who love to experiment in the kitchen, this recipe provides a wonderful foundation. While the classic flavor is unbeatable, don’t hesitate to play around a little. You could try adding a pinch of sea salt to the mixture for a fantastic salted caramel effect, or perhaps a dash of bourbon extract for a grown-up twist that pairs wonderfully with the pecans. For a truly unique variation, consider adding a sprinkle of toasted coconut flakes right before pouring the mixture onto the parchment paper. Another idea is to incorporate a thin drizzle of melted dark chocolate over the cooled pralines for an extra layer of decadence. Each small tweak offers a new dimension, allowing you to personalize this classic treat to your heart’s content. These Vanilla Pecan Pralines are incredibly adaptable, inviting you to put your own signature spin on them.
So, what are you waiting for? This is your moment to transform your kitchen into a confectionery paradise. Don’t be intimidated; follow the steps, trust the process, and prepare to be amazed by the delicious outcome. I wholeheartedly encourage each and every one of you to give this recipe a try. You’ll not only create an incredibly satisfying dessert, but you’ll also gain a wonderful new skill. And once you do, please, please share your experiences! I absolutely love hearing about your kitchen adventures. Did you try a variation? Did they come out perfectly crunchy or wonderfully chewy? Snap a picture, tell us about your triumphs, or even your learning moments. Your feedback and stories inspire me and our entire community of home bakers. Let’s celebrate the joy of homemade treats together!
Happy baking, and I can’t wait to hear all about your delicious creations!
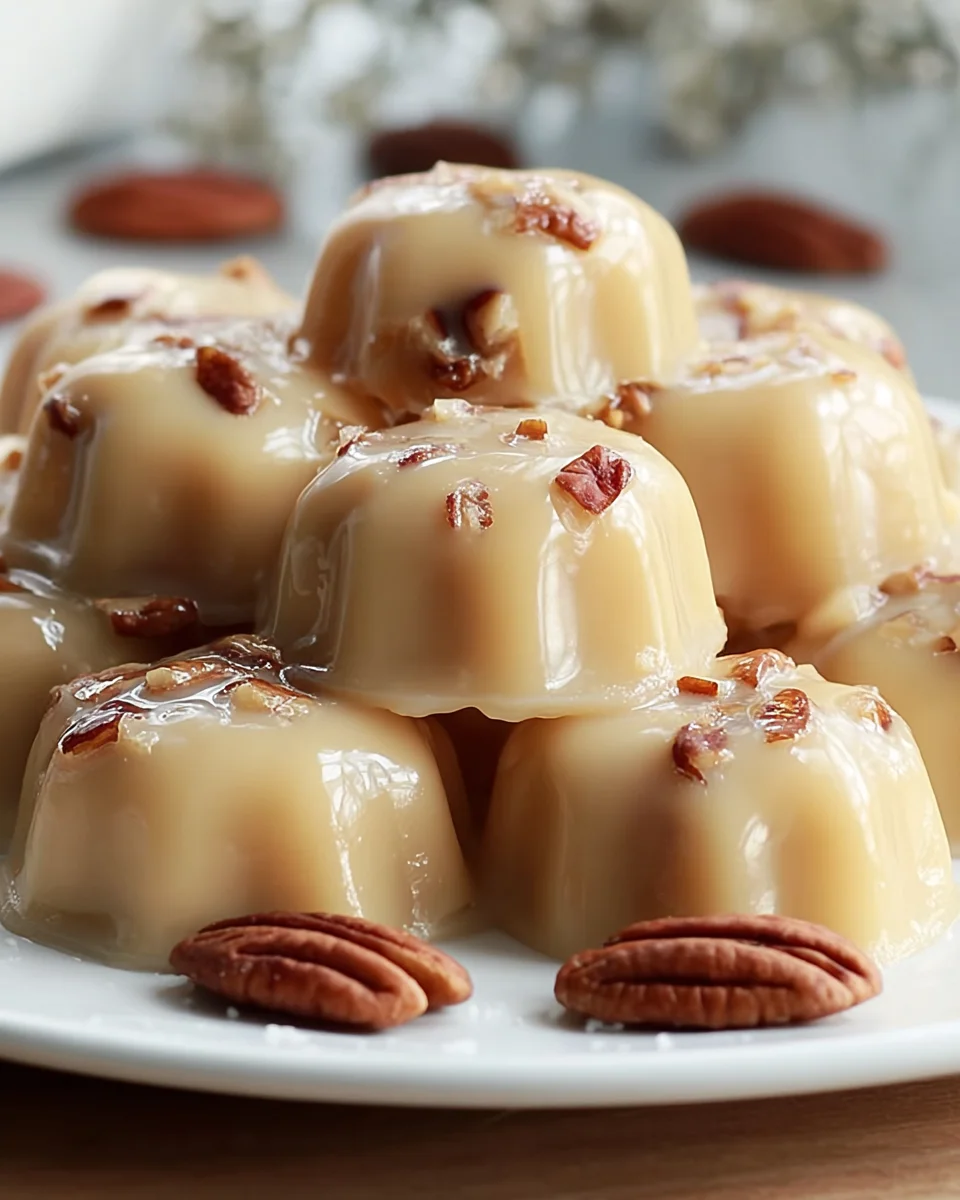
Vanilla Pecan Pralines
Vanilla Pecan Pralines are a classic Southern treat tracing their lineage to New Orleans. These delightful candies feature a buttery sweet base, crunchy toasted pecans, and fragrant vanilla, creating a melt-in-your-mouth experience that is both elegant and utterly satisfying.
Ingredients
Instructions
Important Information
Nutrition Facts (Per Serving)
It is important to consider this information as approximate and not to use it as definitive health advice.
Allergy Information
Please check ingredients for potential allergens and consult a health professional if in doubt.
Leave a Comment