
Biscoff Cookie Butter Cinnamon Rolls are more than just a delightful breakfast treat; they are an invitation to experience pure culinary bliss.
Imagine waking up to the irresistible aroma of warm, freshly baked cinnamon rolls, but with an extraordinary twist that elevates them far beyond the ordinary.
I am absolutely thrilled to share with you a recipe that takes the beloved, comforting classic and infuses it with the rich, spiced caramel notes of Biscoff cookie butter, creating a truly unforgettable experience for your palate.
The traditional cinnamon roll, with its humble origins in Sweden as “kanelbulle” and its journey to becoming an American staple, has always been cherished for its soft, fluffy dough, sweet cinnamon swirl, and decadent frosting. However, this rendition introduces a layer of complexity and indulgence that is simply unparalleled. People adore this dish not only for its familiar warmth and comforting texture but now, specifically, for the unique depth of flavor that the Biscoff cookie butter brings. It’s a masterful blend of the nostalgic and the novel, promising a gooey, utterly satisfying bite every single time.
I believe that once you try these Biscoff Cookie Butter Cinnamon Rolls, you’ll understand why they’re quickly becoming a sensation. They offer that perfect balance of sweetness, spice, and a velvety richness that makes them ideal for a special brunch, a cozy weekend morning, or simply as a well-deserved treat. Prepare to fall in love with your new favorite way to enjoy a classic!

Ingredients:
- For the Dough:
- 1 cup (240ml) warm milk (ideally between 105-115°F / 40-46°C – think warm bathwater, not scalding hot, which would kill your yeast)
- 2 ¼ teaspoons (1 packet or 7g) active dry yeast (always check the expiration date to ensure freshness and potency!)
- ¼ cup (50g) granulated sugar, plus 1 teaspoon for yeast activation
- 1 large egg, brought to room temperature (this is important for better emulsification and a smoother dough texture)
- ¼ cup (57g) unsalted butter, melted and cooled slightly (ensure it’s not hot, as it could scramble the egg or deactivate the yeast)
- ½ teaspoon salt (finely ground salt works best for even distribution in dough)
- 4 cups (480g) all-purpose flour, plus a little extra for dusting your work surface (I find using a good quality unbleached all-purpose flour makes a noticeable difference in the final texture of these Biscoff Cookie Butter Cinnamon Rolls).
- For the Irresistible Biscoff Filling:
- ½ cup (113g) unsalted butter, softened to room temperature (it needs to be easily spreadable, but not melted)
- ½ cup (120g) Biscoff cookie butter, softened slightly (if it’s very firm, a quick 10-15 second zap in the microwave will help, but don’t melt it completely)
- ¾ cup (150g) packed light brown sugar (the molasses in brown sugar adds a lovely depth of flavor that complements the Biscoff beautifully)
- 2 tablespoons ground cinnamon (yes, a full two tablespoons! This is a cinnamon roll after all, and the warmth beautifully complements the Biscoff flavor profile)
- A generous pinch of salt (this tiny addition truly enhances all the sweet flavors and prevents the filling from being one-dimensionally sweet).
- For the Dreamy Cream Cheese Biscoff Glaze:
- 4 oz (113g) cream cheese, softened completely (full-fat cream cheese yields the richest, creamiest glaze)
- ¼ cup (57g) unsalted butter, softened (again, room temperature is paramount for a perfectly smooth, lump-free glaze)
- 1 cup (120g) powdered sugar, sifted (sifting is a small step that makes a huge difference in achieving a super silky glaze without any gritty texture)
- ¼ cup (60g) Biscoff cookie butter, melted slightly for pourability (about 20-30 seconds in the microwave, stirring well, will make it easy to incorporate)
- 1-2 tablespoons milk or heavy cream, as needed for consistency (start with one and add more slowly until you reach your desired pourable, yet thick, consistency)
- ½ teaspoon pure vanilla extract (opt for a good quality extract; its flavor shines in the glaze)
- A tiny pinch of salt (just like in the filling, it magically balances the sweetness of the glaze).
- Optional Garnish for an Extra Flourish:
- Crushed Biscoff cookies (for that perfect textural crunch and visual appeal that screams “Biscoff Cookie Butter Cinnamon Rolls”!)
Crafting the Velvety Dough for Your Biscoff Cookie Butter Cinnamon Rolls
- The Crucial Yeast Activation: Begin by pouring your precisely warmed milk (remember, 105-115°F / 40-46°C is the sweet spot – it should feel like a warm bath on your wrist) into the bowl of your stand mixer. If you’re kneading by hand, a large mixing bowl will suffice. Add the 1 teaspoon of granulated sugar – this acts as a little ‘wake-up call’ snack for your yeast, getting it ready to work its magic. Now, with a gentle hand, sprinkle the active dry yeast evenly over the surface of the milk. Avoid dumping it all in one spot, as this can prevent even hydration. Give it a very gentle stir, just enough to ensure all the yeast comes into contact with the warm liquid. Then, simply step back and let it sit undisturbed for about 5 to 10 minutes. This is a critical, non-negotiable step for successful, fluffy Biscoff Cookie Butter Cinnamon Rolls! You’re looking for a beautiful, frothy, almost creamy layer to form on top, indicating that your yeast is alive, active, and eager to make your rolls light and airy. If, after 10 minutes, there’s no foam or very minimal activity, your yeast might be expired, or your milk was either too hot (which kills yeast) or too cold (which puts it to sleep). In such a scenario, it’s best to start this step over with fresh yeast and properly warmed milk; otherwise, your rolls won’t rise.
- Incorporating the Wet Ingredients: Once your yeast mixture is wonderfully bloomed and frothy, it’s time to introduce the remaining wet components. To the same bowl, add the remaining ¼ cup of granulated sugar, your room temperature large egg, the melted and slightly cooled unsalted butter, and the ½ teaspoon of salt. Using a whisk attachment (or a hand whisk), gently mix everything together until it’s thoroughly combined and appears homogenous. Before adding, it’s worth double-checking that your melted butter isn’t hot to the touch; if it is, allow it to cool down a bit more, as excessive heat can, once again, harm your freshly activated yeast and compromise the dough’s rise.
- Gradually Adding the Flour: Now, switch to the dough hook attachment on your stand mixer if you’re using one. Begin to add your all-purpose flour, about 1 cup at a time. After each addition, start the mixer on the lowest speed to gently incorporate the flour. The mixture will initially look quite shaggy and unappealing – don’t be alarmed, this is precisely what you want at this stage! Continue adding flour until all 4 cups have been incorporated. Resist the urge to add all the flour at once; doing it gradually ensures even distribution, prevents flour pockets, and helps your mixer work more efficiently.
- The Art of Kneading for Perfect Texture: Once all the flour is added and the dough has mostly come together in a rough, shaggy mass, increase your stand mixer speed to medium-low. Allow the dough to knead for a full 8 to 10 minutes. During this time, you’ll witness a remarkable transformation. The dough will gradually become smooth, elastic, and will begin to pull away cleanly from the sides of the bowl, gathering around the dough hook. It should feel supple to the touch, almost like an earlobe, and possess a slight springiness when poked. It might still be slightly sticky when touched, which is perfectly desirable – you absolutely do not want a dry, stiff dough, as this will result in tough rolls. If your dough is excessively sticky, clinging persistently to the bowl and your hands, add a tablespoon of flour at a time, allowing it to incorporate fully before adding more, until it reaches the right, manageable texture. Conversely, if it appears too dry or stiff and isn’t coming together, add a teaspoon of milk. Proper kneading is paramount for developing the gluten structure that gives these Biscoff Cookie Butter Cinnamon Rolls their signature soft, tender chewiness and irresistible rise. Do not rush or skimp on this step; it’s a foundational element for success!
- The All-Important First Rise: Lightly grease a large, clean bowl with a neutral oil or non-stick cooking spray. Transfer your beautifully kneaded dough into this bowl, turning it over once to ensure the entire surface is lightly coated with oil. This prevents the dough from drying out and sticking to the bowl during its rise. Cover the bowl tightly with plastic wrap or a clean, slightly damp kitchen towel. Now, find a warm, draft-free spot in your kitchen. This could be your countertop on a warm day, inside a turned-off oven (you can preheat it for a minute to create a cozy, warm environment, then turn it off completely before placing the dough inside), or even on top of your refrigerator, which often emits a gentle warmth. Allow the dough to rise for 1 to 1.5 hours, or until it has distinctly doubled in size. This primary fermentation is where the yeast works its silent magic, producing gases that create those airy pockets, and developing much of the incredible, complex flavor that will make your Biscoff Cookie Butter Cinnamon Rolls truly special. Patience here will be profoundly rewarded!
Crafting the Delectable Biscoff Cookie Butter Filling
- Preparing the Rich Filling: While your dough is happily undergoing its first rise, you can prepare the truly irresistible Biscoff filling. In a medium-sized mixing bowl, combine the thoroughly softened unsalted butter, the slightly softened Biscoff cookie butter, the packed light brown sugar, a generous 2 tablespoons of ground cinnamon, and that crucial pinch of salt. It’s absolutely essential that your butter and Biscoff are soft enough to cream together easily, but definitely not melted, as a runny filling will prove difficult to spread and may leak out during baking.
- Mixing to Perfection: Using a sturdy spoon, a fork, or even a handheld electric mixer on low speed, mix all these glorious ingredients together until they are perfectly well combined and form a thick, homogenous, and easily spreadable paste. The color should be a beautiful, uniform caramel-brown, and the aroma filling your kitchen will already be heavenly – a delightful preview of the delicious Biscoff Cookie Butter Cinnamon Rolls to come! Make sure there are no visible streaks of butter or pockets of sugar. Set this magical mixture aside until your dough has completed its first rise and is ready for assembly.
Assembling Your Biscoff Cookie Butter Cinnamon Rolls
- Prepare Your Work Surface: Once your dough has majestically doubled in size, gently punch it down to release the accumulated air. This step is incredibly satisfying! Lightly flour a clean, spacious countertop or a large pastry mat. You will want ample room to roll out your dough without feeling cramped.
- Roll Out the Dough: Transfer the deflated dough from the bowl to your generously floured surface. Using a rolling pin, roll the dough into a large rectangle. Aim for approximate dimensions of 12×18 inches (30×45 cm) and an even thickness, roughly ¼ to ⅓ inch (about 0.6-0.8 cm). Try your best to keep your edges as straight as possible; this will contribute to neater, more uniform rolls later on. Don’t hesitate to add a little more flour to your rolling pin or under the dough if it starts to stick. An evenly rolled dough ensures uniform Biscoff Cookie Butter Cinnamon Rolls, which bake more consistently and look stunning.
- Spread the Biscoff Filling: Now for the most exciting part! Take your prepared Biscoff cookie butter filling and evenly spread it across the entire surface of the rolled-out dough. Make sure to leave a small ½-inch border along one of the long edges of the rectangle. This border will serve as a seal when you roll the dough. Use an offset spatula or the back of a spoon to spread the filling all the way to the other three edges. Don’t be shy; every inch should be covered in that rich, spiced Biscoff goodness!
- Roll ‘Em Up!: Starting from the long edge opposite the ½-inch plain border, carefully and tightly roll the dough into a firm log. The tighter you roll, the more beautiful and spiraled your Biscoff Cookie Butter Cinnamon Rolls will be, with fewer gaps in the swirl. Take your time, making sure each turn is snug. When you reach the very end, firmly pinch the seam closed to seal the log. This crucial step prevents your rolls from unraveling during the second rise and while baking.
- Slice the Rolls: Lightly grease a 9×13 inch (23×33 cm) baking dish. Using a sharp, un-serrated knife, a bench scraper, or even unflavored dental floss (my personal favorite trick for achieving beautifully clean cuts without squishing the dough!), slice the log into 12 equally sized rolls. Each roll should be approximately 1 to 1.5 inches (2.5-3.8 cm) thick. If using dental floss, slide a long piece under the log, cross the ends over the top of the log, and pull to slice cleanly. This method often yields the best, most perfectly round shapes.
- Arrange for Second Rise: Carefully place the sliced Biscoff Cookie Butter Cinnamon Rolls into your prepared baking dish. Arrange them so they are slightly touching but not overly crowded. You want just a little space for them to expand during their final rise.
- The Second Rise (Proofing): Cover the baking dish loosely with plastic wrap or a clean kitchen towel. Return it to your warm, draft-free spot for a second rise, which will typically take about 30 to 45 minutes. The rolls should visibly puff up, grow noticeably larger, and become softer to the touch. They will snuggle up against each other in the dish, indicating they are ready. This “proof” stage is absolutely crucial for achieving that characteristic light, airy, and fluffy texture in your finished rolls. While they are happily rising, it’s the perfect time to preheat your oven.
Baking Your Golden Biscoff Cookie Butter Cinnamon Rolls
- Preheat Your Oven: While your Biscoff Cookie Butter Cinnamon Rolls are enjoying their second rise, preheat your oven to 375°F (190°C). If you have a convection setting, you might consider reducing the temperature slightly to 350°F (175°C) and keep a closer eye on them, as convection ovens tend to bake faster and more intensely.
- Bake to Golden Perfection: Once the rolls have sufficiently risen and look beautifully plump, carefully remove the plastic wrap and place the baking dish into the preheated oven. Bake for 20 to 25 minutes. You’re aiming for the rolls to turn a gorgeous golden brown on top and be thoroughly cooked through in the center. If you notice they are browning too quickly on top before they are cooked inside, you can loosely tent the dish with aluminum foil for the remaining baking time. An internal temperature of 200-205°F (93-96°C) when checked with an instant-read thermometer indicates they are perfectly baked. The irresistible aroma filling your kitchen will be utterly divine – a heavenly blend of warm cinnamon and rich Biscoff, signaling that your homemade Biscoff Cookie Butter Cinnamon Rolls are nearly ready for their grand debut!
- Cool Slightly: Once baked, carefully remove the rolls from the oven. Let them cool in the baking dish for about 5-10 minutes. This short cooling period allows them to set slightly and prevents them from collapsing or tearing when you add the glorious glaze.
Whipping Up the Creamy Biscoff Glaze
- Cream Cheese and Butter Base: While the rolls are cooling slightly, it’s the perfect time to prepare your decadent, signature glaze. In a medium-sized mixing bowl, combine the completely softened cream cheese and the softened unsalted butter. Using an electric hand mixer or a stand mixer with the paddle attachment, beat these together on medium speed until they are incredibly smooth, light, and fluffy, with absolutely no lumps of cream cheese remaining. Make sure to scrape down the sides of the bowl frequently to ensure everything is thoroughly incorporated.
- Add Remaining Glaze Ingredients: Reduce the mixer speed to low. Gradually add the sifted powdered sugar, the slightly melted Biscoff cookie butter, the pure vanilla extract, and that tiny pinch of salt. Mix until just combined.
- Achieve Perfect Consistency: Increase the mixer speed to medium and beat for another 1-2 minutes until the glaze is completely smooth, creamy, and wonderfully light. If you find the glaze is too thick to spread or pour easily, add milk or cream, one tablespoon at a time, mixing well after each addition, until you achieve your desired pourable but still thick consistency. This luscious Biscoff glaze is the crowning glory for your warm, fluffy Biscoff Cookie Butter Cinnamon Rolls!
The Grand Finale: Glazing and Serving
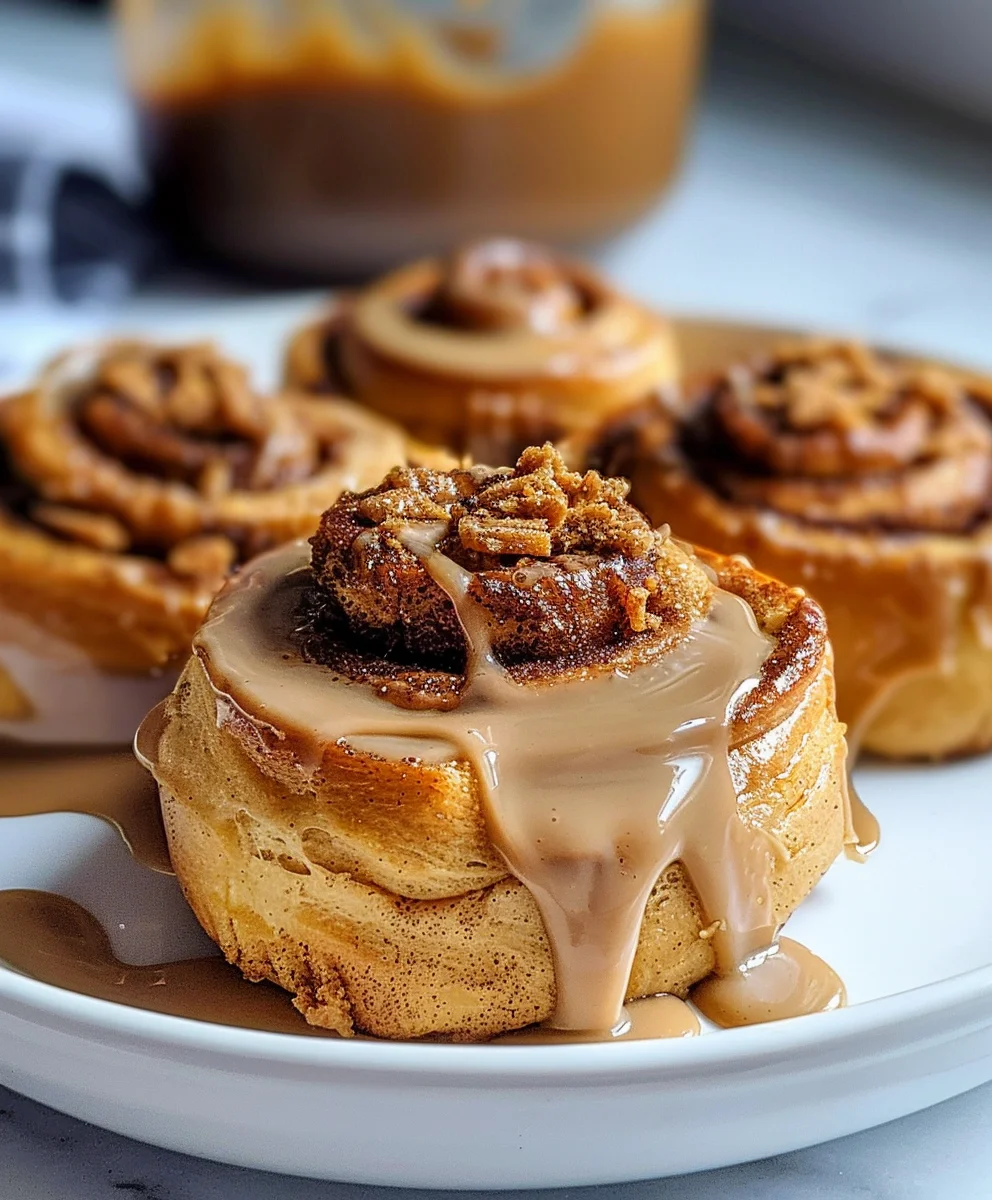
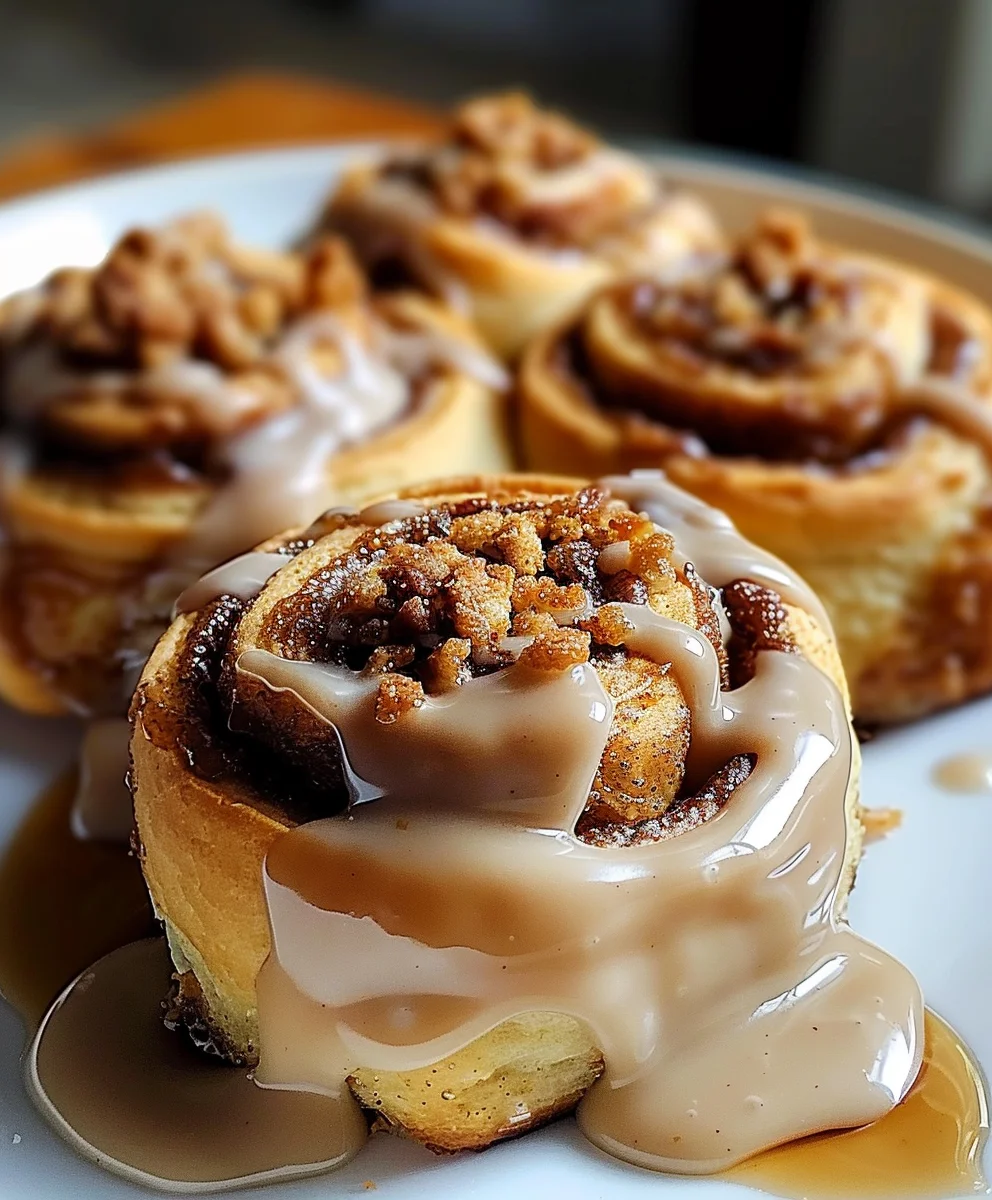
- Glaze Generously: While the Biscoff Cookie Butter Cinnamon Rolls are still wonderfully warm (but not piping hot, as the glaze would simply melt away completely), generously pour or spread the luscious cream cheese Biscoff glaze over them. The gentle warmth of the rolls will allow the glaze to melt ever so slightly, seeping into every nook and cranny, creating an incredibly moist, flavorful, and irresistible treat. Don’t be shy; when it comes to glaze on Biscoff Cookie Butter Cinnamon Rolls, more is always better!
- Optional Garnish: For an extra touch of texture, visual appeal, and to truly reinforce that signature Biscoff flavor, sprinkle some crushed Biscoff cookies over the glazed rolls. This adds a delightful textural crunch that perfectly complements the soft rolls and creamy glaze.
- Serve Immediately: These Biscoff Cookie Butter Cinnamon Rolls are truly at their absolute best when enjoyed warm, straight from the oven, with the glaze still slightly gooey and the dough impossibly soft and tender. Grab one (or perhaps two, I won’t tell!) and savor every single decadent bite. Any leftover rolls can be stored in an airtight container at room temperature for up to 2-3 days, or in the refrigerator for up to a week. To bring back that fresh-baked warmth and delightful softness, simply reheat gently in the microwave for a few seconds.
Conclusion:
And so, we arrive at the sweet, satisfying culmination of our baking journey. I truly believe that these Biscoff Cookie Butter Cinnamon Rolls are more than just a recipe; they are an experience, a delightful fusion of comforting classics and an unexpected, irresistible twist. If you’ve ever yearned for a breakfast treat that transcends the ordinary, something that feels both wonderfully familiar and excitingly new, then you absolutely must add this to your baking repertoire. I’ve poured my heart into perfecting these rolls, ensuring that each bite delivers that perfect balance of soft, pillowy dough, a rich, spicy cinnamon swirl, and the unparalleled, caramelized embrace of Biscoff cookie butter. It’s the kind of indulgence that makes lazy weekend mornings feel utterly luxurious, transforming a simple cup of coffee into an event.
What makes these particular rolls a standout is that unique Biscoff flavor profile. It’s not just sweet; it’s a complex, spiced sweetness with a hint of ginger and a creamy texture that melts into the warm dough, creating a gooey masterpiece that’s impossible to resist. The aroma alone, as they bake to golden perfection in your oven, is enough to draw everyone to the kitchen, promising a treat unlike any other. They are a testament to the power of combining beloved elements in a fresh, innovative way, elevating the humble cinnamon roll to gourmet status without requiring complicated techniques. I promise you, the effort is well worth the reward, and you’ll find yourself reaching for this recipe again and again, especially for those special occasions or when you simply need a little extra cheer in your day.
Serving Suggestions to Enhance Your Experience:
While these rolls are undeniably spectacular straight from the oven, still warm and wonderfully sticky, there are several ways to enjoy them. I love serving them for a festive brunch, perhaps alongside some fresh fruit and a strong cup of coffee or a creamy latte. For a truly decadent dessert, try them with a scoop of vanilla bean ice cream that slowly melts into the warm Biscoff glaze – it’s an absolute game-changer! They also make a fantastic pick-me-up with an afternoon tea or as a surprise treat for a loved one. Don’t hesitate to enjoy them at room temperature later in the day, though a quick 15-second zap in the microwave will bring back some of that fresh-baked warmth and gooey goodness.
Exciting Variations to Explore:
Part of the joy of baking is making a recipe your own, and these rolls are incredibly adaptable. If you’re feeling adventurous, here are a few ideas:
- Nutty Crunch: Before rolling the dough, sprinkle some finely chopped pecans or walnuts over the Biscoff filling for an added layer of texture and nutty flavor.
- Cream Cheese Dream: While the Biscoff glaze is incredible on its own, for an extra layer of decadence, consider drizzling a classic cream cheese frosting over the cooled rolls in addition to or instead of the Biscoff glaze. The tangy cream cheese provides a wonderful contrast to the sweet, spiced Biscoff.
- Mini Rolls: For smaller portions or a party spread, simply slice your rolled dough into thinner, more numerous pieces (about 1-inch thick) and bake them in a larger pan, slightly closer together. Adjust baking time accordingly.
- A Pinch of Salt: A tiny sprinkle of flaky sea salt over the finished glazed rolls can surprisingly enhance all the sweet flavors, providing a sophisticated contrast.
- Make-Ahead Magic: For ultimate convenience, you can prepare the rolls up to the point of the second proof, cover them tightly, and refrigerate overnight. The next morning, simply pull them out, let them come to room temperature for about 30-60 minutes, and then bake as directed. Fresh-baked cinnamon rolls for breakfast, with minimal morning effort!
Now that I’ve shared all my tips and tricks, it’s your turn! I genuinely hope you feel inspired to dive into your kitchen and give these incredible Biscoff Cookie Butter Cinnamon Rolls a try. There’s nothing quite like the satisfaction of creating something so delicious from scratch, filling your home with the most inviting aromas, and then sharing the fruits of your labor with those you love. I would be absolutely thrilled to see your creations! Please, don’t be shy – once you’ve baked these masterpieces, I encourage you to snap a photo and share your experience with me and our community. You can leave a comment below with your thoughts, any variations you tried, or what your family thought. Your feedback not only brightens my day but also helps inspire other bakers. Happy baking, and get ready to fall in love with your new favorite cinnamon roll!
Ultimate Biscoff Cookie Butter Cinnamon Rolls Recipe
Transform convenient refrigerated cinnamon rolls into an extraordinary treat. This recipe infuses them with the rich, spiced caramel notes of Biscoff cookie butter, creating a quick and irresistibly delicious breakfast or dessert.
Ingredients
-
1 can (17.5 oz) refrigerated cinnamon rolls (8-10 rolls), with included icing
-
1/2 cup Biscoff Cookie Butter, divided
-
1 tsp ground cinnamon
-
1-2 tbsp milk
Instructions
- Step 1
Preheat oven as directed on refrigerated cinnamon roll package. Lightly grease a baking dish. Unroll each refrigerated cinnamon roll and flatten slightly. - Step 2
In a small bowl, combine 1/4 cup Biscoff Cookie Butter and 1 tsp ground cinnamon. Spread this mixture evenly over the surface of each flattened cinnamon roll. - Step 3
Carefully re-roll each cinnamon roll and place them in the prepared baking dish. Bake according to package directions (typically 15-20 minutes) until golden brown. - Step 4
While rolls cool slightly, prepare the glaze: Empty the cream cheese icing packet (included with cinnamon rolls) into a medium bowl. Add the remaining 1/4 cup Biscoff Cookie Butter and 1 tablespoon of milk. Whisk until completely smooth. Add more milk, 1 teaspoon at a time, if a thinner consistency is desired. - Step 5
Generously spread or drizzle the Biscoff glaze over the warm cinnamon rolls. Serve immediately for the best experience.
Important Information
Nutrition Facts (Per Serving)
It is important to consider this information as approximate and not to use it as definitive health advice.
Allergy Information
Please check ingredients for potential allergens and consult a health professional if in doubt.
Leave a Comment