
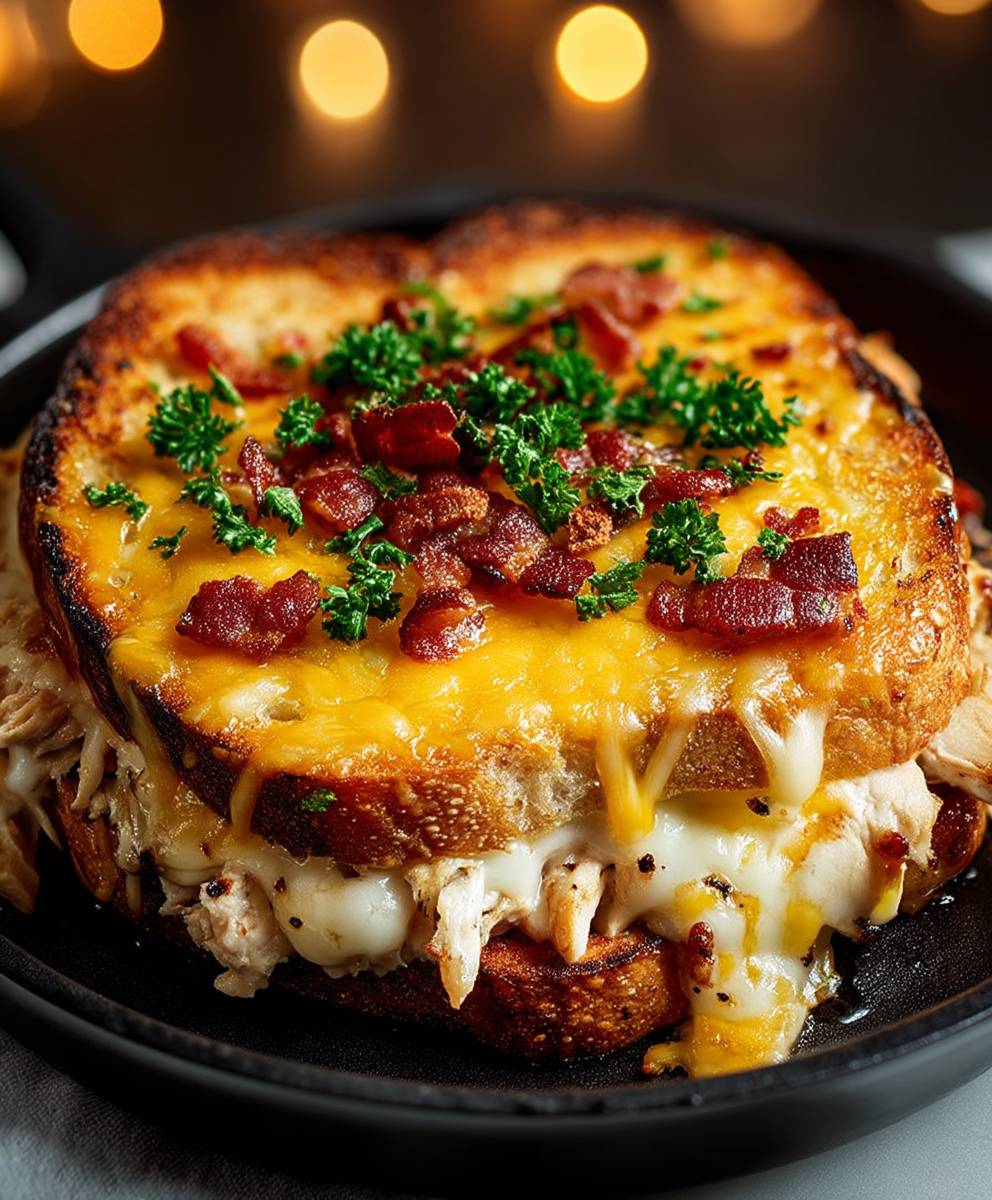
Turkey Bacon Cheddar Melt: Prepare to experience a sandwich that redefines lunchtime! Imagine biting into toasted, golden-brown bread, yielding to a symphony of savory flavors. We’re talking crispy turkey bacon, melted cheddar cheese oozing with deliciousness, all coming together in perfect harmony. This isn’t just a sandwich; it’s an experience.
While the exact origins of the melt sandwich are debated, its popularity exploded in American diners and lunch counters in the mid-20th century. It represents a comforting, accessible, and customizable meal that quickly became a staple. Our version, the Turkey Bacon Cheddar Melt, elevates the classic by swapping traditional bacon for a leaner, yet equally flavorful, turkey bacon. This simple substitution makes it a slightly healthier option without sacrificing any of the satisfying crunch and smoky goodness we all crave.
People adore melts for their simplicity and incredible taste. The combination of warm, melted cheese, crispy protein, and toasted bread is simply irresistible. The Turkey Bacon Cheddar Melt is particularly appealing because it’s quick to prepare, making it perfect for busy weeknights or a satisfying weekend lunch. The textures – the crisp bacon, the gooey cheese, and the crunchy bread – create a delightful sensory experience that will leave you wanting more. So, get ready to discover your new favorite sandwich!

Ingredients:
- 8 slices of whole wheat bread
- 8 slices of turkey bacon
- 8 slices of sharp cheddar cheese
- 2 tablespoons of butter, softened
- 1 tablespoon of olive oil
- 1/4 cup of mayonnaise
- 1 tablespoon of Dijon mustard
- 1/2 teaspoon of garlic powder
- 1/4 teaspoon of black pepper
- Optional: Sliced tomato, avocado, or lettuce for added flavor and texture
Preparing the Turkey Bacon:
Okay, let’s start with the bacon! We want it nice and crispy, but not burnt. Trust me, nobody likes burnt bacon.
- Preheat your skillet: Place a large skillet over medium heat. Let it heat up for a minute or two before adding the bacon. This helps prevent the bacon from sticking and ensures even cooking.
- Cook the turkey bacon: Add the turkey bacon slices to the hot skillet in a single layer. You might need to do this in batches depending on the size of your skillet. Avoid overcrowding the pan, as this will steam the bacon instead of frying it.
- Flip and cook until crispy: Cook the bacon for about 3-4 minutes per side, flipping occasionally, until it’s crispy and golden brown. Keep a close eye on it, as turkey bacon can cook quickly. The exact cooking time will depend on the thickness of the bacon and the heat of your skillet.
- Drain the bacon: Once the bacon is cooked to your liking, remove it from the skillet and place it on a plate lined with paper towels to drain off any excess grease. This will help keep your sandwich from getting soggy.
- Set aside: Set the cooked bacon aside while you prepare the rest of the ingredients.
Preparing the Bread and Spread:
Now, let’s get the bread ready. A little bit of flavor goes a long way!
- Prepare the garlic mayo: In a small bowl, combine the mayonnaise, Dijon mustard, garlic powder, and black pepper. Mix well until all the ingredients are fully incorporated. This will be our flavorful spread for the bread.
- Spread the garlic mayo: Spread a thin layer of the garlic mayo mixture on one side of each slice of bread. This will add a delicious flavor and help to keep the bread from getting soggy when you assemble the sandwich.
- Butter the outside: On the opposite side of each slice of bread (the side that will be facing out when the sandwich is assembled), spread a thin layer of softened butter. This will help the sandwich to brown nicely and become crispy when it’s grilled.
Assembling the Sandwiches:
Time to put it all together! This is where the magic happens.
- Lay out the bread: Place four slices of bread, butter-side down, on a clean work surface. These will be the bottom slices of your sandwiches.
- Add the cheese: On each slice of bread, layer two slices of sharp cheddar cheese. Make sure the cheese covers the entire surface of the bread to ensure a cheesy bite in every bite.
- Add the turkey bacon: On top of the cheese, arrange two slices of cooked turkey bacon. You can break the bacon in half if needed to fit it neatly on the bread.
- Top with more cheese: Add another two slices of sharp cheddar cheese on top of the turkey bacon. This will help to hold the sandwich together and create a gooey, melty center.
- Top with the remaining bread: Place the remaining four slices of bread on top of the cheese, butter-side up. Make sure the garlic mayo side is facing down towards the cheese.
Grilling the Sandwiches:
The final step! Get ready for that golden-brown, cheesy goodness.
- Preheat your skillet or griddle: Place a large skillet or griddle over medium-low heat. You want the heat to be low enough to melt the cheese without burning the bread.
- Add olive oil: Add the olive oil to the skillet or griddle and spread it around evenly. This will help to prevent the sandwiches from sticking and ensure even browning.
- Grill the sandwiches: Carefully place the sandwiches in the preheated skillet or griddle. Make sure not to overcrowd the pan; you may need to cook the sandwiches in batches.
- Press down on the sandwiches: Using a spatula, gently press down on the sandwiches to help them cook evenly and to encourage the cheese to melt.
- Cook until golden brown and cheese is melted: Cook the sandwiches for about 3-5 minutes per side, or until the bread is golden brown and the cheese is melted and gooey. Keep a close eye on them to prevent burning.
- Flip the sandwiches: Carefully flip the sandwiches using a spatula and continue to cook for another 3-5 minutes, or until the second side is golden brown and the cheese is fully melted.
- Remove from skillet: Once the sandwiches are cooked to your liking, remove them from the skillet or griddle and place them on a cutting board.
- Optional: Add toppings: If you’re adding any optional toppings like sliced tomato, avocado, or lettuce, now is the time to do it. Carefully open the sandwich and add your desired toppings.
- Cut and serve: Using a sharp knife, cut the sandwiches in half diagonally. This makes them easier to handle and eat. Serve immediately and enjoy!
Tips for the Perfect Turkey Bacon Cheddar Melt:
- Use high-quality ingredients: The better the ingredients, the better the sandwich will taste. Opt for good quality whole wheat bread, thick-cut turkey bacon, and sharp cheddar cheese.
- Don’t overcrowd the pan: Cooking the sandwiches in batches will ensure that they cook evenly and brown properly.
- Use medium-low heat: Cooking the sandwiches over medium-low heat will allow the cheese to melt completely without burning the bread.
- Press down on the sandwiches: Pressing down on the sandwiches with a spatula will help them cook evenly and encourage the cheese to melt.
- Serve immediately: These sandwiches are best served hot and fresh, when the cheese is melted and gooey.
Variations:
- Add vegetables: Sliced tomato, avocado, lettuce, or spinach are all great additions to this sandwich.
- Use different cheeses: Try using different types of cheese, such as provolone, mozzarella, or pepper jack.
- Add a sauce: A drizzle of hot sauce, pesto, or balsamic glaze can add a lot of flavor to this sandwich.
- Make it a breakfast sandwich: Add a fried egg to make it a breakfast sandwich.
- Use different bread: Try using sourdough, rye, or ciabatta bread.
Conclusion:
This Turkey Bacon Cheddar Melt isn’t just another sandwich; it’s a flavor explosion waiting to happen, and trust me, you absolutely need this in your life! The combination of savory turkey, crispy bacon, and gooey cheddar, all nestled between perfectly toasted bread, is simply irresistible. It’s quick, easy, and satisfying – the trifecta of a perfect meal, especially on a busy weeknight or a lazy weekend lunch. I’ve made this countless times, and it’s always a hit.
But the best part? It’s incredibly versatile! Feeling adventurous? Try swapping out the cheddar for a sharp provolone or a creamy Havarti. Add a smear of Dijon mustard or a dollop of cranberry sauce for an extra layer of flavor. For a spicier kick, a few slices of jalapeño or a drizzle of sriracha mayo will do the trick. If you’re watching your carbs, you can even ditch the bread altogether and enjoy the filling as a delicious salad topping or a protein-packed snack.
Speaking of serving suggestions, this melt pairs perfectly with a side of crispy sweet potato fries, a refreshing green salad, or a comforting bowl of tomato soup. For a truly decadent experience, try dipping it in a creamy avocado ranch dressing. And if you’re making it for a crowd, consider cutting it into smaller portions and serving it as an appetizer.
I know you might be thinking, “It’s just a sandwich,” but believe me, this Turkey Bacon Cheddar Melt is so much more than that. It’s a comforting, satisfying, and customizable meal that’s sure to become a new favorite. It’s the kind of recipe that you’ll find yourself craving again and again. It’s also a great way to use up leftover Thanksgiving turkey!
So, what are you waiting for? Head to your kitchen, gather your ingredients, and get ready to experience sandwich perfection. I promise you won’t be disappointed. And once you’ve tried it, I’d absolutely love to hear what you think! Did you make any variations? What did you serve it with? What was your favorite part?
Don’t be shy – share your culinary adventures in the comments below! I’m always looking for new ideas and inspiration, and I’m sure other readers would love to hear your thoughts as well. After all, cooking is all about sharing and connecting, and I can’t wait to see what delicious creations you come up with. So go ahead, give this recipe a try, and let’s create a community of melt-loving foodies! I’m confident that this will become a staple in your recipe rotation. Enjoy!
Turkey Bacon Cheddar Melt: The Ultimate Comfort Food Recipe
Crispy turkey bacon and sharp cheddar elevate the classic grilled cheese, all enhanced by a flavorful garlic mayo spread. A quick and satisfying meal!
Ingredients
- 8 slices of whole wheat bread
- 8 slices of turkey bacon
- 8 slices of sharp cheddar cheese
- 2 tablespoons of butter, softened
- 1 tablespoon of olive oil
- 1/4 cup of mayonnaise
- 1 tablespoon of Dijon mustard
- 1/2 teaspoon of garlic powder
- 1/4 teaspoon of black pepper
Instructions
- Cook the Turkey Bacon: Preheat a large skillet over medium heat. Add turkey bacon slices in a single layer and cook for 3-4 minutes per side, flipping occasionally, until crispy and golden brown. Drain on paper towels and set aside.
- Prepare Garlic Mayo: In a small bowl, combine mayonnaise, Dijon mustard, garlic powder, and black pepper. Mix well.
- Prepare Bread: Spread a thin layer of garlic mayo on one side of each slice of bread. Spread a thin layer of softened butter on the opposite side of each slice.
- Assemble Sandwiches: Place four slices of bread, butter-side down, on a clean work surface. Layer two slices of cheddar cheese on each slice. Add two slices of cooked turkey bacon on top of the cheese. Add another two slices of cheddar cheese on top of the turkey bacon. Top with the remaining four slices of bread, butter-side up (garlic mayo side facing down towards the cheese).
- Grill Sandwiches: Preheat a large skillet or griddle over medium-low heat. Add olive oil and spread evenly. Carefully place the sandwiches in the preheated skillet or griddle. Gently press down on the sandwiches with a spatula. Cook for about 3-5 minutes per side, or until the bread is golden brown and the cheese is melted and gooey.
- Serve: Remove from skillet and place on a cutting board. Optional: Add toppings like sliced tomato, avocado, or lettuce. Cut the sandwiches in half diagonally and serve immediately.
Notes
- Use high-quality ingredients for the best flavor.
- Don’t overcrowd the pan when grilling the sandwiches. Cook in batches if necessary.
- Use medium-low heat to allow the cheese to melt completely without burning the bread.
- Press down on the sandwiches with a spatula to help them cook evenly.
- Serve immediately for the best taste and texture.
Leave a Comment