
Taco Bell Chalupa Supreme: Craving that iconic, craveable Chalupa from Taco Bell but want to skip the drive-thru? I get it! There’s something undeniably satisfying about that pillowy, shell-like flatbread cradling seasoned ground beef, crisp lettuce, tangy tomatoes, cheddar cheese, and cool sour cream. It’s a symphony of textures and flavors that hits all the right notes.
While the Chalupa might seem like a modern fast-food invention, its roots actually trace back to traditional Mexican cuisine. The word “chalupa” refers to a small boat, and these fried masa creations were originally served as street food, filled with various toppings. Taco Bell put their own spin on it, creating the Chalupa Supreme we know and love today.
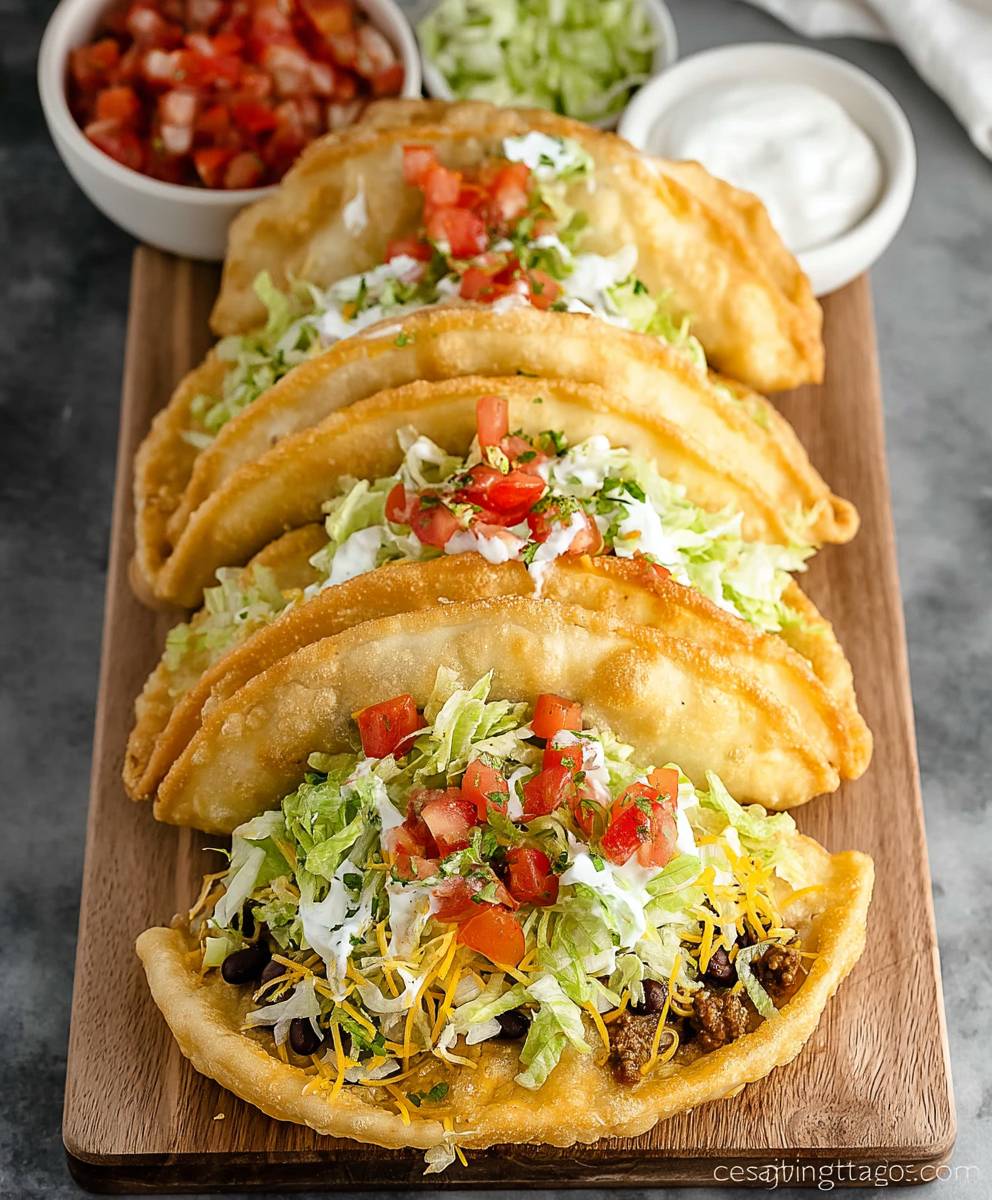
What makes the Taco Bell Chalupa Supreme so irresistible? It’s the perfect combination of soft and crunchy, savory and refreshing. The warm, slightly chewy chalupa shell provides a delightful contrast to the cool, crisp fillings. Plus, it’s incredibly convenient – a handheld meal that’s perfect for a quick lunch or satisfying dinner. In this recipe, I’ll show you how to recreate this fast-food favorite at home, using fresh ingredients and simple techniques. Get ready to enjoy a homemade Chalupa Supreme that’s even better than the original!

Ingredients:
- For the Chalupa Shells:
- 2 cups all-purpose flour, plus more for dusting
- 1 teaspoon baking powder
- 1/2 teaspoon salt
- 1/4 cup shortening, chilled
- 3/4 cup warm water
- Vegetable oil, for frying
- For the Seasoned Ground Beef:
- 1 pound ground beef (80/20 blend recommended)
- 1/2 cup chopped onion
- 1 clove garlic, minced
- 1 packet (1 ounce) taco seasoning
- 1/2 cup water
- For the Sour Cream:
- 1 cup sour cream
- 1 tablespoon milk (optional, for thinning)
- 1/4 teaspoon lime juice (optional)
- For the Shredded Lettuce:
- 1 head iceberg lettuce, shredded
- For the Diced Tomatoes:
- 2 medium tomatoes, diced
- For the Shredded Cheddar Cheese:
- 2 cups shredded cheddar cheese
Making the Chalupa Shells:
- Combine Dry Ingredients: In a large bowl, whisk together the flour, baking powder, and salt. This ensures the baking powder is evenly distributed, leading to a consistent rise.
- Cut in the Shortening: Add the chilled shortening to the dry ingredients. Use a pastry blender or your fingertips to cut the shortening into the flour mixture until it resembles coarse crumbs. The smaller the pieces of shortening, the flakier the final shell will be.
- Add Water and Form Dough: Gradually add the warm water to the flour mixture, mixing until a shaggy dough forms. Be careful not to overmix, as this can develop the gluten and make the shells tough.
- Knead the Dough: Turn the dough out onto a lightly floured surface and knead for 5-7 minutes, or until it becomes smooth and elastic. Kneading develops the gluten, which gives the dough structure.
- Rest the Dough: Wrap the dough in plastic wrap and let it rest for at least 30 minutes at room temperature. This allows the gluten to relax, making the dough easier to roll out. You can even rest it for an hour or two for even better results.
- Divide the Dough: Divide the dough into 6-8 equal portions, depending on the desired size of your chalupas.
- Roll Out the Dough: On a lightly floured surface, roll out each portion of dough into an oval shape, about 1/4 inch thick. Aim for a shape that resembles a small football.
- Heat the Oil: Pour about 2-3 inches of vegetable oil into a large, heavy-bottomed pot or deep fryer. Heat the oil to 350°F (175°C). Use a thermometer to ensure the oil is at the correct temperature. If the oil is too hot, the shells will burn; if it’s too cold, they will be greasy.
- Fry the Shells: Carefully place one or two dough ovals into the hot oil. Use a slotted spoon to gently press down on the center of the shell while it fries. This will create the characteristic chalupa shape. Fry for 2-3 minutes per side, or until golden brown and puffed up.
- Drain the Shells: Remove the fried shells from the oil and place them on a wire rack lined with paper towels to drain excess oil. This helps to keep the shells crispy.
- Keep Warm: If you’re not assembling the chalupas immediately, keep the shells warm in a low oven (200°F or 95°C).
Preparing the Seasoned Ground Beef:
- Brown the Ground Beef: In a large skillet over medium-high heat, brown the ground beef, breaking it up with a spoon as it cooks. Drain off any excess grease.
- Sauté the Onion and Garlic: Add the chopped onion and minced garlic to the skillet and cook until softened, about 3-5 minutes. The onion should be translucent and the garlic fragrant.
- Add Taco Seasoning and Water: Stir in the taco seasoning and water. Bring to a simmer and cook for 5-7 minutes, or until the sauce has thickened slightly. The taco seasoning will infuse the beef with flavor.
- Simmer and Thicken: Continue to simmer the beef mixture, stirring occasionally, until the sauce has thickened to your liking. If it gets too thick, add a little more water.
- Taste and Adjust: Taste the seasoned beef and adjust the seasoning as needed. You may want to add a pinch of salt, pepper, or chili powder to enhance the flavor.
Preparing the Sour Cream:
- Combine Ingredients: In a small bowl, combine the sour cream, milk (if using), and lime juice (if using).
- Whisk Until Smooth: Whisk until smooth and creamy. The milk will thin the sour cream, making it easier to drizzle. The lime juice adds a touch of tanginess.
- Adjust Consistency: If the sour cream is too thick, add a little more milk until it reaches your desired consistency.
- Chill (Optional): Cover and chill the sour cream until ready to use. This will help it stay cool and refreshing.
Assembling the Chalupas:
- Warm the Shells (if needed): If the chalupa shells have cooled, warm them in a low oven or microwave for a few seconds.
- Layer the Ingredients: Start by spreading a generous layer of seasoned ground beef inside each chalupa shell.
- Add Sour Cream: Drizzle a generous amount of sour cream over the ground beef.
- Top with Lettuce: Add a layer of shredded lettuce on top of the sour cream.
- Add Tomatoes: Sprinkle diced tomatoes over the lettuce.
- Finish with Cheese: Top with shredded cheddar cheese.
- Serve Immediately: Serve the chalupas immediately while the shells are still warm and crispy.
Conclusion:
So there you have it! This isn’t just another recipe; it’s your passport to Taco Bell bliss, right in your own kitchen. I truly believe this homemade Taco Bell Chalupa Supreme recipe is a must-try for anyone who craves that iconic flavor and satisfying crunch. We’ve broken down each component, from the perfectly seasoned ground beef to the creamy, tangy sauce, ensuring that you can recreate the magic with ease.
But why is this recipe so special? It’s more than just convenience; it’s about control. You get to choose the quality of your ingredients, adjust the spice levels to your liking, and even experiment with different variations to create your ultimate Chalupa masterpiece. Forget those late-night drive-thru runs – now you can satisfy your cravings whenever they strike, with a version that’s arguably even better than the original!
Think about it: the warm, pillowy shell, the savory beef, the crisp lettuce, the juicy tomatoes, the melty cheese, and that signature sour cream. It’s a symphony of textures and flavors that dance on your tongue. And the best part? You made it yourself!
Now, let’s talk serving suggestions and variations. While the classic Chalupa Supreme is a winner in its own right, don’t be afraid to get creative. For a vegetarian option, swap the ground beef for seasoned black beans or lentils. Add a sprinkle of diced onions or a dash of hot sauce for an extra kick. If you’re feeling adventurous, try using shredded chicken or carnitas instead of ground beef. You could even experiment with different types of cheese, like pepper jack or Monterey Jack, to add a unique twist.
Consider serving your homemade Chalupas with a side of Mexican rice and refried beans for a complete and satisfying meal. Or, if you’re hosting a party, set up a Chalupa bar with all the fixings and let your guests customize their own creations. It’s a guaranteed crowd-pleaser!
Serving Suggestions:
* Mexican Rice and Refried Beans
* Guacamole and Tortilla Chips
* Elote (Mexican Street Corn)
* Horchata or Agua Fresca
Variations:
* Vegetarian Chalupa: Substitute ground beef with seasoned black beans or lentils.
* Spicy Chalupa: Add diced jalapeños or a dash of hot sauce.
* Chicken Chalupa: Use shredded chicken instead of ground beef.
* Carnitas Chalupa: Use slow-cooked carnitas for a richer flavor.
* Seafood Chalupa: Try using grilled shrimp or fish.
I’m so excited for you to try this recipe and experience the joy of making your own Taco Bell Chalupa Supreme. It’s a fun, rewarding, and delicious experience that I know you’ll love.
So, what are you waiting for? Gather your ingredients, fire up your stove, and get ready to create some culinary magic. And most importantly, don’t forget to share your creations with me! I’d love to see your photos, hear about your variations, and read your feedback. Tag me in your social media posts or leave a comment below. Let’s build a community of Chalupa lovers! I can’t wait to hear about your experience. Happy cooking!
Taco Bell Chalupa Supreme: A Delicious Guide to the Iconic Menu Item
Crispy, homemade chalupas filled with seasoned ground beef, creamy sour cream, fresh lettuce, juicy tomatoes, and melty cheddar cheese. A delicious and satisfying Tex-Mex treat!
Ingredients
Instructions
Recipe Notes
- For the flakiest chalupa shells, make sure your shortening is well-chilled and don’t overmix the dough.
- Use a thermometer to ensure the oil is at the correct temperature for frying the shells.
- Adjust the amount of taco seasoning to your preference.
- Feel free to add other toppings like black olives, green onions, or salsa.
Leave a Comment