
Summer Watermelon Pie: just the name conjures images of sunshine, picnics, and sweet, juicy refreshment! Forget everything you thought you knew about pie because this isn’t your grandma’s apple crumble. This no-bake wonder is a vibrant celebration of summer’s favorite fruit, transformed into a stunning and surprisingly sophisticated dessert.
While the exact origins of watermelon pie are a bit hazy, the concept of using fruits in creative ways to mimic traditional pies has been around for centuries. Think of it as a playful twist on the classic fruit tart, embracing the abundance of watermelons during the warmer months. It’s a delightful way to showcase the natural sweetness and refreshing qualities of this beloved melon.
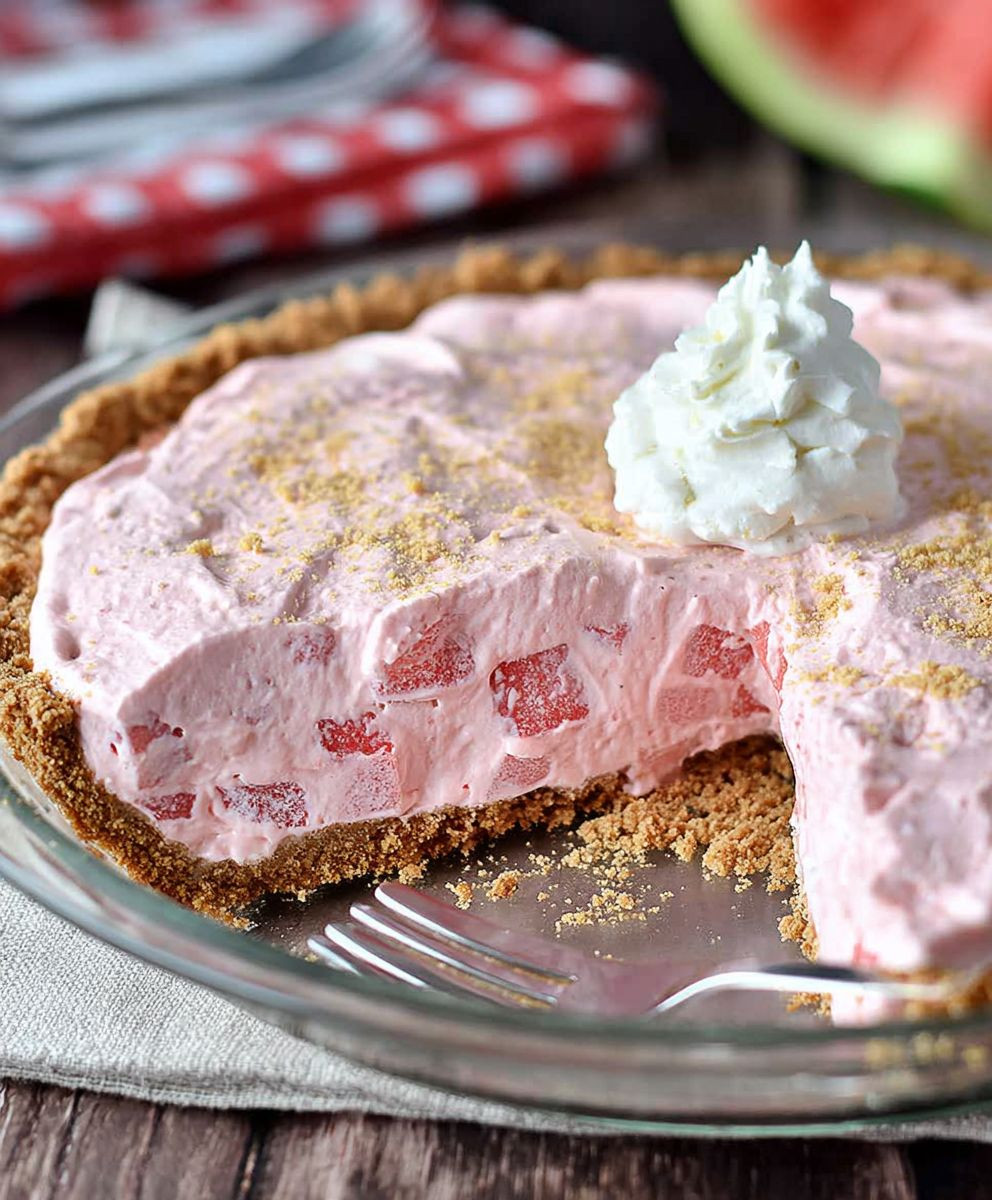
What makes this Summer Watermelon Pie so irresistible? It’s the perfect combination of textures and flavors. The crisp, juicy watermelon filling contrasts beautifully with the creamy, cool whipped topping and the satisfying crunch of the crust. It’s light, refreshing, and not overly sweet, making it the ideal dessert for a hot summer day. Plus, it’s incredibly easy to make – no oven required! This makes it a fantastic option for potlucks, barbecues, or any occasion where you want to impress without spending hours in the kitchen. Get ready to wow your friends and family with this unexpected and utterly delicious treat!

Ingredients:
- For the Crust:
- 1 ½ cups all-purpose flour
- ½ teaspoon salt
- ½ cup (1 stick) cold unsalted butter, cut into cubes
- ¼ cup cold vegetable shortening, cut into cubes
- 5-7 tablespoons ice water
- For the Watermelon Filling:
- 6 cups cubed seedless watermelon, well-drained
- ½ cup granulated sugar
- ¼ cup cornstarch
- ¼ cup water
- 2 tablespoons lime juice, freshly squeezed
- 1 teaspoon lime zest
- ½ teaspoon almond extract (optional, but highly recommended!)
- Pinch of salt
- For the Whipped Cream Topping:
- 1 ½ cups heavy cream, very cold
- ¼ cup powdered sugar
- ½ teaspoon vanilla extract
- Optional Garnish:
- Fresh mint sprigs
- Watermelon wedges
- Lime zest
Preparing the Crust:
- Combine Dry Ingredients: In a large bowl, whisk together the flour and salt. This ensures the salt is evenly distributed throughout the crust, which is crucial for flavor.
- Cut in the Fat: Add the cold butter and vegetable shortening to the flour mixture. Using a pastry blender or your fingertips (work quickly to keep the butter cold!), cut the fat into the flour until the mixture resembles coarse crumbs. You should still see small pieces of butter and shortening – these are what create flaky layers.
- Add Ice Water: Gradually add the ice water, one tablespoon at a time, mixing gently after each addition. Be careful not to overmix. You want just enough water to bring the dough together. The dough should be slightly shaggy but not sticky.
- Form the Dough: Turn the dough out onto a lightly floured surface. Gently form it into a disc, about 1 inch thick. Wrap the disc tightly in plastic wrap and refrigerate for at least 30 minutes, or up to 2 hours. This chilling time is essential for relaxing the gluten and preventing the crust from shrinking during baking.
- Roll Out the Dough: On a lightly floured surface, roll out the chilled dough into a 12-inch circle. Be sure to rotate the dough frequently and add more flour as needed to prevent sticking.
- Transfer to Pie Plate: Carefully transfer the rolled-out dough to a 9-inch pie plate. Gently press the dough into the bottom and up the sides of the plate.
- Crimp the Edges: Crimp the edges of the crust using your fingers or a fork to create a decorative border. This also helps to seal the edges and prevent them from shrinking.
- Pre-Bake the Crust (Blind Bake): Preheat your oven to 375°F (190°C). Line the pie crust with parchment paper and fill it with pie weights or dried beans. This will prevent the crust from puffing up during baking. Bake for 15 minutes.
- Remove Weights and Bake Further: Remove the parchment paper and pie weights. Return the crust to the oven and bake for another 10-15 minutes, or until lightly golden brown. Watch it carefully to prevent burning.
- Cool Completely: Let the baked pie crust cool completely on a wire rack before filling. This is very important; a warm crust will melt the watermelon filling.
Preparing the Watermelon Filling:
- Drain the Watermelon: Place the cubed watermelon in a colander lined with cheesecloth or a fine-mesh sieve set over a bowl. Let it drain for at least 1 hour, or even better, overnight in the refrigerator. This step is absolutely crucial for preventing a soggy pie. You want to remove as much excess liquid as possible.
- Combine Sugar and Cornstarch: In a medium saucepan, whisk together the granulated sugar and cornstarch. This ensures the cornstarch is evenly distributed and prevents lumps from forming when you add the water.
- Add Water and Cook: Gradually whisk in the water until the mixture is smooth. Cook over medium heat, stirring constantly, until the mixture thickens and becomes translucent. This should take about 3-5 minutes.
- Remove from Heat: Remove the saucepan from the heat and stir in the lime juice, lime zest, almond extract (if using), and salt. The lime juice adds a bright, tangy flavor that complements the sweetness of the watermelon, and the almond extract enhances the overall flavor profile.
- Gently Fold in Watermelon: Gently fold the drained watermelon into the thickened sauce. Be careful not to crush the watermelon cubes. You want them to remain intact for a nice texture.
- Chill the Filling: Cover the saucepan with plastic wrap, pressing it directly onto the surface of the filling to prevent a skin from forming. Refrigerate for at least 2 hours, or until completely chilled. This allows the filling to set up properly.
Assembling the Pie:
- Pour Filling into Crust: Once the watermelon filling is completely chilled, pour it into the cooled pie crust. Spread it evenly to create a smooth surface.
- Refrigerate: Refrigerate the pie for at least 2 hours, or preferably overnight, to allow the filling to set completely. This will make it easier to slice and serve.
Making the Whipped Cream Topping:
- Chill Bowl and Whisk: Place your mixing bowl and whisk (or the bowl and whisk attachment of your stand mixer) in the freezer for at least 15 minutes before making the whipped cream. This helps the cream whip up faster and hold its shape better.
- Combine Ingredients: Pour the cold heavy cream into the chilled bowl. Add the powdered sugar and vanilla extract.
- Whip the Cream: Beat the cream on medium speed until soft peaks form. Then, increase the speed to medium-high and continue beating until stiff peaks form. Be careful not to overwhip, or the cream will turn grainy.
Serving the Pie:
- Spread Whipped Cream: Just before serving, spread the whipped cream evenly over the top of the watermelon pie.
- Garnish (Optional): Garnish with fresh mint sprigs, watermelon wedges, and/or lime zest, if desired. These add a pop of color and freshness to the pie.
- Slice and Serve: Slice the pie into wedges and serve immediately. Enjoy!
Tips for Success:
- Use Seedless Watermelon: This will save you a lot of time and effort.
- Drain the Watermelon Thoroughly: This is the most important step for preventing a soggy pie. Don’t skip it!
- Keep Everything Cold: Cold ingredients are key for a flaky pie crust and stable whipped cream.
- Don’t Overmix the Dough: Overmixing will develop the gluten and result in a tough crust.
- Chill the Pie Completely: This allows the filling to set up properly and makes it easier to slice.
Variations:
- Add Other Fruits: You can add other fruits to the watermelon filling, such as strawberries, blueberries, or raspberries.
- Use a Different Crust: You can use a graham cracker crust or an Oreo crust instead of a traditional pie crust.
- Make it Vegan: Use a vegan pie crust, coconut cream for the whipped topping, and agar-agar instead of cornstarch to thicken the filling.
Conclusion:
This Summer Watermelon Pie isn’t just a dessert; it’s a vibrant celebration of summer flavors, a refreshing escape from the heat, and a guaranteed crowd-pleaser. From the crisp, buttery crust to the juicy, naturally sweet watermelon filling, every bite is an explosion of textures and tastes that will leave you wanting more. I truly believe this recipe is a must-try because it’s surprisingly easy to make, requires minimal baking (perfect for those hot summer days!), and delivers maximum impact. It’s a showstopper that looks as good as it tastes, making it ideal for potlucks, barbecues, or simply a delightful treat for yourself.
But the best part? It’s incredibly versatile! While I’ve shared my go-to recipe, feel free to experiment and make it your own. For a touch of extra sweetness, consider adding a drizzle of honey or maple syrup to the watermelon filling. If you’re feeling adventurous, a sprinkle of fresh mint or basil can elevate the flavor profile to a whole new level. For a creamier texture, you could even incorporate a layer of whipped cream or a light mascarpone cheese between the crust and the watermelon.
Serving suggestions are endless! This Summer Watermelon Pie is fantastic on its own, but it also pairs beautifully with a scoop of vanilla ice cream or a dollop of whipped cream. For a more sophisticated presentation, garnish with fresh berries, a sprig of mint, or a dusting of powdered sugar. You can even cut it into smaller squares and serve it as a refreshing appetizer at your next summer gathering. And if you have any leftover watermelon, don’t let it go to waste! Use it to make a refreshing watermelon juice or add it to a summer salad.
Don’t be intimidated by the idea of making a pie. This recipe is designed to be simple and straightforward, even for beginner bakers. The key is to use a high-quality watermelon that is ripe and juicy. And remember, the crust doesn’t have to be perfect! A rustic, homemade crust adds to the charm of this pie.
I’m so excited for you to try this recipe and experience the magic of Summer Watermelon Pie for yourself. I’m confident that it will become a new favorite in your household. So, gather your ingredients, preheat your oven, and get ready to create a dessert that will impress your friends and family.
Once you’ve made it, I would absolutely love to hear about your experience! Did you make any variations? What did your family and friends think? Share your photos and stories in the comments below. Your feedback is invaluable, and it helps me to continue creating recipes that you’ll love. Happy baking, and enjoy your slice of summer! I can’t wait to see your creations! Let me know if you have any questions, and I’ll do my best to help. This pie is truly a taste of sunshine, and I hope it brings you as much joy as it brings me.
Summer Watermelon Pie: A Refreshing No-Bake Dessert Recipe
A refreshing Watermelon Pie with flaky crust, sweet watermelon filling, and light whipped cream. Perfect for summer!
Ingredients
Instructions
Recipe Notes
- Use seedless watermelon for convenience.
- Draining the watermelon thoroughly is crucial to prevent a soggy pie.
- Keep ingredients cold for a flaky crust and stable whipped cream.
- Avoid overmixing the dough to prevent a tough crust.
- Chill the pie completely for easy slicing.
Leave a Comment