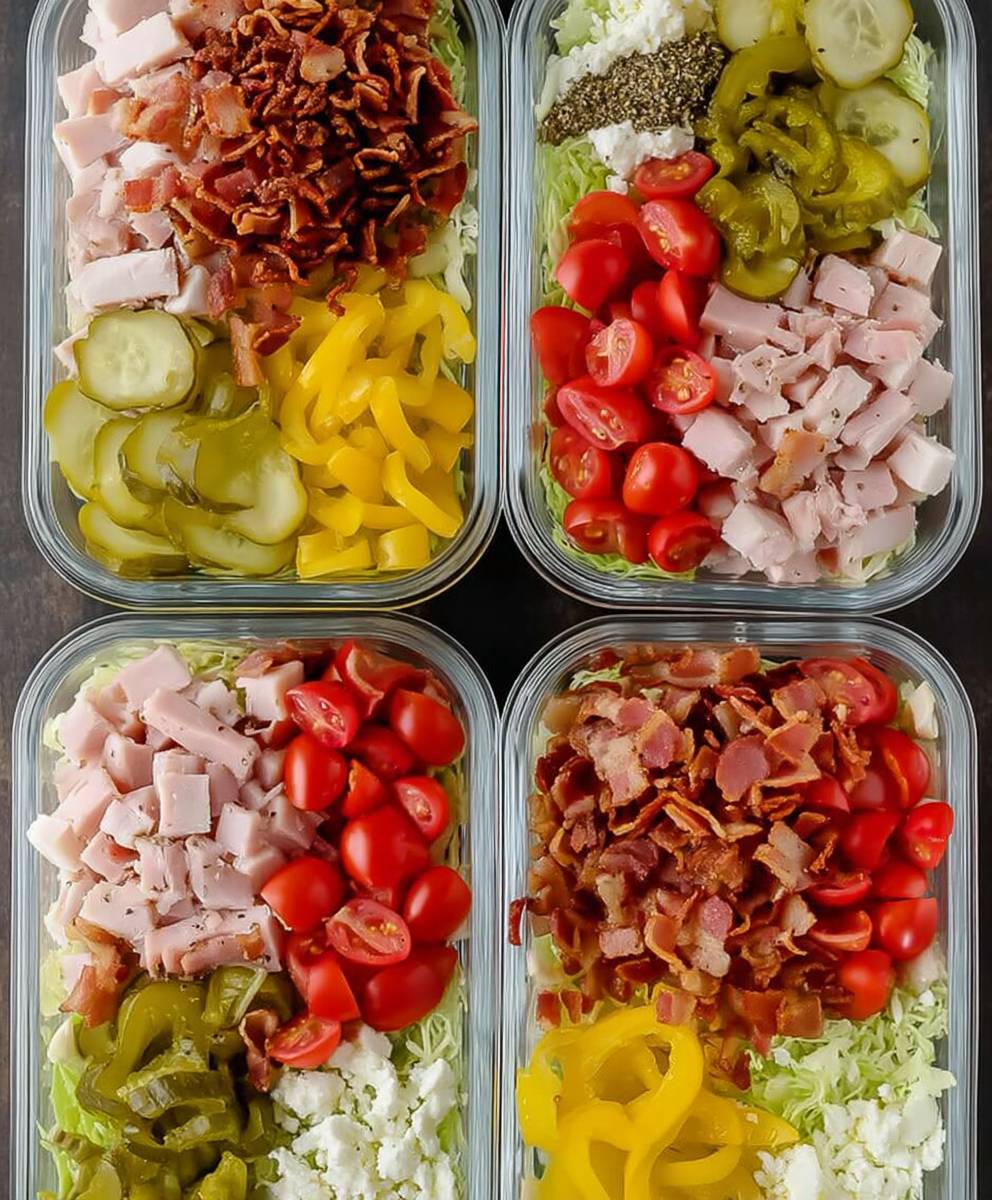
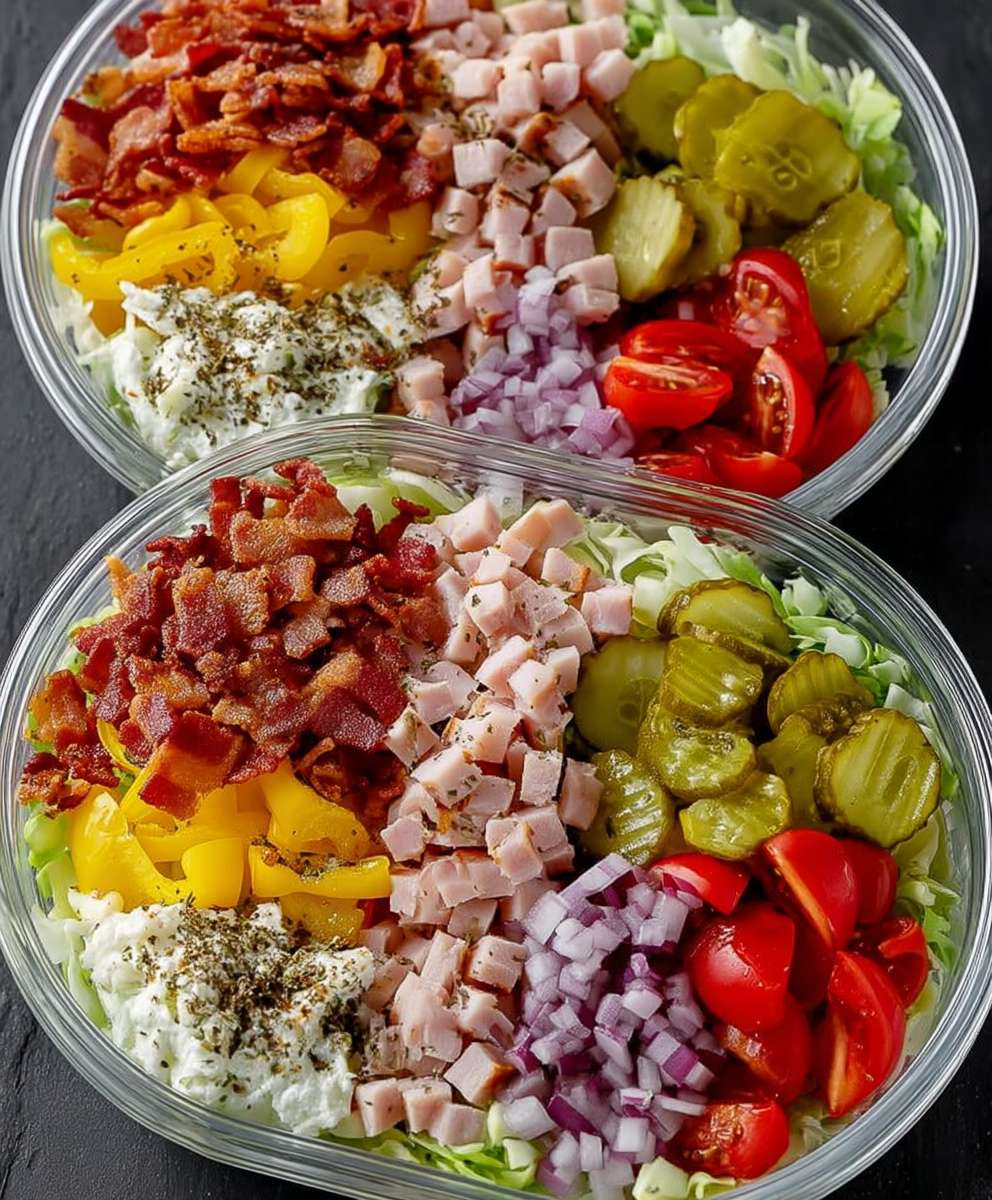
Sub in a tub: Forget the bread, keep the flavor! Have you ever craved all the delicious fillings of your favorite submarine sandwich but wanted a lighter, low-carb option? Well, you’re in for a treat! I’m thrilled to share my take on a deconstructed sub that’s taking the internet by storm.
While the exact origins of the “sub in a tub” are a bit murky, its popularity stems from the ever-growing keto and low-carb communities. People are constantly seeking creative ways to enjoy their favorite foods without sacrificing their dietary goals. This ingenious idea allows you to savor all the savory, tangy, and satisfying elements of a classic sub sandwich, minus the carb-heavy bread.
What’s not to love? This sub in a tub is incredibly versatile, allowing you to customize it with your preferred meats, cheeses, veggies, and dressings. It’s quick to assemble, making it perfect for a speedy lunch, a satisfying snack, or even a light dinner. The combination of textures – the crispness of the lettuce, the creaminess of the cheese, and the savory bite of the meats – creates a delightful culinary experience. Plus, it’s a fantastic way to pack in extra vegetables and protein, making it a healthy and delicious choice. So, ditch the bread and dive into this flavorful adventure!
Ingredients:
- 1 large loaf of Italian bread (about 24 inches long), crusty on the outside, soft on the inside
- 1/2 cup olive oil, extra virgin
- 1/4 cup red wine vinegar
- 1 tablespoon dried oregano
- 1 teaspoon garlic powder
- 1/2 teaspoon red pepper flakes (optional, for a little kick)
- 1/4 teaspoon salt
- 1/4 teaspoon black pepper
- 8 ounces provolone cheese, thinly sliced
- 6 ounces ham, thinly sliced
- 6 ounces salami, thinly sliced
- 4 ounces capicola (or other spicy Italian ham), thinly sliced
- 4 ounces pepperoni, thinly sliced
- 1/2 cup giardiniera (Italian pickled vegetables), drained
- 1/4 cup roasted red peppers, drained and sliced
- 1/4 cup black olives, sliced
- 1/4 cup green olives, sliced
- 2 tablespoons mayonnaise (optional)
- 2 tablespoons mustard (optional, yellow or Dijon)
- Lettuce leaves (optional, shredded iceberg or romaine)
- Tomato slices (optional)
- Onion slices (optional, red or white)
Preparing the Dressing:
Okay, first things first, we need to get our dressing ready. This is what really makes the sub sing! It’s super simple, but trust me, it’s the key.
- In a small bowl, whisk together the olive oil, red wine vinegar, dried oregano, garlic powder, red pepper flakes (if using), salt, and pepper. Make sure everything is well combined. You want a nice, emulsified dressing.
- Taste the dressing and adjust the seasonings as needed. Maybe you want a little more oregano? A pinch more red pepper flakes? Go for it! This is your sub, make it your own.
- Set the dressing aside. We’ll use it later to drizzle over the bread and the fillings.
Preparing the Bread:
Now for the star of the show – the bread! Choosing the right bread is crucial. You want something sturdy enough to hold all those delicious fillings, but also soft enough to bite into easily. Italian bread is my go-to, but a good hoagie roll will also work.
- Carefully slice the loaf of Italian bread horizontally, creating a top and bottom half. Be careful not to cut all the way through! You want to keep the two halves connected on one side, like a hinge. This will make it easier to assemble and eat.
- Gently hollow out the inside of both the top and bottom halves of the bread. This will create more space for the fillings and prevent the sub from becoming too bready. Don’t go overboard, though! You still want some bread to hold everything together. I usually pull out about 1/2 inch of bread from each side. You can save the bread crumbs for another recipe, like meatballs or bread pudding!
- Drizzle about half of the prepared dressing evenly over the inside of both the top and bottom halves of the bread. This will add flavor and moisture to the bread, preventing it from drying out.
Layering the Meats and Cheeses:
This is where the fun begins! We’re going to layer all those delicious meats and cheeses to create a flavor explosion in every bite.
- On the bottom half of the bread, start by layering the provolone cheese. Make sure to cover the entire surface of the bread with cheese. This will create a nice barrier between the bread and the meats, preventing the bread from getting soggy.
- Next, layer the ham over the provolone cheese. Spread the ham evenly over the cheese.
- Now, add the salami. Again, spread it evenly over the ham.
- Follow with the capicola (or other spicy Italian ham). This will add a nice kick to the sub.
- Finally, layer the pepperoni over the capicola.
- If you’re using mayonnaise and mustard, spread a thin layer of each over the top of the meats. This is optional, but it adds a nice creaminess and tang to the sub.
Adding the Veggies and Finishing Touches:
Almost there! Now we’re going to add the veggies and other toppings to complete our masterpiece.
- Sprinkle the giardiniera over the meats. Make sure to drain the giardiniera well before adding it to the sub, otherwise it will make the bread soggy.
- Add the roasted red peppers, black olives, and green olives.
- If you’re using lettuce, tomato, and onion, add them now. I like to shred the lettuce for better coverage.
- Drizzle the remaining dressing over the vegetables.
Assembling and Serving:
The final step! Carefully close the sub and get ready to enjoy.
- Carefully close the top half of the bread over the bottom half.
- Wrap the sub tightly in plastic wrap or parchment paper. This will help to hold everything together and prevent the fillings from falling out.
- Refrigerate the sub for at least 30 minutes before serving. This will allow the flavors to meld together and the sub to become more cohesive. You can even refrigerate it for a few hours, or overnight, for an even better flavor.
- When you’re ready to serve, remove the sub from the refrigerator and cut it into individual portions. I usually cut it into 4-6 pieces, depending on how hungry everyone is.
- Serve immediately and enjoy!
Tips and Variations:
- Cheese Variations: Feel free to experiment with different types of cheese. Mozzarella, fontina, or even a sharp cheddar would be delicious.
- Meat Variations: You can also use different types of meat, such as turkey, roast beef, or even grilled chicken.
- Vegetarian Option: For a vegetarian option, you can substitute the meats with grilled vegetables, such as zucchini, eggplant, and bell peppers.
- Spicy Option: If you like things spicy, add more red pepper flakes to the dressing or use a spicy provolone cheese.
- Make it a Grinder: Wrap the assembled sub in foil and bake in a preheated oven at 350°F (175°C) for 10-15 minutes, or until the cheese is melted and bubbly.
- Add Avocado: Sliced avocado adds a creamy texture and healthy fats.
- Use Different Bread: While Italian bread is classic, try using a ciabatta roll or a French baguette for a different texture.
Serving Suggestions:
This sub is a meal in itself, but here are a few serving suggestions to round out your meal:
- Serve with a side of potato chips or french fries.
- Serve with a side salad.
- Serve with a bowl of soup.
- Serve with a cold beer or soda.
Enjoy your delicious homemade sub! I hope you love it as much as I do.
Conclusion:
So, there you have it! This “Sub in a Tub” recipe is more than just a deconstructed sandwich; it’s a flavor explosion waiting to happen, and I truly believe it’s a must-try for anyone looking for a quick, healthy, and incredibly satisfying meal. Forget boring salads or bland lunches – this is where it’s at!
Why is it a must-try? Well, first and foremost, it’s incredibly versatile. You can customize it to your exact liking, using your favorite deli meats, cheeses, and veggies. It’s also a fantastic way to use up leftover ingredients in your fridge, minimizing food waste and maximizing deliciousness. Plus, it’s naturally lower in carbs than a traditional sub, making it a great option for those watching their intake. But most importantly, it’s just plain fun to eat! The combination of textures and flavors is simply irresistible.
This recipe is a game-changer for busy weeknights or quick lunches.
Now, let’s talk serving suggestions and variations. While I love it as is, there are endless possibilities to explore. For a spicier kick, add some sliced jalapeños or a dash of hot sauce. If you’re a fan of Italian flavors, try using provolone cheese, salami, and a drizzle of balsamic glaze. For a vegetarian option, swap the meat for grilled halloumi or marinated tofu. You could even add some cooked quinoa or chickpeas for extra protein and fiber.
Think about different dressings too! While I suggested a simple vinaigrette, you could also use ranch dressing, Caesar dressing, or even a creamy avocado dressing. Get creative and experiment with different combinations until you find your perfect “Sub in a Tub” masterpiece.
For serving, I personally love to enjoy it straight from the bowl, but you could also serve it as a side dish at a barbecue or potluck. It’s also great for meal prepping – just assemble the ingredients in separate containers and combine them when you’re ready to eat.
Don’t be afraid to get creative with your ingredients!
I’m so excited for you to try this recipe and experience the joy of a “Sub in a Tub” for yourself. It’s truly one of my go-to meals, and I know you’ll love it just as much as I do.
So, what are you waiting for? Head to the kitchen, gather your ingredients, and get ready to create a culinary masterpiece. And most importantly, don’t forget to share your experience! I’d love to hear what variations you tried, what your favorite ingredients are, and how much you enjoyed it.
Leave a comment below, tag me in your photos on social media, or send me an email – I can’t wait to see your creations! Remember to use the hashtag #SubInATub so I can easily find your posts. Let’s spread the word about this amazing recipe and inspire others to try it too.
I’m confident that this Sub in a Tub will become a staple in your kitchen, just like it has in mine. Happy cooking, and bon appétit!
Sub in a Tub: The Ultimate Guide to Delicious and Easy Recipes
A classic Italian sub sandwich piled high with layers of cured meats, provolone cheese, tangy giardiniera, and a flavorful homemade dressing. Perfect for lunch, dinner, or a party!
Ingredients
Instructions
Recipe Notes
- Cheese Variations: Mozzarella, fontina, or sharp cheddar can be substituted for provolone.
- Meat Variations: Turkey, roast beef, or grilled chicken can be used instead of the traditional Italian meats.
- Vegetarian Option: Substitute the meats with grilled vegetables like zucchini, eggplant, and bell peppers.
- Spicy Option: Add more red pepper flakes to the dressing or use spicy provolone cheese.
- Make it a Grinder: Wrap the assembled sub in foil and bake in a preheated oven at 350°F (175°C) for 10-15 minutes, or until the cheese is melted and bubbly.
- Add Avocado: Sliced avocado adds a creamy texture and healthy fats.
- Use Different Bread: Try using a ciabatta roll or a French baguette for a different texture.
- Serving Suggestions: Serve with potato chips, french fries, a side salad, or a bowl of soup.


Leave a Comment