
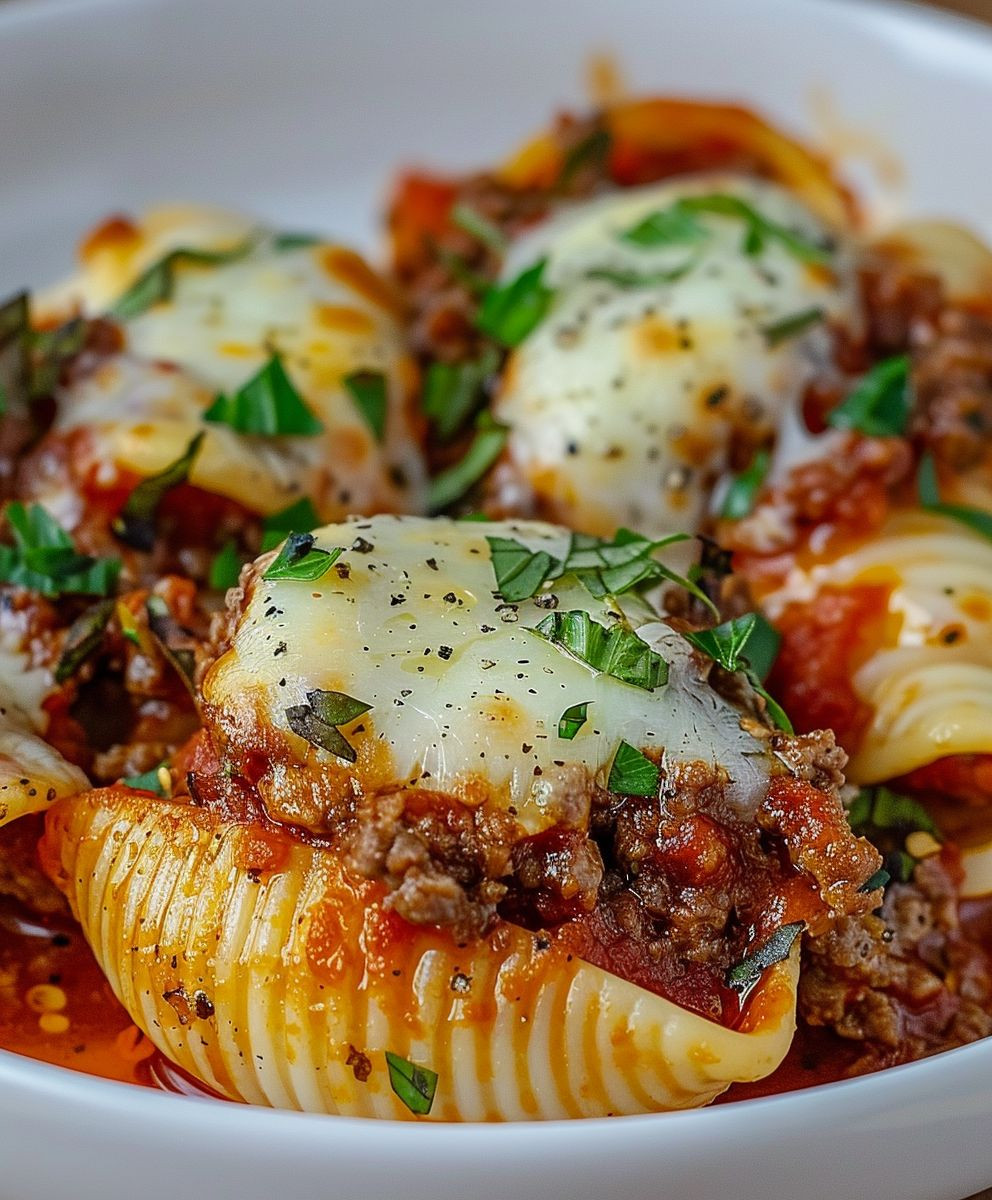
Stuffed Shells with Meat: Prepare to embark on a culinary journey that will transport you straight to the heart of Italy! Imagine sinking your teeth into tender, jumbo pasta shells, overflowing with a savory, perfectly seasoned meat filling, all smothered in a rich, tangy tomato sauce and blanketed with a generous layer of melted mozzarella. Sounds divine, doesn’t it?
This classic Italian-American comfort food has a history as rich and layered as the dish itself. While the exact origins are debated, many believe stuffed shells with meat evolved from traditional Italian pasta dishes like manicotti and cannelloni, adapted by Italian immigrants in America who had access to different ingredients and cooking styles. It quickly became a staple in Italian-American households, a dish passed down through generations, each family adding their own unique twist.
But what is it about stuffed shells with meat that makes them so universally loved? It’s the perfect combination of textures and flavors. The soft, yielding pasta, the hearty, flavorful meat filling, the bright acidity of the tomato sauce, and the creamy, melty cheese all come together in perfect harmony. Plus, it’s a dish that’s both satisfying and comforting, perfect for a cozy family dinner or a special occasion. And let’s be honest, who can resist a big plate of cheesy, meaty goodness? I know I can’t!

Ingredients:
- 1 (12 ounce) package jumbo pasta shells
- 1 tablespoon olive oil
- 1 pound ground beef
- 1/2 pound ground Italian sausage (sweet or hot, your preference!)
- 1 medium yellow onion, finely chopped
- 2 cloves garlic, minced
- 1 (28 ounce) can crushed tomatoes
- 1 (15 ounce) can tomato sauce
- 1 (6 ounce) can tomato paste
- 1 teaspoon dried oregano
- 1 teaspoon dried basil
- 1/2 teaspoon salt
- 1/4 teaspoon black pepper
- 15 ounces ricotta cheese
- 1/2 cup grated Parmesan cheese, plus more for topping
- 1/4 cup chopped fresh parsley
- 1 large egg, lightly beaten
- 8 ounces mozzarella cheese, shredded
Preparing the Shells:
- Cook the pasta shells according to package directions. Be careful not to overcook them, as they need to be firm enough to hold their shape when stuffed. I usually cook them for about a minute or two less than the package suggests.
- Drain the shells well and rinse them with cold water. This stops the cooking process and prevents them from sticking together.
- Gently toss the cooked shells with a little olive oil. This will further prevent sticking and keep them pliable while you prepare the filling. Set them aside.
Making the Meat Sauce:
- Heat the olive oil in a large skillet or Dutch oven over medium heat. Make sure the skillet is large enough to accommodate all the sauce ingredients.
- Add the ground beef and Italian sausage to the skillet. Break the meat up with a spoon and cook until browned, draining off any excess grease. Nobody wants greasy stuffed shells!
- Add the chopped onion to the skillet and cook until softened, about 5 minutes. The onions should be translucent and fragrant.
- Add the minced garlic and cook for another minute, until fragrant. Be careful not to burn the garlic, as it can become bitter.
- Stir in the crushed tomatoes, tomato sauce, and tomato paste. Make sure everything is well combined.
- Add the dried oregano, dried basil, salt, and pepper. Stir well to incorporate the spices.
- Bring the sauce to a simmer, then reduce the heat to low, cover, and cook for at least 30 minutes, or up to an hour, stirring occasionally. The longer the sauce simmers, the more the flavors will meld together. I usually let it simmer for the full hour if I have the time. This is where the magic happens!
Preparing the Ricotta Filling:
- In a large bowl, combine the ricotta cheese, Parmesan cheese, and chopped parsley. Make sure the ricotta is smooth and creamy.
- Add the lightly beaten egg to the cheese mixture. The egg helps to bind the filling together.
- Season the cheese mixture with a pinch of salt and pepper. Taste and adjust the seasoning as needed.
- Mix all ingredients until well combined. The filling should be smooth and creamy.
Assembling the Stuffed Shells:
- Preheat your oven to 375°F (190°C). Make sure your oven is properly preheated for even cooking.
- Spread a thin layer of the meat sauce in the bottom of a 9×13 inch baking dish. This prevents the shells from sticking and adds flavor to the bottom.
- Using a spoon or a piping bag, carefully stuff each cooked shell with the ricotta cheese filling. Don’t overstuff them, or the filling will spill out during baking. I find that a small spoon works best for me.
- Arrange the stuffed shells in the baking dish, seam-side up, in a single layer. Try to fit them snugly together.
- Spoon the remaining meat sauce over the stuffed shells, making sure they are well covered. You want every shell to be coated in that delicious sauce!
- Sprinkle the shredded mozzarella cheese and additional Parmesan cheese over the top. Don’t be shy with the cheese!
Baking the Stuffed Shells:
- Cover the baking dish with aluminum foil. This prevents the cheese from browning too quickly and keeps the shells moist.
- Bake for 25 minutes.
- Remove the foil and bake for another 10-15 minutes, or until the cheese is melted and bubbly and the sauce is heated through. The cheese should be golden brown and slightly bubbly. Keep a close eye on it to prevent burning.
- Let the stuffed shells rest for 10 minutes before serving. This allows the cheese to set slightly and makes it easier to serve.
Serving Suggestions:
- Serve the stuffed shells hot, garnished with fresh parsley or basil.
- A side salad with a light vinaigrette is a perfect complement to the richness of the stuffed shells.
- Garlic bread or crusty bread is great for soaking up the extra sauce.
- For a heartier meal, serve with roasted vegetables like broccoli or asparagus.
Tips and Variations:
- For a vegetarian version, omit the ground beef and Italian sausage and use a vegetable-based sauce. You can add sautéed mushrooms, zucchini, and bell peppers to the sauce for extra flavor and texture.
- You can use different types of cheese in the ricotta filling. Try adding some provolone or fontina for a richer flavor.
- Add some spinach or other greens to the ricotta filling for extra nutrients. Make sure to squeeze out any excess moisture from the spinach before adding it to the filling.
- If you don’t have time to make your own meat sauce, you can use a store-bought sauce. Just make sure to choose a high-quality sauce that you enjoy.
- You can prepare the stuffed shells ahead of time and bake them later. Assemble the shells in the baking dish, cover with foil, and refrigerate for up to 24 hours. When ready to bake, add 10-15 minutes to the baking time.
- For a spicier dish, add a pinch of red pepper flakes to the meat sauce.
- If you want a smoother sauce, you can use an immersion blender to blend the sauce before adding it to the shells. Be careful not to over-blend, or the sauce will become too thin.
- Don’t be afraid to experiment with different flavors and ingredients to create your own unique version of stuffed shells! The possibilities are endless!
Make Ahead Instructions:
These stuffed shells are perfect for making ahead! You can assemble the entire dish, cover it tightly with foil, and refrigerate it for up to 24 hours before baking. When you’re ready to bake, simply remove the foil and bake as directed, adding an extra 10-15 minutes to the baking time to ensure the shells are heated through. This is a great option for busy weeknights or when you’re entertaining guests.
Freezing Instructions:
Stuffed shells also freeze well, making them a convenient option for meal prepping. To freeze, assemble the dish as directed, but don’t bake it. Cover the baking dish tightly with plastic wrap, then with aluminum foil. Freeze for up to 3 months. When you’re ready to bake, thaw the dish in the refrigerator overnight. Remove the plastic wrap and bake as directed, adding an extra 15-20 minutes to the baking time to ensure the shells are heated through. You can also bake the shells from frozen, but it will take significantly longer (about 1 hour and 15 minutes to 1 hour and 30 minutes). Make sure to check the internal temperature to ensure they are fully heated.
Nutritional Information (Approximate):
Please note that the nutritional information is an estimate and may vary depending on the specific ingredients used.
- Calories: Approximately 450-550 per serving
- Fat: 25-35 grams
- Saturated Fat: 12-18 grams
- Cholesterol: 100-150 mg
- Sodium: 700-900 mg
- Carbohydrates: 40-50 grams
- Fiber: 3-5 grams
- Sugar: 10-15 grams
- Protein: 25-3
Conclusion:
And there you have it! These Stuffed Shells with Meat are more than just a meal; they’re a comforting hug on a plate, a celebration of flavor, and a guaranteed crowd-pleaser. I truly believe this recipe deserves a spot in your regular rotation. The combination of perfectly cooked pasta, a rich and savory meat filling, and that blanket of melted cheese is simply irresistible. It’s the kind of dish that evokes memories of family gatherings and cozy evenings, and I’m confident it will create new ones for you too.
But what makes these stuffed shells a must-try? It’s the simplicity combined with the incredible depth of flavor. We’re not talking about a complicated, all-day affair here. This recipe is designed to be approachable and manageable, even for beginner cooks. Yet, the end result tastes like you’ve been slaving away in the kitchen for hours. The secret lies in the quality of the ingredients and the careful layering of flavors. From the browned ground beef to the fragrant herbs and the creamy ricotta cheese, each component plays a crucial role in creating a symphony of taste that will leave you wanting more.
Beyond the deliciousness, these stuffed shells are also incredibly versatile. Feel free to get creative and adapt the recipe to your own preferences. For a vegetarian option, you can easily substitute the meat filling with a mixture of sautéed vegetables like spinach, mushrooms, and zucchini. Or, if you’re feeling adventurous, try adding a pinch of red pepper flakes to the meat filling for a little extra kick.
Serving Suggestions and Variations:
* Serve these beauties with a simple side salad dressed with a light vinaigrette to balance the richness of the dish.
* Garlic bread is always a welcome addition!
* For a more elegant presentation, sprinkle some fresh basil or parsley on top before serving.
* Leftovers (if there are any!) are just as delicious the next day. Simply reheat them in the oven or microwave.
* Consider using different types of cheese in the filling, such as mozzarella, provolone, or even a little bit of Parmesan.
* If you’re short on time, you can use store-bought marinara sauce instead of making your own. However, I highly recommend trying the homemade version at least once – it makes a world of difference!
* For a creamier sauce, stir in a dollop of ricotta cheese or heavy cream into the marinara sauce before baking.I’m so excited for you to try this recipe! I know you’ll love it as much as I do. It’s a dish that’s perfect for any occasion, from a casual weeknight dinner to a special celebration. And remember, cooking should be fun and enjoyable, so don’t be afraid to experiment and make it your own.
Now, it’s your turn! Head to the kitchen, gather your ingredients, and get ready to create some culinary magic. Once you’ve made these Stuffed Shells with Meat, I’d love to hear about your experience. Did you make any modifications? What did your family think? Share your photos and comments below – I can’t wait to see your creations! Happy cooking!
Stuffed Shells with Meat: The Ultimate Comfort Food Recipe
Classic stuffed pasta shells filled with a creamy ricotta mixture and savory meat sauce, topped with melted mozzarella and Parmesan cheese. A comforting and satisfying Italian-American favorite!
By: ShareyCategory: DinnerDifficulty: EasyCuisine: AmericanYield: 6-8 servingsDietary: VegetarianIngredients
Instructions
Recipe Notes
- Vegetarian Variation: Omit the ground beef and Italian sausage and use a vegetable-based sauce. Add sautéed mushrooms, zucchini, and bell peppers to the sauce for extra flavor and texture.
- Cheese Variation: Use different types of cheese in the ricotta filling. Try adding some provolone or fontina for a richer flavor.
- Add Greens: Add some spinach or other greens to the ricotta filling for extra nutrients. Make sure to squeeze out any excess moisture from the spinach before adding it to the filling.
- Store-Bought Sauce: If you don’t have time to make your own meat sauce, you can use a store-bought sauce. Just make sure to choose a high-quality sauce that you enjoy.
- Make Ahead: Prepare the stuffed shells ahead of time and bake them later. Assemble the shells in the baking dish, cover with foil, and refrigerate for up to 24 hours. When ready to bake, add 10-15 minutes to the baking time.
- Spice it Up: For a spicier dish, add a pinch of red pepper flakes to the meat sauce.
- Smooth Sauce: If you want a smoother sauce, you can use an immersion blender to blend the sauce before adding it to the shells. Be careful not to over-blend, or the sauce will become too thin.
- Experiment: Don’t be afraid to experiment with different flavors and ingredients to create your own unique version of stuffed shells! The possibilities are endless!
- Serving Suggestions: Serve the stuffed shells hot, garnished with fresh parsley or basil. A side salad with a light vinaigrette is a perfect complement to the richness of the stuffed shells. Garlic bread or crusty bread is great for soaking up the extra sauce. For a heartier meal, serve with roasted vegetables like broccoli or asparagus.
- Make Ahead Instructions: These stuffed shells are perfect for making ahead! You can assemble the entire dish, cover it tightly with foil, and refrigerate it for up to 24 hours before baking. When you’re ready to bake, simply remove the foil and bake as directed, adding an extra 10-15 minutes to the baking time to ensure the shells are heated through. This is a great option for busy weeknights or when you’re entertaining guests.
- Freezing Instructions: Stuffed shells also freeze well, making them a convenient option for meal prepping. To freeze, assemble the dish as directed, but don’t bake it. Cover the baking dish tightly with plastic wrap, then with aluminum foil. Freeze for up to 3 months. When you’re ready to bake, thaw the dish in the refrigerator overnight. Remove the plastic wrap and bake as directed, adding an extra 15-20 minutes to the baking time to ensure the shells are heated through. You can also bake the shells from frozen, but it will take significantly longer (about 1 hour and 15 minutes to 1 hour and 30 minutes). Make sure to check the internal temperature to ensure they are fully heated.
- Nutritional Information (Approximate): Please note that the nutritional information is an estimate and may vary depending on the specific ingredients used.
- Calories: Approximately 450-550 per serving
- Fat: 25-35 grams
- Saturated Fat: 12-18 grams
- Cholesterol: 100-150 mg
- Sodium: 700-900 mg
- Carbohydrates: 40-50 grams
- Fiber: 3-5 grams
- Sugar: 10-15 grams
- Protein: 25-35 grams
Frequently Asked Questions
→ How do I ensure the bread stays moist?Use fresh, ripe ingredients and avoid overmixing the batter. Store in an airtight container.→ Can I substitute ingredients?Yes, you can substitute similar ingredients while maintaining the basic ratios for best results.→ How long does this bread keep?Store tightly wrapped at room temperature for 2-3 days, or refrigerate for up to a week.→ What if I don't have all the spices?You can adjust spices to taste or substitute with similar warming spices.→ Can I freeze this bread?Yes, wrap individual slices and freeze for up to 3 months. Thaw at room temperature before serving.
Leave a Comment