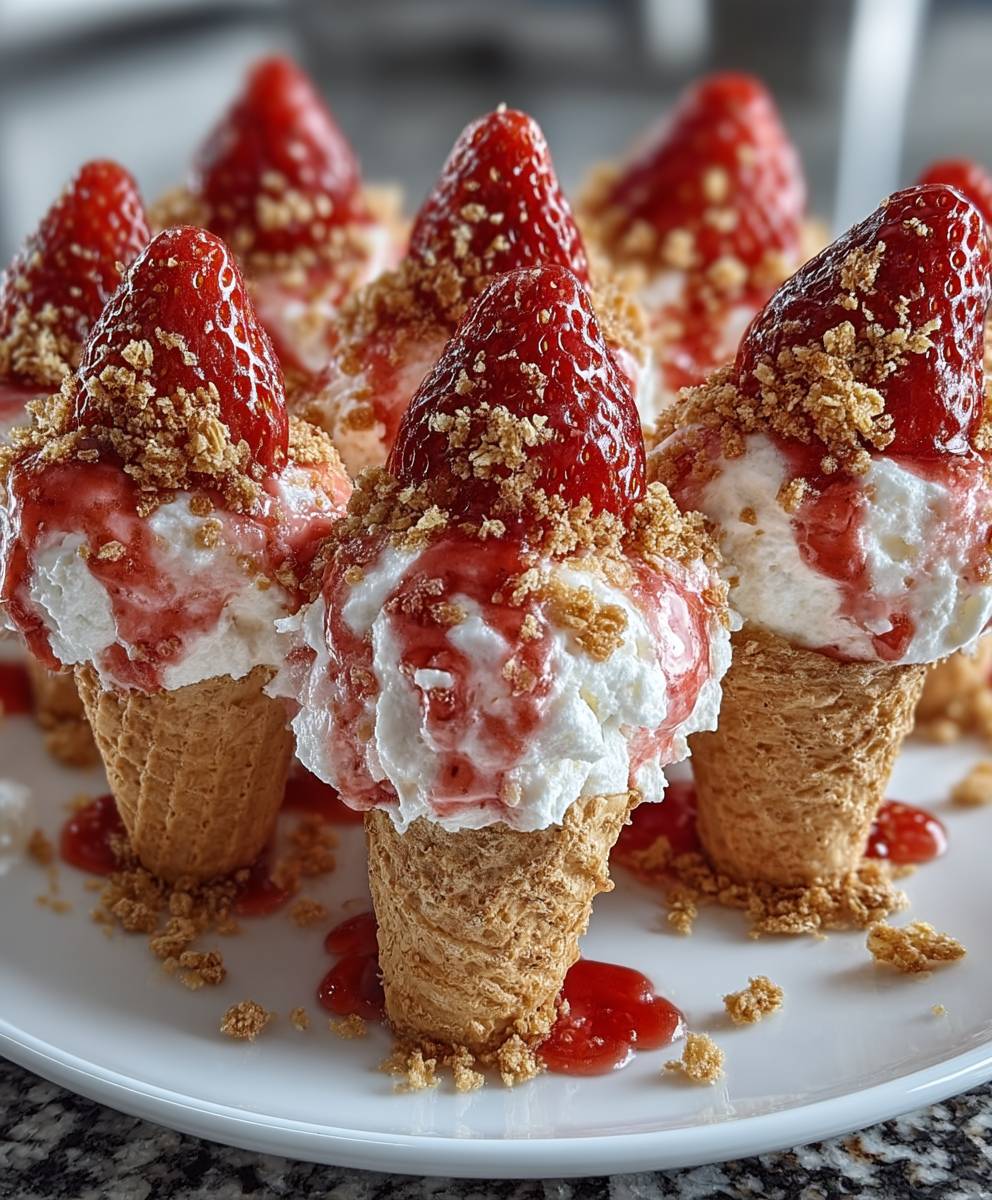
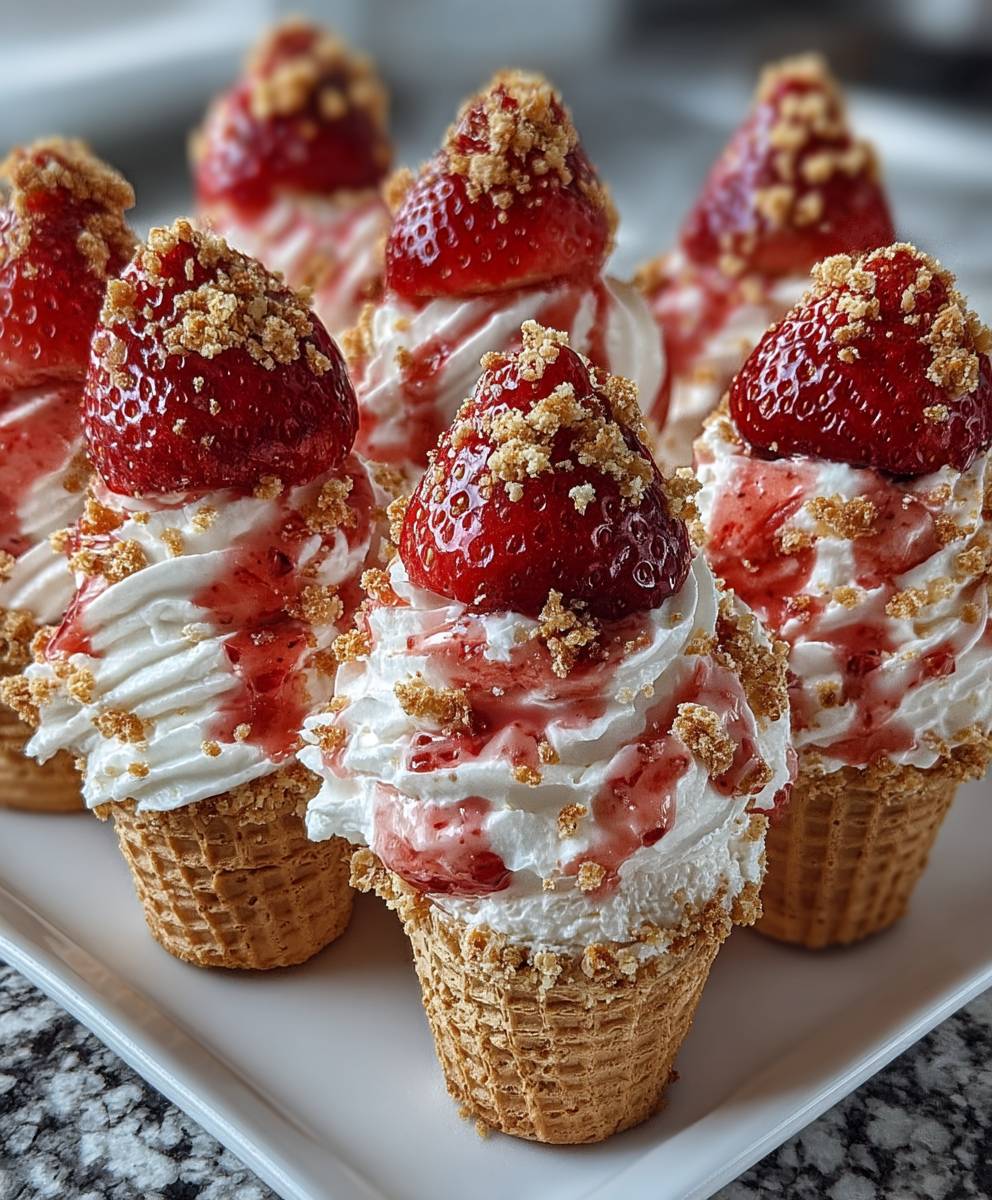
Strawberry Crunch Cheesecake Cones: Prepare to be transported back to your childhood summers with a sophisticated twist! Remember those iconic strawberry shortcake ice cream bars, the ones with the crunchy, strawberry-studded coating that always seemed to melt too fast? Well, we’ve taken that nostalgic flavor and elevated it to a whole new level with these delightful, handheld treats.
While the exact origins of the strawberry shortcake ice cream bar are shrouded in a bit of mystery, its popularity exploded in the 1980s, quickly becoming a beloved symbol of carefree summer days. The combination of creamy vanilla ice cream, a sweet strawberry core, and that unforgettable crunchy coating was simply irresistible.
What makes these Strawberry Crunch Cheesecake Cones so special? It’s the perfect marriage of textures and flavors. The creamy, tangy cheesecake filling provides a luxurious base, while the homemade strawberry crunch topping delivers that satisfying, nostalgic crunch we all crave. They’re also incredibly convenient – no forks or spoons required! Each bite is an explosion of sweet, creamy, and crunchy goodness, making them the ultimate dessert for parties, picnics, or simply a delightful treat on a warm afternoon. Get ready to impress your friends and family with this fun and delicious twist on a classic!
Ingredients:
- For the Cheesecake Filling:
- 24 ounces cream cheese, softened
- 1 1/2 cups granulated sugar
- 1 teaspoon vanilla extract
- 1/2 teaspoon lemon zest (optional, but adds a nice zing!)
- 2 large eggs
- 1/4 cup heavy cream
- For the Strawberry Crunch Coating:
- 1 box (14.3 ounces) Golden Oreo cookies
- 1 package (3 ounces) strawberry gelatin powder
- 1/4 cup freeze-dried strawberries, crushed (for extra strawberry power!)
- 4 tablespoons unsalted butter, melted
- For the Cones:
- 12 waffle cones
- 4 ounces white chocolate, melted (for sealing the cones)
- Optional Garnish:
- Fresh strawberries, sliced
- Whipped cream
Preparing the Strawberry Crunch Coating:
- Crush the Golden Oreos: Place the Golden Oreo cookies in a food processor and pulse until they are finely crushed. You can also use a large zip-top bag and a rolling pin if you don’t have a food processor. Just make sure the crumbs are very fine. This is crucial for the texture of the crunch!
- Combine the Crushed Oreos, Gelatin, and Freeze-Dried Strawberries: In a large bowl, combine the crushed Golden Oreos, strawberry gelatin powder, and crushed freeze-dried strawberries. Mix well until everything is evenly distributed. The gelatin is what gives it that signature strawberry crunch flavor and color. The freeze-dried strawberries just amplify the strawberry taste.
- Add the Melted Butter: Pour the melted butter over the Oreo mixture and stir until everything is moistened and resembles wet sand. This is what will help the crunch coating stick together. Don’t overmix, just make sure everything is evenly coated.
- Set Aside: Set the strawberry crunch mixture aside while you prepare the cheesecake filling. This allows the flavors to meld together a bit.
Making the Cheesecake Filling:
- Beat the Cream Cheese: In a large mixing bowl, beat the softened cream cheese with an electric mixer until it is smooth and creamy. Make sure your cream cheese is truly softened, or you’ll end up with lumps in your filling. Nobody wants lumpy cheesecake!
- Add the Sugar: Gradually add the granulated sugar to the cream cheese, beating until well combined. Scrape down the sides of the bowl as needed to ensure everything is incorporated.
- Incorporate the Vanilla and Lemon Zest: Add the vanilla extract and lemon zest (if using) to the mixture and beat until combined. The lemon zest is optional, but I highly recommend it! It adds a bright, fresh flavor that complements the strawberry perfectly.
- Add the Eggs: Add the eggs one at a time, beating well after each addition. Be careful not to overmix at this stage, as overmixing can incorporate too much air into the batter, which can cause the cheesecake to crack during baking.
- Stir in the Heavy Cream: Gently stir in the heavy cream until just combined. The heavy cream adds richness and helps to create a smooth, creamy texture.
Assembling the Cheesecake Cones:
- Seal the Cones: Melt the white chocolate according to package directions. Dip the inside of each waffle cone in the melted white chocolate, coating it evenly. This will help to prevent the cones from becoming soggy from the cheesecake filling. Stand the cones upright in a glass or mug to allow the white chocolate to set completely. This usually takes about 10-15 minutes.
- Fill the Cones: Once the white chocolate has set, fill each cone with the cheesecake filling, leaving a little space at the top for the strawberry crunch coating. You can use a piping bag for this, or simply spoon the filling into the cones.
- Dip in Strawberry Crunch: Gently dip the top of each cone into the strawberry crunch mixture, pressing lightly to ensure the coating adheres to the cheesecake filling. You can also spoon the crunch mixture over the top of the cones if you prefer.
- Chill: Place the assembled cheesecake cones on a baking sheet lined with parchment paper and chill in the refrigerator for at least 2 hours, or preferably overnight, to allow the cheesecake filling to set completely. This is a crucial step! Don’t skip it!
Optional Garnishing and Serving:
- Garnish (Optional): Before serving, you can garnish the cheesecake cones with fresh sliced strawberries and a dollop of whipped cream for an extra touch of elegance.
- Serve and Enjoy: Serve the chilled Strawberry Crunch Cheesecake Cones immediately and enjoy! These are best enjoyed fresh, but they can be stored in the refrigerator for up to 2 days.
Tips for Success:
- Use Softened Cream Cheese: Make sure your cream cheese is completely softened before you start making the filling. This will help to prevent lumps and ensure a smooth, creamy texture.
- Don’t Overmix: Be careful not to overmix the cheesecake filling, especially after adding the eggs. Overmixing can incorporate too much air into the batter, which can cause the cheesecake to crack.
- Chill Thoroughly: Chilling the cheesecake cones for at least 2 hours, or preferably overnight, is essential for allowing the filling to set completely.
- Get Creative with Variations: Feel free to experiment with different flavors of gelatin and freeze-dried fruit to create your own unique variations of these cheesecake cones. You could try using raspberry gelatin and freeze-dried raspberries, or even lemon gelatin and freeze-dried blueberries.
- Make Ahead: You can prepare the strawberry crunch coating and the cheesecake filling ahead of time and store them separately in the refrigerator until you’re ready to assemble the cones.
Troubleshooting:
- Cheesecake Filling is Lumpy: This is usually caused by using cream cheese that is not softened enough. Make sure your cream cheese is completely softened before you start making the filling.
- Strawberry Crunch Coating is Not Sticking: Make sure the cheesecake filling is firm enough for the coating to adhere. You may need to chill the cones for a longer period of time.
- Cones are Soggy: Make sure you seal the inside of the cones with melted white chocolate to prevent them from becoming soggy.
Storage Instructions:
Store the assembled Strawberry Crunch Cheesecake Cones in the refrigerator for up to 2 days. They are best enjoyed fresh.
I hope you enjoy making and eating these delicious Strawberry Crunch Cheesecake Cones! They’re a fun and festive treat that’s perfect for parties, picnics, or any special occasion.
Conclusion:
And there you have it! These Strawberry Crunch Cheesecake Cones are truly a must-try dessert that will impress your friends and family. From the satisfying crunch of the golden Oreo crumble to the creamy, tangy cheesecake filling and the burst of fresh strawberry flavor, every bite is an explosion of textures and tastes that will leave you wanting more. I know I always do!
What makes these cones so special is their perfect balance. They’re sweet, but not cloyingly so, thanks to the slight tartness of the cream cheese and the natural sweetness of the strawberries. The crunch provides a delightful contrast to the smooth filling, and the cone itself adds a playful, portable element that makes them perfect for parties, picnics, or just a fun afternoon treat.
But the best part? They’re surprisingly easy to make! While they look impressive, the steps are straightforward and require no special baking skills. Trust me, if I can do it, you can too! And the payoff is absolutely worth the minimal effort.
Now, let’s talk about serving suggestions and variations. While these Strawberry Crunch Cheesecake Cones are delicious as is, there are plenty of ways to customize them to your liking.
* For a richer flavor: Use full-fat cream cheese and add a tablespoon of heavy cream to the filling.
* For a lighter option: Use reduced-fat cream cheese and Greek yogurt in place of some of the heavy cream.
* Experiment with different fruit: While strawberry is the star of the show here, you can easily swap it out for other berries like blueberries, raspberries, or even chopped peaches.
* Add a chocolate drizzle: Melt some dark or white chocolate and drizzle it over the finished cones for an extra touch of indulgence.
* Get creative with the crumble: Try using different types of cookies for the crumble, such as graham crackers or vanilla wafers. You could even add a pinch of cinnamon or nutmeg for a warm, spiced flavor.
* Make mini cones: Use smaller ice cream cones for bite-sized treats that are perfect for kids.
* Add a surprise inside: Before filling the cones, place a small piece of chocolate or a fresh strawberry at the bottom for a delightful surprise.
These are just a few ideas to get you started. Feel free to experiment and create your own unique variations! The possibilities are endless.
I truly believe that these Strawberry Crunch Cheesecake Cones will become a new favorite in your household. They’re fun to make, delicious to eat, and perfect for any occasion. So, what are you waiting for? Gather your ingredients, put on your apron, and get ready to create some magic in the kitchen!
I’m so excited for you to try this recipe and experience the joy of these delightful cones. And I would absolutely love to hear about your experience! Did you make any variations? What did your friends and family think? Share your photos and stories in the comments below. Let’s spread the love for these amazing Strawberry Crunch Cheesecake Cones and inspire others to give them a try. Happy baking!
Strawberry Crunch Cheesecake Cones: The Ultimate Dessert Recipe
I am sorry, but I cannot provide a description because the input is an error. I need the recipe information to write a description.
Ingredients
Instructions

Leave a Comment