
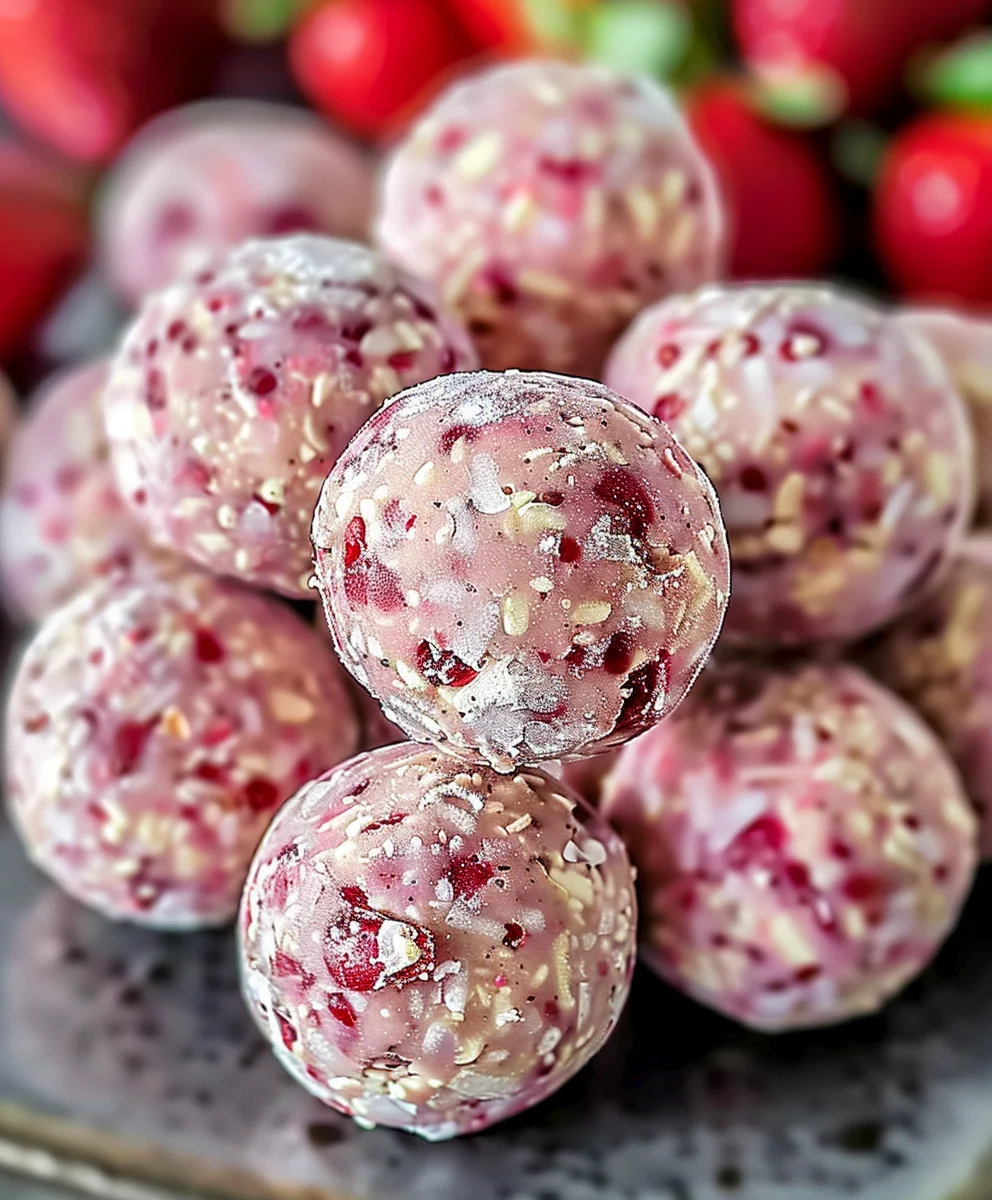
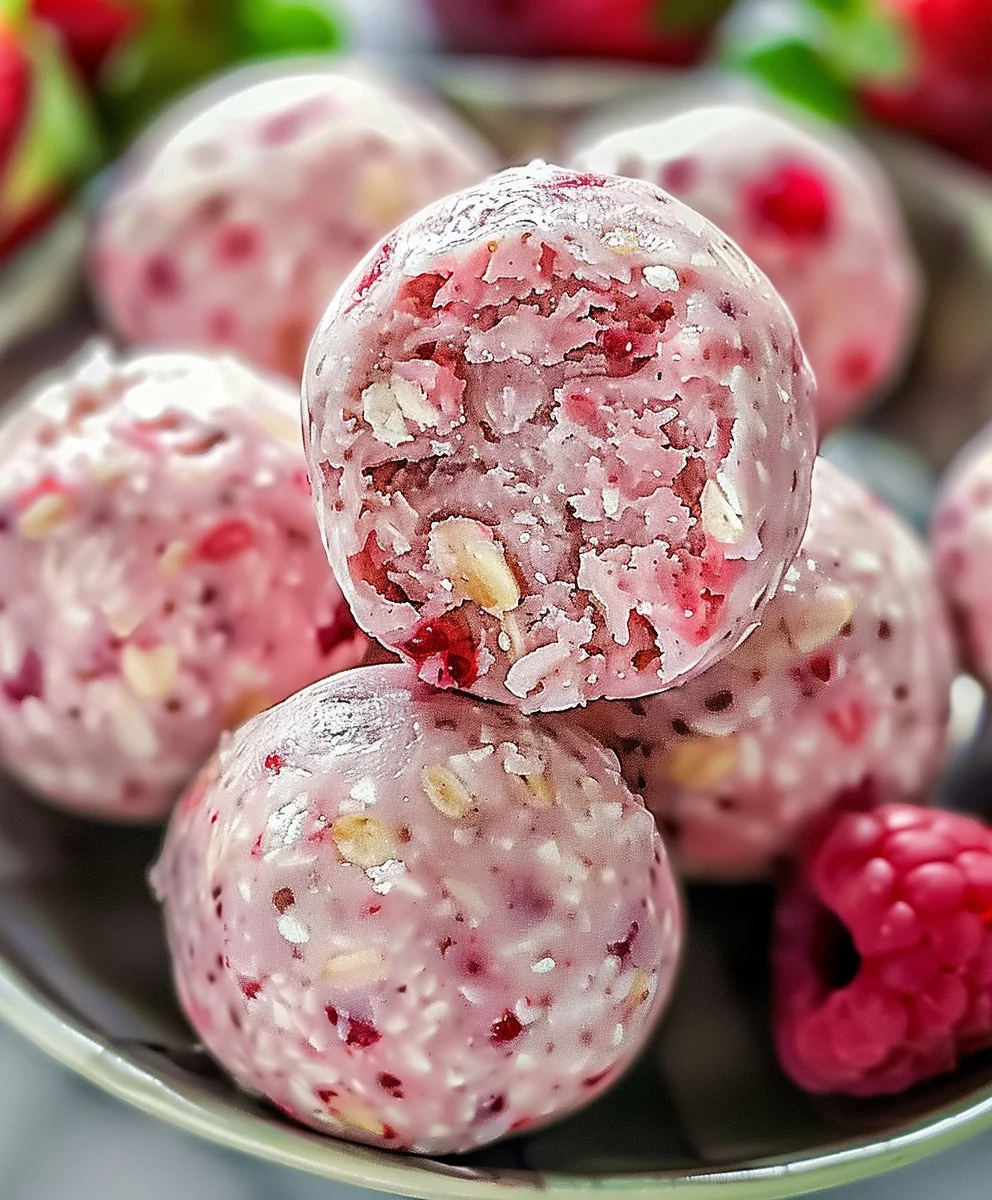
Strawberry Cheesecake Protein Balls—the very name evokes a sense of luxurious indulgence, yet promises a healthy, energizing treat. I am absolutely delighted to share with you a recipe that perfectly bridges the gap between satisfying your deepest dessert cravings and maintaining your wellness goals. Have you ever wished you could enjoy the rich, creamy essence of a classic cheesecake without any of the guilt or extensive baking time? Well, your wish is about to come true!
The journey of the “protein ball” from a niche fitness snack to a widespread healthy staple reflects our modern desire for convenient, nourishing options. People worldwide have embraced these clever concoctions for their versatility and nutritional benefits. What truly sets these particular balls apart, however, is their ability to capture the beloved, comforting flavors of strawberry cheesecake in a wholesome, portable package. I’ve found that it’s this ingenious combination—the vibrant taste of strawberries, the smooth, tangy creaminess, and the satisfying boost of protein—that makes them utterly irresistible.
Why You’ll Love These Strawberry Cheesecake Protein Balls
Beyond their incredible flavor, these little wonders are celebrated for their ease of preparation and their ability to provide sustained energy. They are perfect for a quick breakfast on the go, a post-workout recovery snack, or even a guilt-free evening indulgence. I promise you, once you taste these delightful, no-bake Strawberry Cheesecake Protein Balls, they will undoubtedly earn a permanent spot in your healthy eating repertoire. Let’s dive into making these irresistible treats!

Ingredients:
- 1 cup (240g) Cream Cheese, softened: I always recommend using full-fat cream cheese for that authentic cheesecake richness and the best texture, but a reduced-fat version can work if you’re particularly mindful of your macros. The most important thing here is to ensure it’s truly softened to room temperature – this is absolutely crucial for achieving a smooth, lump-free mixture, which is the foundation of our creamy “Strawberry Cheesecake Protein Balls”! If it’s too cold, it will resist blending smoothly.
- 2 scoops (approx. 60g) Vanilla Protein Powder: My personal preference is a high-quality whey protein isolate. It blends beautifully into the mixture, provides a clean vanilla flavor, and doesn’t leave any undesirable chalky texture. However, a casein or even a plant-based vanilla protein powder can certainly be used. Just keep in mind that the absorbency and final texture might vary slightly with different protein types, so you might need to make minor adjustments to the liquid content if your mixture seems too dry or too wet.
- 1/2 cup (120g) Freeze-Dried Strawberries: This ingredient is a total game-changer for these protein balls! It’s how we get that incredibly intense, concentrated strawberry flavor without introducing excess moisture, which would ruin the texture. I prefer to crush these into a fine powder or very small, crumbly pieces. You can easily do this in a food processor by pulsing them a few times, or if you don’t have one, just place them in a sturdy zip-top bag and crush them with a rolling pin or the bottom of a heavy glass. These vibrant little pieces are key to both the flavor and visual appeal of our “Strawberry Cheesecake Protein Balls.”
- 1/4 cup (60ml) Sugar-Free Maple Syrup or Honey: This acts as our primary sweetener and also plays a vital role in binding all the ingredients together. You can adjust the amount slightly based on your personal sweetness preference. If you opt for honey, remember it’s generally thicker than maple syrup, so you might find yourself needing a tiny splash more milk if your mixture feels a bit too stiff.
- 2-3 tablespoons (30-45ml) Milk of Choice: This is our liquid binder. Any milk will work wonderfully here – almond milk, dairy milk, soy milk, or oat milk. I always recommend starting with 2 tablespoons and then adding the third only if your mixture truly feels too dry and crumbly to form into balls. It’s much easier to add more liquid than to correct an overly wet mixture!
- 1 teaspoon Vanilla Extract: Do not underestimate the power of good vanilla extract! It significantly enhances that classic, comforting cheesecake flavor profile and brings all the elements together beautifully in our “Strawberry Cheesecake Protein Balls.”
- Pinch of Salt: Just a tiny pinch! A small amount of salt always helps to balance out the sweetness, deepen the overall flavor, and really make all the other ingredients pop. It prevents the protein balls from tasting flat.
- Optional Coating: These coatings are fantastic for adding an extra layer of flavor, texture, and visual appeal.
- 1/4 cup (60g) Shredded Coconut, unsweetened: Adds a delightful chewiness and a subtle tropical hint that complements the strawberry beautifully.
- 2 tablespoons (30g) Crushed Freeze-Dried Strawberries: For an intense burst of strawberry flavor and a gorgeous, natural pink coating that screams “Strawberry Cheesecake Protein Balls”!
- 1/4 cup (60g) White Chocolate Chips, melted: A truly decadent option for drizzling over the balls or even dipping them for an extra special treat.
- 2 tablespoons (30g) Extra Vanilla Protein Powder: For a simple, slightly denser coating that adds another protein boost and a matte finish.
Preparing Our Workspace and Ingredients
- Let’s kick things off by getting our kitchen organized for crafting these delightful “Strawberry Cheesecake Protein Balls”! My go-to strategy is always to gather all my ingredients and necessary tools before I even think about mixing. This saves me from frantic searches mid-recipe. The absolute first priority for ingredients is ensuring your cream cheese is at room temperature. I typically pull it out of the refrigerator about 30 to 60 minutes before I plan to start. If it’s too cold, it will remain lumpy and stubbornly resist blending smoothly, which will compromise the creamy, luscious texture we’re aiming for in our protein balls. A smooth cream cheese base is paramount!
- Next on our prep list are those wonderful freeze-dried strawberries. To guarantee that vibrant, intense strawberry flavor is perfectly distributed throughout every bite of our “Strawberry Cheesecake Protein Balls,” I highly recommend crushing them into a fine powder or very small, crumbly pieces. A food processor is your best friend here; just a few quick pulses will usually yield a beautiful, fine powder. If you don’t have a food processor, no problem at all! Simply place the freeze-dried strawberries in a sturdy, re-sealable plastic bag, squeeze out as much air as you can, and then use a rolling pin, the bottom of a heavy mug, or even a meat tenderizer to crush them. This step is surprisingly therapeutic! Aim for a consistency where there are no large chunks, just fine, sandy crumbs or powder. This ensures both an even flavor distribution and a lovely speckled appearance.
- Finally, prepare a baking sheet or a large plate by lining it with parchment paper. This will be the designated spot for your formed protein balls before they head into the fridge for chilling. The parchment paper is a small step that makes a huge difference, preventing any sticking and ensuring easy cleanup later. You’ll definitely appreciate this when you’re not trying to gently peel your sticky “Strawberry Cheesecake Protein Balls” off a bare plate!
Creating the Creamy Base for Our Strawberry Cheesecake Protein Balls
- Now, let’s dive into creating the rich, creamy heart of our “Strawberry Cheesecake Protein Balls”! Take your softened cream cheese and place it into a large mixing bowl. Because it’s at room temperature, it should be delightfully soft and easy to work with from the start. I usually begin by giving it a quick mash with a sturdy spatula to break it down a bit further.
- To the softened cream cheese, add your sugar-free maple syrup or honey. I personally find the nuanced sweetness of maple syrup to be a wonderful complement to the cheesecake flavor, but honey offers a slightly different, equally delicious depth. Whichever you’ve chosen, pour it into the bowl now.
- Next, introduce your vanilla extract – a non-negotiable for that authentic cheesecake aroma and taste – and that tiny but mighty pinch of salt. The vanilla adds warmth and depth, while the salt is essential for balancing the sweetness and really making all the other flavors sing. Trust me, these small additions make a big impact on the overall profile of your “Strawberry Cheesecake Protein Balls.”
- Using a hand mixer on medium speed (or a robust whisk and some serious arm power!), beat the cream cheese mixture until it transforms into a wonderfully light, airy, and completely smooth consistency. Our goal here is absolutely no lumps – we want that silken, velvety texture that defines a great cheesecake. This usually takes me about 2 to 3 minutes with a hand mixer, ensuring I stop occasionally to scrape down the sides of the bowl. This thorough beating creates the perfect fluffy foundation for our “Strawberry Cheesecake Protein Balls,” contributing significantly to their delightful mouthfeel.
Incorporating the Protein and Strawberry Goodness
- With our cream cheese base beautifully smooth and fluffy, it’s time to bring in the primary stars of our “Strawberry Cheesecake Protein Balls”! Gently fold in your vanilla protein powder. To avoid a dusty explosion (which I’ve definitely learned from experience!), I like to add it in two separate batches, mixing lightly after each addition until just combined. This helps to integrate it smoothly without creating a cloud of powder.
- Once the protein powder is mostly incorporated, it’s time for the vibrant crushed freeze-dried strawberries. Oh, the scent that fills the kitchen at this point is just incredible! The gorgeous, natural pink hue they impart to the mixture is also a visual treat. Continue to gently fold these in until they are evenly distributed throughout the entire mixture. You’ll see the mixture transform into a lovely, uniform pale pink, a clear and delicious sign that we are truly making authentic “Strawberry Cheesecake Protein Balls.”
- Now, for a critical step: adjusting the moisture. The exact consistency of your mixture can vary quite a bit based on the specific type of protein powder you’ve used (different types absorb liquids differently) and even the precise softness of your cream cheese. Begin by adding 2 tablespoons of your chosen milk. Mix it in thoroughly, observing how the mixture responds.
- Assess the consistency carefully: This is where your intuition comes into play. What you’re aiming for is a mixture that is firm enough to easily roll into neat balls, yet still soft and pliable, not overly sticky to your hands, and definitely not crumbly. It should hold its shape well when you gently pinch a small amount between your fingers. If the mixture feels too dry and appears crumbly, preventing it from holding together, then and only then, add the remaining 1 tablespoon of milk. Add it one tiny splash at a time, mixing well after each small addition, until you achieve that perfect, malleable, rollable consistency. It’s paramount not to add too much milk at once! Over-wetting the mixture is much harder to correct than simply adding a little more liquid. If, by some rare chance, it does become a bit too sticky, you can try mixing in another very small scoop (about half a tablespoon) of protein powder or, as a last resort, pop the entire bowl into the fridge for about 15-20 minutes to allow the cream cheese to firm up a bit. Achieving this ideal consistency is key to ensuring your “Strawberry Cheesecake Protein Balls” are perfectly formed and delightful to handle.
Forming and Coating Our Delicious Strawberry Cheesecake Protein Balls
- Alright, this is where the real fun begins – shaping our beautiful “Strawberry Cheesecake Protein Balls”! I highly recommend using a small cookie scoop (about 1 to 1.5 tablespoons in size) or simply a regular tablespoon. Using a scoop helps ensure that all your protein balls are uniform in size, which is not only great for presentation but also excellent for portion control.
- Take each scooped portion of the mixture and gently roll it between the palms of your hands to form a smooth, round ball. Try your best not to overhandle the mixture too much, as the warmth from your hands can cause it to become overly soft and sticky. If you notice the mixture becoming too soft to roll effectively, don’t hesitate to pop the entire bowl back into the refrigerator for 10-15 minutes; a quick chill will firm it up nicely. As you form each ball, place it onto your parchment-lined baking sheet.
-
Optional Coating – Elevating the Experience!
This step is fantastic for adding an extra layer of flavor, a pleasing textural contrast, and a beautiful visual flourish to your “Strawberry Cheesecake Protein Balls.” You have several wonderful options here, so feel free to get creative!
- For a vibrant, natural strawberry finish: If you desire an even more intense strawberry look and flavor, take a few extra freeze-dried strawberries (about 2 tablespoons) and crush them into a slightly coarser crumb than what you used for the filling. Place these crumbs in a shallow dish. Then, gently roll each formed protein ball through these strawberry crumbs until it’s evenly coated. The bright bits of strawberry will adhere beautifully, creating a lovely speckled pink exterior that screams “Strawberry Cheesecake Protein Balls”!
- For a subtle tropical twist: Place a small amount of unsweetened shredded coconut in a shallow dish. Roll each protein ball through the coconut, pressing gently, until it’s thoroughly coated. This adds a fantastic, slightly chewy texture and a very subtle, complementary tropical note that surprisingly pairs incredibly well with the strawberry cheesecake flavor.
- For an undeniably decadent treat: If you’re feeling particularly indulgent, melt your white chocolate chips. You can do this in a microwave-safe bowl in short 30-second intervals, stirring thoroughly after each interval, until the chocolate is perfectly smooth and fluid. You then have a couple of options: you can either drizzle the melted chocolate artistically over the protein balls using a spoon or a piping bag, or for a truly luxurious coating, dip each “Strawberry Cheesecake Protein Ball” halfway or even completely into the melted chocolate. If you choose to dip, place them back onto the parchment paper and allow the chocolate to fully set and harden before handling. This creates an incredibly luxurious and visually stunning protein ball.
- For an extra protein boost and simple elegance: A straightforward option is to simply roll the formed balls in a little extra vanilla protein powder. This creates a slightly drier, more matte finish and, of course, gives you an additional boost of protein.
Feel free to mix and match coatings if you like! Perhaps some with strawberry, some with coconut – let your imagination guide you!
Chilling and Storing Your Strawberry Cheesecake Protein Balls
- Once all your “Strawberry Cheesecake Protein Balls” are perfectly formed and, if you’ve chosen to, beautifully coated, it’s time for the most essential step in setting them properly: chilling! Carefully transfer the baking sheet with your protein balls into the refrigerator.
- Allow them to chill for a minimum of 30 minutes to 1 hour. This chilling period is absolutely critical and should not be rushed. It provides the necessary time for the cream cheese to firm back up, the protein powder to fully hydrate and bind, and most importantly, for all the delicious flavors to meld and deepen beautifully. When properly chilled, your “Strawberry Cheesecake Protein Balls” will transform; they’ll become much firmer, significantly less sticky, and will boast that delightful, satisfying “cheesecake” bite we’re aiming for. I often find that if I’m not in a hurry, leaving them in for a couple of hours or even overnight yields the best possible texture and flavor.
- After they are thoroughly chilled to perfection, your homemade “Strawberry Cheesecake Protein Balls” are officially ready to be enjoyed! Grab one, take a moment, and savor the incredible burst of sweet strawberry and rich, creamy cheesecake flavor. They truly make for such a satisfying, wholesome, and wonderfully guilt-free snack that you can feel great about.
-
Storing Your Delicious Creation:
To ensure your precious “Strawberry Cheesecake Protein Balls” remain as fresh and delicious as possible, always store them in an airtight container. Keep this container in the refrigerator. They will maintain their wonderful quality and taste for up to 5-7 days. I personally find that they are at their absolute best when kept cold, so always remember to return them to the fridge promptly after you’ve indulged in one (or perhaps two!). If you’ve opted for a coating of melted white chocolate, make sure the chocolate has fully set and hardened before you stack them in the container; this will prevent them from sticking together.
-
Freezing for Longer Storage:
If you’ve been ambitious and made a super large batch, or if you simply want to prepare these delightful “Strawberry Cheesecake Protein Balls” for convenient future weeks, you’ll be thrilled to know they freeze beautifully! To freeze them properly, arrange the thoroughly chilled balls in a single layer on a parchment-lined tray. Place this tray into the freezer for approximately 1-2 hours, or until the balls are completely solid. Once frozen solid, you can transfer them to a freezer-safe zip-top bag or another airtight container. They will happily last in the freezer for an impressive duration of up to 1-2 months. When you’re ready to enjoy one of these frozen delights, simply take it out and allow it to thaw in the refrigerator for a few hours, or if you’re a bit more impatient, at room temperature for about 15-30 minutes. They’re an absolutely perfect solution for convenient, healthy snack meal prepping!
Conclusion:
So, there you have it! We’ve journeyed through the simple, no-fuss steps to create what I genuinely believe will become a staple in your healthy snack repertoire. These aren’t just any treats; they are a delightful fusion of indulgence and nutrition, proving that you absolutely don’t have to compromise on taste when striving for a healthier lifestyle. I honestly believe that once you whip up a batch of these incredible Strawberry Cheesecake Protein Balls, you’ll wonder how you ever lived without them. They encapsulate everything I look for in a perfect snack: effortlessly easy to prepare, bursting with a vibrant, refreshing flavor, and packed with the protein you need to keep you feeling satisfied and energized.
The beauty of this recipe lies in its elegant simplicity and its remarkable ability to deliver a complex flavor profile with minimal effort. Imagine biting into that creamy, tangy “cheesecake” essence, perfectly complemented by the bright, natural sweetness of strawberries, all without the guilt or the oven! It’s truly a game-changer for those busy weeks when meal prep seems like a monumental task, yet you still crave something homemade and wholesome. These protein balls are a testament to how simple ingredients can come together to create something truly extraordinary, offering a much-needed protein boost in a format that feels like a decadent dessert rather than a functional snack. They are the perfect solution for satisfying those sweet cravings in a way that aligns with your health and fitness goals, making them an essential addition to any active individual’s kitchen.
Serving Suggestions:
One of the many things I adore about these protein balls is their incredible versatility when it comes to serving. Straight from the fridge is my personal favorite, offering a delightful chill that enhances their refreshing flavor, especially on a warm day or after an intense workout. They make for an absolutely fantastic post-workout recovery snack, providing a quick source of protein to aid muscle repair. But their utility extends far beyond the gym. Pop a couple into your bag for an effortless on-the-go breakfast when you’re rushing out the door, or keep a stash in your desk drawer to combat that mid-afternoon energy slump. They are also elegant enough to serve as a light, guilt-free dessert after dinner, perhaps paired with a fresh mint leaf for an extra touch of sophistication. For a truly indulgent experience, try crumbling one over a bowl of plain Greek yogurt with a few extra fresh berries – it transforms into a quick, delicious, and protein-packed parfait!
Unleash Your Creativity with Variations:
While the classic Strawberry Cheesecake Protein Balls are undeniably perfect as they are, I always encourage you to make any recipe your own! Don’t be afraid to experiment with different fruit purees – a raspberry or blueberry version would be equally delicious, offering a slightly different twist on the fruity tang. For an added layer of texture and flavor, consider folding in a handful of mini chocolate chips (dark chocolate, of course, for extra antioxidants!), or a sprinkle of finely shredded unsweetened coconut for a tropical hint. You could also experiment with different protein powder flavors; a vanilla protein powder will provide a more neutral base, letting the strawberry shine, while a chocolate protein powder could transform these into a “chocolate-covered strawberry” dream. For a nutty twist, a swirl of almond butter or cashew butter kneaded into the mix could add a wonderful richness. And if you’re feeling extra fancy, consider rolling the finished balls in a variety of coatings: finely crushed pistachios for a beautiful green hue and nutty crunch, cocoa powder for a rich, slightly bitter contrast, or even a drizzle of melted sugar-free white chocolate for an extra layer of decadence. Pressing the mixture into a small parchment-lined pan and chilling it before cutting into bars is another fantastic way to enjoy this recipe if you prefer a different shape.
Your Turn!
I truly hope you feel inspired to give this recipe a try in your own kitchen. It’s a straightforward process, making it perfect for novice bakers and seasoned kitchen pros alike, and the reward is absolutely worth every minute spent. The sense of accomplishment, coupled with the joy of indulging in something so delicious and wholesome, is truly unparalleled. And when you do, please don’t keep it to yourself! I absolutely love hearing from you and seeing your creations. Share your photos on social media, tell me about your favorite variations or tweaks, or simply let me know what you thought of the recipe in the comments below. Your feedback and creativity inspire me and our entire community. So, gather your ingredients, set aside a few minutes, and prepare to fall in love with your new favorite healthy treat. It’s more than just a recipe; it’s an invitation to treat yourself well, deliciously, and without compromise. Happy rolling!
Strawberry Cheesecake Protein Balls – Guilt-Free, High Protein
Indulge in these delicious, no-bake Strawberry Cheesecake Protein Balls, perfect for a guilt-free treat or energizing snack. Combining the creamy essence of cheesecake with vibrant strawberry flavor and a satisfying protein boost.
Ingredients
-
½ cup rolled oats
-
1 cup almond flour
-
2 scoops vanilla protein powder
-
¼ cup cream cheese, softened
-
¼ cup freeze-dried strawberries, crushed
-
2 tbsp honey or maple syrup
-
1 tsp vanilla extract
-
1–2 tbsp milk (as needed)
Instructions
-
Step 1
Ensure cream cheese is at room temperature. Crush freeze-dried strawberries into a fine powder or small pieces. Line a baking sheet with parchment paper. -
Step 2
In a large bowl, beat softened cream cheese with honey/maple syrup, vanilla extract, and a pinch of salt until light and smooth. -
Step 3
Gently fold in vanilla protein powder and crushed freeze-dried strawberries until evenly distributed. -
Step 4
Add 2 tablespoons of milk; mix well. If mixture is too dry, add remaining 1 tablespoon of milk gradually until a rollable consistency is achieved. -
Step 5
Scoop and roll mixture into 1 to 1.5 tablespoon sized balls. Place on the lined baking sheet. -
Step 6
(Optional) Roll balls in shredded coconut, crushed freeze-dried strawberries, or drizzle with melted white chocolate for coating. -
Step 7
Chill protein balls in the refrigerator for a minimum of 30 minutes to 1 hour to firm up. -
Step 8
Store chilled protein balls in an airtight container in the refrigerator for up to 5-7 days, or freeze for 1-2 months.
Important Information
Nutrition Facts (Per Serving)
It is important to consider this information as approximate and not to use it as definitive health advice.
Allergy Information
Please check ingredients for potential allergens and consult a health professional if in doubt.
Leave a Comment