
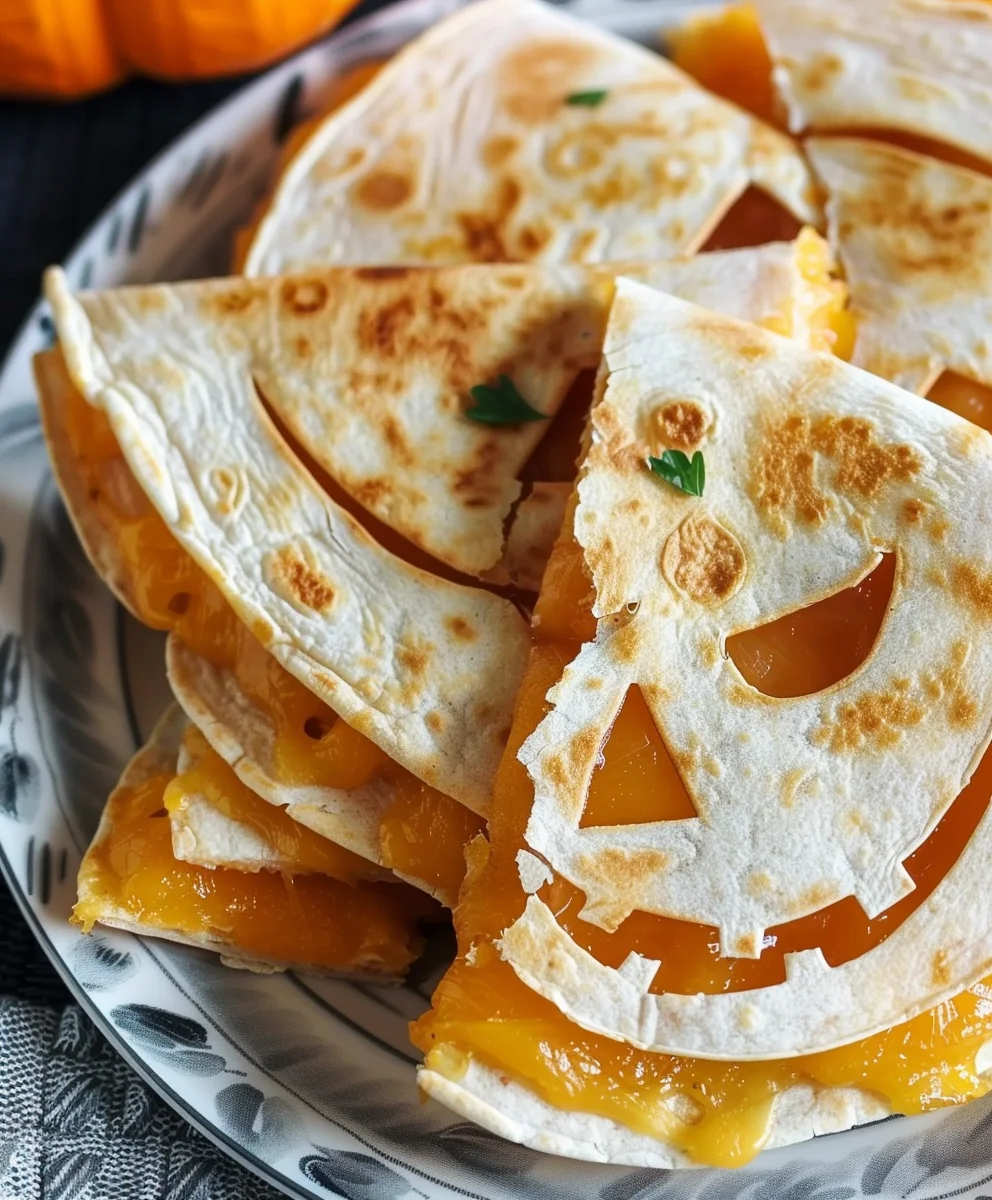
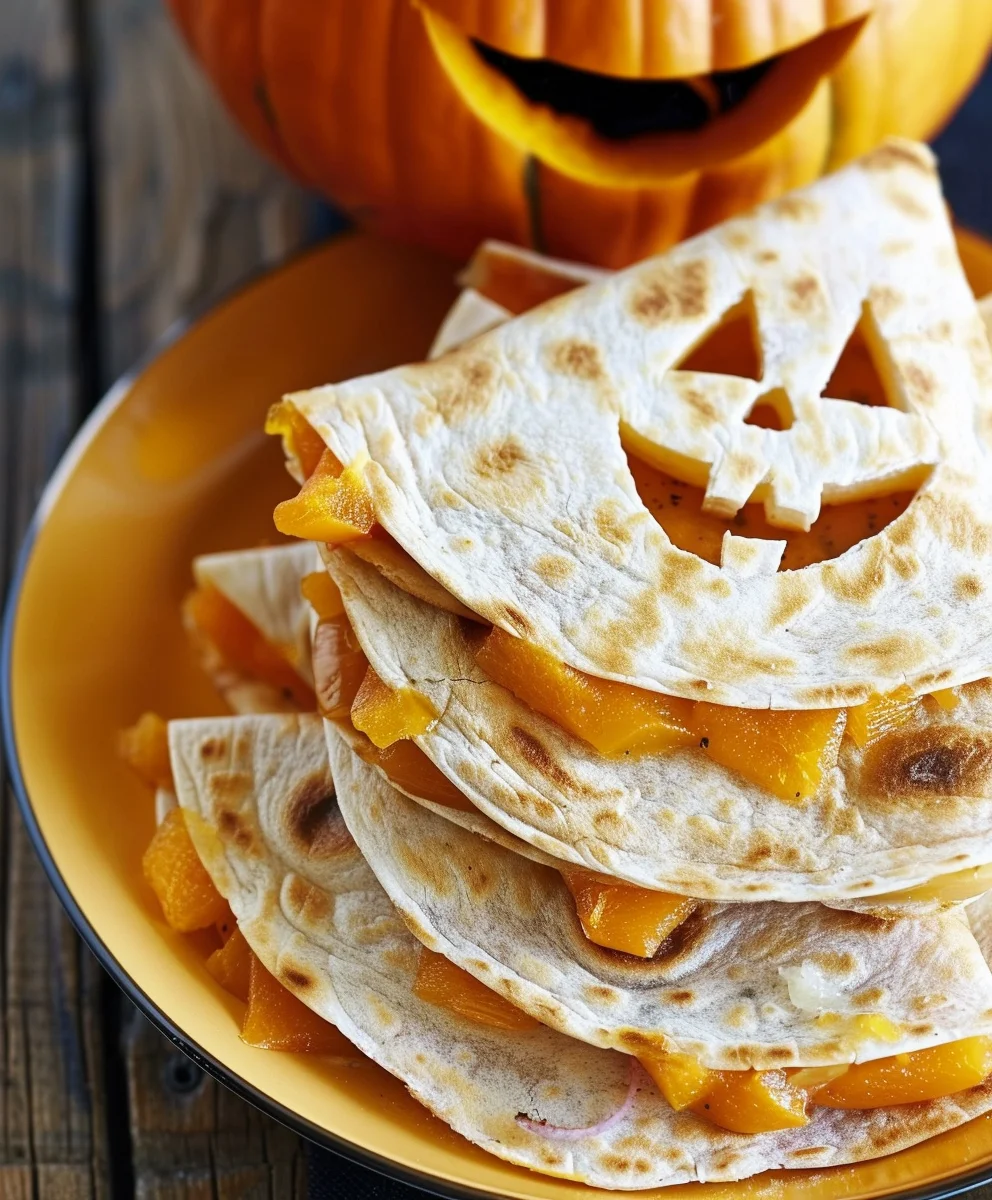
Jack O Lantern Quesadillas are the perfect way to bring festive fun into your kitchen this autumn. As the leaves change color and a crisp, cool breeze ushers in the spirit of Halloween, few traditions capture the season’s joy quite like carving a glowing Jack O’Lantern. This year, I invite you to transform that beloved, playful spirit into a delicious culinary creation that’s guaranteed to delight. Imagine golden-brown tortillas, expertly cut into charmingly spooky faces, filled with a warm, gooey blend of melted cheese and your favorite savory additions. These aren’t just any quesadillas; they are a canvas for creativity and a celebration of seasonal delight.
Whether you’re looking for a quick, wholesome lunch, a fun after-school snack, or a vibrant appetizer for your Halloween party, these festive treats deliver on all fronts. Their irresistible combination of crispy texture, savory cheese, and customizable ingredients makes them an instant hit with both children and adults alike. The sheer joy of seeing these delightful Jack O Lantern Quesadillas come to life on the plate is truly magical, making mealtime an unforgettable experience. They’re incredibly simple to prepare, yet yield impressive, Instagram-worthy results, proving that seasonal cooking can be both effortless and extraordinarily charming. Get ready to embark on a culinary adventure that tastes as good as it looks!

Ingredients:
- Large Flour Tortillas: You’ll need about 8-10 tortillas, approximately 10-12 inches in diameter. These serve as the foundation of our delightful quesadillas, providing a sturdy yet pliable canvas for our festive creation. I find that the larger size allows for a more generous filling and a clearer Jack O’Lantern design.
- Cooked Chicken Breast: About 2 cups, shredded or finely diced. This is roughly equivalent to 2 medium chicken breasts. I often prepare this by boiling or baking the chicken ahead of time, then shredding it with two forks or my stand mixer for ease.
- Shredded Cheese Blend: 2 cups, a mix of Monterey Jack and sharp cheddar works wonderfully for both flavor and meltability. Colby Jack is another excellent choice. The blend ensures a perfect gooey texture and a rich, cheesy taste that really brings everything together.
- Bell Peppers: 1 large orange bell pepper and 1 green bell pepper. The orange one is crucial for our Jack O’Lantern aesthetic, providing that vibrant Halloween hue, while the green one adds a lovely contrasting color and fresh crunch to our filling. We’ll be dicing these.
- Yellow Onion: 1 medium, finely diced. Onions lay a fantastic aromatic base for our filling, slowly caramelizing to add a subtle sweetness and depth.
- Garlic: 3-4 cloves, minced. Fresh garlic is non-negotiable for me in almost any savory dish; it provides a pungent, fragrant kick that elevates the entire flavor profile.
- Olive Oil: 2 tablespoons, for sautéing our vegetables and cooking our quesadillas. A good quality olive oil can really make a difference.
- Chili Powder: 1 teaspoon. This spice introduces a mild, earthy warmth that’s quintessential for quesadilla fillings.
- Ground Cumin: 1 teaspoon. Cumin adds a distinctive, smoky aroma and flavor that pairs beautifully with chicken and cheese.
- Smoked Paprika: ½ teaspoon. I absolutely adore smoked paprika for its deep, rich, and slightly smoky notes that add another layer of complexity.
- Salt: ½ teaspoon, or to taste. Essential for enhancing all the other flavors.
- Black Pepper: ¼ teaspoon, freshly ground is always my preference for a more robust flavor.
- Optional Garnishes and Dipping Sauces: Fresh cilantro (chopped), sour cream, salsa, guacamole, or your favorite hot sauce. These aren’t just for show; they add freshness, creaminess, and extra zest that complement the rich quesadillas perfectly.
Preparing Your Ingredients: The Foundation of Flavor
- Prepare the Chicken: If you haven’t already, take your cooked chicken breasts and shred them into small, manageable pieces. Alternatively, if you’re starting with raw chicken, you can dice it into half-inch cubes and sauté it in a separate pan with a touch of olive oil, salt, and pepper until fully cooked. Once cooked, set it aside. For shredded chicken, I often boil chicken breasts until they’re easily pulled apart, then use two forks to shred them. This method ensures the chicken is tender and ready to absorb all the wonderful flavors we’re about to add. Aim for about two cups of shredded or finely diced chicken, making sure no pieces are too large, as this ensures an even distribution within our quesadillas.
- Dice the Vegetables: Begin by finely dicing your yellow onion. The goal here is small, uniform pieces so they cook evenly and integrate seamlessly into our filling without being overly chunky. Next, take your green bell pepper and dice it into similar small pieces. For the orange bell pepper, which will serve a dual purpose, first dice about half of it for the filling, again ensuring small, even cuts. The remaining half of the orange bell pepper will be set aside for cutting into decorative Jack O’Lantern faces later. Finally, mince your garlic cloves. Freshly minced garlic releases the most potent aroma and flavor, so avoid pre-minced if you can. Having all your vegetables prepped and ready (a technique known as “mise en place”) makes the cooking process so much smoother and more enjoyable.
- Grate the Cheese: If you’re using block cheese, now is the time to shred it. While pre-shredded cheese is convenient, I often find that freshly grated cheese melts more smoothly and has a creamier texture. Aim for about two cups of your chosen blend – Monterey Jack, cheddar, or Colby Jack work beautifully. Set the cheese aside in a bowl, keeping it cool until assembly.
- Prepare the Tortillas for Cutting: This is where the magic of our Jack O’Lantern design begins! Lay out about four or five of your large flour tortillas on a clean, dry surface. These will be our “top” tortillas, which will feature the carved faces. Using a small, sharp knife (a paring knife works perfectly here), carefully cut out simple Jack O’Lantern faces into the center of each tortilla. Think triangular eyes, a small triangular nose, and a jagged, smiling, or even spooky mouth. Don’t press too hard – you just want to cut through the tortilla, not into your countertop! You can get creative with different expressions for each quesadilla. Set these “face” tortillas aside. The other four or five tortillas will serve as the plain bases for our quesadillas. This preparation step is crucial for the festive appearance of our finished dish, so take your time and have fun with it!
Crafting the Savory Filling: A Symphony of Spices
- Sauté the Aromatics: Heat 1 tablespoon of olive oil in a large skillet or frying pan over medium heat. Once the oil shimmers, add your finely diced yellow onion. Sauté the onion for about 5-7 minutes, stirring occasionally, until it becomes translucent and soft. You’ll notice a lovely sweet aroma starting to fill your kitchen. This is the first layer of flavor building for our delicious filling.
- Add the Bell Peppers: Now, add the diced green bell pepper and the diced portion of the orange bell pepper to the pan with the onions. Continue to cook for another 5-7 minutes, stirring frequently, until the peppers are tender-crisp. We want them softened but still with a slight bite, adding texture to our filling. The vibrant colors of the peppers will really start to pop at this stage.
- Introduce the Garlic: Stir in your minced garlic and cook for just 1 minute more. It’s important not to let the garlic brown or burn, as it can turn bitter very quickly. You’ll know it’s ready when you can smell its wonderfully pungent and fragrant aroma. Keep a close eye on it during this brief step.
- Combine with Chicken: Add your shredded or diced cooked chicken to the skillet with the sautéed vegetables. Stir everything together well, ensuring the chicken is evenly distributed and starts to warm through, absorbing the flavors from the onion, peppers, and garlic.
- Season Generously: This is where we truly bring our filling to life! Sprinkle in the chili powder, ground cumin, smoked paprika, salt, and black pepper. Stir thoroughly, making sure all the chicken and vegetables are coated evenly with the spices. Continue to cook for another 2-3 minutes, allowing the spices to toast slightly and release their full aromatic potential. You should notice a rich, inviting scent permeating your kitchen. Taste a small bit of the filling and adjust seasonings if necessary. Perhaps a little more salt, or a pinch of cayenne pepper if you like a bit of heat!
- Cool Slightly: Remove the skillet from the heat and allow the filling to cool for about 5-10 minutes. This step is important because it prevents the cheese from melting too prematurely when we assemble the quesadillas, helping us achieve that perfect, gooey, evenly melted cheese layer later on. Transferring it to a separate bowl can speed up the cooling process if you’re in a hurry.
The Artistic Touch: Assembling Your Jack O’Lantern Quesadillas
- Set Up Your Workstation: Gather your plain tortillas, your “face” tortillas, your cooled chicken and vegetable filling, and your shredded cheese. Having everything within easy reach makes the assembly process smooth and enjoyable.
- Layer the First Tortilla: Lay one plain flour tortilla flat on your clean countertop or a large cutting board. This will be the bottom layer of our quesadilla.
- Add the First Layer of Cheese: Sprinkle about ¼ cup of shredded cheese evenly over one half of the plain tortilla. Don’t go all the way to the edge; leave about a half-inch border. This cheese acts as a delicious glue to hold our filling in place and ensures a beautifully melted interior.
- Spoon on the Filling: Take a generous spoonful (about ½ cup) of your savory chicken and vegetable filling and spread it evenly over the cheese, again keeping it on one half of the tortilla and away from the very edge. You want a good, hearty amount of filling in each quesadilla without overstuffing it to the point where it’s hard to fold or cook.
- Top with More Cheese: Sprinkle another ¼ cup of shredded cheese over the filling. This second layer of cheese is key! It creates a double layer of gooey deliciousness and helps seal the top tortilla securely to the bottom, ensuring our filling stays perfectly contained during cooking.
- Place the Jack O’Lantern Top: Carefully take one of your “face” tortillas (the one with the Jack O’Lantern cut-out) and place it directly over the filling and cheese, aligning it perfectly with the bottom plain tortilla. Ensure the edges meet up nicely. Gently press down on the top tortilla to help it adhere to the cheese and filling. This step is where our quesadilla truly transforms into its festive, spooky-fun form!
Cooking to Golden Perfection: The Grand Finale
- Heat the Pan: Place a large non-stick skillet or a flat griddle over medium heat. You want it hot enough to get a good crisp, but not so hot that it burns the tortilla before the cheese has a chance to melt. A good test is to flick a drop of water onto the pan – if it sizzles and evaporates quickly, it’s ready. Add about ½ tablespoon of olive oil to the pan, swirling to coat the bottom evenly.
- Cook the Quesadilla: Carefully transfer one assembled Jack O’Lantern quesadilla to the hot pan. You can use a large spatula or gently slide it from your cutting board. Cook for about 3-5 minutes on the first side. You’re looking for a beautiful golden-brown color on the bottom tortilla, and you should start to see the cheese melting around the edges and through the cut-out face. The delicious aroma of toasted tortilla and melting cheese will fill your kitchen – a sure sign of success!
- Flip and Finish: Using a large, sturdy spatula, carefully flip the quesadilla over to the other side. Cook for another 3-5 minutes, or until that side is also golden brown and crispy, and all the cheese inside is completely melted and wonderfully gooey. Sometimes, if my pan isn’t perfectly flat or if I want to speed up the melting process, I’ll place a lid over the pan for the last minute or two of cooking on each side. This creates a steamy environment that helps the cheese melt beautifully without over-browning the tortilla. You’ll see the cheese oozing through the “face” cut-outs, creating a truly irresistible sight.
- Repeat the Process: Remove the cooked quesadilla from the pan and place it on a clean cutting board. If necessary, add another drizzle of olive oil to the pan before cooking the next quesadilla. Continue this process until all your Jack O’Lantern Quesadillas are cooked to golden, cheesy perfection. Remember to adjust the heat as needed; sometimes the pan gets hotter with successive quesadillas.
- Rest Before Cutting: Allow each quesadilla to rest on the cutting board for a minute or two before slicing. This brief resting period allows the cheese to set slightly, making it easier to cut without the filling spilling out. It also helps the tortilla maintain its crispness.
Serving Your Spooky-Good Jack O’Lantern Quesadillas
- Slice and Serve: Using a sharp knife or a pizza cutter, carefully slice each quesadilla into wedges or quarters. I find cutting them into triangles makes them perfect for dipping and easy for little (and big!) hands to manage. Arrange them artfully on a serving platter, making sure the festive Jack O’Lantern faces are proudly displayed.
- Garnish and Enjoy: Now for the final flourish! Sprinkle fresh, chopped cilantro over the quesadillas for a burst of color and herbaceous freshness. Serve immediately while they are warm and the cheese is still wonderfully gooey. These Jack O’Lantern Quesadillas are absolutely fantastic on their own, but they truly shine when paired with an array of dipping sauces. My personal favorites include a dollop of cool sour cream to balance the savory flavors, a vibrant salsa for a tangy kick, and a creamy, homemade guacamole for extra richness. For those who like a bit of heat, a dash of your favorite hot sauce is always a welcome addition.
- Storage and Reheating: If by some miracle you happen to have any leftovers, they can be stored in an airtight container in the refrigerator for up to 2-3 days. To reheat, I recommend using a dry skillet over medium-low heat for a few minutes per side, or even a toaster oven, to help crisp up the tortillas again. Microwaving is an option, but it often results in a softer, less crispy texture, which just isn’t the same as that freshly cooked crunch. These quesadillas are so much fun to make and eat, especially around Halloween, but they’re delicious enough to enjoy any time you’re craving a festive and flavorful meal!
Conclusion:
So, we’ve journeyed through the simple steps to create a truly special treat, and now it’s time to reflect on why this recipe is more than just another meal idea. I genuinely believe that these aren’t just any quesadillas; they’re an experience waiting to happen in your kitchen. Imagine the smiles when you present a plate full of these vibrant, cheesy delights. They are the epitome of fun food, combining the universally loved comfort of a warm, gooey quesadilla with an undeniable festive charm. This recipe shines because it’s incredibly adaptable, surprisingly quick to assemble, and utterly delicious. It transforms simple ingredients into something memorable, making it a stellar choice for busy weeknights, last-minute gatherings, or as a delightful activity to share with family. You’re not just making food; you’re crafting edible art that’s both satisfying and visually appealing. The simplicity means even novice cooks can achieve fantastic results, feeling a sense of accomplishment without hours of effort. And for parents, it’s a fantastic way to encourage little ones to get involved in the kitchen, turning meal prep into playtime. This isn’t just a recipe; it’s a blueprint for joy. It’s the perfect blend of ease, taste, and visual appeal that makes any meal instantly special.
Elevate Your Quesadillas: Serving Suggestions & Creative Variations
Now, let’s talk about how to make these even more spectacular, or how to put your own unique spin on them. While the classic cheesy filling is always a winner, the beauty of this dish lies in its incredible versatility. For a heartier meal, consider adding some seasoned shredded chicken, tender ground beef, or savory black beans to your filling. A sprinkle of finely diced bell peppers, corn, or even a handful of spinach can sneak in some extra veggies without compromising on flavor or the fun aesthetic. Experiment with different cheese blends too! A mix of sharp cheddar and creamy Monterey Jack creates a wonderful texture and depth of flavor, while a touch of pepper jack can add a subtle, exciting kick. Don’t forget about the dips! Serve your quesadillas with an array of vibrant accompaniments like chunky homemade salsa, cool sour cream, creamy guacamole, or a warm bowl of queso. For a touch of spice, a drizzle of your favorite hot sauce or a dash of chili flakes directly into the filling can really elevate the experience. Think about different tortilla types as well; while classic flour tortillas work perfectly, smaller corn tortillas could make cute mini versions, perfect for appetizers or tiny hands. The possibilities are truly endless, allowing you to tailor this recipe to your family’s specific tastes and preferences and explore new flavor combinations with confidence.
So, what are you waiting for? I’ve shared all my tips and tricks, and now it’s your turn to bring this magic to life in your own home. Trust me, making these is not just about following instructions; it’s about embracing creativity, enjoying the process, and sharing warmth around the table. Whether you’re whipping them up for a themed party, a cozy family dinner, or just a fun afternoon snack, I promise you these will be a hit. Don’t be shy about experimenting with the fillings or carving your own unique designs into the tortillas – that’s half the fun and truly makes them your own! I am so excited for you to try this recipe, and I absolutely can’t wait to hear about your experience. Did you discover a new favorite filling? Did your kids have a blast helping with the carvings? Or did you just enjoy a moment of delicious, cheesy bliss? Please, share your culinary adventures with me and our community! Tag me in your photos on social media (without actual links, of course, just imagine!) or drop a comment below telling me all about your wonderful creations. Let’s make some amazing Jack O Lantern Quesadillas together! Happy cooking, everyone!
Jack O Lantern Quesadillas
Bring festive Halloween fun to your kitchen with Jack O’Lantern Quesadillas! Golden-brown tortillas, expertly cut into charmingly spooky faces, are filled with warm, gooey Colby Jack cheese, savory chicken, and fresh vegetables. Perfect for a quick lunch, snack, or vibrant party appetizer that delights all ages.
Ingredients
-
10 – 8 inch flour tortillas
-
2 cups cooked chicken breast, shredded or finely diced
-
2 cups shredded Colby Jack cheese
-
1 large orange bell pepper (half diced for filling, half for faces)
-
1 green bell pepper, diced
-
1 medium yellow onion, finely diced
-
3-4 cloves garlic, minced
-
2 tablespoons olive oil
-
1 teaspoon chili powder
-
1 teaspoon ground cumin
-
½ teaspoon smoked paprika
-
½ teaspoon salt
-
¼ teaspoon black pepper
-
Optional garnishes: fresh cilantro (chopped), sour cream, salsa, guacamole, hot sauce
Instructions
-
Step 1
Shred or dice 2 cups cooked chicken. Finely dice onion, green bell pepper, and half of the orange bell pepper. Mince garlic. Grate 2 cups Colby Jack cheese. Set all aside for assembly. -
Step 2
Lay out 5 flour tortillas. Using a small, sharp knife or a 4-inch pumpkin cookie cutter, cut out simple Jack O’Lantern faces (eyes, nose, jagged mouth) into the center of each. These are your ‘face’ tortillas; the other 5 are plain bases. -
Step 3
Heat 1 tbsp olive oil in a large skillet over medium heat. Sauté diced onion for 5-7 min until translucent. Add diced green and orange bell peppers; cook another 5-7 min until tender-crisp. Stir in minced garlic and cook for 1 min until fragrant. -
Step 4
Add shredded chicken to the skillet. Sprinkle in chili powder, ground cumin, smoked paprika, salt, and black pepper. Stir well and cook for 2-3 min. Remove from heat and let filling cool for 5-10 min. -
Step 5
Lay a plain tortilla flat. Sprinkle ¼ cup Colby Jack cheese over half, leaving a ½-inch border. Spoon ½ cup cooled filling over cheese. Sprinkle another ¼ cup cheese over filling. Top with a ‘face’ tortilla, aligning edges, and press gently. -
Step 6
Heat ½ tbsp olive oil in a non-stick skillet over medium heat. Carefully transfer one assembled quesadilla to the pan. Cook 3-5 min per side until golden brown, crispy, and cheese is fully melted and gooey. Repeat for remaining quesadillas, adding oil as needed. Rest for 1-2 min before slicing. -
Step 7
Slice each quesadilla into wedges or quarters, displaying the Jack O’Lantern faces. Garnish with fresh cilantro. Serve warm with sour cream, salsa, guacamole, or hot sauce. -
Step 8
Store leftovers in an airtight container in the refrigerator for 2-3 days. Reheat in a dry skillet or toaster oven for best crispness.
Important Information
Nutrition Facts (Per Serving)
It is important to consider this information as approximate and not to use it as definitive health advice.
Allergy Information
Please check ingredients for potential allergens and consult a health professional if in doubt.
Leave a Comment