
Sopapilla Cheesecake: Just the name conjures images of warm, cinnamon-dusted clouds of dough hugging a creamy, tangy filling, doesn’t it? Imagine sinking your fork into a dessert that perfectly marries the comforting flavors of a classic sopapilla with the decadent richness of cheesecake. This isn’t just a dessert; it’s an experience!
While the exact origins of sopapilla cheesecake are somewhat debated, it’s widely believed to be a modern twist on traditional Southwestern cuisine. Sopapillas themselves have deep roots in the region, often served with honey or powdered sugar as a sweet ending to a meal. This cheesecake variation takes that beloved concept and elevates it to a whole new level of indulgence.
What makes this dessert so irresistible? It’s the delightful contrast of textures and flavors. The slightly crisp, buttery sopapilla crust gives way to a smooth, velvety cheesecake filling. The cinnamon-sugar topping adds a warm, spicy sweetness that perfectly complements the tangy cream cheese. Plus, it’s surprisingly easy to make! Whether you’re looking for a show-stopping dessert for a special occasion or a comforting treat to enjoy on a cozy night in, this sopapilla cheesecake is guaranteed to be a crowd-pleaser. Get ready to experience dessert heaven!

Ingredients:
- For the Crust:
- 1 ½ cups all-purpose flour
- ½ teaspoon salt
- ½ cup shortening, chilled
- 3-5 tablespoons ice water
- For the Cheesecake Filling:
- 2 (8 ounce) packages cream cheese, softened
- 1 cup granulated sugar
- 2 large eggs
- 1 teaspoon vanilla extract
- ½ cup sour cream
- For the Sopapilla Topping:
- ½ cup (1 stick) unsalted butter, melted
- 1 cup granulated sugar
- 2 tablespoons ground cinnamon
- Optional Garnish:
- Honey, for drizzling
- Whipped cream
- Fresh berries
Preparing the Crust:
Okay, let’s start with the crust! This is a simple pastry crust, and it’s what gives the sopapilla cheesecake that authentic sopapilla feel. Don’t be intimidated; it’s easier than you think!
- Combine Dry Ingredients: In a large bowl, whisk together the flour and salt. This ensures the salt is evenly distributed throughout the flour, which is important for flavor and texture.
- Cut in the Shortening: Add the chilled shortening to the flour mixture. Using a pastry blender (or your fingers, if you’re feeling adventurous!), cut the shortening into the flour until the mixture resembles coarse crumbs. The key here is to keep the shortening cold. Cold fat = flaky crust!
- Add Ice Water: Gradually add the ice water, one tablespoon at a time, mixing gently after each addition. You want to add just enough water to bring the dough together. Be careful not to overmix! Overmixing develops the gluten in the flour, resulting in a tough crust.
- Form the Dough: Once the dough starts to come together, gently form it into a disc. Wrap the disc in plastic wrap and refrigerate for at least 30 minutes. This allows the gluten to relax, making the dough easier to roll out. I usually let it chill for an hour, just to be safe.
Making the Cheesecake Filling:
While the crust is chilling, let’s whip up the cheesecake filling. This is the creamy, dreamy part that makes this dessert so irresistible.
- Cream the Cream Cheese and Sugar: In a large bowl (or the bowl of your stand mixer), beat the softened cream cheese and sugar together until smooth and creamy. Make sure your cream cheese is truly softened; otherwise, you’ll end up with lumps in your filling. Nobody wants lumpy cheesecake!
- Add Eggs: Beat in the eggs one at a time, mixing well after each addition. Don’t overbeat at this stage; just mix until the eggs are incorporated.
- Stir in Vanilla and Sour Cream: Stir in the vanilla extract and sour cream until just combined. The sour cream adds a lovely tang and helps to keep the cheesecake moist.
Assembling and Baking:
Now for the fun part: putting it all together and baking it to golden perfection!
- Preheat Oven and Prepare Pan: Preheat your oven to 350°F (175°C). Grease and flour a 9×13 inch baking dish. You can also line it with parchment paper, leaving an overhang, for easy removal.
- Roll Out the Crust: On a lightly floured surface, roll out the chilled dough into a rectangle slightly larger than your baking dish.
- Place Crust in Pan: Carefully transfer the dough to the prepared baking dish. Press it into the bottom and up the sides of the dish. Trim any excess dough.
- Pour in the Filling: Pour the cheesecake filling evenly over the crust.
- Melt the Butter: Melt the butter in a small bowl.
- Combine Sugar and Cinnamon: In another small bowl, combine the sugar and cinnamon.
- Brush with Butter and Sprinkle with Cinnamon-Sugar: Brush the top of the cheesecake filling with the melted butter. Then, generously sprinkle the cinnamon-sugar mixture evenly over the buttered surface. This is what creates that signature sopapilla flavor and texture.
- Bake: Bake in the preheated oven for 30-35 minutes, or until the crust is golden brown and the filling is set but still slightly jiggly in the center. The center will firm up as it cools.
- Cool Completely: Let the cheesecake cool completely in the baking dish on a wire rack. This is crucial! Don’t be tempted to cut into it while it’s still warm; it needs time to set properly.
- Refrigerate: Once cooled, cover the baking dish with plastic wrap and refrigerate for at least 2 hours, or preferably overnight. This allows the flavors to meld together and the cheesecake to firm up even more.
Serving and Enjoying:
Finally, the moment we’ve all been waiting for! Time to slice, serve, and savor this delicious sopapilla cheesecake.
- Cut into Squares: Cut the cheesecake into squares.
- Garnish (Optional): Drizzle with honey, top with whipped cream, and/or garnish with fresh berries, if desired. I personally love a drizzle of honey; it complements the cinnamon-sugar perfectly.
- Serve and Enjoy! Serve chilled and enjoy every bite! This sopapilla cheesecake is best enjoyed within a few days of baking.
Tips and Variations:
Here are a few extra tips and ideas to make this recipe your own:
- Crust Variations: For a graham cracker crust, use 1 ½ cups graham cracker crumbs, 5 tablespoons melted butter, and ¼ cup sugar. Press into the bottom of the baking dish before adding the filling.
- Spice it Up: Add a pinch of cayenne pepper to the cinnamon-sugar mixture for a little kick.
- Citrus Zest: Add the zest of one lemon or orange to the cheesecake filling for a bright, citrusy flavor.
- Chocolate Drizzle: Drizzle with melted chocolate after baking for an extra decadent treat.
- Caramel Sauce: Serve with a warm caramel sauce for a truly indulgent dessert.
- Make it Mini: Use a muffin tin to make individual sopapilla cheesecakes. Reduce the baking time accordingly.
- Storage: Store leftover sopapilla cheesecake in an airtight container in the refrigerator for up to 3 days.
- Freezing: You can freeze sopapilla cheesecake for up to 2 months. Wrap it tightly in plastic wrap and then in foil. Thaw in the refrigerator overnight before serving.
Troubleshooting:
Sometimes things don’t go exactly as planned. Here are a few common problems and how to fix them:
- Cracked Cheesecake: A cracked cheesecake is usually caused by baking it at too high a temperature or overbaking it. To prevent this, bake at a lower temperature and don’t overbake. You can also try placing a pan of water on the bottom rack of the oven to create a more humid environment.
- Soggy Crust: A soggy crust can be caused by using too much water in the dough or by not baking it long enough. Make sure to use the correct amount of water and bake the crust until it’s golden brown.
- Lumpy Filling: A lumpy filling is usually caused by using cold cream cheese. Make sure your cream cheese is completely softened before using it.
- Too Sweet: If you find the cheesecake too sweet, you can reduce the amount of sugar in the filling or the cinnamon-sugar mixture.
I hope you enjoy this Sopapilla Cheesecake recipe as much as I do! It’s a crowd-pleaser that’s perfect for any occasion. Happy baking!
Conclusion:
So, there you have it! This Sopapilla Cheesecake recipe is truly a must-try for anyone who loves a dessert that’s both comforting and impressive. The creamy, tangy cheesecake filling nestled between layers of flaky, cinnamon-sugar-dusted pastry is an absolute dream. It’s the perfect balance of textures and flavors, making it a guaranteed crowd-pleaser at any gathering, or even just a special treat for yourself. I promise, once you take that first bite, you’ll understand why I’m so enthusiastic about it!
But why is this recipe so special? It’s more than just a dessert; it’s an experience. The warm, comforting aroma that fills your kitchen as it bakes, the satisfying crunch of the sopapilla topping, and the smooth, rich cheesecake – it all comes together to create something truly magical. Plus, it’s surprisingly easy to make! Don’t let the “cheesecake” part intimidate you. This recipe is designed to be approachable for bakers of all skill levels.
Serving Suggestions and Variations:
Now, let’s talk about how to make this Sopapilla Cheesecake even more amazing! While it’s absolutely delicious on its own, there are plenty of ways to customize it to your liking.
* Toppings: A drizzle of honey is a classic pairing, but feel free to experiment with other toppings like caramel sauce, chocolate syrup, or even a dollop of whipped cream. Fresh berries, like strawberries or raspberries, add a burst of freshness and color.
* Flavor Variations: Want to switch things up? Try adding a teaspoon of vanilla extract or almond extract to the cheesecake filling. You could also incorporate a swirl of fruit preserves, like raspberry or cherry, for a fruity twist. For a chocolatey version, add a few tablespoons of cocoa powder to the filling.
* Serving Temperature: While I personally love it warm, straight from the oven, this Sopapilla Cheesecake is also delicious chilled. Let it cool completely and then refrigerate for a few hours for a firmer, more decadent treat.
* Individual Servings: For a fun and elegant presentation, you can bake this recipe in individual ramekins. Just adjust the baking time accordingly.
* Spice it up: Add a pinch of cayenne pepper to the cinnamon-sugar mixture for a subtle kick.
This recipe is incredibly versatile, so don’t be afraid to get creative and experiment with different flavors and toppings. The most important thing is to have fun and enjoy the process!
Time to Bake!
I truly believe that this Sopapilla Cheesecake will become a new favorite in your household. It’s the perfect dessert for any occasion, from casual weeknight dinners to special celebrations. It’s also a wonderful way to impress your friends and family with your baking skills (even if it’s our little secret how easy it actually is!).
So, what are you waiting for? Preheat your oven, gather your ingredients, and get ready to create a truly unforgettable dessert. I’m confident that you’ll love this recipe as much as I do.
And finally, I would absolutely love to hear about your experience making this Sopapilla Cheesecake! Did you try any of the variations I suggested? Did you come up with your own unique twist? Please share your photos and comments with me. I can’t wait to see what you create! Happy baking!
Sopapilla Cheesecake: The Ultimate Guide to a Delicious Dessert
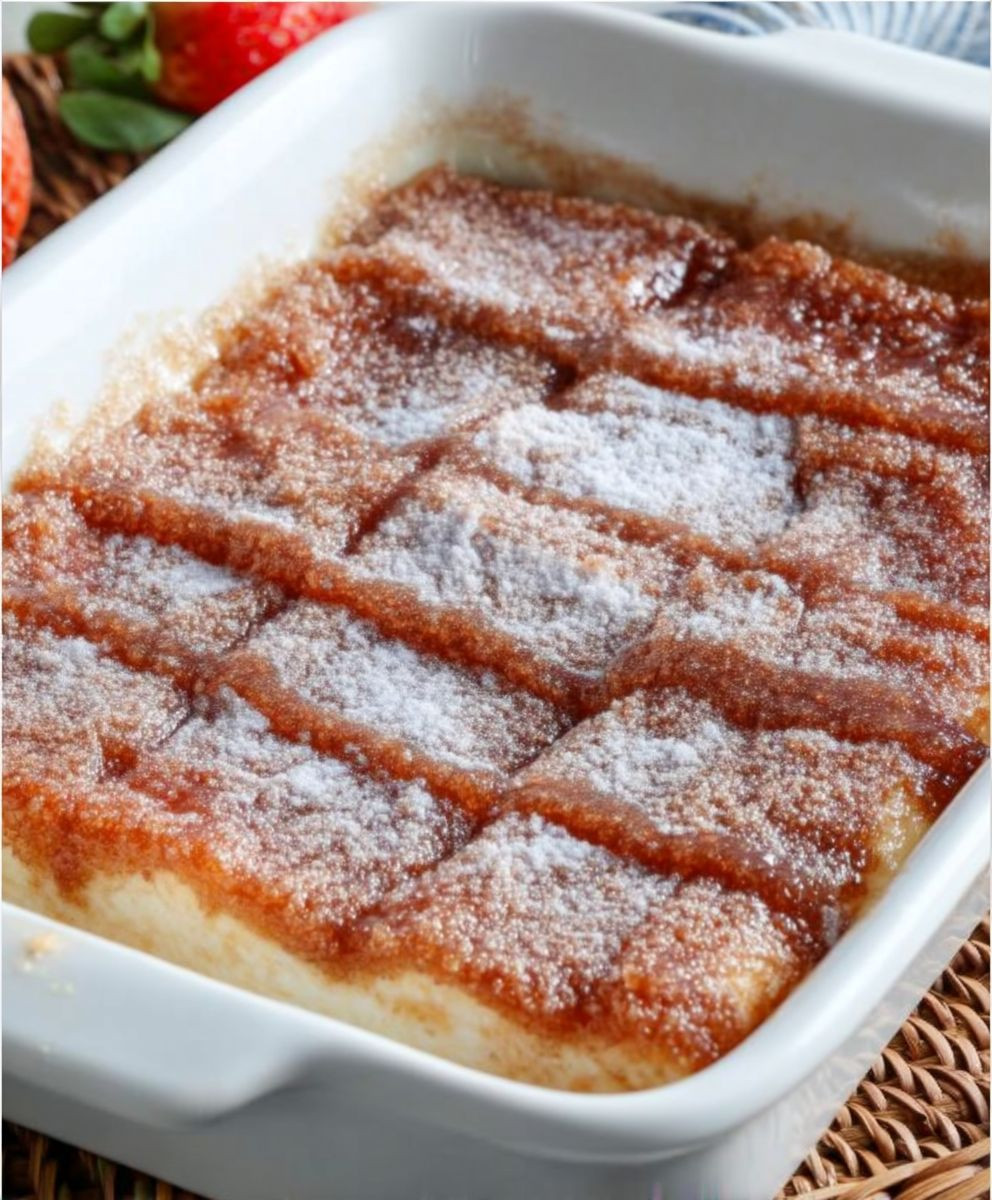
A creamy cheesecake with a flaky crust, topped with melted butter and a generous sprinkle of cinnamon-sugar, reminiscent of classic sopapillas.
Ingredients
Instructions
Recipe Notes
- Crust Variations: For a graham cracker crust, use 1 ½ cups graham cracker crumbs, 5 tablespoons melted butter, and ¼ cup sugar. Press into the bottom of the baking dish before adding the filling.
- Spice it Up: Add a pinch of cayenne pepper to the cinnamon-sugar mixture for a little kick.
- Citrus Zest: Add the zest of one lemon or orange to the cheesecake filling for a bright, citrusy flavor.
- Chocolate Drizzle: Drizzle with melted chocolate after baking for an extra decadent treat.
- Caramel Sauce: Serve with a warm caramel sauce for a truly indulgent dessert.
- Make it Mini: Use a muffin tin to make individual sopapilla cheesecakes. Reduce the baking time accordingly.
- Storage: Store leftover sopapilla cheesecake in an airtight container in the refrigerator for up to 3 days.
- Freezing: You can freeze sopapilla cheesecake for up to 2 months. Wrap it tightly in plastic wrap and then in foil. Thaw in the refrigerator overnight before serving.
- Troubleshooting:
- Cracked Cheesecake: Bake at a lower temperature and don’t overbake. You can also try placing a pan of water on the bottom rack of the oven to create a more humid environment.
- Soggy Crust: Make sure to use the correct amount of water and bake the crust until it’s golden brown.
- Lumpy Filling: Make sure your cream cheese is completely softened before using it.
- Too Sweet: Reduce the amount of sugar in the filling or the cinnamon-sugar mixture.
Leave a Comment