
Salted Caramel Apple Crum extractble Bars Fall Treat – just hearing those words evokes images of crisp autumn days, cozy kitchens, and the irresistible aroma of baking apples. There’s something truly magical about the moment when sweet meets salty, and juicy apples are embraced by a buttery, crumbly topping. I find myself dreaming of that perfect balance, a dessert that truly encapsulates the spirit of the season and brings a smile to everyone’s face.
While apple crumbles and crisps have long been a beloved staple of harvest celebrations and comfort food traditions, tracing their lineage back to ingenious wartime recipes in Britain, these bars take that cherished concept and elevate it to new heights. My take on this classic transforms it into a convenient, portable delight that’s perfect for potlucks, lunchboxes, or simply an indulgent afternoon treat with a cup of coffee. People absolutely adore this particular incarnation because it offers the quintessential taste of fall in an incredibly satisfying package. Each bite delivers a harmonious symphony of flavors and textures: the refreshing tartness of the apples, the luxurious richness of homemade salted caramel, and the delightful crunch of the crumble. It’s a complete sensory experience that brings warmth and joy, proving that these are the ultimate Salted Caramel Apple Crum extractble Bars Fall Treat.

Ingredients:
-
For the Shortbread Crust and Crumble Topping:
- 2 ½ cups (300g) all-purpose flour: The foundation of our delightful shortbread and crumble.
- ½ cup (100g) granulated sugar: For just the right amount of sweetness in the base.
- ½ cup (100g) packed light brown sugar: Adds a wonderful molasses note and chewiness.
- ½ teaspoon salt: Essential for balancing flavors and enhancing the sweetness.
- 1 cup (226g) unsalted butter: Very cold and cut into small cubes. This is crucial for a flaky, tender crumb.
- 1 teaspoon pure vanilla extract: Aromatic and comforting, it rounds out the flavor profile beautifully.
-
For the Apple Filling:
- 6-7 medium apples: Approximately 6-7 cups sliced. I love using a mix of Granny Smith for tartness and Honeycrisp or Fuji for sweetness and texture. It makes for the best apple experience in these “Salted Caramel Apple Crumble Bars Fall Treat”.
- ¼ cup (50g) granulated sugar: To sweeten the apples just a touch.
- ¼ cup (50g) packed light brown sugar: Adds depth and a lovely caramel-like flavor to the apples.
- 2 tablespoons all-purpose flour: Helps to thicken the apple juices, preventing a soggy bottom.
- 1 teaspoon ground cinnamon: The quintessential fall spice, warming and inviting.
- ½ teaspoon ground nutmeg: A hint of nutty warmth that pairs perfectly with cinnamon and apples.
- ¼ teaspoon ground allspice: Adds a subtle complexity and aromatic spice.
- 1 tablespoon fresh lemon juice: Brightens the apple flavor and prevents browning.
-
For the Salted Caramel Drizzle:
- ½ cup (100g) granulated sugar: The base for our homemade liquid gold.
- 2 tablespoons water: To help the sugar dissolve evenly.
- ¼ cup (60ml) heavy cream: Warmed slightly, it creates the rich, smooth texture of our caramel.
- 2 tablespoons unsalted butter: Cut into cubes, for richness and shine.
- ½ teaspoon sea salt flakes: Crucial for that irresistible salty-sweet balance, making it truly a salted caramel. Don’t skip this for the ultimate “Salted Caramel Apple Crumble Bars Fall Treat” experience.
Preparing the Shortbread Crust & Crumble Topping
- Preheat your oven and prepare the pan. First things first, let’s get our oven ready. Preheat it to a cozy 375°F (190°C). Then, grab a 9×13 inch baking pan and line it with parchment paper, leaving an overhang on the sides. This little trick will make it so much easier to lift the bars out once they’re baked and cooled, trust me! Lightly grease the parchment paper with a bit of butter or non-stick spray for good measure.
- Combine dry ingredients. In a large mixing bowl, whisk together your all-purpose flour, granulated sugar, light brown sugar, and salt. Make sure there are no clumps of brown sugar; you want everything nicely incorporated. This ensures an even distribution of sweetness and seasoning throughout our base.
- Incorporate the butter. Now for the fun part! Add the very cold, cubed unsalted butter to your dry ingredients. Using a pastry blender, your fingertips, or a stand mixer with a paddle attachment, cut the butter into the flour mixture. You want to work quickly to prevent the butter from getting too warm. Continue until the mixture resembles coarse crumbs, with some larger pea-sized pieces of butter remaining. These little pockets of butter are what give our shortbread its incredible tender texture.
- Add vanilla extract. Drizzle in the pure vanilla extract and mix until just combined. Be careful not to overmix at this stage; we’re just aiming to evenly distribute the vanilla. The aroma alone is starting to make these “Salted Caramel Apple Crumble Bars Fall Treat” smell amazing!
- Divide and press the crust. Take about two-thirds of this crumb mixture and press it firmly and evenly into the bottom of your prepared 9×13 inch baking pan. You can use the bottom of a flat glass or your clean hands to get a nice, compact base. This will form the sturdy, buttery shortbread crust for our bars. Set aside the remaining one-third of the crumb mixture; this will be our delicious crumble topping later. Pop the pan with the pressed crust into the refrigerator to chill while we prepare the apple filling. Chilling helps the butter solidify, preventing the crust from shrinking too much during baking and giving us a wonderfully crisp texture.
Preparing the Apple Filling
- Prepare the apples. Time to get those apples ready! Peel, core, and slice your 6-7 medium apples into roughly ¼-inch thick pieces. I find that a mix of Granny Smith and Honeycrisp gives the perfect balance of tartness and sweetness, along with a great texture that holds up well during baking. You want about 6-7 cups of sliced apples. Place them immediately into a large bowl.
- Season the apples. To the sliced apples, add the granulated sugar, light brown sugar, all-purpose flour, ground cinnamon, ground nutmeg, and ground allspice. Finish with a splash of fresh lemon juice. The lemon juice is key here; it not only brightens the flavor of the apples but also helps prevent them from browning.
- Toss gently to coat. Toss everything together gently but thoroughly, ensuring all the apple slices are evenly coated with the spices and sugars. You’ll notice the apples will start to release some of their natural juices, which will mix with the flour to create a lovely, thickened sauce as they bake. This spiced apple filling is what makes these “Salted Caramel Apple Crumble Bars Fall Treat” truly autumnal and comforting.
Assembling the Bars
- Retrieve the crust. Take your chilled crust out of the refrigerator. It should be firm to the touch, ready to hold our delicious apple filling.
- Add the apple filling. Spoon the apple mixture evenly over the chilled shortbread crust. Make sure to spread the apples all the way to the edges of the pan. Don’t worry if it looks like a lot of apples; they will cook down significantly in the oven. The goal is to have a generous layer of spiced, tender apples.
- Top with crumble. Finally, sprinkle the remaining one-third of the reserved crumb mixture evenly over the apple filling. This forms our signature crumble topping, which will bake into a golden, buttery, irresistible crunch. This crumble layer is what truly elevates these from simple apple bars to proper “Salted Caramel Apple Crumble Bars Fall Treat.”
Baking the Salted Caramel Apple Crumble Bars
- Bake the bars. Place the pan in your preheated 375°F (190°C) oven. Bake for approximately 45-55 minutes, or until the crumble topping is beautifully golden brown, and the apple filling is bubbling around the edges. You should see juices gently bubbling up through the crumble, indicating that the apples are tender and the filling is cooked through. If the crumble topping starts to brown too quickly, you can loosely tent the pan with aluminum foil for the last 10-15 minutes of baking.
- Cool completely. Once baked, carefully remove the pan from the oven. This is a critical step for perfect bars. Let the bars cool completely in the pan on a wire rack for at least 2-3 hours, or even longer. For the cleanest cuts, I often let them chill in the refrigerator for an hour after they’ve reached room temperature. Cooling allows the apple filling to set properly and the crust to firm up, making them much easier to slice without crumbling. Patience is a virtue here, my friends, especially when anticipating these “Salted Caramel Apple Crumble Bars Fall Treat.”
Preparing the Salted Caramel Drizzle
- Gather your caramel ingredients. While the bars are cooling, let’s prepare the star of the show: our homemade salted caramel drizzle! This step might seem a little intimidating if you’ve never made caramel before, but I promise it’s worth it. Have all your ingredients measured and ready to go: granulated sugar, water, warm heavy cream, cubed butter, and sea salt flakes. Warming the heavy cream slightly beforehand helps prevent the caramel from seizing when you add it.
- Cook the sugar and water. In a medium-sized, heavy-bottomed saucepan (this is important for even heating), combine the granulated sugar and water. Stir gently just to moisten the sugar. Place the saucepan over medium heat. Do not stir once it starts to boil! Stirring can cause sugar crystals to form, leading to a grainy caramel. Instead, you can gently swirl the pan occasionally to ensure even cooking.
- Watch for color change. Keep a close eye on the sugar mixture. It will first dissolve, then begin to simmer, and eventually start to turn golden around the edges. Continue to cook, swirling occasionally, until the entire mixture turns a beautiful amber color. This usually takes about 8-12 minutes. Don’t walk away! Caramel can go from perfect to burnt in a matter of seconds. You’re looking for a rich, deep amber, not a pale yellow, but also not dark brown (which tastes burnt).
- Carefully add cream and butter. Once you’ve reached the desired amber color, immediately and very carefully remove the saucepan from the heat. Slowly pour in the warm heavy cream while whisking constantly. Be extremely cautious, as the mixture will bubble up vigorously and release a lot of steam. Continue whisking until the caramel is smooth. Next, add the cubed butter, one cube at a time, whisking until each piece is fully incorporated and the caramel is glossy.
- Finish with salt. Stir in the sea salt flakes. The salt is what really makes this caramel sing, providing that essential contrast to the sweetness. Taste and adjust the salt if you like a stronger salty kick. Transfer the salted caramel to a heatproof bowl or jar and let it cool slightly. It will thicken as it cools. If it gets too thick to drizzle, you can gently warm it for a few seconds in the microwave or over a double boiler. This luscious, homemade salted caramel is the crown jewel for our “Salted Caramel Apple Crumble Bars Fall Treat.”
Finishing and Serving
- Lift and drizzle. Once the bars are completely cooled (and ideally chilled), use the parchment paper overhang to carefully lift the entire slab out of the baking pan and transfer it to a cutting board. Now for the grand finale! Generously drizzle the cooled (but still pourable) salted caramel sauce over the top of the bars. You can do a zig-zag pattern or just cover the entire surface—your choice!
- Chill again (optional but recommended). For the neatest slices, I highly recommend popping the drizzled bars back into the refrigerator for another 30 minutes to an hour. This allows the caramel to set slightly, making for much cleaner cuts.
- Slice and serve. Using a sharp knife, slice the bars into 12-16 squares or rectangles, depending on your desired portion size. Clean the knife between cuts for the tidiest edges. These “Salted Caramel Apple Crumble Bars Fall Treat” are absolutely heavenly served at room temperature, perhaps with a scoop of vanilla bean ice cream if you’re feeling extra indulgent. They are the epitome of fall flavors in a convenient, handheld form.
- Storage. Store any leftover bars in an airtight container at room temperature for up to 3 days, or in the refrigerator for up to 5 days. If refrigerated, allow them to come to room temperature before serving for the best texture and flavor. They also freeze wonderfully for up to 2-3 months; just thaw at room temperature.
Conclusion:
Well, my friends, we’ve reached the sweet finale of our culinary journey, and I genuinely hope you’re as excited as I am about these incredible bars. If there’s one recipe you absolutely have to try this season, it’s this one. Imagine biting into that perfect combination of tender, spiced apples, bursting with autumnal flavour, nestled beneath a rich, buttery, oat-filled crumble. But then, there’s the magic – swirls of luscious, homemade salted caramel, weaving its way through every layer, adding that delightful salty-sweet counterpoint that makes these bars utterly irresistible. They’re a celebration of fall, a hug in bar form, and honestly, they disappear faster than autumn leaves in a strong breeze. Trust me when I say your taste buds will thank you for this delightful experience.
What truly sets these apart, making them a phenomenal choice for any occasion, is the harmonious balance of textures and tastes. The crispness of the crumble topping, the yielding softness of the apple filling, and that gooey caramel ribbon – it’s a symphony! This isn’t just another dessert; it’s an experience. Preparing these Salted Caramel Apple Crumble Bars Fall Treat will fill your home with the most intoxicating aromas, promising warmth and comfort even before the first bite. They’re impressive enough for a holiday gathering, yet comforting enough for a quiet Sunday afternoon with a cup of tea. They effortlessly combine gourmet appeal with homely, rustic charm, making them universally loved.
Serving these beauties is a joy in itself. While they are phenomenal straight from the pan, slightly warm, allowing the caramel to remain perfectly molten, there are so many ways to enjoy them. A scoop of good quality vanilla bean ice cream melting gently on top elevates them to a decadent dessert experience. The contrast of warm bar and cold ice cream is simply heavenly. Alternatively, a dollop of fresh whipped cream, perhaps infused with a hint of cinnamon or maple, adds another layer of creamy indulgence. For a simpler, yet equally satisfying treat, enjoy them cooled with your morning coffee or as an afternoon pick-me-up. They’re surprisingly sturdy for packed lunches too, making them a fantastic portable snack for work or school.
And don’t be afraid to get creative with variations! Want to add more texture to your crumble? Try folding in some chopped pecans, walnuts, or even toasted almonds for an extra nutty crunch. For an even more complex apple flavour, consider using a mix of Granny Smith and Honeycrisp apples. You could also experiment with different spices in the apple filling – a pinch of cardamom alongside the cinnamon and nutmeg can be truly transformative. Feeling extra adventurous? A thin layer of cream cheese mixture (similar to a cheesecake bar base) spread over the shortbread crust before adding the apples could add a delightful tangy counterpoint. The possibilities are truly endless, allowing you to tailor this recipe to your unique preferences and whatever ingredients you have on hand.
So, there you have it. My heartfelt plea to you is to clear your schedule, gather those beautiful fall apples, and dedicate some time to creating this masterpiece. I promise you, the effort is minimal compared to the incredible reward. There’s a special kind of satisfaction that comes from pulling a tray of these golden, bubbling bars from your oven, the aroma filling every corner of your home. Don’t just read about them; make them! And once you’ve experienced the sheer deliciousness, I would absolutely love for you to share your baking journey with me. Tag me in your photos, tell me about your favourite serving suggestions, or share any delightful variations you came up with. Let’s spread the joy of these exceptional Salted Caramel Apple Crumble Bars Fall Treat far and wide. Happy baking!
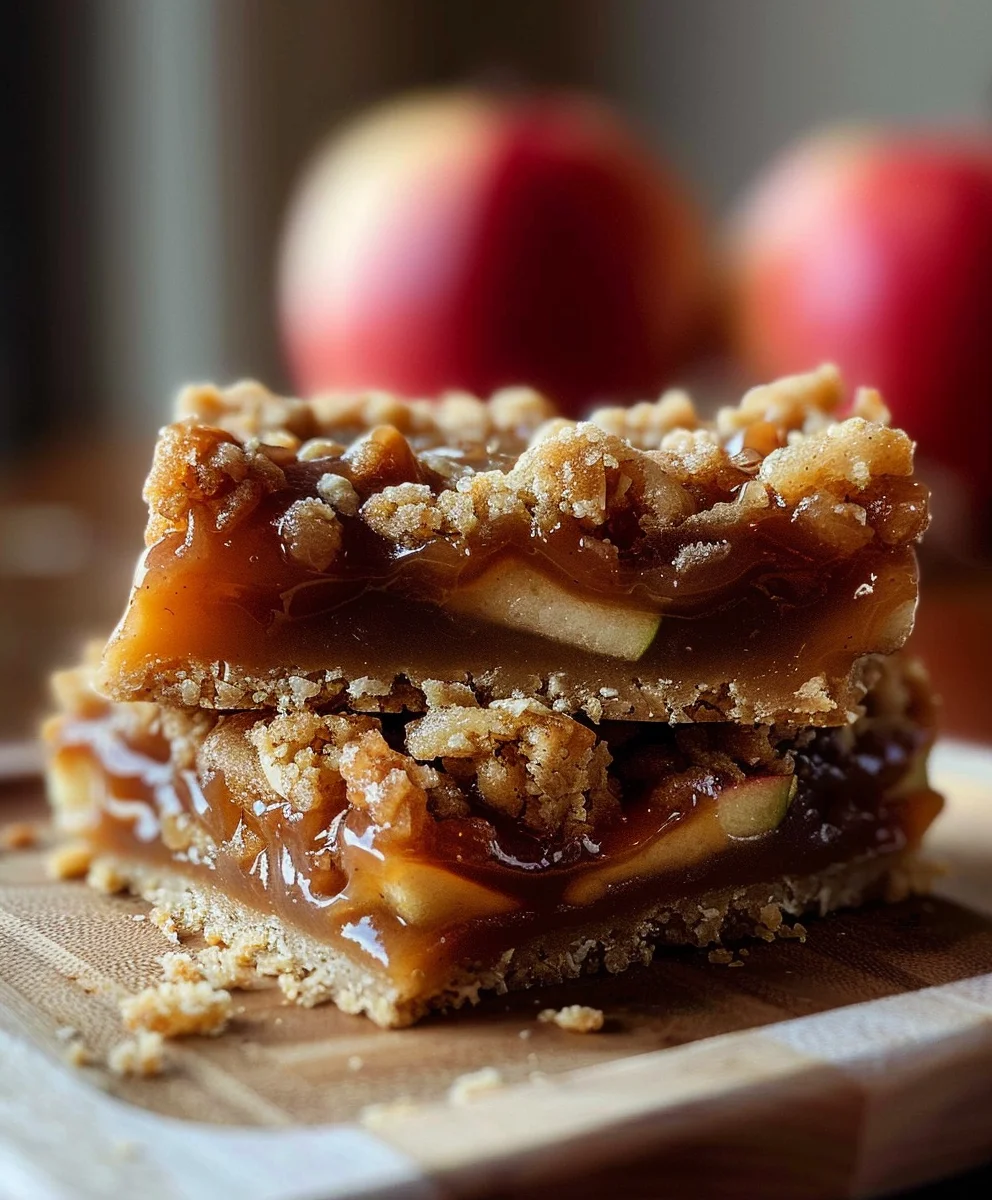
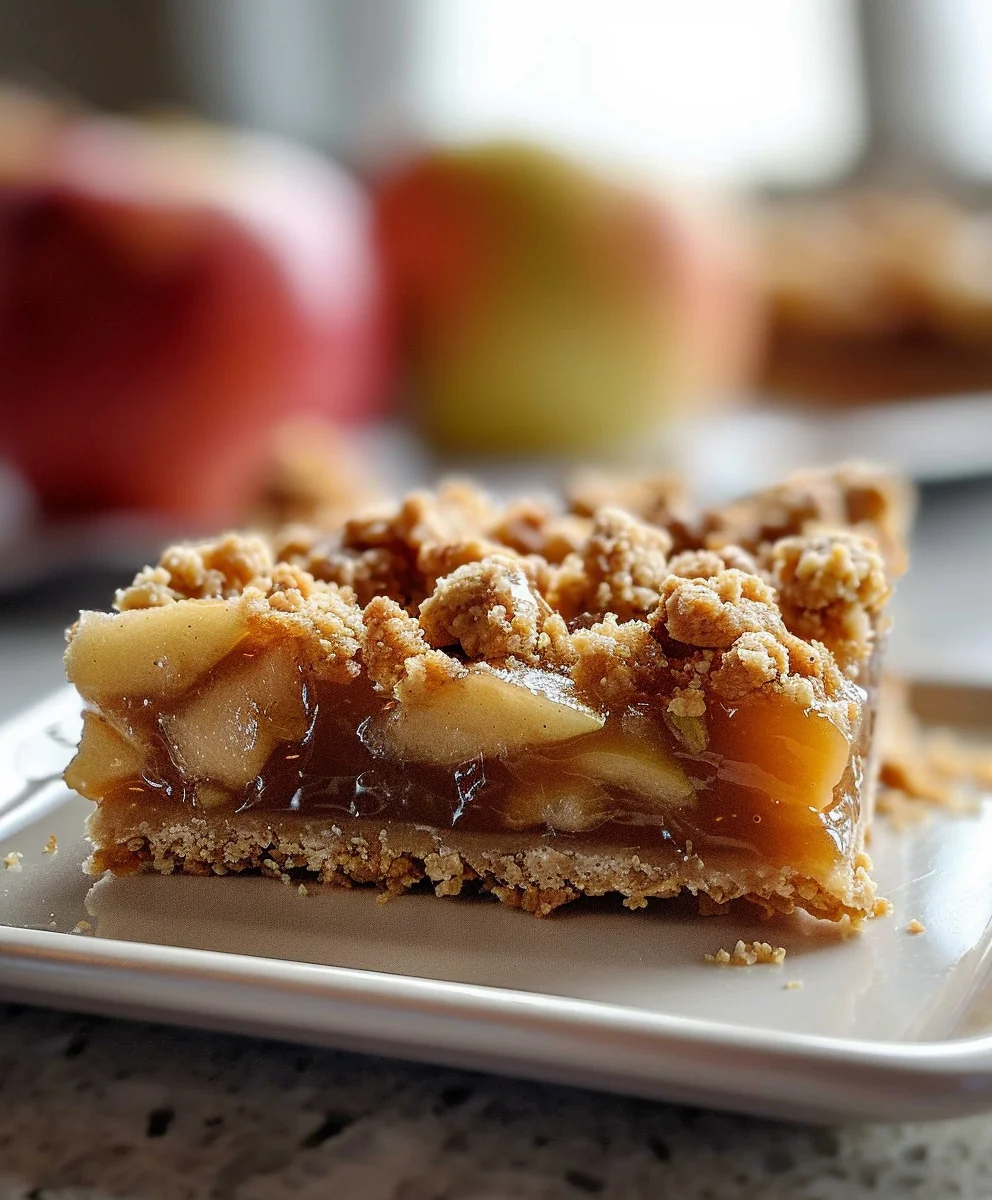
Salted Caramel Apple Crumble Bars: A Perfect Fall Treat!
A delightful fall treat combining the sweet and salty flavors of salted caramel with the comforting taste of baked apples in a buttery, crumbly bar. Perfect for crisp autumn days, these portable bars are a true taste of the season.
Ingredients
-
1 cup (2 sticks) unsalted butter, melted
-
1 1/2 cups granulated sugar
-
1 tsp vanilla extract
-
1/2 tsp salt
-
2 1/2 cups all-purpose flour
-
3 cups peeled & thinly sliced apples (about 3 medium)
-
1/2 cup salted caramel sauce
-
1 tsp ground cinnamon
-
1/4 tsp ground nutmeg
Instructions
-
Step 1
Preheat oven to 375°F (190°C). Line a 9×13 inch baking pan with parchment paper, leaving an overhang for easy lifting. -
Step 2
In a large bowl, whisk together 2 ½ cups all-purpose flour, 1 ½ cups granulated sugar, ½ tsp salt, and 1 tsp vanilla extract. Stir in 1 cup melted unsalted butter until a uniform, moist dough forms. -
Step 3
Press about two-thirds of the dough firmly and evenly into the bottom of the prepared pan to form the crust. Reserve the remaining one-third of the dough for the crumble topping. -
Step 4
In another large bowl, toss 3 cups peeled, thinly sliced apples with 1 tsp ground cinnamon and ¼ tsp ground nutmeg until the apple slices are evenly coated. -
Step 5
Spread the seasoned apple mixture evenly over the pressed crust. Crumble the reserved dough mixture evenly over the apples. Bake for 45-55 minutes, or until the crumble topping is golden brown and the apple filling is bubbling around the edges. -
Step 6
Remove the pan from the oven and allow the bars to cool completely in the pan on a wire rack for at least 2-3 hours. This is crucial for the bars to set properly and be easy to slice. -
Step 7
Once the bars are completely cooled, use the parchment paper overhang to lift the entire slab out of the pan onto a cutting board. Generously drizzle ½ cup salted caramel sauce over the top of the bars. -
Step 8
For the neatest slices, chill the drizzled bars in the refrigerator for another 30-60 minutes to allow the caramel to set. Slice into 12-16 squares or rectangles using a sharp knife. Clean the knife between cuts. Serve at room temperature. Store any leftover bars in an airtight container at room temperature for up to 3 days, or in the refrigerator for up to 5 days.
Important Information
Nutrition Facts (Per Serving)
It is important to consider this information as approximate and not to use it as definitive health advice.
Allergy Information
Please check ingredients for potential allergens and consult a health professional if in doubt.
Leave a Comment