
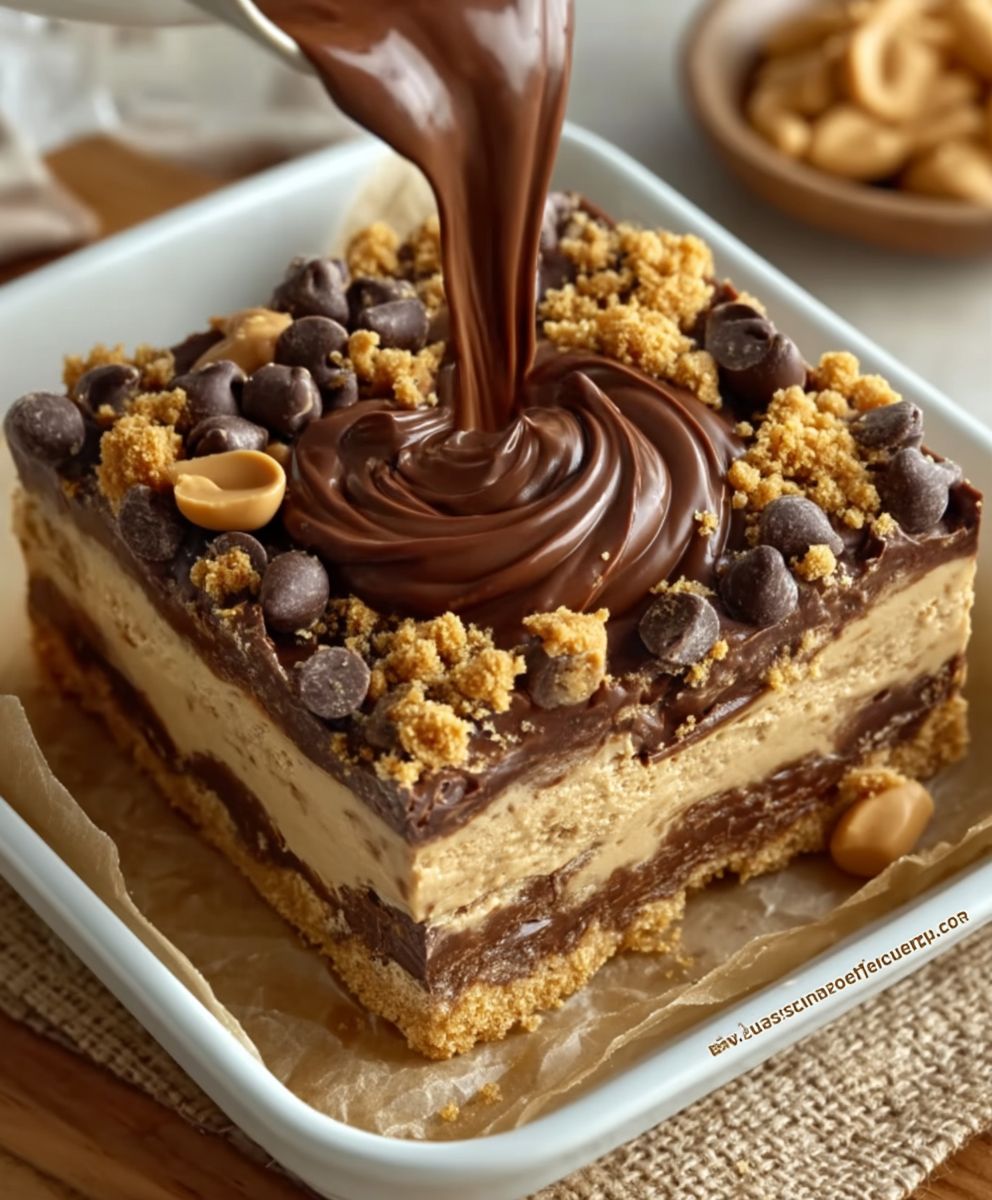
Reeses Peanut Butter No Bake bars are the answer to your sweet tooth cravings when you want something decadent but don’t want to turn on the oven! Imagine layers of creamy peanut butter and rich chocolate melding together in a symphony of flavor. These aren’t just any dessert; they’re a nostalgic trip back to childhood, a comforting hug in every bite.
While the exact origins of this no-bake treat are a bit hazy, the combination of peanut butter and chocolate has been a beloved pairing for generations. The genius of this recipe lies in its simplicity. It captures the essence of the classic Reese’s Peanut Butter Cups in an easy-to-make, shareable format. Think of it as a deconstructed candy bar, elevated to dessert status!
People adore Reeses Peanut Butter No Bake bars for several reasons. First, the taste is undeniably addictive – the salty-sweet combination is a match made in dessert heaven. Second, the texture is divine, offering a delightful contrast between the smooth, creamy peanut butter layer and the slightly firmer chocolate topping. But perhaps the biggest draw is the convenience. With minimal ingredients and no baking required, this recipe is perfect for busy weeknights, potlucks, or any time you need a quick and impressive dessert. I know I always reach for this recipe when I need a guaranteed crowd-pleaser!

Ingredients:
- For the Crust:
- 1 ½ cups graham cracker crumbs (about 12 full sheets)
- 5 tablespoons (70g) unsalted butter, melted
- ¼ cup (50g) granulated sugar
- For the Peanut Butter Filling:
- 8 ounces (226g) cream cheese, softened
- 1 cup (227g) creamy peanut butter (I recommend using a no-stir variety like Jif or Skippy for best results)
- 1 cup (120g) powdered sugar
- 1 teaspoon vanilla extract
- ½ cup (120ml) heavy cream
- For the Chocolate Ganache Topping:
- 1 cup (170g) semi-sweet chocolate chips
- ½ cup (120ml) heavy cream
- 1 tablespoon (14g) unsalted butter (optional, for extra shine)
- Optional Garnishes:
- Mini Reese’s Peanut Butter Cups, halved or quartered
- Chopped peanuts
- Sea salt flakes
Preparing the Graham Cracker Crust
- Crush the Graham Crackers: The first thing we need to do is turn those graham crackers into fine crumbs. You can do this in a food processor, pulsing until you have a consistent, sandy texture. If you don’t have a food processor, no worries! Just place the graham crackers in a large zip-top bag, seal it tightly, and use a rolling pin to crush them into crumbs. Make sure there aren’t any large chunks left.
- Combine Crust Ingredients: In a medium bowl, combine the graham cracker crumbs, melted butter, and granulated sugar. Mix well until all the crumbs are evenly moistened. The mixture should resemble wet sand. This is what will hold our crust together.
- Press into Pan: Now, grab a 9-inch square baking pan. I like to line mine with parchment paper, leaving an overhang on two sides. This makes it super easy to lift the bars out later for cutting. Press the graham cracker mixture firmly and evenly into the bottom of the pan. You can use the bottom of a measuring cup or a flat-bottomed glass to help you get a nice, even layer. The firmer you press, the better the crust will hold its shape.
- Chill the Crust: Place the prepared crust in the refrigerator while you make the peanut butter filling. This will help it firm up and prevent it from crumbling when you add the filling. A minimum of 30 minutes is ideal, but even 15 minutes will help.
Making the Peanut Butter Filling
- Cream the Cream Cheese and Peanut Butter: In a large bowl (or the bowl of your stand mixer), beat the softened cream cheese and peanut butter together until smooth and creamy. Make sure your cream cheese is truly softened; otherwise, you’ll end up with lumps in your filling. I usually let mine sit out at room temperature for about an hour before starting.
- Add Powdered Sugar and Vanilla: Gradually add the powdered sugar to the cream cheese and peanut butter mixture, beating on low speed until combined. Be careful not to add it all at once, or you’ll end up with a cloud of powdered sugar! Stir in the vanilla extract.
- Incorporate Heavy Cream: Pour in the heavy cream and beat on medium speed until the filling is light and fluffy. The heavy cream helps to lighten the filling and gives it a wonderful, smooth texture. Be careful not to overbeat, or the filling could become too thin. You want it to be thick enough to hold its shape.
- Spread Filling over Crust: Remove the chilled graham cracker crust from the refrigerator. Spread the peanut butter filling evenly over the crust. Use an offset spatula or the back of a spoon to smooth the surface.
- Chill Again: Return the pan to the refrigerator and chill for at least 2 hours, or preferably longer. This will allow the filling to set up completely before you add the chocolate ganache. The longer it chills, the easier it will be to cut the bars neatly.
Preparing the Chocolate Ganache Topping
- Heat the Heavy Cream: In a microwave-safe bowl or a small saucepan, heat the heavy cream until it’s just simmering. You don’t want it to boil, just get hot enough to melt the chocolate. If using the microwave, heat in 30-second intervals, stirring in between, to prevent it from boiling over.
- Pour over Chocolate Chips: Place the chocolate chips in a separate heat-safe bowl. Pour the hot heavy cream over the chocolate chips and let it sit for about a minute to soften the chocolate.
- Stir Until Smooth: Gently stir the chocolate and cream together until the chocolate is completely melted and the ganache is smooth and glossy. If you’re having trouble getting the chocolate to melt completely, you can microwave the mixture in 15-second intervals, stirring in between, until it’s smooth.
- Add Butter (Optional): If you want an extra shiny ganache, stir in the tablespoon of butter until it’s melted and incorporated. The butter adds a beautiful sheen to the chocolate.
- Pour over Peanut Butter Filling: Remove the chilled peanut butter bars from the refrigerator. Pour the chocolate ganache evenly over the peanut butter filling. Use an offset spatula or the back of a spoon to spread it into a smooth, even layer.
- Chill to Set: Return the pan to the refrigerator and chill for at least 1 hour, or until the ganache is completely set. This is important for clean cuts.
Cutting and Serving
- Lift from Pan: Once the ganache is set, lift the bars out of the pan using the parchment paper overhang (if you lined the pan). If you didn’t line the pan, you can carefully run a thin knife around the edges to loosen the bars.
- Cut into Squares: Place the bars on a cutting board and use a sharp knife to cut them into squares. I usually cut them into 16 squares, but you can cut them smaller or larger depending on your preference. For clean cuts, wipe the knife clean between each cut.
- Garnish (Optional): If desired, garnish the bars with halved or quartered mini Reese’s Peanut Butter Cups, chopped peanuts, and/or sea salt flakes. The sea salt adds a wonderful contrast to the sweetness of the chocolate and peanut butter.
- Serve and Enjoy!: These Reese’s Peanut Butter No Bake Bars are best served chilled. Store any leftovers in an airtight container in the refrigerator for up to 5 days. They are so rich and decadent, they are the perfect treat for any peanut butter and chocolate lover!
Conclusion:
And there you have it! These Reese’s Peanut Butter No Bake bars are truly a must-try for anyone who loves the iconic combination of peanut butter and chocolate. They’re incredibly easy to make, require no baking (perfect for those hot summer days or when you just don’t feel like turning on the oven!), and deliver an explosion of flavor in every single bite. Seriously, what’s not to love?
I know, I know, you’re probably thinking, “Another no-bake recipe? What makes this one so special?” Well, it’s the perfect balance of textures and flavors. The creamy, rich peanut butter filling is perfectly complemented by the smooth, decadent chocolate topping, and the slightly salty pretzel crust adds a delightful crunch that will keep you coming back for more. Plus, the simplicity of the recipe means you can whip up a batch in no time, making it ideal for last-minute gatherings or a quick and satisfying dessert for yourself.
But the best part? This recipe is incredibly versatile! Feel free to get creative and customize it to your liking. For a richer, more intense chocolate flavor, use dark chocolate for the topping. If you’re a fan of white chocolate, swap it out for a creamy white chocolate ganache. Want to add some extra crunch? Sprinkle some chopped peanuts or Reese’s Pieces on top before the chocolate sets.
Serving suggestions? Oh, the possibilities are endless! These bars are delicious on their own, of course, but they’re also fantastic served with a scoop of vanilla ice cream or a dollop of whipped cream. You can even crumble them over a milkshake or use them as a topping for your favorite brownie recipe. For a fun and festive twist, cut them into smaller squares and serve them as party appetizers.
And if you’re feeling extra adventurous, try adding a layer of caramel between the peanut butter filling and the chocolate topping. The combination of peanut butter, chocolate, and caramel is simply divine! Or, for a healthier option, use natural peanut butter and a sugar-free chocolate alternative.
I’m confident that once you try this recipe, it will become a staple in your dessert repertoire. It’s the perfect treat for any occasion, and it’s guaranteed to impress your friends and family. The ease of preparation and the incredible flavor make it a winner every time.
So, what are you waiting for? Gather your ingredients, put on your apron, and get ready to indulge in the most delicious Reese’s Peanut Butter No Bake bars you’ve ever tasted. I promise you won’t be disappointed.
I’m so excited for you to try this recipe! And I’d absolutely love to hear about your experience. Did you make any variations? Did you serve them at a party? What did your friends and family think? Please, share your thoughts and photos in the comments below. I can’t wait to see your creations! Happy baking (or rather, no-baking!) and enjoy!
Reeses Peanut Butter No Bake: Easy Recipe & Delicious Dessert
Decadent no-bake Reese's Peanut Butter Bars with graham cracker crust, creamy peanut butter filling, and rich chocolate ganache. Perfect for peanut butter and chocolate lovers!
Ingredients
Instructions
Recipe Notes
- For the peanut butter filling, use a no-stir peanut butter like Jif or Skippy for best results.
- Make sure the cream cheese is fully softened to avoid lumps in the filling.
- Be careful not to overbeat the peanut butter filling after adding the heavy cream.
- For clean cuts, chill the bars completely before cutting and wipe the knife clean between each cut.
- The optional butter in the ganache adds a beautiful shine.
- Sea salt flakes add a wonderful contrast to the sweetness of the bars.
Leave a Comment