
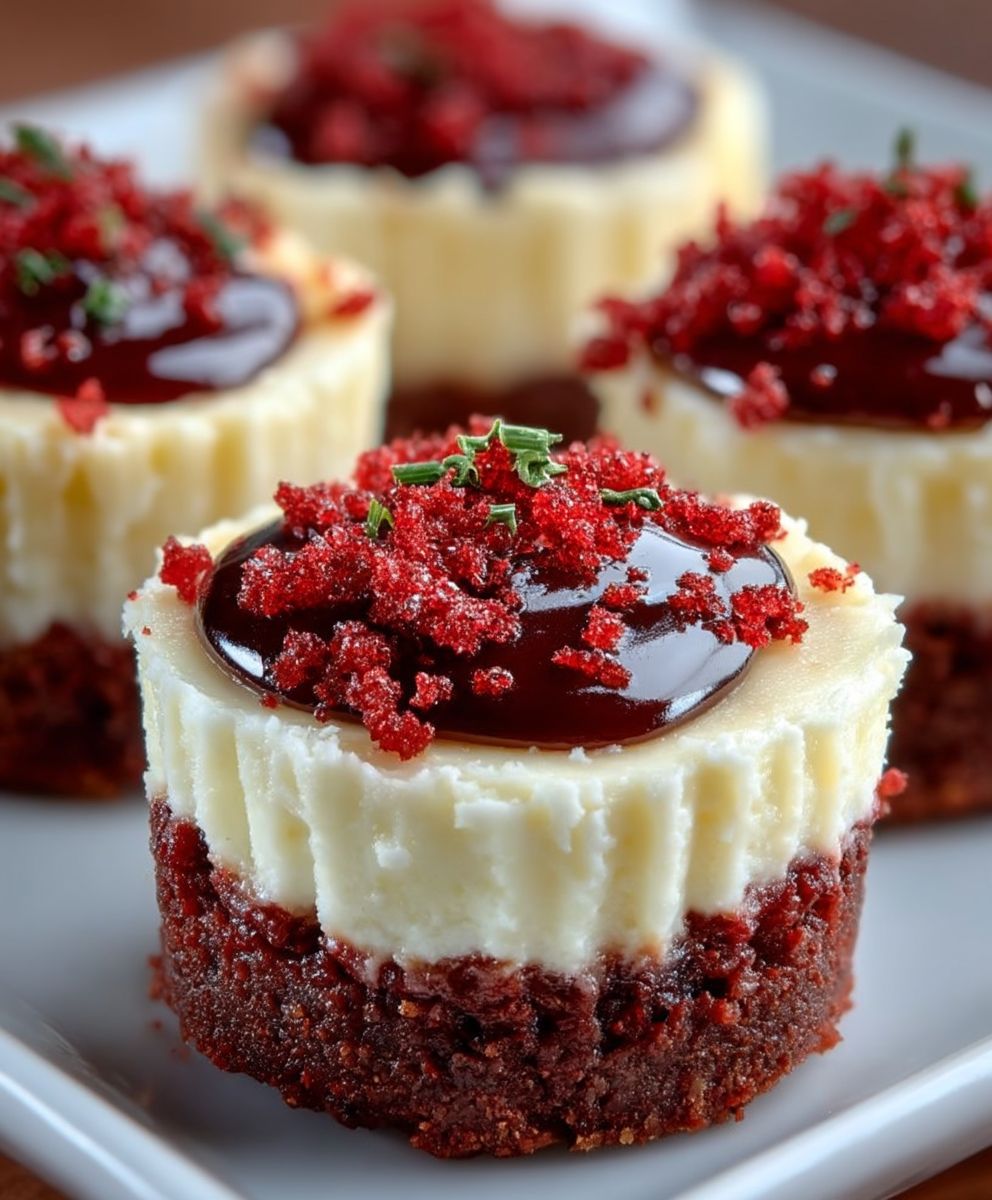
Red Velvet Mini Cheesecakes: Prepare to be utterly captivated by these delightful, bite-sized treats! Imagine the classic, tangy sweetness of cheesecake swirled with the unmistakable, subtly cocoa-infused flavor of red velvet cake. It’s a match made in dessert heaven, and trust me, once you try one, you won’t be able to stop.
Red velvet, with its vibrant hue and delicate crumb, has a rich history rooted in the American South. While the exact origins are debated, its popularity soared in the mid-20th century, becoming a symbol of elegance and indulgence. The addition of cream cheese frosting elevated it to iconic status, and now, we’re taking that beloved combination to a whole new level with these mini cheesecakes.
What makes these Red Velvet Mini Cheesecakes so irresistible? It’s the perfect balance of textures and flavors. The creamy, smooth cheesecake filling contrasts beautifully with the slightly tangy red velvet swirl. They are incredibly easy to make, perfect for parties, holidays, or simply satisfying your sweet tooth. Plus, their individual size makes them ideal for portion control (though you might find yourself reaching for more than one!). Get ready to impress your friends and family with these stunning and delicious desserts!

Ingredients:
- For the Red Velvet Crust:
- 1 ½ cups red velvet cookie crumbs (about 24 cookies)
- 5 tablespoons unsalted butter, melted
- 2 tablespoons granulated sugar
- For the Cheesecake Filling:
- 24 ounces cream cheese, softened to room temperature
- ¾ cup granulated sugar
- 2 large eggs
- ½ cup sour cream
- 1 teaspoon vanilla extract
- 1 tablespoon all-purpose flour
- Red food coloring (gel is recommended), to desired color intensity
- For the Cream Cheese Frosting:
- 8 ounces cream cheese, softened to room temperature
- ½ cup (1 stick) unsalted butter, softened to room temperature
- 3 cups powdered sugar, sifted
- 1 teaspoon vanilla extract
- 2-3 tablespoons milk or heavy cream, as needed for consistency
- Optional Garnishes:
- Red velvet cookie crumbs
- Fresh raspberries or strawberries
- White chocolate shavings
Preparing the Red Velvet Crust:
- Crush the Cookies: If you’re starting with whole red velvet cookies, place them in a food processor and pulse until you have fine crumbs. Alternatively, you can place the cookies in a large zip-top bag and crush them with a rolling pin. Make sure you get a consistent crumb size for the best crust texture.
- Combine the Crust Ingredients: In a medium bowl, combine the red velvet cookie crumbs, melted butter, and granulated sugar. Mix well until all the crumbs are evenly moistened. The mixture should resemble wet sand.
- Press into Muffin Liners: Line a 24-cup mini muffin tin with paper liners. Spoon about 1 tablespoon of the red velvet crumb mixture into each liner. Use the bottom of a measuring cup or a small spoon to firmly press the crumbs into an even layer at the bottom of each liner. This is important for creating a solid base for your cheesecakes.
- Bake the Crusts (Optional): For a slightly firmer crust, you can pre-bake the crusts in a preheated oven at 350°F (175°C) for about 5-7 minutes. This step is optional, but it can help prevent the crust from becoming soggy. If you choose to bake them, let them cool completely before adding the cheesecake filling.
Making the Cheesecake Filling:
- Cream the Cream Cheese and Sugar: In a large bowl, using an electric mixer (either a stand mixer or a hand mixer), beat the softened cream cheese until it is smooth and creamy. This is crucial for a lump-free cheesecake. Gradually add the granulated sugar and continue to beat until the mixture is light and fluffy. Scrape down the sides of the bowl as needed to ensure everything is evenly incorporated.
- Add the Eggs: Beat in the eggs one at a time, mixing well after each addition. Be careful not to overmix at this stage, as overmixing can incorporate too much air into the batter, which can cause the cheesecakes to crack during baking.
- Incorporate Sour Cream and Vanilla: Add the sour cream and vanilla extract to the cream cheese mixture. Mix until just combined. The sour cream adds a lovely tang and richness to the cheesecake.
- Add Flour and Food Coloring: Sprinkle the all-purpose flour over the mixture and gently fold it in until just combined. The flour helps to stabilize the cheesecake and prevent it from being too soft. Add red food coloring, a few drops at a time, until you reach your desired shade of red. Remember that the color will deepen slightly during baking. Gel food coloring is recommended because it’s more concentrated and won’t add excess liquid to the batter.
- Fill the Crusts: Spoon the cheesecake filling into the prepared red velvet crusts, filling each liner almost to the top. Be careful not to overfill them, as they may overflow during baking.
Baking the Mini Cheesecakes:
- Preheat the Oven: Preheat your oven to 325°F (160°C).
- Bake the Cheesecakes: Bake the mini cheesecakes for 18-22 minutes, or until the edges are set and the centers are just slightly jiggly. The baking time may vary depending on your oven, so keep a close eye on them.
- Cool in the Oven: Turn off the oven and crack the oven door slightly. Allow the cheesecakes to cool in the oven for about 30 minutes. This slow cooling process helps prevent the cheesecakes from cracking.
- Refrigerate: Remove the cheesecakes from the oven and let them cool completely at room temperature. Then, transfer them to the refrigerator and chill for at least 2 hours, or preferably overnight. This allows the cheesecakes to fully set and develop their flavor.
Preparing the Cream Cheese Frosting:
- Cream the Cream Cheese and Butter: In a large bowl, using an electric mixer, beat the softened cream cheese and butter until smooth and creamy. Make sure both the cream cheese and butter are at room temperature to avoid lumps in your frosting.
- Add Powdered Sugar: Gradually add the sifted powdered sugar to the cream cheese mixture, beating on low speed until combined. Sifting the powdered sugar helps to prevent lumps in the frosting.
- Incorporate Vanilla and Milk: Add the vanilla extract and 2 tablespoons of milk or heavy cream. Beat on medium speed until the frosting is light and fluffy. If the frosting is too thick, add more milk or cream, 1 tablespoon at a time, until you reach your desired consistency.
Assembling and Decorating:
- Frost the Cheesecakes: Once the cheesecakes are completely chilled, remove them from the muffin tin. Using a piping bag fitted with a decorative tip or a simple knife, frost each cheesecake with the cream cheese frosting. You can create swirls, rosettes, or any other design you like.
- Garnish (Optional): Decorate the frosted cheesecakes with your desired garnishes. You can sprinkle them with red velvet cookie crumbs, top them with fresh raspberries or strawberries, or add white chocolate shavings. Get creative and have fun with it!
- Serve and Enjoy: Serve the red velvet mini cheesecakes immediately or store them in the refrigerator for up to 3 days. They are best enjoyed cold.
Conclusion:
And there you have it! These Red Velvet Mini Cheesecakes are truly a must-try for anyone who loves a little indulgence. The combination of the tangy cream cheese filling with the subtle cocoa notes of the red velvet base is simply divine. They’re the perfect size for individual servings, making them ideal for parties, potlucks, or even just a special treat for yourself after a long day. Trust me, once you take that first bite, you’ll understand why I’m so enthusiastic about them.
What makes these mini cheesecakes so special is their versatility. While they’re fantastic as is, there are so many ways you can customize them to your liking. For a truly decadent experience, try drizzling them with melted white chocolate or a rich chocolate ganache. A sprinkle of chopped pecans or walnuts adds a delightful crunch and nutty flavor. If you’re feeling festive, top them with fresh berries like raspberries or strawberries for a burst of color and freshness.
For a slightly different twist, consider adding a swirl of raspberry jam to the cheesecake batter before baking. This will create a beautiful marbled effect and infuse the cheesecakes with a fruity sweetness that complements the red velvet perfectly. Another fun variation is to use different types of cookies for the crust. Instead of the traditional Oreo crumbs, you could try using gingersnaps for a warm, spicy flavor or even shortbread cookies for a buttery, melt-in-your-mouth base.
Serving these Red Velvet Mini Cheesecakes is just as fun as making them! They’re elegant enough to be served at a formal dinner party, yet casual enough to be enjoyed at a backyard barbecue. For a more sophisticated presentation, arrange them on a tiered dessert stand and garnish with edible flowers or a dusting of cocoa powder. If you’re serving them at a potluck, consider placing them in individual cupcake liners for easy handling.
But the best part about this recipe is how easy it is to make. Even if you’re not an experienced baker, you’ll be able to whip up a batch of these mini cheesecakes with minimal effort. The instructions are straightforward, and the ingredients are readily available at most grocery stores. Plus, the baking time is relatively short, so you won’t have to spend hours in the kitchen.
I truly believe that everyone should experience the joy of these Red Velvet Mini Cheesecakes. They’re the perfect balance of sweet, tangy, and decadent, and they’re guaranteed to impress your friends and family. So, what are you waiting for? Grab your ingredients, preheat your oven, and get ready to bake!
I’m so excited for you to try this recipe and I can’t wait to hear about your experience. Did you make any variations? What toppings did you use? Did you serve them at a special occasion? Please, share your photos and stories in the comments below! I love seeing your creations and hearing how much you enjoyed them. Happy baking, and enjoy every delicious bite of your homemade Red Velvet Mini Cheesecakes! Don’t forget to rate the recipe once you’ve tried it!
Red Velvet Mini Cheesecakes: The Ultimate Guide to Baking Perfection
Red velvet mini cheesecakes with a red velvet cookie crust, creamy cheesecake filling, and tangy cream cheese frosting. Perfect for parties or a special treat!
Ingredients
- 1 ½ cups red velvet cookie crumbs (about 24 cookies)
- 5 tablespoons unsalted butter, melted
- 2 tablespoons granulated sugar
- 24 ounces cream cheese, softened to room temperature
- ¾ cup granulated sugar
- 2 large eggs
- ½ cup sour cream
- 1 teaspoon vanilla extract
- 1 tablespoon all-purpose flour
- Red food coloring (gel recommended), to desired color intensity
- 8 ounces cream cheese, softened to room temperature
- ½ cup (1 stick) unsalted butter, softened to room temperature
- 3 cups powdered sugar, sifted
- 1 teaspoon vanilla extract
- 2-3 tablespoons milk or heavy cream, as needed for consistency
- Red velvet cookie crumbs
- Fresh raspberries or strawberries
- White chocolate shavings
Instructions
- Prepare the Red Velvet Crust:
- If using whole cookies, crush them into fine crumbs using a food processor or rolling pin.
- In a medium bowl, combine red velvet cookie crumbs, melted butter, and granulated sugar. Mix until evenly moistened.
- Line a 24-cup mini muffin tin with paper liners.
- Spoon about 1 tablespoon of the crumb mixture into each liner and press firmly to create an even layer.
- (Optional) Bake the crusts at 350°F (175°C) for 5-7 minutes for a firmer crust. Let cool completely.
- Make the Cheesecake Filling:
- In a large bowl, beat softened cream cheese until smooth and creamy.
- Gradually add granulated sugar and beat until light and fluffy. Scrape down the sides of the bowl as needed.
- Beat in the eggs one at a time, mixing well after each addition. Be careful not to overmix.
- Add sour cream and vanilla extract; mix until just combined.
- Sprinkle all-purpose flour over the mixture and gently fold it in until just combined.
- Add red food coloring, a few drops at a time, until you reach your desired shade of red.
- Spoon the cheesecake filling into the prepared red velvet crusts, filling each liner almost to the top.
- Bake the Mini Cheesecakes:
- Preheat oven to 325°F (160°C).
- Bake for 18-22 minutes, or until the edges are set and the centers are just slightly jiggly.
- Turn off the oven and crack the oven door slightly. Allow the cheesecakes to cool in the oven for about 30 minutes.
- Remove from the oven and let cool completely at room temperature.
- Refrigerate for at least 2 hours, or preferably overnight.
- Prepare the Cream Cheese Frosting:
- In a large bowl, beat softened cream cheese and butter until smooth and creamy.
- Gradually add the sifted powdered sugar, beating on low speed until combined.
- Add vanilla extract and 2 tablespoons of milk or heavy cream. Beat on medium speed until light and fluffy. Add more milk or cream, 1 tablespoon at a time, until you reach your desired consistency.
- Assemble and Decorate:
- Once the cheesecakes are completely chilled, remove them from the muffin tin.
- Frost each cheesecake with the cream cheese frosting using a piping bag or knife.
- Decorate with red velvet cookie crumbs, fresh raspberries or strawberries, or white chocolate shavings (optional).
- Serve immediately or store in the refrigerator for up to 3 days.
Notes
- Using gel food coloring is recommended for the cheesecake filling as it’s more concentrated and won’t add excess liquid.
- Be careful not to overmix the cheesecake batter after adding the eggs, as this can cause the cheesecakes to crack during baking.
- Cooling the cheesecakes slowly in the oven helps prevent cracking.
- Make sure the cream cheese and butter are at room temperature for the frosting to avoid lumps.
- Sifting the powdered sugar helps to prevent lumps in the frosting.
Leave a Comment