
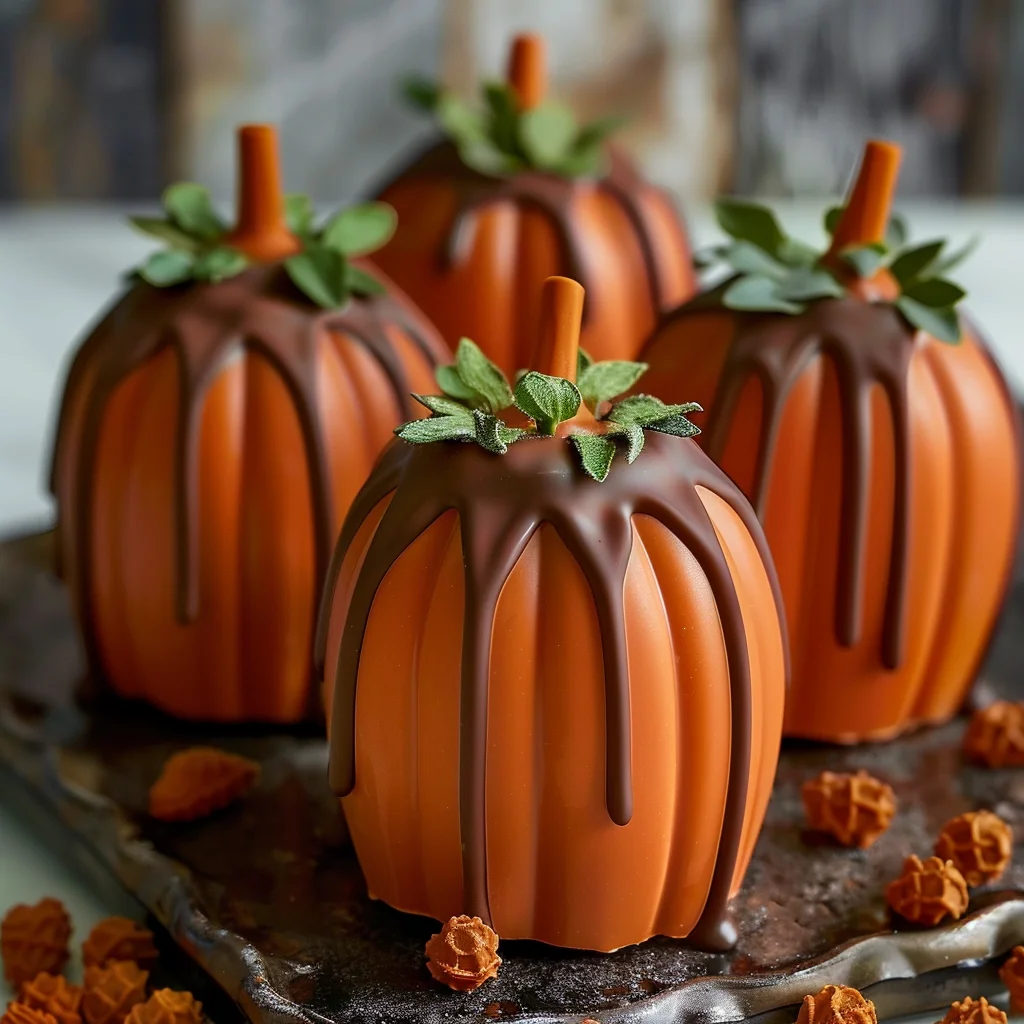
Pumpkin Patch Strawberries are here to delight your senses and redefine your perception of seasonal treats! Imagine the vibrant sweetness of sun-kissed strawberries mingling with the cozy, spiced essence of autumn – a truly unexpected yet utterly harmonious blend that captures the very best of two beloved seasons. This delightful creation isn’t just a dessert; it’s an experience, a whimsical journey for your palate that brings a touch of summer’s joy into the heart of fall.
The Unexpected Harmony of Autumn and Summer
Historically, while strawberries are typically a summer fruit and pumpkins reign in autumn, the playful concept of these Pumpkin Patch Strawberries emerges from a modern desire to bridge the seasons, celebrating the harvest in imaginative new ways. It’s a testament to the creativity that blossoms when we allow ingredients to tell a fresh story. People adore this dish not only for its captivating visual appeal – those bright red berries nestled amongst warm, earthy tones – but especially for its irresistible flavor profile. The juicy burst of fresh strawberries provides a refreshing counterpoint to the subtle, comforting spices, creating a balanced and uniquely satisfying treat that is surprisingly easy to prepare. Get ready to impress and indulge!

Ingredients:
-
For the “Pumpkin Patch Strawberries”:
- 2 lbs (about 45-50 large) fresh, ripe strawberries, preferably with green stems intact for a more natural look, or a little extra green icing for artificial stems if needed. We want these to be substantial enough to hold our delightful filling.
- 1-2 bottles (0.5 oz each) orange gel food coloring. Gel coloring provides a vibrant hue without adding too much liquid.
- 1-2 tablespoons clear vanilla extract or vodka (for thinning the food coloring, optional, but helps achieve an even coat).
- A small, clean, food-safe paintbrush or sponge for applying the color.
- 2 oz dark chocolate or chocolate melts, melted (for pumpkin lines and optional stems/vines).
- 1 oz green candy melts or a small tube of green icing with a fine tip (for making small green stems or tiny leaves/vines).
- Parchment paper or wax paper for drying and setting.
-
For the Cream Cheese Filling:
- 8 oz (1 block) cream cheese, full-fat, softened to room temperature. This is crucial for a smooth, lump-free filling.
- 1/2 cup (1 stick) unsalted butter, softened to room temperature.
- 3-4 cups powdered sugar (confectioners’ sugar), sifted. Adjust to your desired sweetness and consistency.
- 1 teaspoon pure vanilla extract.
- 1/4 teaspoon ground cinnamon (optional, for a subtle autumnal spice).
- Pinch of ground nutmeg (optional, complements the cinnamon beautifully).
- 1-2 tablespoons heavy cream or milk (adjust as needed for desired consistency).
-
For Garnish (Optional):
- A dusting of cocoa powder or extra cinnamon.
- Tiny mint leaves for an added touch of green.
Phase 1: Crafting Your Adorable “Pumpkin Patch Strawberries”
This is where the magic begins, transforming humble strawberries into delightful, autumnal “Pumpkin Patch Strawberries.” It’s a process that requires a little patience but promises a visually stunning and delicious result. Trust me, the effort is absolutely worth it for these charming treats.
- Prepare the Strawberries: First things first, we need impeccably clean strawberries. Gently rinse all your fresh strawberries under cool running water. Be careful not to bruise them. We want them pristine and ready for their transformation.
- Thoroughly Dry the Strawberries: This step is paramount. After rinsing, lay your strawberries out on a clean kitchen towel or several layers of paper towels. Allow them to air dry completely, or very gently pat them dry. Any residual moisture will prevent the food coloring from adhering properly, leading to a splotchy finish. We’re aiming for vibrant, even “Pumpkin Patch Strawberries,” so take your time here. Let them sit for at least 15-20 minutes, or even longer if needed, to ensure they are bone dry.
- Hull the Strawberries: Using a small paring knife or a strawberry huller, carefully remove the green leafy tops (the calyx) and the white core from each strawberry. We need to create a small cavity that will later be filled with our creamy, sweet concoction. Try to make the opening wide enough for easy filling, but not so deep that you compromise the strawberry’s structural integrity. A neat, cone-shaped cavity is ideal. Place the hulled strawberries on a clean sheet of parchment paper.
- The Magical Transformation: Coloring Your “Pumpkin Patch Strawberries”: Now for the fun part! In a small bowl, squeeze out a generous amount of orange gel food coloring. If it’s too thick to paint smoothly, add a few drops of clear vanilla extract or vodka and mix until you have a paint-like consistency. Using your clean, food-safe paintbrush or sponge, carefully paint the entire surface of each hulled strawberry orange. You might need two thin coats to achieve a rich, opaque pumpkin hue. Be sure to cover all the red, leaving no pink spots visible. These are going to be your incredible “Pumpkin Patch Strawberries,” so let’s make them brilliantly orange! Place the painted strawberries back on fresh parchment paper and allow the color to set and dry slightly, about 10-15 minutes.
-
Adding the Pumpkin Details and Stems: This is where your “Pumpkin Patch Strawberries” truly come to life!
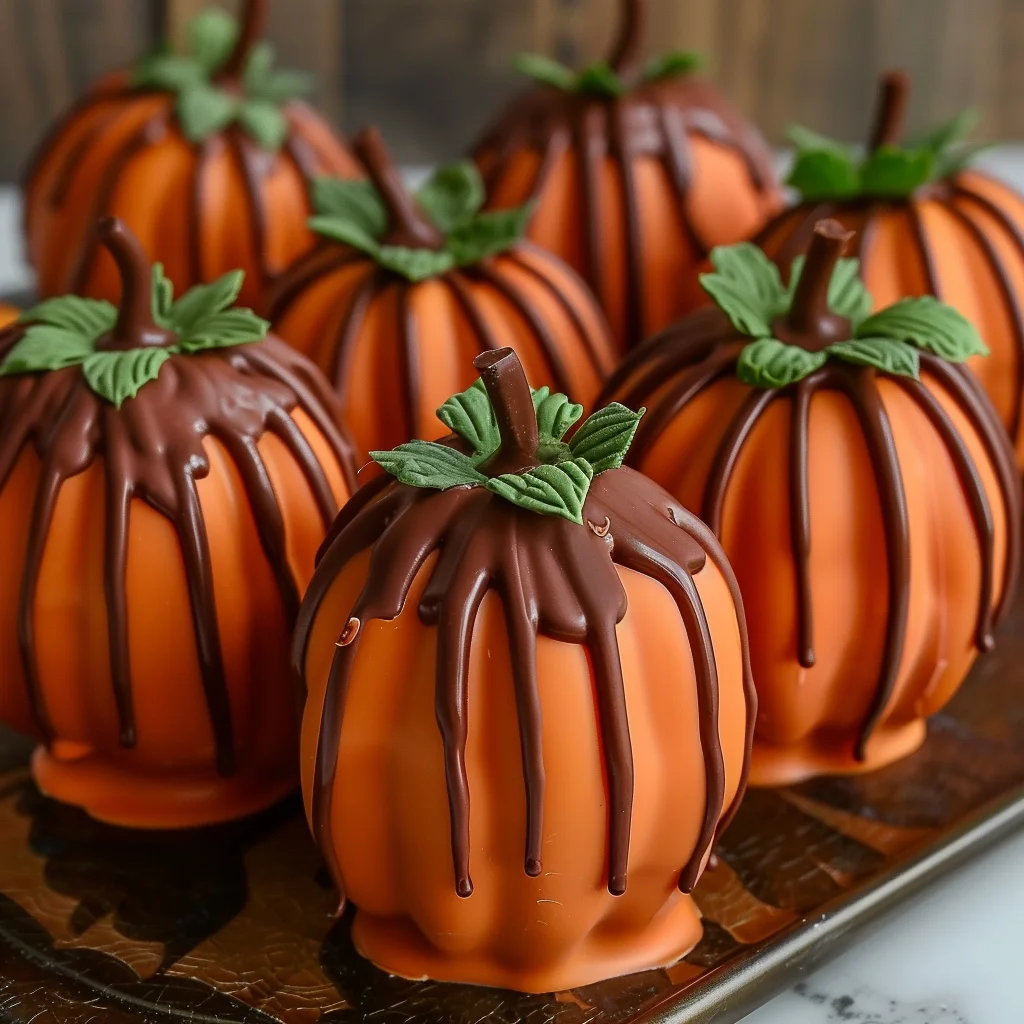
- For the Pumpkin Lines: Melt your dark chocolate or chocolate melts according to package directions. You can use a microwave in 30-second intervals, stirring in between, or a double boiler. Once melted and smooth, transfer the chocolate into a small piping bag with a very fine tip, or a ziplock bag with a tiny corner snipped off. Carefully pipe thin, vertical lines down the sides of each orange strawberry, mimicking the natural ridges of a pumpkin. These lines are key to making them look like miniature pumpkins.
- For the Stems/Vines: If your strawberries didn’t come with nice green tops, or you want to enhance the look, you have options.
- Melted Green Candy Melts: Melt green candy melts as you did the chocolate. Using a small toothpick or a very fine piping tip, create tiny green stems at the top of each strawberry where the hull was removed. You can even add a tiny swirl for a vine.
- Green Icing Tube: If using a tube of green icing, simply pipe small green stems or a tiny leaf/vine pattern at the top.
Once detailed, carefully place your fully decorated “Pumpkin Patch Strawberries” back on the parchment paper and allow the chocolate and green decorations to set completely. This might take 30 minutes at room temperature or 10-15 minutes in the refrigerator. We want everything firm before filling.
Phase 2: Whipping Up the Dreamy Cream Cheese Filling
Every gorgeous “Pumpkin Patch Strawberry” deserves an equally magnificent filling. This creamy, slightly spiced cream cheese mixture perfectly complements the fresh fruit and adds a delightful textural contrast. It’s rich, sweet, and oh-so-irresistible.
- Prepare Your Base Ingredients: In a large mixing bowl, combine the softened full-fat cream cheese and the softened unsalted butter. It is absolutely critical that both are at true room temperature. If they are cold, you’ll end up with a lumpy filling, and no one wants that! Let them sit out on the counter for at least an hour, or even two, before you begin.
- Cream Together: Using an electric mixer (handheld or stand mixer with a paddle attachment), beat the cream cheese and butter together on medium speed until the mixture is incredibly light, fluffy, and completely smooth. This should take about 3-5 minutes. Scrape down the sides of the bowl frequently to ensure everything is well incorporated. This aeration makes the filling wonderfully airy.
- Sift the Powdered Sugar: Measure out 3 cups of powdered sugar. Sifting the powdered sugar before adding it to the mixture is a small but important step that prevents lumps and ensures a silky-smooth filling. Pass it through a fine-mesh sieve into a separate bowl.
- Gradually Add Powdered Sugar: With the mixer on low speed, slowly add the sifted powdered sugar to the cream cheese mixture, about one cup at a time. Mix until just combined after each addition, then increase speed to medium-high and beat until smooth. Continue this process until all 3 cups of sugar are incorporated. If you prefer a sweeter filling or a thicker consistency, you can gradually add the remaining cup of powdered sugar, ½ cup at a time, beating well after each addition until you reach your desired taste and texture.
- Infuse with Flavor: Add the pure vanilla extract, optional ground cinnamon, and pinch of nutmeg to the mixture. Beat on medium speed for another 1-2 minutes until all the flavors are evenly distributed throughout the filling. The aroma will start to become incredibly inviting!
- Adjust Consistency with Cream: If your filling seems too stiff to pipe easily, add the heavy cream or milk one tablespoon at a time, beating on low speed until it reaches a smooth, pipeable consistency. You want it firm enough to hold its shape but soft enough to flow easily through a piping bag. Avoid adding too much liquid, as it can make the filling runny.
- Chill the Filling (Optional but Recommended): For the best piping experience and a firmer set, you can cover the bowl of filling with plastic wrap and refrigerate it for about 15-30 minutes. This will help it firm up slightly, making it easier to work with when filling your delicate “Pumpkin Patch Strawberries.” If it becomes too firm after chilling, let it sit at room temperature for a few minutes or give it a quick whip with your mixer to soften it just enough.
Phase 3: Assembling Your Edible “Pumpkin Patch Strawberries” Masterpiece
With your stunning “Pumpkin Patch Strawberries” ready and your luscious cream cheese filling whipped to perfection, it’s time for the grand finale: assembling these edible works of art. This step is incredibly satisfying, as you watch your individual components come together into a truly show-stopping dessert.
- Prepare Your Piping Bag: Grab a sturdy piping bag and fit it with your chosen piping tip. A star tip (like a Wilton 1M or 21) works beautifully to create a lovely, decorative swirl of filling. Alternatively, a round tip will also work if you prefer a smoother, simpler dome. If you don’t have piping tips, you can simply snip a corner off a sturdy ziplock bag – just make sure the hole is wide enough for the filling to come out smoothly but not so wide that it gushes out uncontrolled.
- Fill the Piping Bag: Carefully spoon your prepared cream cheese filling into the piping bag. Don’t overfill it; about two-thirds full is ideal, as it gives you better control. Twist the top of the bag to seal it and push the filling down towards the tip, expelling any air bubbles.
- Fill Each “Pumpkin Patch Strawberry”: Gently pick up one of your beautifully decorated “Pumpkin Patch Strawberries.” Hold it steady in one hand. With the other hand, position the piping tip directly into the hulled cavity of the strawberry. Apply gentle, even pressure to the piping bag, filling the cavity with a generous swirl or dome of cream cheese filling. You want to fill it so the cream cheese rises slightly above the cut edge of the strawberry, creating an inviting peak. The contrast between the vibrant orange “pumpkin” exterior and the creamy white filling is utterly delightful. Take your time with each one; consistency in filling makes for a more appealing presentation.
- Arrange Your Masterpiece: As you fill each “Pumpkin Patch Strawberry,” carefully place it onto a serving platter or a clean tray lined with parchment paper. Arrange them artfully; perhaps in a circular pattern, or scattered to mimic a small “pumpkin patch.” The visual appeal of these treats is immense, so don’t be afraid to make them the centerpiece of your dessert spread.
-
Optional Garnishing Touches: For an extra touch of elegance or autumn warmth, consider these optional garnishes:
- Dusting of Spice: Lightly dust the tops of the cream cheese filling with a very fine sieve of cocoa powder or a tiny sprinkle of ground cinnamon. This adds another layer of flavor and visual texture.
- Tiny Mint Leaves: For a pop of fresh green, tuck a tiny mint leaf or a very small piece of mint stem into the side of the cream cheese filling on a few of the “Pumpkin Patch Strawberries.” This mimics the green foliage often found near pumpkins and adds a touch of freshness.
- Serve and Enjoy: These “Pumpkin Patch Strawberries” are best served chilled. If you’re not serving them immediately, cover the platter loosely with plastic wrap and refrigerate them for at least 30 minutes, or until you’re ready to present them. Chilling allows the filling to firm up completely and meld with the fresh strawberry flavor. They are truly an unforgettable, festive treat, perfect for any autumnal gathering or simply as a special indulgence. They make fantastic party desserts and are always a conversation starter!
- Storage: Store any leftover “Pumpkin Patch Strawberries” in an airtight container in the refrigerator for up to 2-3 days. While they are best enjoyed fresh, they will still be delicious for a couple of days. The strawberry might soften slightly, but the flavors will remain delightful.
Conclusion:
And so, we arrive at the culmination of our culinary journey with this truly exceptional recipe. I genuinely believe that if there’s one dish you absolutely must add to your repertoire this season, it’s this one. It’s not just a recipe; it’s an experience, a delightful surprise that marries the familiar with the unexpectedly wonderful. I’ve found that it perfectly encapsulates comfort and gourmet appeal in a way that few dishes manage to do so effortlessly. The sheer ease of preparation belies the sophisticated flavor profile it delivers, making it an ideal choice for both seasoned home cooks and those just beginning their culinary adventures. You’ll be amazed at how quickly you can create something so utterly delicious, something that truly stands out from the usual fare and leaves a lasting impression on everyone who tries it. This recipe is designed to bring joy and a touch of magic to your table, transforming simple ingredients into a memorable treat that you’ll want to revisit again and again.
What makes this recipe a true standout is its incredible balance. It offers a symphony of tastes that dance on your palate, with each bite revealing new layers of flavor and texture. The subtle sweetness, combined with a comforting warmth, creates a harmonious blend that is both refreshing and deeply satisfying. It’s a unique take that truly makes for unforgettable moments, a delightful twist that you won’t find just anywhere. Seriously, this recipe is a game-changer, promising to elevate your dessert or snack game with minimal fuss but maximum impact. The unique combination of elements truly shines, proving that sometimes the most extraordinary flavors come from unexpected pairings. It’s a testament to the idea that a little creativity can go a long way in the kitchen, turning everyday ingredients into something truly special and exciting.
Elevate Your Experience with Serving Suggestions:
Once you’ve mastered this incredible dish, the fun doesn’t stop there! While it’s absolutely divine on its own, I’ve discovered a few ways to further enhance your enjoyment. For a truly decadent treat, I love serving it alongside a scoop of vanilla bean ice cream or a dollop of freshly whipped cream. The cool, creamy contrast against the rich flavors of our main dish is simply divine. Imagine a cozy evening, curled up with a warm bowl of this delightful creation, perhaps with a sprinkle of toasted nuts for added texture. It’s the perfect end to a special meal, or even a comforting mid-afternoon pick-me-up. For a lighter, yet equally satisfying option, consider pairing it with a hot cup of spiced chai tea or a rich, dark roast coffee. The complementary notes will awaken your senses and make each bite even more enjoyable. For those brunch enthusiasts, I’ve even enjoyed it as a unique topping for pancakes or waffles, adding an unexpected gourmet flair to a breakfast classic.
Unleash Your Creativity with Variations:
But wait, there’s more! The beauty of this recipe lies not just in its perfection, but also in its versatility. I encourage you to experiment and make it your own. If you’re feeling adventurous, try incorporating different spice blends – a hint of cardamom or a touch of ginger could introduce an entirely new dimension. For those who love a bit of zest, a grating of orange or lemon peel can brighten the flavors beautifully. If you’re looking to make it a bit more indulgent, a drizzle of caramel or a sprinkle of dark chocolate shavings would be an exquisite addition. For a healthier spin, consider reducing the amount of sweetener or substituting it with a natural alternative like maple syrup or agave, adjusting to your taste. You could also experiment with different types of berries or fruits, though I must say, the original combination is truly hard to beat. However, if you’re seeking a specific autumnal delight, perhaps envisioning a more thematic treat, try to infuse the essence of the season with a sprinkle of cinnamon and nutmeg over fresh berries, reminiscent of the vibrant colors and flavors found in a field. This playful and delicious concoction could be playfully dubbed Pumpkin Patch Strawberries, a delightful nod to autumn’s bounty and a true celebration of creative culinary fusion. The possibilities are truly endless, and that’s what makes cooking such an exciting and personal journey.
Your Culinary Journey Awaits!
So, there you have it. I’ve shared with you a recipe that I truly adore, a dish that has brought so much warmth and happiness into my kitchen. Now, it’s your turn to experience the magic! I wholeheartedly encourage you to roll up your sleeves, gather your ingredients, and give this incredible recipe a try. You don’t need to be a gourmet chef; all you need is a little enthusiasm and a willingness to create something delicious. I promise you, the effort will be richly rewarded with a dish that will impress your family, delight your friends, and most importantly, bring a smile to your own face. Don’t let this unique culinary opportunity pass you by. It’s a fantastic way to explore new flavors and add a truly special item to your cooking repertoire.
Once you’ve made it, I would absolutely love to hear about your experience! Did you stick to the original recipe, or did you put your own creative spin on it? What were your favorite serving suggestions? Please feel free to share your thoughts, your photos, and any delightful variations you came up with. Connecting with fellow food enthusiasts and seeing your creations truly makes my day. Your feedback and shared experiences are invaluable, inspiring me and others to keep exploring the wonderful world of food. Let’s celebrate the joy of cooking and the simple pleasure of sharing delicious food together. Happy cooking, everyone!
Pumpkin Patch Strawberries: Easy Fall Dessert Recipe
Pumpkin Patch Strawberries offer a delightful fusion of summer’s vibrant sweetness and autumn’s cozy spiced essence. This unexpected yet harmonious blend creates a captivating, easy-to-prepare treat, perfect for bridging seasons and impressing guests with its unique flavor and visual appeal.
Ingredients
-
1 lb fresh strawberries (large, firm, with bright green tops)
-
12 oz orange candy melts
-
1 tsp coconut oil or shortening (optional, for smoother melting)
-
2 oz dark chocolate or chocolate melts
-
1 oz green candy melts or a small tube of green icing with a fine tip
-
8 oz (1 block) cream cheese, full-fat, softened
-
1/2 cup (1 stick) unsalted butter, softened
-
3-4 cups powdered sugar (confectioners’ sugar), sifted
-
1 teaspoon pure vanilla extract
-
1/4 teaspoon ground cinnamon (optional)
-
Pinch of ground nutmeg (optional)
-
1-2 tablespoons heavy cream or milk
-
12 chocolate sandwich cookies, crushed (optional, for ‘dirt’ base)
-
6 chocolate peanut butter cups or chocolate disks (optional, for ‘dirt’ base)
-
Parchment paper
Instructions
-
Step 1
Rinse and hull 1 lb large, fresh strawberries, removing green tops and white core to create a cavity. Pat them thoroughly dry on paper towels, ensuring no moisture remains for proper coating adhesion. -
Step 2
Melt 12 oz orange candy melts (with optional 1 tsp coconut oil or shortening for smoothness) according to package instructions until smooth. Dip each hulled strawberry completely into the melted orange candy, ensuring full coverage. Place coated strawberries on parchment paper to set in the refrigerator for 10-15 minutes until firm. -
Step 3
Melt 2 oz dark chocolate or chocolate melts. Transfer to a fine-tipped piping bag or ziplock bag with a tiny corner snipped off. Carefully pipe thin, vertical lines down the sides of each orange strawberry to mimic natural pumpkin ridges. Allow chocolate to set completely. -
Step 4
Melt 1 oz green candy melts or use a small tube of green icing. Using a toothpick or fine piping tip, create small green stems or tiny leaves/vines at the top of each strawberry where the hull was removed. Let these green decorations set completely. -
Step 5
In a large mixing bowl, beat 8 oz softened full-fat cream cheese and 1/2 cup softened unsalted butter until light, fluffy, and completely smooth (3-5 minutes). Gradually add 3-4 cups sifted powdered sugar, 1 teaspoon pure vanilla extract, 1/4 teaspoon ground cinnamon (optional), and a pinch of ground nutmeg (optional). Beat until well combined and fluffy. Adjust consistency with 1-2 tablespoons heavy cream or milk if needed. Chill filling for 15-30 minutes for best piping. -
Step 6
Transfer the chilled cream cheese filling to a sturdy piping bag fitted with a star tip (e.g., Wilton 1M). Hold each decorated ‘pumpkin’ strawberry steady and pipe a generous swirl or dome of cream cheese filling into its hulled cavity, rising slightly above the cut edge. -
Step 7
If desired, crush 12 chocolate sandwich cookies (and optional 6 chocolate peanut butter cups or disks) and arrange on a serving platter to create an edible ‘dirt’ base. Place the filled ‘Pumpkin Patch Strawberries’ on top. Optionally, lightly dust the cream cheese filling with cocoa powder or extra cinnamon, or tuck tiny mint leaves for an added touch of green. -
Step 8
Serve ‘Pumpkin Patch Strawberries’ chilled. If not serving immediately, cover loosely and refrigerate for at least 30 minutes. Store any leftovers in an airtight container in the refrigerator for up to 2-3 days.
Important Information
Nutrition Facts (Per Serving)
It is important to consider this information as approximate and not to use it as definitive health advice.
Allergy Information
Please check ingredients for potential allergens and consult a health professional if in doubt.
Leave a Comment