
Pumpkin Pie Recipe — for many of us, these three words conjure images of crisp autumn days, heartwarming family gatherings, and the undeniable aroma of cinnamon, nutmeg, and cloves wafting from the kitchen. It’s more than just a dessert; it’s a cornerstone of holiday traditions, particularly Thanksgiving and Christmas, symbolizing warmth, generosity, and the bounty of the harvest season.
Have you ever wondered what makes this particular pie so universally adored? I believe its charm lies in its perfect symphony of flavors and textures. Imagine a velvety smooth, spiced pumpkin custard, rich with the warmth of autumn spices, nestled within a delicate, flaky crust. Each bite is a comforting embrace, a sweet reminder of home and hearth. Historically, the pumpkin has been a staple in North American cuisine for centuries, with early American settlers adapting native pumpkin dishes into their culinary traditions, eventually leading to the sweet, spiced pies we cherish today. This evolution solidified its place as an iconic symbol of gratitude and harvest.
Why We Love the Classic Pumpkin Pie Recipe
People flock to this dish not just for its exquisite taste and creamy texture, but also for the powerful sense of nostalgia it evokes. It’s a dish that transcends generations, bringing smiles to faces young and old. The simplicity of its wholesome ingredients, combined with its profound cultural significance, makes it an irresistible treat. Whether it’s the centerpiece of your holiday feast or a simple dessert for a cozy evening, mastering a reliable Pumpkin Pie Recipe is an essential skill for any home baker.

Ingredients:
Making a truly memorable pumpkin pie starts with having the right ingredients, and for this classic Pumpkin Pie Recipe, we’ll be making everything from scratch, including a wonderfully flaky pie crust. Trust me, it’s worth the extra effort!
For the Flaky Pie Crust:
- All-purpose flour: 2 ½ cups (plus extra for dusting) – I recommend sifting it for a lighter crust.
- Unsalted butter: 1 cup (2 sticks), very cold and cut into ½-inch cubes. The colder, the flakier!
- Granulated sugar: 1 teaspoon – just a touch to balance the savory.
- Salt: 1 teaspoon – essential for flavor.
- Ice water: ½ cup to ¾ cup – have extra on hand, but add slowly.
For the Rich Pumpkin Filling:
- Pumpkin puree: 1 (15-ounce) can, 100% pure pumpkin, not pie filling. I always look for a trusted brand.
- Sweetened condensed milk: 1 (14-ounce) can – this is my secret weapon for creaminess and sweetness.
- Large eggs: 2, plus 1 egg yolk – the extra yolk adds richness and helps with setting.
- Light brown sugar: ½ cup, packed – for a deeper, more molasses-like sweetness.
- Granulated sugar: ¼ cup – to complement the brown sugar.
- All-purpose flour: 1 tablespoon – helps thicken the filling slightly.
- Ground cinnamon: 1 ½ teaspoons – fresh spices make all the difference.
- Ground ginger: 1 teaspoon – for that warm, zesty kick.
- Ground nutmeg: ½ teaspoon – aromatic and essential.
- Ground cloves: ¼ teaspoon – use sparingly, it’s potent!
- Allspice (optional): ¼ teaspoon – if you love a complex spice profile.
- Salt: ½ teaspoon – brightens all the flavors.
- Vanilla extract: 1 teaspoon – a touch of pure vanilla enhances everything.
Equipment You’ll Need:
- 9-inch pie plate
- Large mixing bowls
- Pastry blender or food processor
- Rolling pin
- Whisk
- Spatula
- Pie weights or dried beans (for blind baking)
Instructions:
Get ready to create the most incredible Pumpkin Pie Recipe you’ve ever tasted! We’re going to break it down into manageable steps, ensuring a perfect result every time.
Phase 1: Crafting the Flaky Pie Crust
The crust is the foundation of any great pie, and for this Pumpkin Pie Recipe, we’re aiming for golden, flaky perfection. Don’t be intimidated; making pie crust from scratch is incredibly rewarding!
- Combine Dry Ingredients: In a large mixing bowl, whisk together the 2 ½ cups of all-purpose flour, 1 teaspoon of granulated sugar, and 1 teaspoon of salt. Make sure it’s all thoroughly combined, as this provides a consistent base for our crust.
- Cut in the Butter: Add the very cold, ½-inch cubed unsalted butter to the dry ingredients. Now, this is where the magic happens for flakiness! Using a pastry blender, two knives, or even your fingertips, work the butter into the flour mixture until it resembles coarse meal with some pea-sized pieces of butter still visible. It’s crucial not to overwork the butter with your hands, as the warmth will melt it, leading to a tough crust. The goal is to keep those butter pieces intact; they create steam pockets during baking, which results in a wonderfully flaky texture.
- Add Ice Water Gradually: Start by adding ½ cup of ice water, a tablespoon at a time, mixing gently after each addition. You want the dough to just come together when squeezed, but it shouldn’t be sticky or wet. If it’s still crumbly, add up to ¼ cup more water, very slowly. Over-hydrating the dough can make it tough, so err on the side of slightly dry rather than too wet.
- Form and Chill the Dough: Once the dough just barely holds together, turn it out onto a lightly floured surface. Gently gather it into a cohesive ball, then flatten it into a disc about 1-inch thick. Wrap the disc tightly in plastic wrap and refrigerate for at least 30 minutes, or up to 2 days. Chilling the dough is a non-negotiable step; it allows the gluten to relax, which makes the dough easier to roll, and keeps the butter cold, contributing to flakiness.
- Roll Out the Dough: After chilling, remove the dough from the refrigerator and let it sit at room temperature for about 5-10 minutes to make it slightly more pliable. Lightly flour your work surface and your rolling pin. Roll the dough into a 12 to 13-inch circle, about ⅛-inch thick. Work from the center outwards, rotating the dough frequently to prevent sticking and ensure an even circle. If the dough starts to crack, gently push it back together.
- Transfer to Pie Plate: Carefully transfer the rolled-out dough to a 9-inch pie plate. The easiest way to do this is to gently roll the dough around your rolling pin and then unroll it over the pie plate. Gently ease the dough into the bottom and up the sides of the plate, being careful not to stretch it, as stretching can cause it to shrink during baking.
- Trim and Crimp: Trim the edges of the dough, leaving about a ½-inch overhang. Fold this overhang under itself, creating a neat edge that sits on the rim of the pie plate. Now, you can crimp the edges decoratively using your fingers or a fork. Get creative! Once crimped, place the pie shell back in the refrigerator for another 20-30 minutes. This second chill helps the crust hold its shape during blind baking.
- Blind Bake the Crust (Highly Recommended!): Preheat your oven to 400°F (200°C). Line the chilled pie crust with parchment paper or aluminum foil, making sure it covers the edges to prevent them from burning. Fill the liner with pie weights, dried beans, or rice, distributing them evenly. Bake for 15 minutes. This step, known as blind baking, is crucial for a pumpkin pie as it helps prevent a soggy bottom crust, which is a common pitfall in high-moisture pies.
- Remove Weights and Finish Blind Baking: Carefully remove the pie weights and parchment/foil. Prick the bottom of the crust a few times with a fork. Return the crust to the oven and bake for another 5-7 minutes, or until the bottom is lightly golden brown and appears dry. Remove from the oven and set aside to cool slightly while you prepare the filling. Reduce the oven temperature to 375°F (190°C) for the main baking of the pie.
Phase 2: Preparing the Rich Pumpkin Filling
Now that our crust is ready, let’s create the luscious, spiced heart of our Pumpkin Pie Recipe. This filling is incredibly easy to mix and yields a beautifully smooth and flavorful result.
- Whisk Eggs and Sugars: In a large mixing bowl, whisk together the 2 large eggs and 1 egg yolk until lightly beaten. Add the ½ cup of packed light brown sugar and ¼ cup of granulated sugar. Whisk vigorously for about 1-2 minutes until the mixture is light in color and fluffy. This step helps dissolve the sugars and incorporates air, contributing to a smoother filling.
- Combine with Pumpkin Puree: Add the 15-ounce can of 100% pumpkin puree (remember, not pie filling!) to the egg and sugar mixture. Stir well with a whisk or spatula until thoroughly combined and smooth.
- Add Wet Ingredients: Pour in the 14-ounce can of sweetened condensed milk and 1 teaspoon of vanilla extract. Mix until everything is completely incorporated. The condensed milk not only adds sweetness but also an incredible creaminess that elevates this Pumpkin Pie Recipe above others.
- Introduce Dry Spices: In a separate small bowl, whisk together the 1 tablespoon of all-purpose flour, 1 ½ teaspoons of ground cinnamon, 1 teaspoon of ground ginger, ½ teaspoon of ground nutmeg, ¼ teaspoon of ground cloves, and an optional ¼ teaspoon of allspice. Don’t forget the ½ teaspoon of salt – it’s vital for balancing and enhancing all the sweet and spicy notes.
- Combine Wet and Dry: Gradually add the dry spice mixture to the wet pumpkin mixture, whisking continuously until no lumps remain and the filling is completely smooth. Ensure there are no dry pockets of flour or spices. Give it a good final whisk to ensure everything is evenly distributed. The aroma at this stage is absolutely divine!
Phase 3: Baking and Cooling Your Perfect Pumpkin Pie
We’re in the home stretch for our glorious Pumpkin Pie Recipe! Proper baking and cooling are key to achieving that perfect set and texture.
- Pour Filling into Crust: Carefully pour the prepared pumpkin filling into the blind-baked and cooled pie crust. The filling should reach just below the crimped edge of the crust.
- Bake the Pie: Gently transfer the pie to the preheated 375°F (190°C) oven. Bake for 50-60 minutes. Baking times can vary slightly depending on your oven, so keep an eye on it.
- Check for Doneness: To test if your Pumpkin Pie Recipe is done, gently jiggle the pie plate. The edges should appear set and slightly puffed, while the very center (about a 1-inch circle) should still have a slight jiggle, like gelatin. If the center is completely firm, it’s likely overbaked, which can lead to cracks. If the crust edges start to brown too quickly, you can loosely cover them with aluminum foil for the remaining baking time.
- Cool Completely: Once baked, carefully remove the pie from the oven and place it on a wire rack to cool completely. This step is absolutely critical! Do not rush it. The pie needs several hours (at least 3-4, but preferably longer) to cool down and allow the filling to fully set. The residual heat will continue to cook the pie gently as it cools, and cutting into it too soon will result in a messy, unset slice. I often bake my pumpkin pies the day before I plan to serve them.
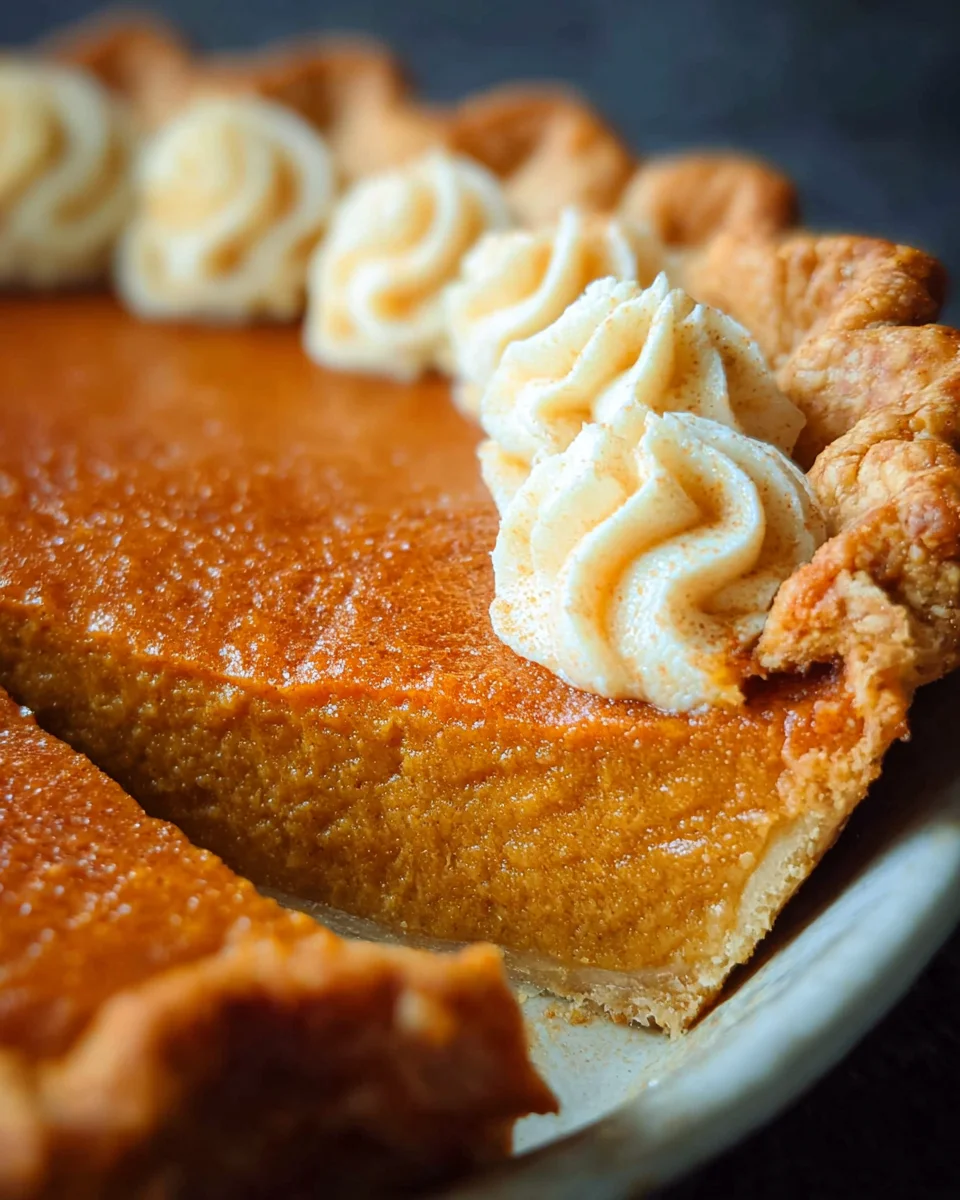
- Serve and Enjoy: Once your perfect Pumpkin Pie Recipe is completely cooled and set, it’s ready to be sliced and served! It’s wonderful on its own, but a dollop of freshly whipped cream or a scoop of vanilla bean ice cream takes it to another level. Store any leftovers loosely covered in the refrigerator for up to 3-4 days.
And there you have it! A truly magnificent homemade pumpkin pie, ready to be enjoyed. The aroma, the creamy texture, and that perfectly flaky crust make this a delightful treat for any occasion. Happy baking!
Conclusion:
Well, my dear friends, we’ve reached the sweet end of our journey through what I truly believe is the ultimate guide to creating a truly unforgettable dessert. This isn’t just another dessert; it’s a slice of pure comfort, a warm hug in culinary form, and a dish that consistently brings smiles to everyone’s faces. I poured my heart into perfecting this particular rendition, ensuring every step is clear, every ingredient plays its part, and the final result is nothing short of spectacular. What makes this recipe an absolute must-try, you ask? It’s the exquisite balance, the delicate dance of flavors that come together in perfect harmony. The filling, oh, the filling! It’s incredibly creamy and smooth, almost custardy, but with just enough body to hold its shape beautifully. It’s never too dense or overly spiced, allowing the natural, earthy sweetness of the pumpkin to truly shine through. Then there’s the crust – golden, flaky, and buttery, providing the ideal counterpoint to the luscious interior. It’s the kind of crust that melts in your mouth, leaving you craving just one more bite. And honestly, the aroma that fills your kitchen while this pie bakes? It’s simply heavenly, instantly transforming your home into a cozy, inviting haven, no matter the season or occasion. This pie isn’t just a dessert; it’s an experience, a tradition waiting to be started in your own home.
Serving Suggestions & Delightful Variations:
Now that you’ve crafted this masterpiece, let’s talk about how to elevate your serving experience. While a perfect slice of this pie is utterly divine on its own, a generous dollop of freshly whipped cream is always a classic, welcome addition. For an extra touch of indulgence, consider infusing your whipped cream with a hint of vanilla bean, a splash of bourbon, or even a touch of maple syrup – trust me, it’s a game-changer! If you’re feeling adventurous, a scoop of premium vanilla bean ice cream, or even a cinnamon or salted caramel swirl ice cream, makes for an incredible pairing. A light dusting of freshly grated nutmeg or cinnamon on top adds both visual appeal and an extra layer of fragrant spice. For those who love a bit of texture, a sprinkle of candied pecans or toasted walnuts can provide a delightful crunch. And don’t forget the drizzle! A swirl of warm caramel sauce or a rich maple glaze can turn an already amazing dessert into something truly extraordinary. Thinking beyond the traditional? You could experiment with the crust itself – a gingersnap or graham cracker crust would introduce a delightful new flavor dimension and texture. For the filling, consider adding a whisper of orange zest for a brighter note, or swirling in a spoonful of softened cream cheese for a marbled effect and an added tanginess. The possibilities are endless, and each variation simply enhances the magic of this core recipe.
Your Culinary Adventure Awaits!
My hope is that reading this has not only inspired you but has also given you the confidence to roll up your sleeves and dive into creating this spectacular dessert. This isn’t just a recipe; it’s an invitation to create, to share, and to savor moments with loved ones. I genuinely believe that once you try this exact Pumpkin Pie Recipe, it will quickly become a cherished staple in your baking repertoire. It’s more than just following instructions; it’s about infusing your own love and care into something truly special. The joy of pulling this golden, fragrant pie from your oven is a reward in itself, and the appreciative smiles of those who taste it? Priceless. So, please, don’t hesitate! Gather your ingredients, set aside some joyful kitchen time, and make this incredible pie. And when you do, I would absolutely love to hear about your experience! Did you stick to the classic? Did you venture into variations? What was your favorite part? Share your baking triumphs, your creative twists, and your family’s reactions in the comments section below. Your stories and photos truly inspire me and the entire community of bakers. Thank you for joining me on this delicious journey, and I can’t wait to see what wonderful creations you bring to life!
Perfect Pumpkin Pie Recipe: Creamy, Spiced & Easy Bake
A universally adored dessert, this homemade pumpkin pie recipe features a velvety smooth, spiced pumpkin custard nestled within a delicate, flaky crust, perfect for holiday traditions and family gatherings. Master this essential holiday treat with our easy-to-follow steps.
Ingredients
Instructions
Important Information
Nutrition Facts (Per Serving)
It is important to consider this information as approximate and not to use it as definitive health advice.
Allergy Information
Please check ingredients for potential allergens and consult a health professional if in doubt.
Leave a Comment