
Extra Flaky Gluten Free Sour Cream Pie Crust is a phrase that might sound like a dream come true for many gluten-free bakers – and I’m here to tell you, it absolutely is! Have you ever found yourself frustrated with gluten-free pie crusts that fall apart, lack the richness of traditional pastry, or simply don’t deliver that coveted, melt-in-your-mouth flakiness? Well, prepare to have your baking world transformed. Sour cream has long been a cherished secret ingredient in traditional baking, celebrated for its ability to add unparalleled tenderness and a subtle tang to doughs. When applied to gluten-free pastry, this humble ingredient works wonders, providing the essential moisture, fat, and acidity needed to create a dough that’s not only incredibly pliable but also bakes up into a truly light and airy masterpiece.
People adore this particular crust for its remarkable texture – it truly lives up to the “extra flaky” promise, offering layers that shatter beautifully with every bite, without being crumbly or dry. Its rich, slightly tangy flavor profile complements both sweet and savory fillings perfectly, making it incredibly versatile for all your pie-making adventures. Say goodbye to dense, uninspired gluten-free crusts; this Extra Flaky Gluten Free Sour Cream Pie Crust recipe will quickly become your trusted go-to, ensuring every pie you bake is a showstopper, from the very first enticing aroma to the last delicious forkful. I’m incredibly excited for you to experience the difference!

Ingredients:
- 2 ½ cups (300g) gluten-free all-purpose flour blend (I recommend a good quality blend that already contains xanthan gum for the best structure. If your blend does not contain it, add ½ teaspoon of xanthan gum to the flour).
- 1 teaspoon granulated sugar (optional, but I find it adds a lovely subtle sweetness and helps with browning for dessert pies).
- 1 teaspoon fine sea salt (essential for flavor balance in both sweet and savory applications).
- 1 cup (226g) unsalted butter, very cold, cut into ½-inch cubes. This is about two sticks. Using extremely cold butter is paramount for flakiness.
- ½ cup (120g) full-fat sour cream, very cold. Make sure it’s full-fat for the best richness and texture.
- 2-4 tablespoons ice water, as needed. Have a small bowl of ice water ready, but be prepared to use only a little.
Preparing Your Workspace and Ingredients for Success
- Before you even think about mixing, take a moment to prepare your workspace. I always start by ensuring all my ingredients are as cold as possible. This is not just a suggestion; it’s the secret weapon for achieving that coveted Extra Flaky Gluten Free Sour Cream Pie Crust. Cube your butter and place it back in the refrigerator or even the freezer for 10-15 minutes while you measure out your dry ingredients. Similarly, measure your sour cream and keep it in the fridge until the last possible moment.
- In a large mixing bowl, whisk together your gluten-free all-purpose flour blend, granulated sugar (if using), and fine sea salt. If your flour blend doesn’t include xanthan gum, now is the time to add it in and whisk it thoroughly to ensure even distribution. This initial step of properly combining your dry ingredients ensures consistent flavor and texture throughout your pie crust. I like to use a large whisk to really aerate the flour mixture, making it lighter and easier to incorporate the butter.
- If you have a food processor, you can certainly use it for this recipe, but I often prefer doing it by hand to better control the texture, especially with gluten-free flour. If you opt for the food processor, pulse your dry ingredients a couple of times before adding the butter.
Making the Gluten-Free Sour Cream Pie Dough
- Now, retrieve your very cold butter cubes from the fridge or freezer. Add the cold butter to your dry ingredient mixture. This is where the magic begins! Using a pastry blender, two knives, or even your fingertips (working quickly to avoid warming the butter), cut the butter into the flour until the mixture resembles coarse crumbs with some pea-sized pieces of butter still visible. These larger butter pieces are what create those incredible pockets of steam during baking, leading to the signature flakiness. Don’t overmix here; you want texture. If you’re using a food processor, pulse the butter into the flour mixture in short bursts, about 10-15 times, until you reach the desired consistency.
- Once the butter is incorporated to your liking, add the very cold full-fat sour cream to the flour and butter mixture. Use a rubber spatula or your hands to gently mix it in. The sour cream not only adds incredible richness and a slight tang, but it also contributes to a tender crust and helps bind the gluten-free flour. Sour cream is truly a game-changer for gluten-free pie crusts, adding moisture without making it gummy.
- Next, slowly add the ice water, one tablespoon at a time, mixing gently after each addition. You might not need all of it, or you might need a tiny bit more, depending on your specific gluten-free flour blend and the humidity in your kitchen. The goal is to bring the dough together just until it forms a cohesive ball that’s not sticky but also not crumbly. Over-hydrating can make the dough tough, while too little water will make it difficult to roll out. Stop adding water as soon as the dough holds together when squeezed. It should feel pliable but still quite firm.
- Gather the dough into a ball and divide it in half if you’re making a double-crust pie. Flatten each half into a disc, about 1-inch thick. This shape makes it much easier to roll out later. Wrap each disc tightly in plastic wrap. Do not skip this step!
Chilling for Perfect Flakiness
- Place the wrapped dough discs in the refrigerator and chill for at least 2 hours, but preferably 4 hours or even overnight. This chilling period is absolutely crucial for an Extra Flaky Gluten Free Sour Cream Pie Crust. It allows the gluten-free flours to fully hydrate, relaxes the dough, and, most importantly, re-chills the butter, preventing it from melting too quickly when you start rolling. A properly chilled dough is much easier to work with and yields a far superior texture. I often make my pie dough the day before I plan to bake, allowing it to chill overnight for optimal results.
Rolling Out the Extra Flaky Crust
- When you’re ready to roll out your dough, remove one disc from the refrigerator. Allow it to sit at room temperature for about 10-15 minutes if it’s been chilling overnight; this makes it slightly more pliable and less prone to cracking. However, ensure it’s still very cold to the touch.
- Lightly flour your clean work surface and your rolling pin with extra gluten-free flour. I like to use a small amount of rice flour or tapioca starch for dusting, as they are very fine and won’t make the crust gummy. Place one dough disc on the floured surface.
- Using your rolling pin, start rolling from the center outwards, turning the dough frequently (about a quarter turn after every few rolls) to prevent sticking and to ensure an even thickness. If the edges start to crack, gently press them back together with your fingers. Gluten-free dough can sometimes be a bit more fragile than traditional wheat dough, so be patient and work gently. Don’t be afraid to lift the dough frequently and add a light dusting of flour underneath if it feels like it’s sticking.
- Roll the dough into a round approximately 12-13 inches in diameter and about ⅛-inch thick. The key here is evenness; a consistent thickness ensures even baking. If the dough feels like it’s getting too warm or sticky, don’t hesitate to slide it onto a baking sheet and pop it back into the fridge for 10-15 minutes to re-chill. This brief chill can save your sanity and preserve the flakiness.
Forming the Pie Crust and Baking Prep
- Carefully transfer the rolled-out dough to your 9-inch pie plate. The easiest way to do this is to gently fold the dough in half or quarters, lift it, and unfold it into the pie plate. Alternatively, you can loosely roll it around your rolling pin and unroll it over the plate. Gently ease the dough into the bottom and sides of the pie plate, making sure there are no air bubbles underneath. Avoid stretching the dough, as this can cause it to shrink during baking.
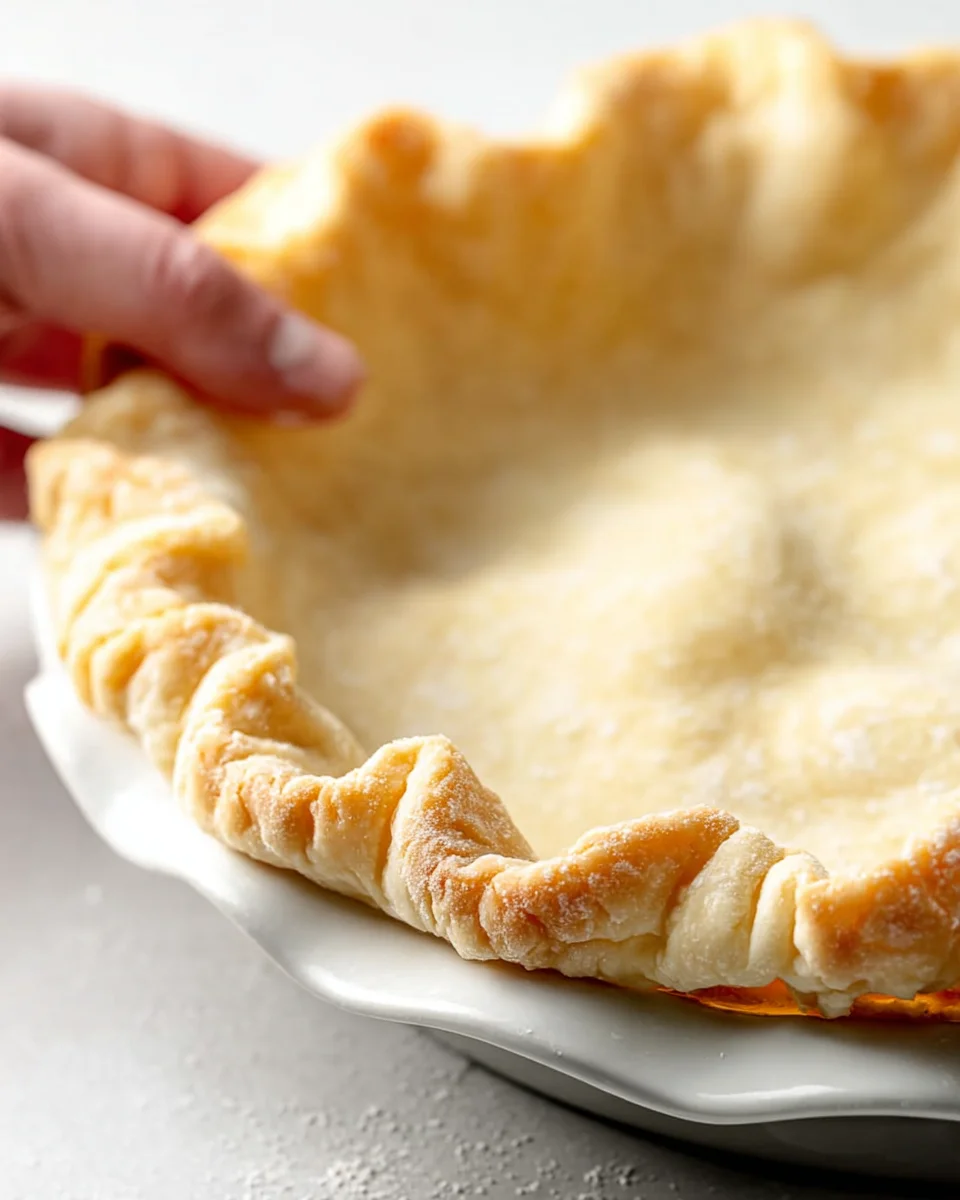
- Trim the edges of the dough, leaving about a ½-inch overhang. Fold this overhang under itself, creating a thicker edge. Now, you can crimp the edges decoratively using your fingers or a fork. For a beautiful finish, I often use my thumb and forefinger to create a scalloped edge, gently pressing outwards.
- If your recipe calls for a double crust, repeat the rolling process with the second dough disc for the top crust. If you’re blind baking for a single-crust pie, proceed to the next step.
- For blind baking: Prick the bottom of the crust all over with a fork. Line the crust with parchment paper and fill it with pie weights, dried beans, or rice. These weights prevent the crust from puffing up and shrinking during baking. Chill the pie crust in the refrigerator for at least 30 minutes (or even the freezer for 15 minutes) before baking. This final chill is incredibly important for maintaining the shape and preventing shrinkage, especially with gluten-free dough.
- Preheat your oven to the temperature specified in your pie recipe (often around 400°F / 200°C for blind baking). Bake the weighted crust for 15-20 minutes, then carefully remove the parchment paper and weights. Continue baking for another 5-10 minutes, or until the crust is lightly golden brown and feels dry to the touch. This creates a perfectly crisp base for your fillings.
- Whether blind baking or simply preparing for filling, your Extra Flaky Gluten Free Sour Cream Pie Crust is now ready to be filled and transformed into a delicious pie! I promise, with these steps, you’ll achieve a crust that’s tender, rich, and so flaky, no one will ever guess it’s gluten-free.
Conclusion:
Well, friends, we’ve reached the end of our journey through what I truly believe is a revolutionary recipe. If you’ve been on the hunt for a pie crust that doesn’t just “pass” as gluten-free but actually excels, then you know exactly why this is a must-try. I designed this recipe because I was tired of crumbly, brittle, or flavorless gluten-free crusts that left me feeling like I was missing out. This isn’t just a gluten-free crust; it’s an experience. The method we’ve explored guarantees an Extra Flaky Gluten Free Sour Cream Pie Crust every single time, boasting a tenderness and rich, subtle tang from the sour cream that will make you forget it’s gluten-free at all. It handles beautifully, rolls out without tearing, and bakes up to a golden perfection that provides the ideal foundation for any filling, sweet or savory.
The magic truly lies in that unparalleled flakiness. Each layer shatters delicately in your mouth, contributing a satisfying texture that is often elusive in gluten-free baking. The sour cream doesn’t just add flavor; it contributes a richness and pliability to the dough, making it a joy to work with and resulting in a crust that is both tender and sturdy enough to hold the most generous fillings. I promise you, this will become your go-to recipe, rescuing you from disappointing store-bought options and opening up a world of pie-making possibilities that you might have thought were closed off.
Serving Suggestions and Creative Variations:
Now that you’ve mastered the crust, let’s talk about how to truly make it shine! For classic dessert pies, imagine this beautiful crust cradling a bubbling apple pie with a generous cinnamon spice blend, a creamy pumpkin pie for the holidays, or a vibrant cherry pie with a stunning lattice top. It’s robust enough for decadent chocolate cream pies and tangy lemon meringues, providing the perfect counterpoint to rich or bright fillings. But don’t limit yourself to sweet treats! This crust is an absolute dream for savory dishes too. Picture a hearty chicken pot pie, its golden crust hinting at the creamy filling within, or an elegant quiche Lorraine, its tender base holding eggs, cheese, and bacon in perfect harmony. You could even use smaller rounds for delectable savory hand pies, perfect for lunches or picnics, perhaps filled with spiced lamb or a vegetarian mix of spinach and feta. And for something a little different, consider creating miniature fruit tarts, allowing the delicate flakiness of the crust to be a star in its own right. If you find yourself with a few scraps of dough, don’t let them go to waste! Roll them out, sprinkle with cinnamon sugar, and bake them into delightful little crispy “cookies” – a delicious snack or garnish.
Don’t Hesitate – Dive In!
I truly hope you’re feeling inspired to roll up your sleeves and give this incredible recipe a try. There’s an immense satisfaction that comes from creating something so delicious and beautiful from scratch, especially when it exceeds all expectations for gluten-free baking. This isn’t just about making a pie; it’s about reclaiming the joy of baking and sharing those moments with loved ones, regardless of dietary needs. Imagine the smiles when you present a stunning pie, and nobody can tell it’s gluten-free. That’s the power of this recipe!
I’d absolutely love to hear about your experiences. What did you fill your pie with? Did you try a sweet or savory option first? Did you experiment with any creative decorations? Please, share your triumphs, your photos, and your feedback in the comments or on social media. Let’s build a community of happy gluten-free bakers who refuse to compromise on flavor or texture. Your kitchen is about to become a haven for amazing pies! Go forth and bake!
Perfect Extra Flaky Gluten-Free Sour Cream Pie Crust
An extra flaky gluten-free sour cream pie crust that’s a dream come true for gluten-free bakers. Say goodbye to crusts that fall apart; sour cream adds unparalleled tenderness, moisture, and a subtle tang, creating a pliable dough that bakes up light and airy. This versatile crust offers remarkable texture, shattering beautifully without crumbling, and complements both sweet and savory fillings perfectly.
Ingredients
Instructions
Important Information
Nutrition Facts (Per Serving)
It is important to consider this information as approximate and not to use it as definitive health advice.
Allergy Information
Please check ingredients for potential allergens and consult a health professional if in doubt.
Leave a Comment