
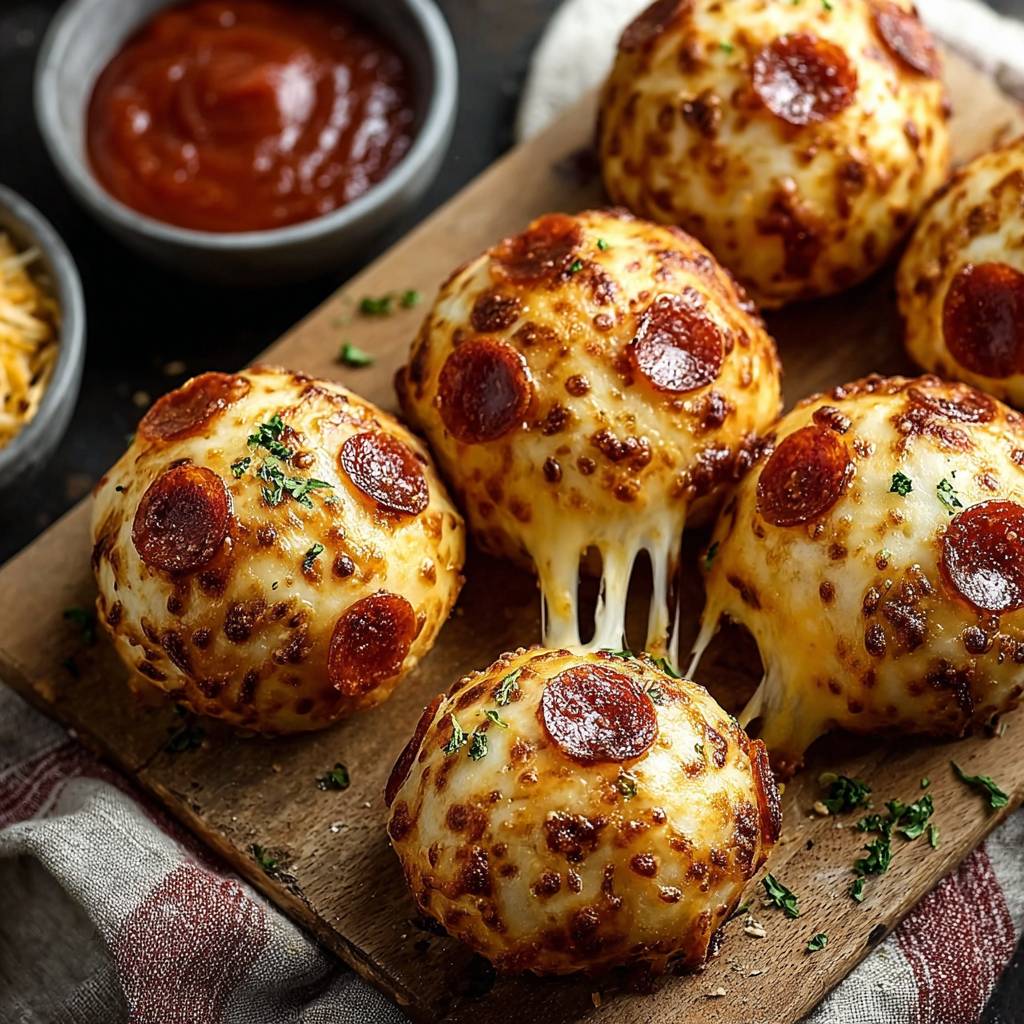
Pepperoni Pizza Bombs: Get ready to explode with flavor! Imagine biting into a warm, golden-brown ball of dough, only to be greeted by a molten core of gooey mozzarella, tangy tomato sauce, and spicy pepperoni. These aren’t your average pizza rolls; they’re a handheld explosion of pizza perfection, and I’m thrilled to share my foolproof recipe with you.
While the exact origins of pizza bombs are shrouded in mystery, their appeal is undeniable. They cleverly capture the essence of pizza in a fun, portable package. Think of them as a modern twist on the classic calzone, offering a convenient and satisfying way to enjoy all your favorite pizza flavors on the go. They’re perfect for parties, game days, or even a quick and easy weeknight dinner.
What makes these Pepperoni Pizza Bombs so irresistible? It’s the combination of textures and tastes. The soft, slightly chewy dough gives way to a burst of savory filling. The melted mozzarella stretches with every bite, while the pepperoni adds a delightful kick. And let’s not forget the convenience! They’re easy to make, easy to eat, and endlessly customizable. So, gather your ingredients, and let’s get ready to create some pizza magic!

Ingredients:
- 1 package (16 ounces) refrigerated biscuit dough (like Pillsbury Grands!)
- 1 cup pizza sauce, divided
- 2 cups shredded mozzarella cheese, divided
- 1/2 cup pepperoni slices, quartered
- 2 tablespoons grated Parmesan cheese
- 1 tablespoon olive oil
- 1 teaspoon garlic powder
- 1/2 teaspoon dried oregano
- Optional: Red pepper flakes, for serving
Preparing the Pepperoni Pizza Bombs:
- Preheat your oven to 375°F (190°C). This is crucial for even baking and ensuring the biscuits cook through properly. Line a baking sheet with parchment paper. This will prevent the pizza bombs from sticking and make cleanup a breeze.
- Prepare the biscuit dough. Open the package of refrigerated biscuit dough. On a lightly floured surface, gently separate each biscuit. If using Grands! biscuits, you might want to flatten each one slightly with a rolling pin or your fingers to make them easier to work with. Aim for a circle about 4-5 inches in diameter. Don’t overwork the dough, as this can make the biscuits tough.
- Assemble the pizza bombs. Now comes the fun part! Take one flattened biscuit and spread about 1 tablespoon of pizza sauce in the center, leaving a small border around the edge. Don’t overfill them, or the sauce will leak out during baking.
- Add the cheese and pepperoni. Sprinkle about 2 tablespoons of shredded mozzarella cheese over the pizza sauce. Then, add a generous amount of quartered pepperoni slices – about 4-5 pieces per pizza bomb. The amount of pepperoni is really up to your preference, so feel free to add more if you’re a pepperoni lover like me!
- Seal the pizza bombs. Carefully bring the edges of the biscuit dough up and over the filling, pinching them together tightly to seal. Make sure there are no gaps, or the cheese and sauce will escape. Roll the sealed dough ball in your hands to form a smooth, round shape. Place the sealed pizza bomb seam-side down on the prepared baking sheet. Repeat this process with the remaining biscuits, sauce, cheese, and pepperoni.
Baking and Finishing Touches:
- Prepare the topping. In a small bowl, whisk together the olive oil, garlic powder, and dried oregano. This mixture will give the pizza bombs a delicious, savory flavor and a beautiful golden-brown color.
- Brush the pizza bombs. Using a pastry brush, generously brush the tops of each pizza bomb with the olive oil mixture. This will help them brown evenly and add a lovely shine.
- Sprinkle with Parmesan cheese. Sprinkle the grated Parmesan cheese evenly over the tops of the brushed pizza bombs. This will add a salty, nutty flavor and a nice textural contrast.
- Bake the pizza bombs. Place the baking sheet in the preheated oven and bake for 15-20 minutes, or until the pizza bombs are golden brown and the biscuit dough is cooked through. The internal temperature should reach at least 200°F (93°C). Keep a close eye on them, as baking times may vary depending on your oven.
- Let them cool slightly. Once the pizza bombs are done, remove them from the oven and let them cool on the baking sheet for a few minutes before transferring them to a serving plate. This will prevent them from burning your fingers and allow the cheese to cool slightly.
Serving Suggestions:
- Serve warm. Pepperoni pizza bombs are best served warm, when the cheese is melted and gooey and the biscuit dough is soft and fluffy.
- Serve with extra pizza sauce. I like to serve these with a small bowl of extra pizza sauce for dipping. It adds even more flavor and moisture.
- Add red pepper flakes. If you like a little heat, sprinkle some red pepper flakes over the pizza bombs before serving.
- Pair with a salad. These pizza bombs are quite rich, so they pair well with a light and refreshing salad.
- Make it a party! Pepperoni pizza bombs are perfect for parties, game nights, or any casual gathering. They’re easy to make, fun to eat, and always a crowd-pleaser.
Tips and Tricks for Perfect Pizza Bombs:
- Don’t overfill the biscuits. As mentioned earlier, overfilling the biscuits with sauce and cheese can cause them to leak during baking. Be mindful of the amount of filling you use.
- Seal the edges tightly. Make sure to pinch the edges of the biscuit dough together tightly to seal the pizza bombs. This will prevent the filling from escaping and ensure that they bake properly.
- Use good quality ingredients. The quality of your ingredients will directly impact the flavor of the pizza bombs. Use good quality pizza sauce, mozzarella cheese, and pepperoni for the best results.
- Experiment with different fillings. While this recipe calls for pepperoni and mozzarella cheese, you can easily customize the filling to your liking. Try adding other toppings like mushrooms, onions, peppers, or sausage.
- Make them ahead of time. You can assemble the pizza bombs ahead of time and store them in the refrigerator until you’re ready to bake them. Just add a few extra minutes to the baking time.
- Freeze them for later. These pizza bombs also freeze well. Simply bake them as directed, let them cool completely, and then wrap them individually in plastic wrap and store them in a freezer bag. When you’re ready to eat them, thaw them in the refrigerator overnight and then reheat them in the oven or microwave.
Variations on the Classic Pepperoni Pizza Bomb:
- Vegetarian Pizza Bombs: Substitute the pepperoni with your favorite vegetables, such as mushrooms, bell peppers, onions, and olives.
- Hawaiian Pizza Bombs: Add diced ham and pineapple to the filling for a sweet and savory twist.
- Supreme Pizza Bombs: Combine pepperoni, sausage, mushrooms, bell peppers, and onions for a loaded pizza experience.
- BBQ Chicken Pizza Bombs: Use shredded cooked chicken, BBQ sauce, and cheddar cheese for a smoky and tangy flavor.
- Spinach and Artichoke Pizza Bombs: Mix spinach, artichoke hearts, cream cheese, and Parmesan cheese for a creamy and flavorful filling.
Troubleshooting Common Pizza Bomb Problems:
- Pizza bombs are leaking: This is usually caused by overfilling the biscuits or not sealing the edges tightly enough. Make sure to use a moderate amount of filling and pinch the edges together firmly.
- Pizza bombs are not cooking through: This could be due to the oven temperature being too low or the baking time being too short. Make sure your oven is properly preheated and bake the pizza bombs until they are golden brown and the biscuit dough is cooked through.
- Pizza bombs are burning on the bottom: This can happen if the baking sheet is too close to the heating element. Try moving the baking sheet to a higher rack in the oven or using a double baking sheet.
- Pizza bombs are dry: This could be due to overbaking or using too little sauce. Make sure to bake the pizza bombs until they are just cooked through and use a generous amount of pizza sauce.
Conclusion:
So, there you have it! These Pepperoni Pizza Bombs are truly a must-try recipe, and I’m not just saying that because I created it. The combination of the flaky, buttery crust, the savory pepperoni, the tangy tomato sauce, and the gooey, melted mozzarella is simply irresistible. It’s a flavor explosion in every single bite, and the best part? They’re incredibly easy and fun to make! Forget ordering takeout; these homemade pizza bombs are quicker, tastier, and a whole lot more satisfying.
Why are these Pepperoni Pizza Bombs a game-changer? Because they’re perfect for so many occasions. Need a quick and easy weeknight dinner? These are your answer. Hosting a game night or a party? They’ll be the star of the show. Looking for a fun activity to do with the kids? Get them involved in assembling these little pockets of deliciousness! They’re also incredibly portable, making them ideal for picnics, potlucks, or even a tasty lunchbox treat.
But the versatility doesn’t stop there! Feel free to get creative with your fillings. Don’t have pepperoni on hand? Try using cooked sausage, ham, or even crumbled bacon. Want to add some veggies? Sautéed mushrooms, onions, or bell peppers would be fantastic additions. For a spicier kick, add a pinch of red pepper flakes or a drizzle of hot sauce. You can even experiment with different cheeses, like provolone, cheddar, or a blend of Italian cheeses. The possibilities are endless!
Serving Suggestions and Variations:
* Serve these Pepperoni Pizza Bombs with a side of warm marinara sauce for dipping.
* Sprinkle them with grated Parmesan cheese and fresh herbs like basil or oregano before baking for an extra touch of flavor.
* For a vegetarian option, replace the pepperoni with your favorite vegetables and use a plant-based cheese alternative.
* Make mini pizza bombs using smaller squares of dough for bite-sized appetizers.
* Brush the tops of the pizza bombs with garlic butter before baking for an extra layer of flavor.
I truly believe that once you try this recipe, you’ll be hooked. It’s a guaranteed crowd-pleaser, and it’s so much fun to customize to your own liking. The best part is that you can easily adapt the recipe to suit your dietary needs and preferences. Whether you’re a meat-lover, a vegetarian, or have any other dietary restrictions, you can easily create a version of these pizza bombs that you’ll absolutely love.
So, what are you waiting for? Gather your ingredients, preheat your oven, and get ready to experience the joy of homemade Pepperoni Pizza Bombs. I’m confident that you’ll be amazed at how easy and delicious they are. And most importantly, don’t forget to share your creations with me! I’d love to see your photos and hear about your variations. Tag me on social media or leave a comment below to let me know how they turned out. Happy baking, and enjoy! I can’t wait to hear about your pizza bomb adventures!
Pepperoni Pizza Bombs: The Ultimate Guide to Delicious Homemade Snacks
Flaky biscuit dough stuffed with pizza sauce, mozzarella, and pepperoni, then baked to golden perfection. A fun and easy appetizer or snack, perfect for parties or a quick weeknight treat!
Ingredients
Instructions
Recipe Notes
- Don’t overfill the biscuits to prevent leaking.
- Seal the edges tightly to keep the filling inside.
- Serve warm with extra pizza sauce for dipping.
- Add red pepper flakes for a little heat.
- Experiment with different fillings like vegetables, ham and pineapple, or sausage.
- These can be assembled ahead of time and stored in the refrigerator or freezer.
Leave a Comment