
Peanut butter pound cake: just the name alone conjures up images of rich, decadent goodness, doesn’t it? Imagine sinking your teeth into a slice of moist, buttery cake, infused with the irresistible flavor of creamy peanut butter. This isn’t just any cake; it’s a nostalgic trip back to childhood, a comforting hug in dessert form, and a guaranteed crowd-pleaser all rolled into one.
While the exact origins of peanut butter pound cake are a bit hazy, the combination of peanut butter and cake has been a beloved pairing in American baking for generations. Peanut butter, a relatively modern invention compared to traditional cakes, quickly found its way into countless recipes, adding a unique nutty flavor and creamy texture that’s hard to resist. It’s a testament to the ingenuity of home bakers who constantly seek new and exciting ways to elevate classic desserts.
What makes this peanut butter pound cake so universally adored? It’s the perfect balance of sweet and savory, the melt-in-your-mouth texture, and the sheer simplicity of the recipe. It’s easy enough for a weeknight treat but impressive enough to serve at a special occasion. Plus, who can resist the allure of peanut butter? Whether you’re a lifelong peanut butter fanatic or simply looking for a new and exciting cake recipe, this peanut butter pound cake is guaranteed to become a new favorite. Get ready to experience a slice of pure peanut butter bliss!

Ingredients:
- 1 cup (2 sticks) unsalted butter, softened
- 3 cups granulated sugar
- 6 large eggs
- 1 teaspoon vanilla extract
- 1 cup creamy peanut butter
- 3 cups all-purpose flour
- 1/2 teaspoon baking powder
- 1/4 teaspoon baking soda
- 1/2 teaspoon salt
- 1 1/4 cups milk
Preparing the Batter:
- Cream the Butter and Sugar: In a large mixing bowl, or the bowl of your stand mixer, cream together the softened butter and granulated sugar until light and fluffy. This usually takes about 5-7 minutes on medium speed. Don’t rush this step! Properly creaming the butter and sugar incorporates air, which is crucial for a light and tender cake. You should see a noticeable change in color and texture.
- Add the Eggs: Beat in the eggs one at a time, making sure each egg is fully incorporated before adding the next. After adding all the eggs, beat for another minute or two until the mixture is smooth and well combined. This helps to emulsify the mixture and prevent curdling.
- Incorporate the Vanilla and Peanut Butter: Stir in the vanilla extract and creamy peanut butter until fully combined. Make sure there are no streaks of peanut butter remaining. The mixture should be smooth and homogenous.
- Combine Dry Ingredients: In a separate bowl, whisk together the all-purpose flour, baking powder, baking soda, and salt. Whisking ensures that the baking powder and baking soda are evenly distributed throughout the flour, which is essential for even rising.
- Alternate Adding Dry and Wet Ingredients: Gradually add the dry ingredients to the wet ingredients, alternating with the milk. Begin and end with the dry ingredients. Add about one-third of the dry ingredients to the butter mixture and mix until just combined. Then, add half of the milk and mix until just combined. Repeat with another third of the dry ingredients, the remaining milk, and finish with the last third of the dry ingredients. Be careful not to overmix! Overmixing develops the gluten in the flour, which can result in a tough cake. Mix only until the ingredients are just combined. A few streaks of flour are okay at this point.
Preparing the Pan and Baking:
- Preheat the Oven: Preheat your oven to 325°F (160°C). This lower temperature helps the cake bake evenly and prevents the edges from browning too quickly.
- Prepare the Pan: Grease and flour a 10-inch tube pan or bundt pan. Make sure to grease every nook and cranny of the pan to prevent the cake from sticking. You can also use baking spray with flour. Alternatively, you can grease the pan and then dust it with flour, tapping out any excess.
- Pour Batter into Pan: Pour the batter into the prepared pan, spreading it evenly.
- Bake the Cake: Bake for 65-75 minutes, or until a wooden skewer inserted into the center comes out clean or with a few moist crumbs attached. The baking time may vary depending on your oven, so start checking for doneness around 60 minutes.
- Cool the Cake: Let the cake cool in the pan for 10-15 minutes before inverting it onto a wire rack to cool completely. Cooling the cake in the pan allows it to firm up slightly, which makes it easier to remove without breaking.
Optional Glaze (Peanut Butter):
- 1/2 cup powdered sugar
- 2 tablespoons creamy peanut butter
- 2-4 tablespoons milk
- 1/4 teaspoon vanilla extract
- Whisk Ingredients: In a small bowl, whisk together the powdered sugar, peanut butter, vanilla extract, and 2 tablespoons of milk until smooth.
- Adjust Consistency: Add more milk, one tablespoon at a time, until the glaze reaches your desired consistency. It should be pourable but not too thin.
- Drizzle over Cake: Once the cake is completely cool, drizzle the glaze evenly over the top.
Optional Chocolate Ganache:
- 4 ounces semi-sweet chocolate, chopped
- 1/4 cup heavy cream
- Heat Cream: Heat the heavy cream in a small saucepan over medium heat until it just begins to simmer. Do not boil.
- Pour over Chocolate: Pour the hot cream over the chopped chocolate in a heatproof bowl.
- Let Sit: Let the mixture sit for 1 minute to allow the heat to melt the chocolate.
- Whisk Until Smooth: Whisk gently until the chocolate is completely melted and the ganache is smooth and glossy.
- Drizzle over Cake: Drizzle the ganache over the cooled cake, either on top of the peanut butter glaze or on its own.
Serving and Storage:
- Slice and Serve: Once the glaze (if using) has set, slice the cake and serve.
- Storage: Store leftover cake in an airtight container at room temperature for up to 3 days or in the refrigerator for up to a week. If storing in the refrigerator, allow the cake to come to room temperature before serving for the best flavor and texture.
Tips for Success:
- Use Room Temperature Ingredients: Using room temperature butter, eggs, and milk is crucial for creating a smooth and emulsified batter. Room temperature ingredients combine more easily and create a more even texture.
- Don’t Overmix: Overmixing the batter develops the gluten in the flour, which can result in a tough cake. Mix only until the ingredients are just combined.
- Properly Grease and Flour the Pan: This is essential for preventing the cake from sticking to the pan. Make sure to grease every nook and cranny of the pan.
- Check for Doneness: Use a wooden skewer to check for doneness. Insert the skewer into the center of the cake. If it comes out clean or with a few moist crumbs attached, the cake is done.
- Cool Completely Before Glazing: Make sure the cake is completely cool before glazing, otherwise the glaze will melt and run off.
- Adjust Sweetness: If you prefer a less sweet cake, you can reduce the amount of sugar slightly.
- Variations: You can add chocolate chips, chopped nuts, or other flavorings to the batter.
Troubleshooting:
- Cake is Dry: Make sure you are not overbaking the cake. Also, ensure you are using the correct amount of liquid in the recipe.
- Cake is Dense: This could be due to overmixing the batter or not creaming the butter and sugar properly.
- Cake Sticks to the Pan: Make sure you are greasing and flouring the pan thoroughly.
- Cake Sinks in the Middle: This could be due to underbaking the cake or opening the oven door too frequently during baking.
Conclusion:
So, there you have it! This peanut butter pound cake is truly something special, and I genuinely believe it deserves a spot in your regular baking rotation. Why? Because it’s ridiculously easy to make, boasts an intensely satisfying peanut butter flavor that’s both comforting and exciting, and has a texture that’s just divine – moist, dense, and utterly irresistible. It’s the kind of cake that disappears quickly, leaving everyone wanting more.
But the best part? It’s incredibly versatile! While it’s absolutely perfect enjoyed simply as is, with a cup of coffee or tea, there are so many ways to elevate this peanut butter masterpiece. For a truly decadent experience, try serving it warm with a scoop of vanilla ice cream and a drizzle of hot fudge sauce. The contrast of temperatures and flavors is simply heavenly. Or, if you’re feeling adventurous, you could even add a dollop of whipped cream and a sprinkle of chopped peanuts for extra texture and nutty goodness.
Looking for variations? I’ve got you covered! If you’re a chocolate lover, consider adding chocolate chips to the batter or drizzling the finished cake with melted chocolate. The combination of peanut butter and chocolate is a classic for a reason! For a more sophisticated twist, you could incorporate a swirl of raspberry jam into the batter before baking. The tartness of the raspberry beautifully complements the richness of the peanut butter. And if you’re feeling particularly creative, you could even try making a peanut butter frosting to slather on top. A simple buttercream frosting with a generous amount of peanut butter mixed in would be absolutely divine.
Don’t be intimidated by the thought of baking a pound cake. This recipe is incredibly forgiving and straightforward. Even if you’re a beginner baker, I’m confident that you can achieve amazing results. Just follow the instructions carefully, and you’ll be rewarded with a truly exceptional cake that will impress your friends and family. I promise, the aroma alone will have everyone drooling!
I’ve poured my heart and soul into perfecting this recipe, and I’m so excited for you to try it. I truly believe that this peanut butter pound cake will become a new favorite in your household. It’s the perfect treat for any occasion, whether it’s a casual weeknight dessert or a special celebration. It’s also a fantastic option for potlucks and bake sales – it’s always a crowd-pleaser!
So, what are you waiting for? Gather your ingredients, preheat your oven, and get ready to bake the most delicious peanut butter pound cake you’ve ever tasted! And most importantly, don’t forget to share your experience with me! I’d love to hear how it turned out, what variations you tried, and what your family and friends thought. Leave a comment below, tag me on social media, or send me an email – I can’t wait to see your creations! Happy baking!
I am confident that you will enjoy this peanut butter pound cake recipe. It is a must-try for any peanut butter lover!
Peanut Butter Pound Cake: The Ultimate Recipe Guide
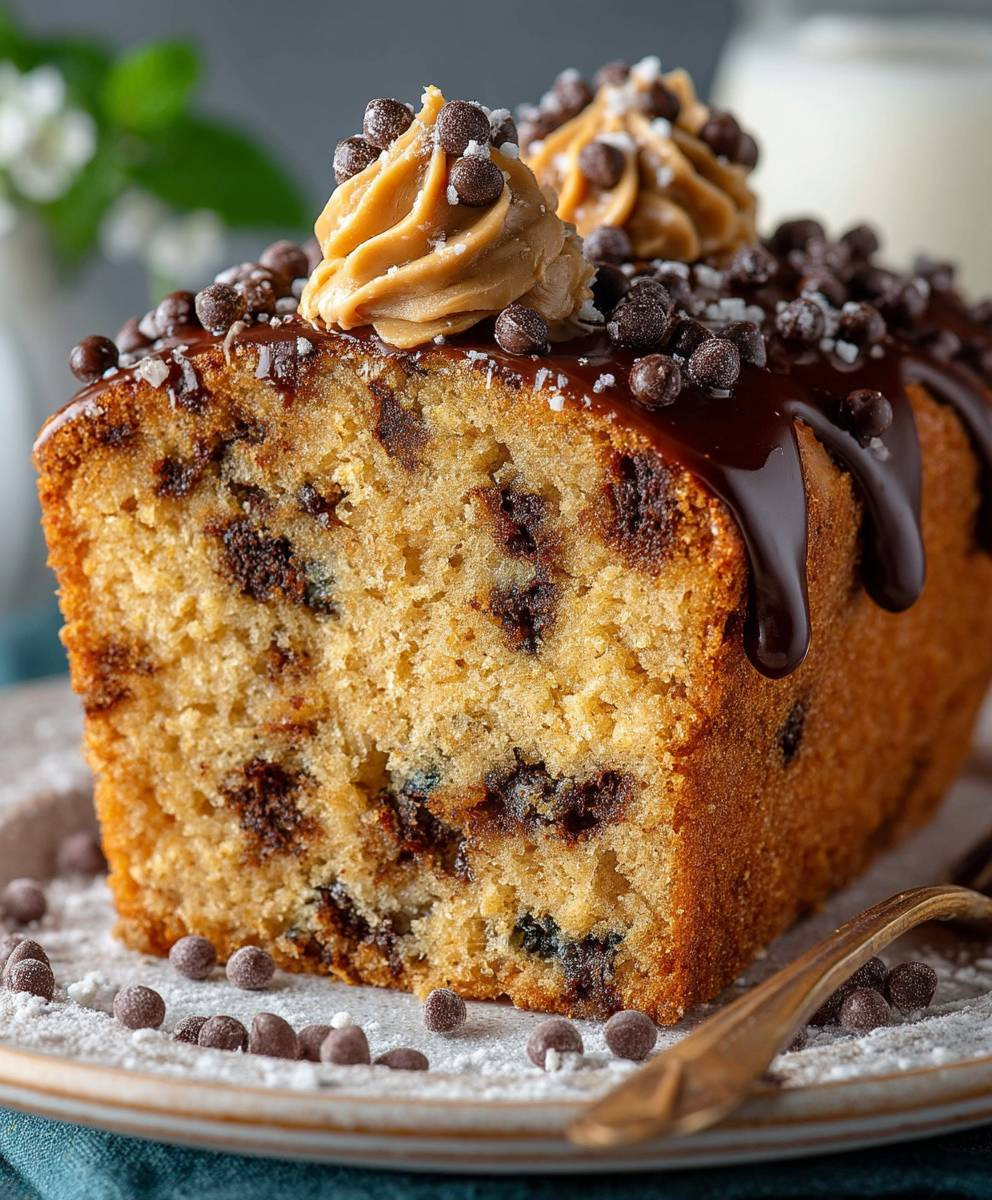
A moist and delicious peanut butter tube cake, perfect for any occasion. Features a tender crumb and rich peanut butter flavor, with optional peanut butter glaze and chocolate ganache.
Ingredients
Instructions
Recipe Notes
- Use room temperature ingredients for best results.
- Don’t overmix the batter.
- Grease and flour the pan thoroughly.
- Check for doneness with a wooden skewer.
- Cool completely before glazing.
- Adjust sweetness to your preference.
- Variations: Add chocolate chips, chopped nuts, or other flavorings.
Leave a Comment