
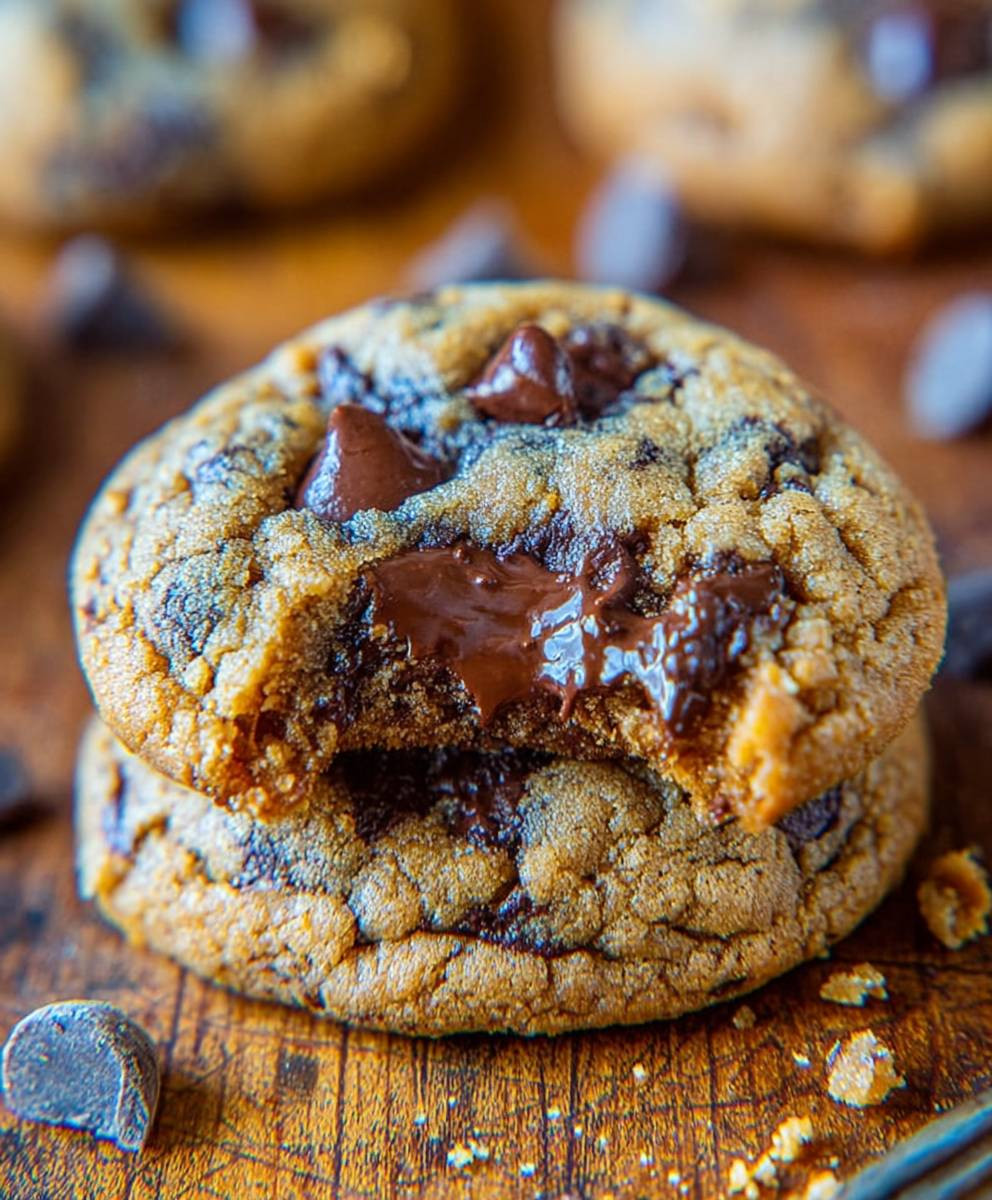
Peanut Butter Chocolate Chip Cookies: Is there a more iconic and universally loved treat? I think not! Imagine sinking your teeth into a warm, chewy cookie, the rich peanut butter flavor dancing on your tongue, perfectly complemented by the sweet bursts of melting chocolate chips. It’s pure bliss, isn’t it?
While the exact origins are debated, the combination of peanut butter and chocolate has been a winning one in American baking for decades. Peanut butter cookies themselves gained popularity in the early 20th century, and the addition of chocolate chips was a stroke of genius that elevated them to legendary status. It’s a testament to the simple pleasures in life, a comforting reminder of childhood memories and homemade goodness.
What makes Peanut Butter Chocolate Chip Cookies so irresistible? It’s the perfect balance of flavors and textures. The slightly salty, nutty peanut butter provides a delightful contrast to the sweetness of the chocolate. The soft, chewy interior and slightly crisp edges create a satisfying mouthfeel that keeps you coming back for more. Plus, they are incredibly easy to make, requiring minimal ingredients and effort. Whether you’re baking for a crowd, a special occasion, or simply craving a sweet treat, these cookies are always a guaranteed crowd-pleaser. So, let’s get baking and create some cookie magic!

Ingredients:
- 1 cup (2 sticks) unsalted butter, softened
- 1 cup granulated sugar
- 1 cup packed brown sugar
- 2 large eggs
- 1 teaspoon vanilla extract
- 1 cup creamy peanut butter
- 2 1/2 cups all-purpose flour
- 1 teaspoon baking soda
- 1 teaspoon baking powder
- 1/2 teaspoon salt
- 2 cups chocolate chips (milk chocolate, semi-sweet, or dark chocolate – your choice!)
Preparing the Dough:
- Cream the Butter and Sugars: In a large bowl (or the bowl of your stand mixer), cream together the softened butter, granulated sugar, and brown sugar until light and fluffy. This usually takes about 3-5 minutes. Don’t rush this step! Properly creaming the butter and sugar incorporates air, which helps create a tender cookie. I like to use a stand mixer with the paddle attachment, but a hand mixer works just as well. Just make sure your butter is truly softened, but not melted.
- Add the Eggs and Vanilla: Beat in the eggs one at a time, mixing well after each addition. Then, stir in the vanilla extract. Make sure to scrape down the sides of the bowl occasionally to ensure everything is evenly incorporated.
- Incorporate the Peanut Butter: Add the creamy peanut butter and mix until well combined. The mixture will be a bit thick at this point, but that’s perfectly normal. I prefer creamy peanut butter for a smoother texture, but you can use chunky peanut butter if you like a little extra crunch in your cookies.
- Combine Dry Ingredients: In a separate medium bowl, whisk together the all-purpose flour, baking soda, baking powder, and salt. Whisking ensures that the baking soda and baking powder are evenly distributed throughout the flour, which is crucial for proper leavening.
- Gradually Add Dry Ingredients to Wet Ingredients: Gradually add the dry ingredients to the wet ingredients, mixing on low speed until just combined. Be careful not to overmix! Overmixing can develop the gluten in the flour, resulting in tough cookies. Mix until you no longer see streaks of flour.
- Fold in the Chocolate Chips: Gently fold in the chocolate chips until they are evenly distributed throughout the dough. I like to use a rubber spatula for this step to avoid overmixing. You can use any type of chocolate chips you prefer – milk chocolate for a sweeter cookie, semi-sweet for a classic flavor, or dark chocolate for a richer, more intense chocolate experience. You can even use a combination of different types of chocolate chips!
- Chill the Dough (Optional, but Recommended): Cover the bowl with plastic wrap and chill the dough in the refrigerator for at least 30 minutes, or up to 2 hours. Chilling the dough helps to prevent the cookies from spreading too much during baking and also allows the flavors to meld together. While this step is optional, I highly recommend it for the best results. If you’re short on time, you can skip this step, but your cookies might be a little thinner.
Baking the Cookies:
- Preheat the Oven: Preheat your oven to 375°F (190°C). Make sure your oven rack is positioned in the center of the oven for even baking.
- Prepare Baking Sheets: Line baking sheets with parchment paper or silicone baking mats. This will prevent the cookies from sticking and make cleanup a breeze. I always prefer parchment paper for easy removal.
- Scoop the Dough: Use a cookie scoop or spoon to drop rounded tablespoons of dough onto the prepared baking sheets, leaving about 2 inches between each cookie. I use a medium-sized cookie scoop to ensure that all the cookies are the same size, which helps them bake evenly.
- Optional: Add a Sprinkle of Sea Salt: For an extra touch of flavor, you can sprinkle a tiny bit of sea salt on top of each cookie before baking. The salt enhances the sweetness of the cookie and creates a delicious sweet-and-salty combination.
- Bake the Cookies: Bake for 9-11 minutes, or until the edges are golden brown and the centers are still slightly soft. The baking time will vary depending on your oven, so keep a close eye on the cookies. Don’t overbake them, or they will be dry and crumbly.
- Cool the Cookies: Remove the baking sheets from the oven and let the cookies cool on the baking sheets for a few minutes before transferring them to a wire rack to cool completely. This allows the cookies to firm up a bit and prevents them from breaking when you move them.
Tips and Variations:
- For Chewier Cookies: Use more brown sugar than granulated sugar. Brown sugar contains molasses, which adds moisture and chewiness to the cookies.
- For Crispier Cookies: Use more granulated sugar than brown sugar. Granulated sugar helps the cookies spread and crisp up.
- Add-Ins: Get creative with your add-ins! You can add chopped nuts (such as peanuts, walnuts, or pecans), pretzels, M&Ms, or even a swirl of Nutella.
- Peanut Butter Swirl: For a peanut butter swirl, reserve a small amount of peanut butter and drizzle it over the tops of the cookies before baking. Use a toothpick or knife to swirl the peanut butter into the dough.
- Chocolate Drizzle: Once the cookies are cooled, you can drizzle them with melted chocolate for an extra touch of decadence.
- Storage: Store the cookies in an airtight container at room temperature for up to 3 days. You can also freeze the cookies for up to 2 months. To freeze, place the cooled cookies in a single layer on a baking sheet and freeze for about 30 minutes, or until solid. Then, transfer the frozen cookies to a freezer bag or container.
- High Altitude Adjustments: If you live at a high altitude, you may need to make some adjustments to the recipe. Try reducing the amount of baking powder by 1/4 teaspoon and adding 1-2 tablespoons of flour. You may also need to increase the baking time slightly.
- Gluten-Free Option: To make these cookies gluten-free, substitute the all-purpose flour with a gluten-free all-purpose flour blend. Make sure the blend contains xanthan gum, which helps to bind the ingredients together.
Troubleshooting:
Why are my cookies flat?
There are several reasons why your cookies might be flat. One common reason is that the butter was too soft or melted. Make sure your butter is softened, but not melted. Another reason could be that you overmixed the dough. Overmixing develops the gluten in the flour, which can cause the cookies to spread. Finally, your oven temperature might be too low. Make sure your oven is properly preheated to 375°F (190°C).
Why are my cookies dry?
Overbaking is the most common cause of dry cookies. Be sure to bake the cookies for only 9-11 minutes, or until the edges are golden brown and the centers are still slightly soft. You can also try adding a tablespoon or two of milk to the dough to add more moisture.
Why are my cookies not spreading?
If your cookies are not spreading, it could be because you used too much flour or not enough butter or sugar. Make sure you are measuring the ingredients accurately. You can also try flattening the dough slightly with the palm of your hand before baking.
Why are my cookies burning on the bottom?
If your cookies are burning on the bottom, it could be because your oven rack is too low. Make sure your oven rack is positioned in the center of the oven. You can also try using a double baking sheet to insulate the cookies from the heat.
Can I make these cookies without eggs?
Yes, you can make these cookies without eggs. You can substitute each egg with 1/4 cup of unsweetened applesauce or mashed banana. Keep in mind that the texture of the cookies will be slightly different.
Can I use a different type of nut butter?
Yes, you can use a different type of nut butter, such as almond butter or cashew butter. The flavor of the cookies will be slightly different, but they will still be delicious.
Can I make these cookies ahead of time?
Yes, you can make the dough ahead of time and store it in the refrigerator for up to 2 days. You can also freeze the dough for up to 2 months. When you’re ready to bake the cookies, simply thaw the dough in the refrigerator overnight and then bake as directed.
Conclusion:
And there you have it! These Peanut Butter Chocolate Chip Cookies are more than just a dessert; they’re a warm hug on a plate, a nostalgic trip to childhood, and a guaranteed crowd-pleaser all rolled into one delicious bite. I truly believe this recipe is a must-try for anyone who loves the classic combination of peanut butter and chocolate, and honestly, who doesn’t?
What makes these cookies so special? It’s the perfect balance of textures – the slightly crisp edges giving way to a soft, chewy center, punctuated by bursts of melty chocolate chips and that unmistakable peanut butter flavor. The recipe is also incredibly forgiving, making it perfect for both seasoned bakers and kitchen novices alike. You really can’t go wrong!
But the best part? The possibilities are endless! While these cookies are absolutely divine on their own, fresh from the oven with a cold glass of milk, there are so many ways to elevate them even further.
Serving Suggestions & Variations:
* Ice Cream Sandwich Extravaganza: Use these cookies to sandwich your favorite ice cream flavor. Vanilla bean, chocolate, or even peanut butter cup ice cream would be incredible!
* Cookie Crumble Topping: Crumble a few cookies over yogurt, oatmeal, or even a bowl of ice cream for an extra dose of peanut butter chocolate goodness.
* Drizzle Delight: Drizzle melted chocolate or peanut butter over the cooled cookies for a beautiful and decadent touch.
* Nutty Additions: Add chopped peanuts, walnuts, or pecans to the dough for extra crunch and flavor.
* Spice it Up: A pinch of cinnamon or a dash of cayenne pepper can add a surprising and delightful twist to the flavor profile.
* Pretzel Power: Fold in some crushed pretzels for a salty-sweet sensation that will leave you wanting more.
* Dark Chocolate Dream: Substitute milk chocolate chips with dark chocolate chips for a richer, more intense chocolate experience.
* White Chocolate Wonder: White chocolate chips offer a sweeter, creamier contrast to the peanut butter.
* Espresso Enhancement: Add a teaspoon of instant espresso powder to the dough for a subtle coffee flavor that complements the chocolate and peanut butter beautifully.
I’m confident that once you try this recipe for Peanut Butter Chocolate Chip Cookies, it will become a staple in your baking repertoire. It’s the perfect treat for any occasion, from a simple weeknight dessert to a special celebration.
So, what are you waiting for? Preheat your oven, gather your ingredients, and get ready to bake up a batch of these irresistible cookies. I promise you won’t regret it!
And most importantly, I’d love to hear about your experience! Did you try any of the variations? What did you think of the recipe? Share your photos, comments, and baking adventures in the comments section below. I can’t wait to see what you create! Happy baking!
Peanut Butter Chocolate Chip Cookies: The Ultimate Recipe
Soft and chewy peanut butter cookies loaded with chocolate chips. A classic combination that's always a crowd-pleaser!
Ingredients
Instructions
Recipe Notes
- For Chewier Cookies: Use more brown sugar than granulated sugar.
- For Crispier Cookies: Use more granulated sugar than brown sugar.
- Add-Ins: Get creative with your add-ins! You can add chopped nuts (such as peanuts, walnuts, or pecans), pretzels, M&Ms, or even a swirl of Nutella.
- Peanut Butter Swirl: For a peanut butter swirl, reserve a small amount of peanut butter and drizzle it over the tops of the cookies before baking. Use a toothpick or knife to swirl the peanut butter into the dough.
- Chocolate Drizzle: Once the cookies are cooled, you can drizzle them with melted chocolate for an extra touch of decadence.
- Storage: Store the cookies in an airtight container at room temperature for up to 3 days. You can also freeze the cookies for up to 2 months. To freeze, place the cooled cookies in a single layer on a baking sheet and freeze for about 30 minutes, or until solid. Then, transfer the frozen cookies to a freezer bag or container.
- High Altitude Adjustments: If you live at a high altitude, you may need to make some adjustments to the recipe. Try reducing the amount of baking powder by 1/4 teaspoon and adding 1-2 tablespoons of flour. You may also need to increase the baking time slightly.
- Gluten-Free Option: To make these cookies gluten-free, substitute the all-purpose flour with a gluten-free all-purpose flour blend. Make sure the blend contains xanthan gum, which helps to bind the ingredients together.
Leave a Comment