
Oven Cooked Beef Brisket: the mere mention of it conjures images of tender, smoky, melt-in-your-mouth goodness, doesn’t it? Forget spending hours tending a smoker; I’m going to show you how to achieve brisket perfection right in your own oven! Imagine pulling apart succulent, flavorful beef that rivals any barbecue joint, all without stepping foot outside your kitchen.
Brisket, a cut from the lower chest of the cow, has a rich history, particularly in Jewish and Texan cuisine. For centuries, it has been a staple in celebratory meals, slow-cooked to tenderize its naturally tough fibers. In Texas, it’s practically a religion, with pitmasters dedicating their lives to perfecting the art of smoking it. But what if you don’t have a smoker, or the time to dedicate to a 12-hour smoking session? That’s where this Oven Cooked Beef Brisket recipe comes in!
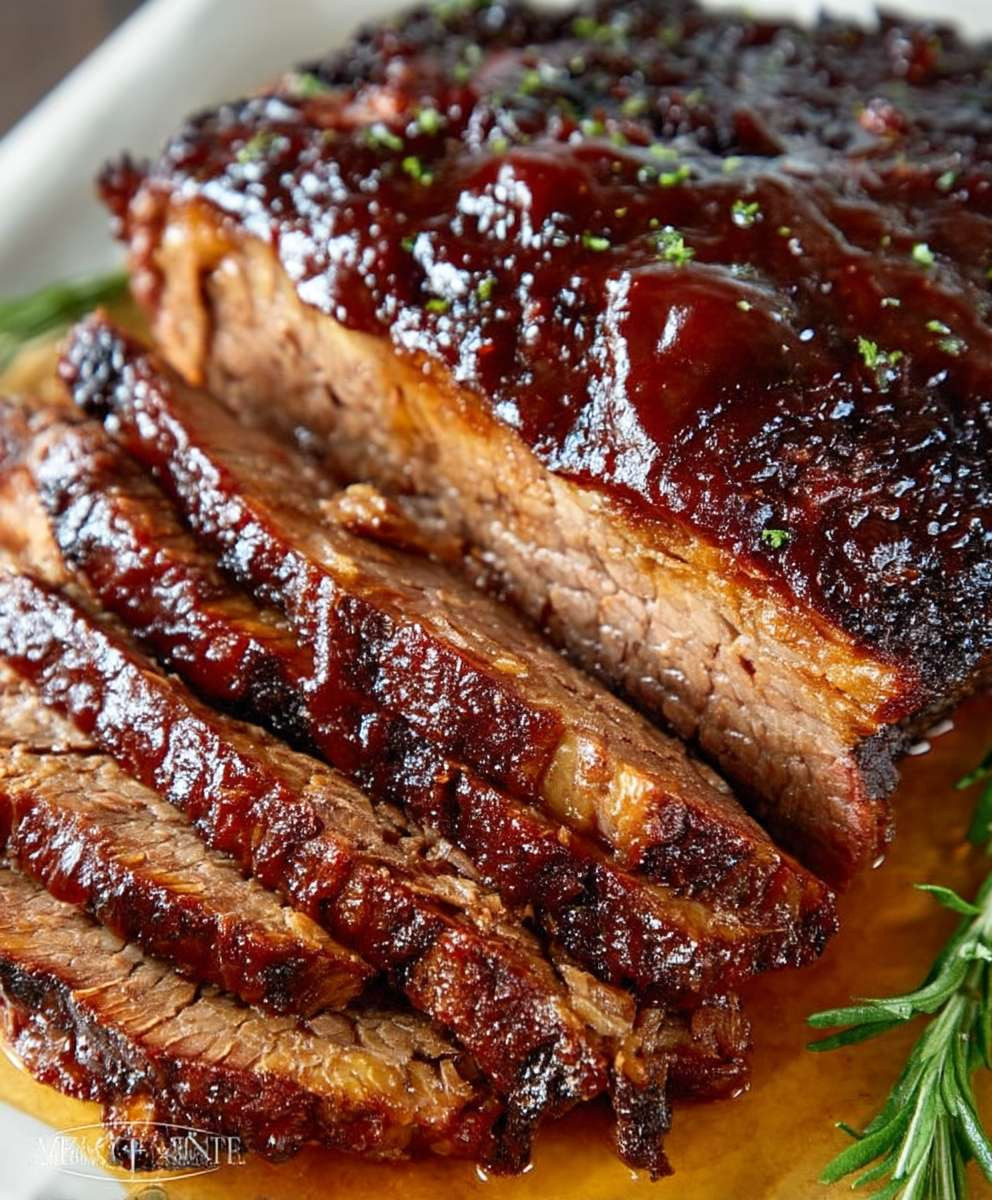
People adore brisket for its deeply savory flavor and incredibly tender texture when cooked properly. The long, slow cooking process breaks down the connective tissue, resulting in a juicy, pull-apart texture that is simply irresistible. Plus, it’s incredibly versatile! Serve it sliced on sandwiches, shredded in tacos, or simply enjoyed on its own with your favorite sides. This oven-baked version offers all the deliciousness with significantly less effort, making it perfect for a weekend family dinner or a special occasion. Get ready to impress your friends and family with this surprisingly simple and utterly delicious recipe!

Ingredients:
- For the Brisket:
- 1 (12-14 pound) beef brisket, point cut (also known as the deckle)
- 2 tablespoons kosher salt
- 1 tablespoon freshly ground black pepper
- 1 tablespoon granulated garlic
- 1 tablespoon onion powder
- 1 teaspoon smoked paprika
- 1/2 teaspoon cayenne pepper (optional, for a little kick)
- For the Braising Liquid:
- 2 large yellow onions, roughly chopped
- 4 carrots, peeled and roughly chopped
- 4 celery stalks, roughly chopped
- 6 cloves garlic, smashed
- 2 tablespoons tomato paste
- 1 (750 ml) bottle dry red wine (Cabernet Sauvignon or Merlot work well)
- 4 cups beef broth
- 2 cups water
- 4 sprigs fresh thyme
- 2 bay leaves
- 1 tablespoon Worcestershire sauce
- Optional for Serving:
- Fresh parsley, chopped (for garnish)
- Mashed potatoes or creamy polenta (for serving)
- Horseradish sauce (for serving)
Preparing the Brisket:
Okay, let’s get started! First things first, we need to prep that beautiful brisket. This is where we build the foundation of flavor, so don’t skip any steps!
- Trim the Fat (Carefully!): This is probably the most important step. Brisket has a thick layer of fat on one side, and we need to trim it down. You want to leave about 1/4 inch of fat. Too much fat, and it won’t render properly, leaving you with a greasy brisket. Too little, and the brisket will dry out. Use a sharp knife (a boning knife is ideal) and carefully trim away the excess fat. I like to score the remaining fat cap in a crosshatch pattern; this helps the fat render and allows the seasoning to penetrate. Be careful not to cut into the meat itself!
- Make the Dry Rub: In a small bowl, combine the kosher salt, black pepper, granulated garlic, onion powder, smoked paprika, and cayenne pepper (if using). Mix it all together until it’s evenly distributed. This is our flavor bomb!
- Season the Brisket Generously: Now, we’re going to generously coat the brisket with the dry rub. Make sure you get every nook and cranny! Rub it in really well, pressing it into the meat. Don’t be shy! We want a nice, even coating. Pay special attention to the sides of the brisket.
- Let it Rest (Important!): Once the brisket is seasoned, wrap it tightly in plastic wrap and refrigerate it for at least 4 hours, or preferably overnight. This allows the salt to penetrate the meat and tenderize it. It also gives the flavors of the rub time to meld together. Trust me, this step makes a huge difference!
Preparing the Braising Liquid:
While the brisket is resting, let’s get the braising liquid ready. This is what’s going to keep the brisket moist and infuse it with even more flavor.
- Chop the Vegetables: Roughly chop the onions, carrots, and celery. We’re not going for perfection here; they’re just going to add flavor to the braising liquid. Smash the garlic cloves with the side of your knife. This releases their flavor without having to mince them.
- Sauté the Vegetables: In a large Dutch oven or oven-safe pot (at least 6 quarts), heat a tablespoon of olive oil over medium heat. Add the chopped onions, carrots, and celery and cook until they’re softened and slightly caramelized, about 8-10 minutes. Stir occasionally to prevent them from burning. We want them to develop some color; this adds depth of flavor to the braising liquid.
- Add the Garlic and Tomato Paste: Add the smashed garlic cloves and tomato paste to the pot and cook for another 2-3 minutes, stirring constantly. The tomato paste will caramelize and deepen in flavor, adding richness to the braising liquid. Be careful not to burn the garlic!
- Deglaze with Red Wine: Pour in the red wine and bring it to a simmer, scraping up any browned bits from the bottom of the pot. These browned bits are called fond, and they’re packed with flavor! Let the wine simmer for 5-7 minutes to reduce slightly and allow the alcohol to evaporate.
- Add the Remaining Ingredients: Add the beef broth, water, thyme sprigs, bay leaves, and Worcestershire sauce to the pot. Bring the liquid to a simmer.
Cooking the Brisket:
Now for the main event! It’s time to cook that brisket low and slow until it’s fall-apart tender.
- Sear the Brisket (Optional, but Recommended): Remove the brisket from the refrigerator and pat it dry with paper towels. This will help it sear better. Heat a tablespoon of olive oil in a large skillet over medium-high heat. Sear the brisket on all sides until it’s nicely browned, about 3-4 minutes per side. This adds another layer of flavor and helps to create a beautiful crust. Be careful not to overcrowd the skillet; you may need to do this in batches.
- Place the Brisket in the Braising Liquid: Carefully place the seared brisket into the Dutch oven with the braising liquid. Make sure the brisket is mostly submerged in the liquid. If necessary, add a little more beef broth or water to cover it.
- Braise in the Oven: Cover the Dutch oven with a tight-fitting lid and transfer it to the preheated oven. Braise the brisket for 5-6 hours, or until it’s fork-tender. The exact cooking time will depend on the size and thickness of the brisket, as well as your oven. Check the brisket after 4 hours and then every hour after that. You want it to be easily pierced with a fork.
- Check for Tenderness: To check for tenderness, insert a fork into the thickest part of the brisket. It should slide in and out easily with very little resistance. If it’s still tough, continue braising for another hour and check again.
Resting and Slicing:
Patience is key! Don’t skip this step. Resting the brisket allows the juices to redistribute, resulting in a more tender and flavorful final product.
- Rest the Brisket: Once the brisket is fork-tender, remove the Dutch oven from the oven and let the brisket rest in the braising liquid for at least 30 minutes, or up to 1 hour. This is crucial for allowing the juices to redistribute throughout the meat. Don’t be tempted to skip this step!
- Remove the Brisket from the Liquid: Carefully remove the brisket from the braising liquid and place it on a cutting board. Strain the braising liquid through a fine-mesh sieve into a saucepan. Discard the solids.
- Skim the Fat (Optional): If desired, skim the fat from the surface of the braising liquid. You can use a spoon or a fat separator.
- Reduce the Braising Liquid: Bring the braising liquid to a simmer over medium heat and cook until it’s reduced by about half, or until it’s thickened to your desired consistency. This will concentrate the flavors and create a delicious sauce.
- Slice Against the Grain: This is the most important part of slicing brisket! Identify the grain of the meat (the direction the muscle fibers are running). Use a sharp knife (a slicing knife is ideal) to slice the brisket against the grain into thin slices, about 1/4 inch thick. Slicing against the grain shortens the muscle fibers, making the brisket more tender and easier to chew.
Serving:
Finally, the moment we’ve all been waiting for! It’s time to serve that delicious, tender brisket.
- Serve with Braising Sauce: Arrange the sliced brisket on a platter and spoon the reduced braising sauce over the top.
- Garnish (Optional): Garnish with fresh chopped parsley, if desired.
- Serve with Sides: Serve the brisket with your favorite sides, such as mashed potatoes, creamy polenta
Conclusion:
And there you have it! This Oven Cooked Beef Brisket recipe is truly a game-changer, transforming a traditionally challenging cut of meat into a tender, flavorful masterpiece right in your own kitchen. Forget spending hours tending a smoker; this method delivers incredible results with minimal effort, making it a must-try for anyone craving that authentic brisket experience without the fuss.
Why is this recipe a must-try? Because it’s accessible, reliable, and utterly delicious. The simple steps and readily available ingredients mean even novice cooks can achieve brisket perfection. The long, slow cooking process ensures the beef becomes incredibly tender, practically melting in your mouth. And the rich, smoky flavor, achieved through the combination of spices and the oven’s consistent heat, will have everyone thinking you’re a seasoned pitmaster. Trust me, the aroma alone is enough to make your mouth water!
But the best part? The versatility! While this recipe is fantastic as is, there are so many ways to customize it to your liking.
Serving Suggestions and Variations:
* Classic Brisket Sandwiches: Pile slices of this tender brisket high on toasted rolls with your favorite barbecue sauce, coleslaw, and maybe even some pickled onions for a tangy kick. This is a guaranteed crowd-pleaser!
* Brisket Tacos: Shred the brisket and use it as a filling for tacos. Top with your favorite taco fixings like salsa, guacamole, sour cream, and cilantro. A fantastic way to add a smoky, savory twist to taco night.
* Brisket Chili: Dice up leftover brisket and add it to your favorite chili recipe for an extra layer of flavor and richness. It’s a hearty and satisfying way to use up any leftovers (if you have any!).
* Brisket Hash: Combine diced brisket with potatoes, onions, and peppers for a delicious and comforting breakfast hash. Top with a fried egg for the ultimate morning indulgence.
* Spice it Up: Experiment with different spice rubs to create your own signature brisket flavor. Try adding chili powder, cumin, or smoked paprika for a spicier kick. Or, for a sweeter flavor, incorporate brown sugar or maple syrup into the rub.
* Sauce it Up: While the brisket is delicious on its own, feel free to experiment with different barbecue sauces. From tangy vinegar-based sauces to sweet and smoky sauces, the possibilities are endless. You can even brush the brisket with sauce during the last hour of cooking for an extra layer of flavor.I truly believe this Oven Cooked Beef Brisket recipe will become a staple in your kitchen. It’s perfect for weekend gatherings, family dinners, or even just a special treat for yourself. The satisfaction of pulling a perfectly cooked brisket out of the oven is unmatched.
So, what are you waiting for? Gather your ingredients, preheat your oven, and get ready to experience brisket bliss. I’m confident you’ll be amazed by the results.
And most importantly, I want to hear about your experience! Did you try the recipe? Did you make any variations? What did you think? Share your photos and comments below. I can’t wait to see your culinary creations and hear your feedback. Happy cooking! Let me know if you have any questions, and I’ll do my best to help. Enjoy!
Oven Cooked Beef Brisket: The Ultimate Guide to Tender Perfection
Tender beef brisket, braised in red wine and vegetable sauce until fall-apart delicious. Perfect for special occasions or family dinners.
By: ShareyCategory: DinnerDifficulty: EasyCuisine: AmericanYield: 12-16 servingsDietary: VegetarianIngredients
Instructions
Recipe Notes
- Trimming the fat is crucial for a non-greasy brisket. Leave about 1/4 inch of fat.
- Resting the brisket is essential for tender, juicy meat.
- Slicing against the grain is key for tenderness.
- Adjust braising time based on the size and thickness of the brisket.
- For a richer flavor, use homemade beef broth.
Frequently Asked Questions
→ How do I ensure the bread stays moist?Use fresh, ripe ingredients and avoid overmixing the batter. Store in an airtight container.→ Can I substitute ingredients?Yes, you can substitute similar ingredients while maintaining the basic ratios for best results.→ How long does this bread keep?Store tightly wrapped at room temperature for 2-3 days, or refrigerate for up to a week.→ What if I don't have all the spices?You can adjust spices to taste or substitute with similar warming spices.→ Can I freeze this bread?Yes, wrap individual slices and freeze for up to 3 months. Thaw at room temperature before serving.
Leave a Comment