
Oven Baked Cheesy Tacos Crispy Loaded Recipe — if those words alone don’t instantly make your mouth water, prepare to be utterly captivated! Today, I am absolutely thrilled to share a culinary revelation that promises to transform your taco nights forever. Forget the usual messy, assemble-as-you-eat routine; we’re talking about a genius method that delivers an unparalleled symphony of textures and flavors straight from your oven.
A Glimpse into Taco Heritage and Why We Love It So Much
The humble taco, a staple of Mexican cuisine, boasts a rich history dating back centuries, evolving from a simple corn tortilla filled with fish or small pieces of meat into the globally beloved, incredibly versatile dish we cherish today. Tacos embody comfort, celebration, and endless customization, making them a universal favorite. What makes this particular rendition so special, you ask? It’s the ingenious combination of convenience and absolute deliciousness.
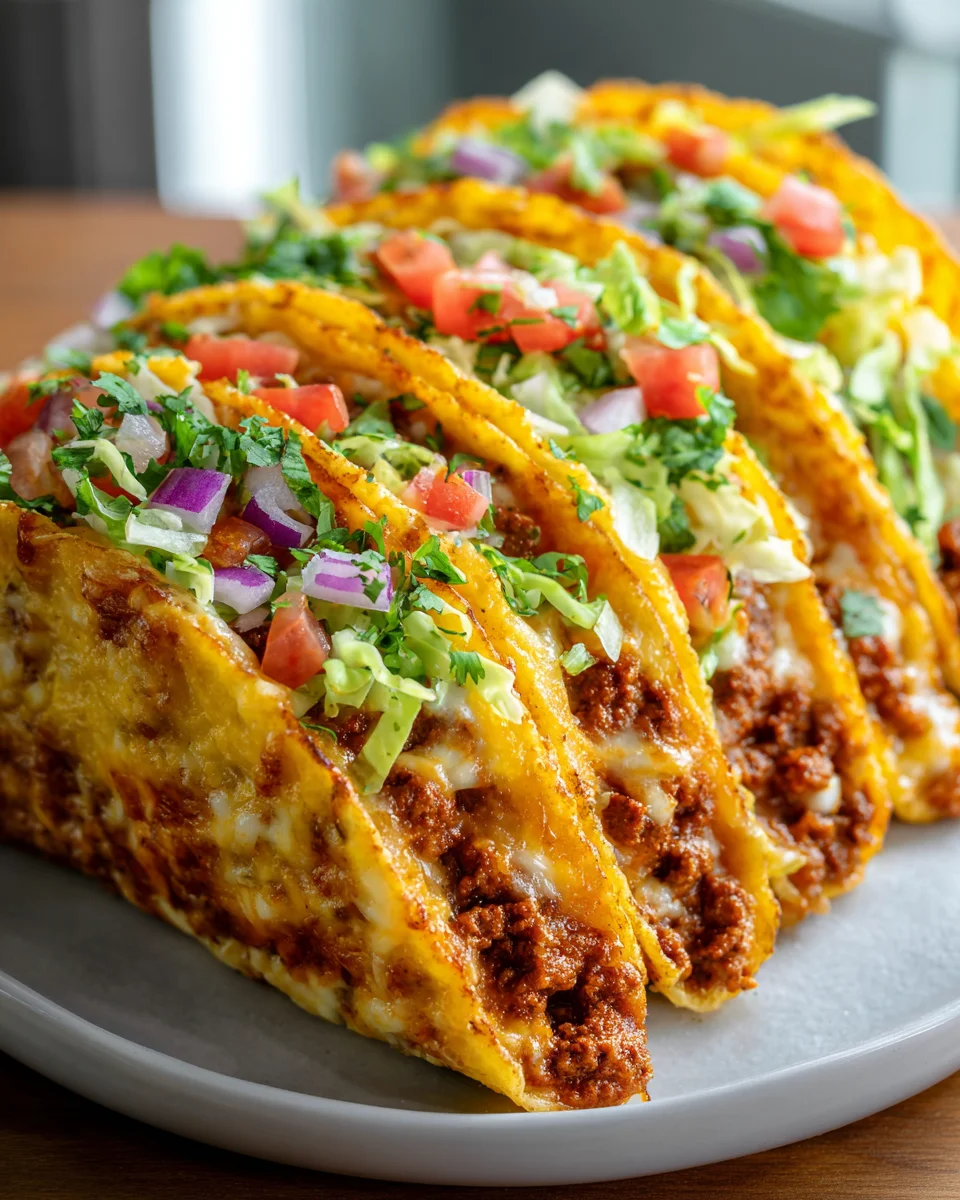
People adore tacos for their dynamic flavor profiles and satisfying textures, but my Oven Baked Cheesy Tacos Crispy Loaded Recipe takes this adoration to a whole new level. Imagine perfectly golden, crunchy taco shells, generously filled with seasoned ground meat or your favorite vegetarian alternative, and then lavishly blanketed in a molten, gooey layer of cheese. Baking them ensures every shell is uniformly crispy, every bit of cheese is perfectly melted, and the fillings are wonderfully warmed through, creating an experience that is both remarkably easy to prepare and incredibly satisfying to devour. Get ready for a weeknight hero or a party showstopper!

Ingredients:
- For the Seasoned Ground Beef Filling:
- 1.5 lbs lean ground beef (I prefer an 80/20 blend for the best flavor and texture, ensuring it’s not too dry once cooked)
- 1 large yellow onion, finely diced (about 1.5 cups)
- 3 cloves garlic, minced (freshly minced makes a huge difference!)
- 1 tablespoon olive oil (or a neutral oil like canola or vegetable oil)
- 1 packet (1 oz) taco seasoning mix (or make your own blend using the spices below)
- 2 teaspoons chili powder
- 1 teaspoon ground cumin
- 1 teaspoon smoked paprika (for that lovely smoky depth)
- 1/2 teaspoon dried oregano
- 1/4 teaspoon cayenne pepper (optional, for a little kick)
- 1 teaspoon salt (adjust to taste)
- 1/2 teaspoon black pepper (adjust to taste)
- 1/2 cup beef broth (low sodium is best so you can control the salt)
- 1/4 cup tomato paste (this really helps to thicken the sauce and add richness)
- 1/4 cup water (or more broth, for simmering)
- For the Tacos and Cheese:
- 18-24 corn or flour tortillas (6-inch size; I love a mix, but flour tortillas tend to get a bit crispier in the oven while corn offers that authentic texture)
- 2 cups shredded Monterey Jack cheese (melts beautifully and has a mild flavor)
- 1 cup shredded sharp cheddar cheese (for a bolder cheesy punch)
- 1/4 cup neutral oil (like canola or vegetable oil), for brushing the tortillas
- For Toppings (Get Creative!):
- Shredded lettuce (iceberg or romaine for crunch)
- Diced fresh tomatoes or pico de gallo
- Sour cream or Greek yogurt
- Salsa (your favorite kind!)
- Sliced jalapeños (fresh or pickled)
- Fresh cilantro, chopped
- Guacamole or diced avocado
- Hot sauce, for those who like extra heat!
Preparing the Hearty Ground Beef Filling:
- Sauté the Aromatics: First, let’s get our large skillet (preferably cast iron or a heavy-bottomed pan) heated over medium-high heat. Add 1 tablespoon of olive oil. Once shimmering, add your finely diced yellow onion. We want to cook this down until it’s beautifully softened and translucent, which usually takes about 5-7 minutes. Stir occasionally to prevent burning.
- Add the Ground Beef: Now, push the softened onions to one side of the skillet and add your 1.5 lbs of lean ground beef to the empty side. Break up the beef with a wooden spoon or spatula as it cooks. Your goal here is to brown the beef thoroughly on all sides, ensuring no pink remains. This step is crucial for developing deep flavor. This typically takes about 8-10 minutes.
- Drain the Excess Fat: Once the beef is fully browned, carefully tilt the skillet and drain off any excess grease. I usually use a spoon to hold the beef back while I pour the fat into a heat-safe container. This prevents your tacos from becoming greasy.
- Introduce the Garlic and Spices: Reduce the heat to medium. Add your minced garlic to the skillet and cook for just about 1 minute until it becomes fragrant. Be careful not to burn it, as burnt garlic can taste bitter. Immediately follow with the taco seasoning mix, chili powder, ground cumin, smoked paprika, dried oregano, cayenne pepper (if using), salt, and black pepper. Stir these spices vigorously into the beef and onion mixture, cooking for another 1-2 minutes. This brief cooking time for the spices helps to “bloom” them, releasing their full aromatic potential and deepening their flavor profile. This aromatic bloom is key to a truly flavorful filling!
- Simmer for Richness: Pour in the 1/2 cup of beef broth and add the 1/4 cup of tomato paste. Stir everything together until the tomato paste is fully incorporated and the sauce begins to thicken around the beef. If the mixture seems too dry, you can add 1/4 cup of water or additional broth. Bring the mixture to a gentle simmer, then reduce the heat to low, cover the skillet, and let it cook for at least 10-15 minutes. This simmering time allows all the flavors to meld together beautifully, creating a rich and robust filling that is perfect for our “Oven Baked Cheesy Tacos Crispy Loaded Recipe.” The sauce should reduce slightly and cling nicely to the beef.
- Taste and Adjust: Before proceeding, always give your filling a taste! Adjust the salt, pepper, or any other spices to your preference. If you like more heat, a pinch more cayenne or a dash of hot sauce can be added now. Set the finished beef filling aside.
Preparing the Tortillas for Optimal Crispiness:
This step is vital for achieving that desirable crispiness without them breaking when you fold them. We want them pliable but ready for a bake!
- Preheat Your Oven: Position an oven rack in the middle of your oven and preheat to 375°F (190°C). Prepare a large baking sheet (or two, depending on how many tacos you’re making) by lining it with parchment paper for easy cleanup and to prevent sticking.
- Brush and Soften Tortillas: Take your tortillas and one by one, lightly brush both sides with a neutral oil using a pastry brush. Don’t drench them, just a thin, even coat. This oil helps them get crispy in the oven. For corn tortillas, an optional but highly recommended step is to quickly warm them in a dry skillet over medium heat for about 15-20 seconds per side until they become pliable. This prevents them from cracking when you fold them. For flour tortillas, the oil brushing alone is usually sufficient to keep them flexible.
Assembling Your “Oven Baked Cheesy Tacos Crispy Loaded”:
- Set Up Your Assembly Line: Have your prepared beef filling, shredded Monterey Jack, and sharp cheddar cheeses, and your oiled tortillas all within easy reach. This makes the assembly process smooth and efficient.
- Fill the Tortillas: Lay an oiled tortilla flat on your work surface. Spoon about 2-3 tablespoons of the seasoned ground beef filling onto one half of the tortilla. Don’t overfill, as you need space to fold and contain the deliciousness!
- Layer on the Cheese: Generously sprinkle a mix of both Monterey Jack and sharp cheddar cheese over the beef filling. I usually aim for about 1-2 tablespoons of cheese per taco. The cheese acts as a delicious glue and will melt into a gooey, savory blanket once baked. This generous layer of cheese is what makes them truly “Cheesy Loaded”!
- Fold the Tacos: Carefully fold the empty half of the tortilla over the filling, creating a half-moon shape. Gently press down to seal the edges as much as possible, but don’t worry if a little filling escapes – that’s part of the rustic charm.
- Arrange on Baking Sheet: Place the folded tacos seam-side down on your prepared baking sheet. Arrange them closely together, but not overlapping, as this helps them stay upright and encourages even crisping. Repeat steps 10-12 until all your tortillas are filled and arranged on the baking sheets. If you have any remaining cheese, you can sprinkle a little extra over the tops of the folded tacos for an even cheesier crust!
Baking to Golden, Crispy Perfection:
- Bake Until Golden and Crispy: Transfer the baking sheet(s) to your preheated oven. Bake for 15-20 minutes, or until the tortillas are golden brown, visibly crispy, and the cheese is fully melted and bubbly. The exact timing can vary depending on your oven and whether you used corn or flour tortillas. Corn tortillas might take a little longer to achieve peak crispiness. Keep an eye on them! You want them to be golden, firm, and invitingly crunchy.
- Achieving the “Crispy Loaded” Texture: For extra crispiness, especially if you used flour tortillas, you might want to flip them halfway through the baking process (around the 10-minute mark) to ensure both sides get that lovely golden crunch. However, if your baking sheet is full, leaving them seam-side down usually works well enough to achieve a fantastic crispy bottom. The goal is that irresistible crunch with every bite, a hallmark of our “Oven Baked Cheesy Tacos Crispy Loaded Recipe.”
Serving Your Delicious “Oven Baked Cheesy Tacos Crispy Loaded”:
- Rest Briefly: Once baked to perfection, carefully remove the baking sheet from the oven. Let the tacos rest for 2-3 minutes directly on the baking sheet. This allows the cheese to set slightly and the tortillas to firm up a bit, making them easier to handle without falling apart.
- Top and Serve Immediately: Transfer the hot, crispy, and cheesy tacos to a serving platter. Now comes the fun part – loading them up with all your favorite fresh toppings! Piling on shredded lettuce, diced tomatoes, a dollop of sour cream, and a spoonful of fresh salsa truly completes the experience. Add some sliced jalapeños or a drizzle of hot sauce if you crave extra zest and heat. Serve them immediately while they are still warm and at their peak crispiness.
There you have it! A truly satisfying and incredibly flavorful batch of “Oven Baked Cheesy Tacos Crispy Loaded” that are perfect for a family dinner, game night, or any time you’re craving some serious taco goodness. Enjoy every single crispy, cheesy bite!
Conclusion:
Well, my friends, we’ve journeyed through the simple steps to create something truly magical, a dish that I genuinely believe will become a staple in your culinary repertoire. What we have here isn’t just another weeknight meal; it’s an experience, a celebration of flavor and texture that truly sets it apart. The beauty of this recipe lies in its sheer genius: taking humble ingredients and transforming them into something extraordinary with minimal fuss. I’m talking about those perfectly golden, delightfully crunchy taco shells, generously filled with a seasoned, savory concoction, all bound together with a luscious blanket of melted cheese. It’s the kind of meal that brings smiles to faces, sparks conversation, and satisfies even the most demanding appetites. The ease with which you can assemble these and then simply pop them in the oven to achieve that incredible crispiness and melty goodness is what makes this a must-try. You’re not just making tacos; you’re crafting an unforgettable feast that embodies comfort food at its very best. This specific method ensures every bite is bursting with flavor, delivering that much-loved crunch and gooey cheesiness without the mess or fuss of traditional frying. This is why I can confidently say that if you’re looking for an incredible dinner idea that impresses every single time, this Oven Baked Cheesy Tacos Crispy Loaded Recipe is absolutely it.
Serving Suggestions to Elevate Your Taco Night:
Once your irresistible tacos emerge from the oven, golden and fragrant, the real fun begins with the toppings! For me, a classic combination is always a winner: a dollop of cool sour cream or Greek yogurt, a generous spoonful of fresh pico de gallo, and a sprinkle of vibrant chopped cilantro. Don’t forget a squeeze of fresh lime juice over everything to really brighten those flavors. If you’re feeling adventurous, consider a homemade guacamole – creamy, rich, and utterly divine. For those who love a bit of heat, a drizzle of your favorite hot sauce is non-negotiable. On the side, traditional Mexican rice or perfectly seasoned refried beans make fantastic companions. Or, for a lighter touch, a simple corn and black bean salad adds freshness and a delightful pop of color. And, of course, no taco night is complete without something refreshing to drink, whether it’s a frosty margarita, a cold Mexican soda, or a pitcher of Agua Fresca.
Endless Variations to Spark Your Creativity:
One of the aspects I adore most about this recipe is its incredible versatility. While the core idea of crispy, cheesy, loaded tacos baked to perfection remains, there are countless ways to customize it to your personal taste or dietary needs.
For the Protein Powerhouses:
- Chicken: Shredded rotisserie chicken or seasoned grilled chicken works wonderfully.
- Fish: Flaky baked or pan-seared fish can be a delightful, lighter alternative.
- Vegetarian & Vegan: Black beans, pinto beans, or lentils seasoned with taco spices make a robust and satisfying filling. You can also roast some sweet potatoes or bell peppers to add to the mix. For vegan options, simply swap out the dairy cheese for your favorite plant-based shreds and use a vegan sour cream alternative.
Cheese, Glorious Cheese: Experiment with different cheese blends! While a classic cheddar-jack mix is always a winner, consider Monterey Jack for extra meltiness, a spicy habanero cheddar for a kick, or even a crumbling of cotija cheese for an authentic touch.
Spice It Up: Adjust the spice level of your ground meat or vegetarian filling. Add extra chili powder, a pinch of cayenne, or some diced jalapeños for more heat. Conversely, if you prefer milder flavors, reduce the amount of spicy seasonings.
Topping Innovations: Beyond the classics, think about grilled corn salsa, pickled red onions, avocado crema, or even a sprinkle of crumbled feta cheese. Each addition can completely transform the flavor profile and make every taco night feel fresh and new.
This recipe truly empowers you to be creative in the kitchen while guaranteeing a delicious outcome. So, what are you waiting for? I implore you to roll up your sleeves, gather your ingredients, and give this incredible Oven Baked Cheesy Tacos Crispy Loaded Recipe a try this week. I promise you won’t regret it. The joy of pulling that sheet pan of golden, bubbling tacos from the oven is unparalleled, and the delicious aroma alone will have everyone rushing to the table. Once you’ve experienced the sheer delight of these crispy, cheesy masterpieces, I would absolutely love to hear about it! Please, share your experience, your favorite toppings, and any brilliant variations you came up with in the comments. Your culinary adventures inspire me, and I can’t wait to see how you make this recipe your own. Happy cooking, and even happier eating!
Oven Baked Cheesy Tacos: Crispy, Loaded & Irresistibly Delicious!
Transform your taco nights forever with this easy Oven Baked Cheesy Tacos recipe! Forget the usual messy, assemble-as-you-eat routine; this genius method delivers an unparalleled symphony of textures and flavors straight from your oven. Imagine golden, crunchy taco shells generously filled with seasoned ground beef and lavishly blanketed in molten, gooey cheese. Baking them ensures every shell is uniformly crispy, every bit of cheese is perfectly melted, and the fillings are wonderfully warmed through, creating an experience that is both remarkably easy to prepare and incredibly satisfying to devour. Get ready for a weeknight hero or a party showstopper!
Ingredients
Instructions
Important Information
Nutrition Facts (Per Serving)
It is important to consider this information as approximate and not to use it as definitive health advice.
Allergy Information
Please check ingredients for potential allergens and consult a health professional if in doubt.
Leave a Comment