
Oreo Dirt Cake: Prepare to unearth a dessert that’s as delightful to make as it is to devour! Imagine layers of creamy, dreamy goodness, punctuated by the unmistakable crunch of Oreo cookies, all nestled together to resemble a playful garden scene. This isn’t just a dessert; it’s an experience, a trip down memory lane, and a guaranteed crowd-pleaser for any occasion.
While the exact origins of Oreo Dirt Cake are shrouded in a bit of mystery, its playful presentation and simple ingredients suggest a connection to childhood fun and imaginative play. Think back to digging in the garden, the thrill of finding earthworms (gummy ones, of course!), and the pure joy of getting a little messy. This dessert captures that spirit perfectly.
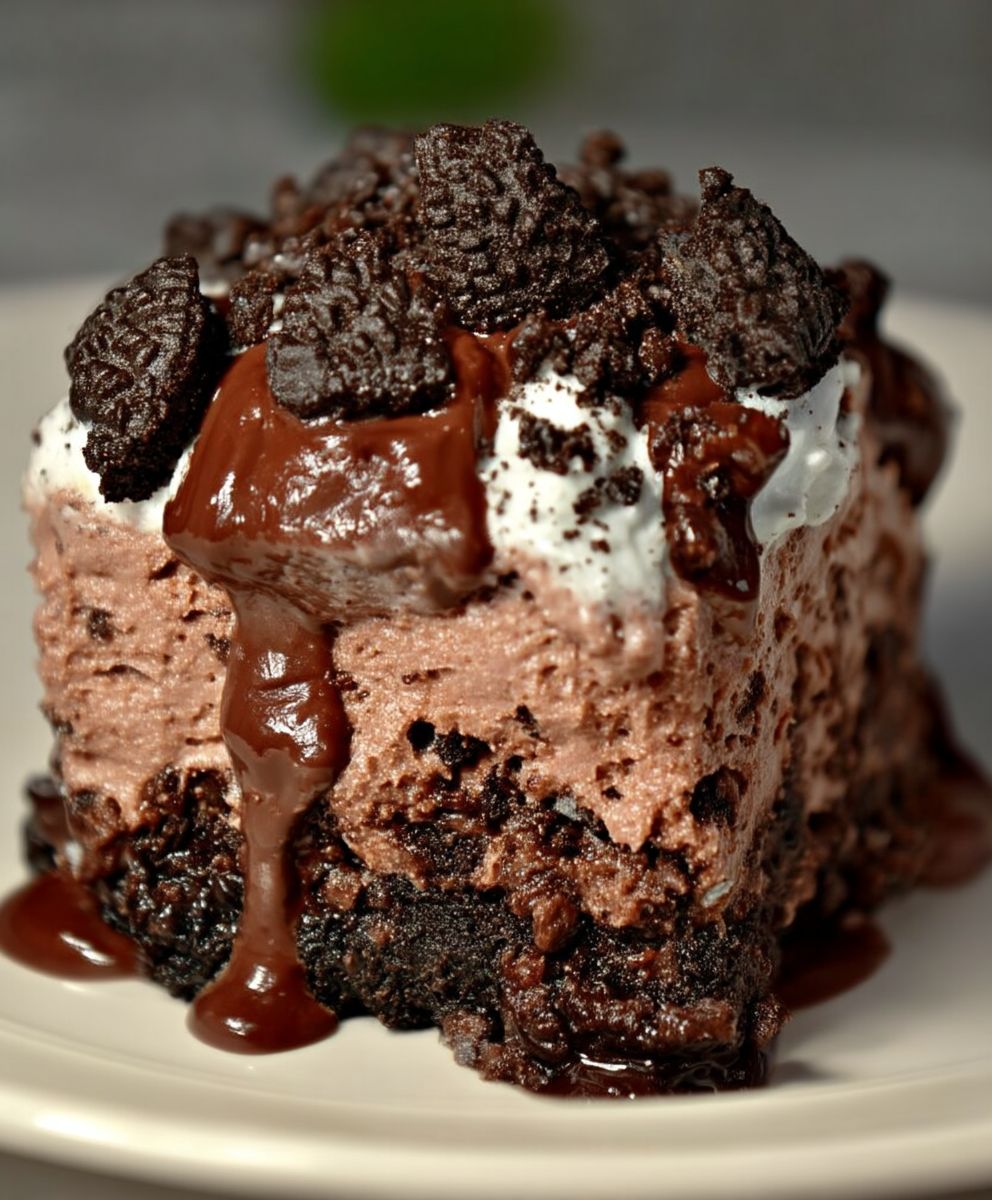
What makes this dessert so universally loved? It’s the irresistible combination of textures and flavors. The smooth, rich cream cheese and whipped topping filling contrasts beautifully with the crumbly, chocolatey Oreo “dirt.” It’s also incredibly easy to make, requiring no baking and minimal effort. Whether you’re hosting a birthday party, a potluck, or simply craving a sweet treat, Oreo Dirt Cake is the perfect choice. Its whimsical appearance and delicious taste are sure to bring smiles to faces of all ages. So, grab your ingredients, and let’s get digging!

Ingredients:
- 1 package (14.3 ounces) Oreo cookies, regular or Double Stuf, divided
- 8 tablespoons (1 stick) unsalted butter, softened
- 8 ounces cream cheese, softened
- 3 cups powdered sugar
- 4 cups cold milk
- 2 packages (3.4 ounces each) instant vanilla pudding mix
- 8 ounces whipped topping, thawed (like Cool Whip)
- Gummy worms, for garnish (optional)
- Chocolate rocks, for garnish (optional)
- Fresh mint sprigs, for garnish (optional)
Preparing the Oreo “Dirt”
Okay, let’s get started! The first thing we need to do is create our “dirt,” which is really just crushed Oreos. This is the fun part, especially if you have little helpers around!
- Separate the Oreo cookies. Carefully twist apart all of the Oreo cookies. We want to separate the creamy filling from the chocolate wafers. Don’t worry if some of the filling sticks to the wafers; it’s all going to be delicious in the end!
- Scrape off the filling. Using a butter knife or small spatula, scrape the creamy filling from all of the Oreo cookies. Place the filling in a medium-sized bowl. We’ll use this later for the cream cheese layer.
- Crush the Oreo wafers. Now for the dirt! You have a few options here. You can use a food processor for a super-fine texture, or you can use a resealable plastic bag and a rolling pin for a more rustic, chunky “dirt.”
- Food Processor Method: Place the Oreo wafers in the food processor and pulse until they are finely ground into crumbs. Be careful not to over-process them into a paste.
- Plastic Bag Method: Place the Oreo wafers in a large resealable plastic bag. Seal the bag tightly, removing as much air as possible. Use a rolling pin to crush the cookies into crumbs. You can control the size of the crumbs this way, making them as fine or as chunky as you like. I personally like a little bit of texture, so I don’t crush them too finely.
- Set aside the crushed Oreos. Once the Oreo wafers are crushed, set them aside in a bowl. We’ll use these for layering later.
Making the Cream Cheese Layer
Next up, we’re going to make the creamy, dreamy cream cheese layer. This is what gives the Oreo dirt cake its richness and decadent flavor.
- Cream the butter and cream cheese. In a large bowl (or the bowl of your stand mixer), beat the softened butter and softened cream cheese together until they are light and fluffy. This is really important! You want to make sure there are no lumps of cream cheese. If you’re using a stand mixer, use the paddle attachment.
- Add the Oreo filling. Remember that Oreo filling we scraped off earlier? Now’s the time to add it to the butter and cream cheese mixture. Beat until well combined. This will give the cream cheese layer that signature Oreo flavor.
- Gradually add the powdered sugar. Gradually add the powdered sugar to the cream cheese mixture, beating on low speed until it is fully incorporated. Be careful not to add all of the powdered sugar at once, or you’ll end up with a cloud of powdered sugar in your kitchen! Once all of the powdered sugar is added, beat on medium speed until the mixture is smooth and creamy.
- Set aside the cream cheese mixture. Cover the bowl with plastic wrap and set it aside.
Preparing the Pudding Layer
Now, let’s whip up the pudding layer. This layer adds a light and airy texture to the cake, and it’s super easy to make!
- Whisk the milk and pudding mix. In a separate large bowl, whisk together the cold milk and the instant vanilla pudding mix until the pudding starts to thicken. This usually takes about 2-3 minutes. Make sure there are no lumps of pudding mix.
- Let the pudding set. Let the pudding mixture sit for about 5 minutes to allow it to fully thicken. It should have a nice, creamy consistency.
Combining the Layers
Alright, we’re almost there! Now it’s time to bring all of the layers together to create our masterpiece.
- Fold in the whipped topping. Gently fold the thawed whipped topping into the thickened pudding mixture until it is fully combined. Be careful not to overmix, or you’ll deflate the whipped topping. We want to keep it light and airy.
- Combine the cream cheese and pudding mixtures. Gently fold the cream cheese mixture into the pudding mixture until they are fully combined. Again, be careful not to overmix. We want to maintain the light and airy texture of the pudding layer.
Assembling the Oreo Dirt Cake
Finally, the fun part – assembling the Oreo dirt cake! You can use a large trifle bowl, a 9×13 inch baking dish, or individual cups for serving. I personally love using a trifle bowl because it shows off all the beautiful layers.
- Layer the ingredients. Start by spreading a layer of crushed Oreo cookies on the bottom of your chosen dish. This will be our “dirt” base.
- Add the cream cheese mixture. Spread a layer of the cream cheese and pudding mixture over the Oreo cookie layer.
- Repeat the layers. Repeat the layers of crushed Oreo cookies and cream cheese mixture until you have used all of the ingredients. You should end with a layer of crushed Oreo cookies on top, resembling dirt.
- Garnish (optional). Now for the fun part – decorating! This is where you can get creative.
- Gummy Worms: Arrange gummy worms on top of the Oreo “dirt” to make it look like they are crawling out of the ground.
- Chocolate Rocks: Scatter chocolate rocks around the gummy worms for added texture and realism.
- Fresh Mint Sprigs: Add a few fresh mint sprigs to represent plants growing in the dirt.
- Chill the cake. Cover the Oreo dirt cake with plastic wrap and refrigerate for at least 4 hours, or preferably overnight. This will allow the flavors to meld together and the cake to set properly.
Serving and Storage
Once the Oreo dirt cake has chilled, it’s ready to serve!
- Serve chilled. Serve the Oreo dirt cake chilled. It’s best enjoyed cold.
- Storage. Store any leftover Oreo dirt cake in the refrigerator in an airtight container for up to 3 days. The Oreo cookies may soften slightly over time, but the cake will still be delicious.
Tips and Variations:
- Use different flavors of Oreos. Experiment with different flavors of Oreos, such as Golden Oreos, Mint Oreos, or Peanut Butter Oreos, to create unique variations of the dirt cake.
- Add chocolate chips. Sprinkle chocolate chips between the layers for added chocolatey goodness.
- Use different pudding flavors. Try using chocolate pudding, cheesecake pudding, or banana cream pudding instead of vanilla pudding for a different flavor profile.
- Make individual cups. For individual servings, layer the ingredients in small cups or glasses. This is a great option for parties or gatherings.
- Add a graham cracker crust. For a more substantial base, press a graham cracker crust into the bottom of the dish before layering the ingredients.
- Make it a no-bake cheesecake. For a richer, more decadent dessert, add a layer of no-bake cheesecake filling between the Oreo layers.
Enjoy!
I hope you enjoy making and eating this delicious Oreo dirt cake! It’s a fun and easy dessert that’s perfect for any occasion. Let me know in the comments if you try it and how it turns out!
Conclusion:
This Oreo Dirt Cake isn’t just a dessert; it’s a nostalgic trip back to childhood, a guaranteed crowd-pleaser, and, quite frankly, one of the easiest and most satisfying treats you’ll ever make. The creamy layers, the crunchy Oreo “dirt,” and the gummy worm surprise create a symphony of textures and flavors that will have everyone reaching for seconds (and maybe thirds!). It’s the perfect dessert for potlucks, birthday parties, or even just a fun weekend treat for the family. Trust me, once you make this, it will become a staple in your dessert repertoire.
But why is this recipe a must-try? Beyond the sheer deliciousness, it’s the simplicity. You don’t need to be a master baker to whip this up. The ingredients are readily available, the steps are straightforward, and the results are consistently impressive. It’s a recipe that even the most novice cook can confidently tackle and feel proud of. Plus, it’s incredibly versatile!
Serving Suggestions and Variations:
* Individual Cups: For a more elegant presentation, layer the Oreo Dirt Cake in individual clear cups or mason jars. This is perfect for parties or gatherings where you want to offer individual portions.
* Chocolate Pudding Boost: For an extra layer of chocolatey goodness, use chocolate pudding instead of vanilla. This will intensify the chocolate flavor and create a richer, more decadent dessert.
* Peanut Butter Twist: Add a layer of peanut butter mousse or a sprinkle of peanut butter chips for a delightful peanut butter and chocolate combination.
* Mint Chocolate: Use mint-flavored Oreos and a few drops of peppermint extract in the pudding for a refreshing mint chocolate version.
* Seasonal Fun: Decorate with seasonal candies and sprinkles to match the occasion. Think candy corn for Halloween, red and green sprinkles for Christmas, or pastel-colored candies for Easter.
* Fruit Infusion: Add a layer of fresh berries, such as strawberries or raspberries, for a burst of freshness and a touch of acidity to balance the sweetness.
* Boozy Upgrade: For an adult version, add a splash of coffee liqueur or chocolate liqueur to the pudding mixture.
* Ice Cream Cake Hybrid: Layer the Oreo “dirt” and pudding mixture in a springform pan, freeze until solid, and then top with whipped cream and more Oreo crumbs for an Oreo Dirt Cake ice cream cake!
I truly believe that this Oreo Dirt Cake recipe is a winner. It’s a guaranteed crowd-pleaser, it’s easy to make, and it’s endlessly customizable. So, what are you waiting for? Gather your ingredients, put on your apron, and get ready to create a dessert that will bring smiles to everyone’s faces.
I’m so excited for you to try this recipe! Once you do, please come back and share your experience in the comments below. Let me know what variations you tried, what your family and friends thought, and any tips or tricks you discovered along the way. I can’t wait to hear all about your Oreo Dirt Cake adventures! Happy baking (or, in this case, layering!). Don’t forget to snap a picture of your creation and share it on social media using #OreoDirtCake – I’d love to see your masterpieces!
Oreo Dirt Cake: The Ultimate No-Bake Dessert Recipe
A fun and easy no-bake dessert with layers of crushed Oreos, creamy cream cheese, and vanilla pudding, garnished with gummy worms and chocolate rocks for a playful "dirt" effect.
Ingredients
Instructions
Recipe Notes
- Use different flavors of Oreos (Golden, Mint, Peanut Butter).
- Add chocolate chips between the layers.
- Use different pudding flavors (chocolate, cheesecake, banana cream).
- Make individual cups.
- Add a graham cracker crust.
- Add a layer of no-bake cheesecake filling.
- Store leftover cake in the refrigerator in an airtight container for up to 3 days. The Oreo cookies may soften slightly over time.
Leave a Comment