
Oreo Cheesecake Cookie Cups: Prepare to be amazed by the most irresistible dessert mashup you’ve ever encountered! Imagine the satisfying crunch of an Oreo cookie, the creamy decadence of cheesecake, all perfectly portioned into adorable, bite-sized cups. These aren’t just cookies; they’re miniature masterpieces of flavor and texture that will disappear faster than you can say “Oreo.”
While the exact origins of combining Oreos and cheesecake into individual servings are shrouded in delicious mystery, the concept draws upon the timeless appeal of both desserts. Oreos, a beloved American classic since 1912, have always been a versatile treat, lending themselves beautifully to countless culinary creations. Cheesecake, with its rich and creamy history dating back to ancient Greece, provides the perfect counterpoint to the Oreo’s crisp chocolatey bite.
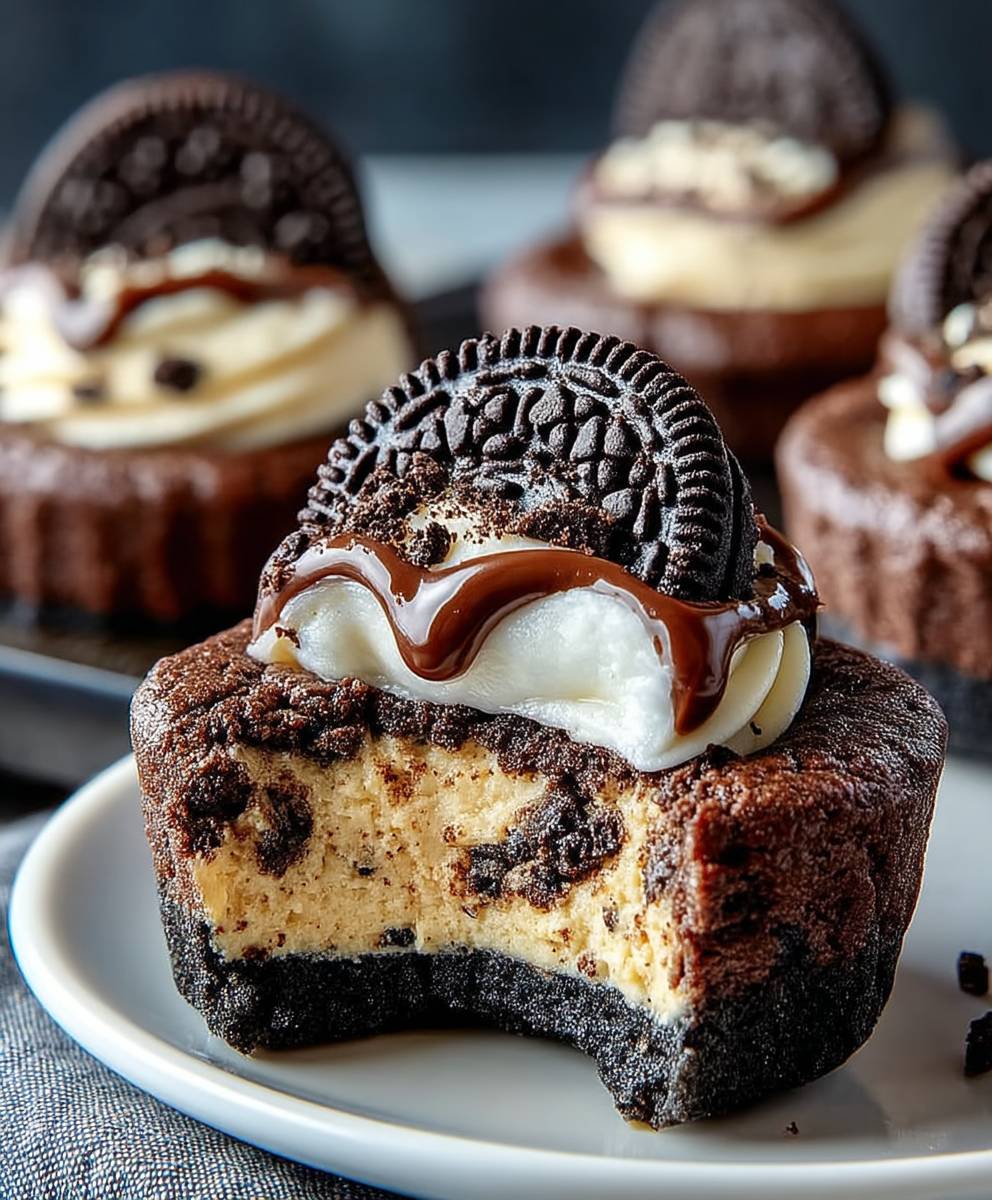
What makes these Oreo Cheesecake Cookie Cups so universally adored? It’s the perfect balance of textures – the crunchy cookie base, the smooth and velvety cheesecake filling. It’s the convenience of a single-serving dessert, ideal for parties, potlucks, or simply a delightful treat for yourself. And, of course, it’s the undeniable magic that happens when you combine two of the world’s most popular desserts into one unforgettable bite. Get ready to experience dessert bliss!

Ingredients:
- For the Oreo Cookie Base:
- 36 Oreo cookies, divided (about 1 package)
- 6 tablespoons unsalted butter, melted
- For the Cheesecake Filling:
- 16 ounces cream cheese, softened to room temperature
- ¾ cup granulated sugar
- 2 large eggs
- 1 teaspoon vanilla extract
- ¼ cup sour cream
- Pinch of salt
- For the Oreo Crumble Topping (Optional):
- 6 Oreo cookies, coarsely chopped
Preparing the Oreo Cookie Base:
- Preheat your oven: I like to start by preheating my oven to 325°F (160°C). This ensures even baking and prevents the cookie cups from burning.
- Crush the Oreos: Separate 24 of the Oreo cookies (leaving 12 whole for later) and place them in a food processor. Pulse until you have fine crumbs. If you don’t have a food processor, you can put the cookies in a large zip-top bag and crush them with a rolling pin. Just make sure the crumbs are fine enough to form a good base.
- Combine crumbs and butter: In a medium bowl, combine the Oreo crumbs and the melted butter. Mix well until the crumbs are evenly moistened and resemble wet sand. This mixture will act as the crust for our cookie cups.
- Press into muffin tin: Line a 12-cup muffin tin with paper liners. This makes removing the cookie cups much easier later on. Place about 1 ½ tablespoons of the Oreo crumb mixture into each liner. Use the bottom of a measuring cup or your fingers to firmly press the crumbs into an even layer at the bottom of each cup. The firmer you press, the better the crust will hold together.
- Bake the crust: Bake the Oreo crusts in the preheated oven for 5-7 minutes. This helps to set the crust and prevent it from becoming soggy when we add the cheesecake filling. Remove the muffin tin from the oven and let the crusts cool slightly while you prepare the cheesecake filling.
Making the Cheesecake Filling:
- Cream the cream cheese and sugar: In a large bowl, beat the softened cream cheese with an electric mixer (either a stand mixer or a hand mixer) until smooth and creamy. This is a crucial step, so make sure there are no lumps of cream cheese remaining. Gradually add the granulated sugar and continue to beat until the mixture is light and fluffy.
- Incorporate the eggs: Add the eggs one at a time, beating well after each addition. Be careful not to overmix at this stage, as overmixing can incorporate too much air into the batter, which can cause the cheesecake to crack during baking.
- Add vanilla and sour cream: Stir in the vanilla extract, sour cream, and salt. Mix until just combined. The sour cream adds a lovely tang and helps to create a smooth and creamy texture.
- Crush and fold in remaining Oreos: Roughly chop the remaining 12 Oreo cookies. Gently fold the chopped Oreos into the cheesecake filling. Be careful not to overmix, as you want to keep the Oreo pieces intact.
Assembling and Baking the Oreo Cheesecake Cookie Cups:
- Fill the cookie cups: Spoon the cheesecake filling evenly into each of the prepared Oreo crusts, filling them almost to the top. If you’re using the optional Oreo crumble topping, sprinkle it over the tops of the filled cookie cups now.
- Bake the cookie cups: Bake the cookie cups in the preheated oven for 18-22 minutes, or until the filling is set around the edges but still slightly jiggly in the center. The baking time may vary depending on your oven, so keep a close eye on them.
- Cool and chill: Turn off the oven and crack the oven door slightly. Let the cookie cups cool in the oven for about 30 minutes. This helps to prevent them from cracking as they cool. After 30 minutes, remove the muffin tin from the oven and let the cookie cups cool completely at room temperature. Once cooled, cover the muffin tin with plastic wrap and refrigerate for at least 2 hours, or preferably overnight. Chilling the cookie cups allows the cheesecake filling to set completely and develop its flavor.
Serving and Storing:
- Remove from muffin tin: Gently remove the Oreo Cheesecake Cookie Cups from the muffin tin by lifting them out using the paper liners.
- Serve and enjoy: Serve the cookie cups chilled. They are perfect for parties, potlucks, or just a sweet treat for yourself!
- Storing leftovers: Store any leftover cookie cups in an airtight container in the refrigerator for up to 3-4 days. They are best enjoyed within the first few days, as the crust may soften over time.
Tips for Perfect Oreo Cheesecake Cookie Cups:
- Use room temperature ingredients: Make sure your cream cheese and eggs are at room temperature before you start. This will help the cheesecake filling to be smooth and creamy.
- Don’t overmix: Overmixing the cheesecake filling can incorporate too much air, which can cause the cookie cups to crack during baking. Mix until just combined.
- Bake at a low temperature: Baking at a low temperature helps to prevent the cheesecake from cracking.
- Cool slowly: Cooling the cookie cups slowly in the oven helps to prevent them from cracking.
- Chill thoroughly: Chilling the cookie cups for at least 2 hours allows the cheesecake filling to set completely and develop its flavor.
- Get creative with toppings: While I love the simple Oreo crumble topping, feel free to get creative with your toppings! You could use chocolate shavings, whipped cream, fresh berries, or even a drizzle of chocolate sauce.
- Make them ahead of time: These cookie cups are perfect for making ahead of time, as they need to chill for at least 2 hours. You can even make them a day or two in advance.
Variations:
- Chocolate Oreo Cheesecake Cookie Cups: Use chocolate Oreos instead of regular Oreos for a richer, more chocolatey flavor. You can also add a tablespoon or two of cocoa powder to the cheesecake filling.
- Peanut Butter Oreo Cheesecake Cookie Cups: Add a few tablespoons of peanut butter to the cheesecake filling for a delicious peanut butter twist. You can also drizzle the tops of the cookie cups with melted peanut butter.
- Mint Oreo Cheesecake Cookie Cups: Use mint Oreos instead of regular Oreos for a refreshing minty flavor. You can also add a few drops of peppermint extract to the cheesecake filling.
- Gluten-Free Oreo Cheesecake Cookie Cups: Use gluten-free Oreo cookies for a gluten-free version of this recipe.
Troubleshooting:
- Cracked Cheesecake: If your cheesecake cracks, don’t worry! It’s still delicious. Cracking can be caused by overbaking, overmixing, or cooling the cookie cups too quickly. To prevent cracking, make sure to bake at a low temperature, don’t overmix the filling, and cool the cookie cups slowly in the oven.
- Soggy Crust: If your crust is soggy, it could be because you didn’t bake it long enough or because the cheesecake filling was too wet. To prevent a soggy crust, bake the crust for 5-7 minutes before adding the filling, and make sure to drain any excess liquid from the sour cream before adding it to the filling.
- Lumpy Filling: If your cheesecake filling is lumpy, it could be because your cream cheese wasn’t soft enough. Make sure your cream cheese is at room temperature before you start, and beat it until it’s smooth and creamy.
I hope you enjoy making these Oreo Cheesecake Cookie Cups as much as I do! They’re a fun and easy treat that’s sure to impress. Let me know in the comments below if you have any questions or if you try any variations! Happy baking!
Conclusion:
And there you have it! These Oreo Cheesecake Cookie Cups are truly a must-try for anyone who loves a delightful combination of textures and flavors. The crunchy Oreo cookie base, the creamy cheesecake filling, and that extra Oreo crumble on top – it’s a symphony of deliciousness in every single bite. I know, I know, I’m biased, but trust me on this one!
Why are these little beauties a must-try? Well, beyond the obvious (they taste amazing!), they’re incredibly easy to make. Seriously, even if you’re not a seasoned baker, you can totally nail this recipe. The ingredient list is short and sweet, the instructions are straightforward, and the results are guaranteed to impress. Plus, they’re perfect for any occasion – from a casual weeknight dessert to a fancy party treat. They’re always a crowd-pleaser!
But the best part? They’re endlessly customizable! Feel like adding a swirl of caramel to the cheesecake filling? Go for it! Want to sprinkle some sea salt on top for a sweet and salty kick? Absolutely! You could even try using different flavors of Oreos for a fun twist. Golden Oreos with a hint of lemon zest in the cheesecake filling? Yes, please! The possibilities are truly endless.
Speaking of serving suggestions, these Oreo Cheesecake Cookie Cups are fantastic on their own, but they’re even better with a few simple additions. A dollop of whipped cream or a scoop of vanilla ice cream takes them to the next level. You could also drizzle them with chocolate sauce or caramel sauce for an extra touch of indulgence. And for a truly decadent treat, try serving them with a side of fresh berries. The tartness of the berries perfectly complements the sweetness of the cheesecake and Oreos.
These little cups are also perfect for making ahead of time. You can bake them a day or two in advance and store them in the refrigerator until you’re ready to serve them. This makes them a great option for parties or gatherings, as you can get all the baking done ahead of time and then just relax and enjoy the company of your guests.
I’m so confident that you’re going to love these Oreo Cheesecake Cookie Cups that I’m practically begging you to try them! Seriously, what are you waiting for? Gather your ingredients, preheat your oven, and get ready to experience a taste of pure bliss.
And when you do make them (because I know you will!), please, please, please share your experience with me! I’d love to hear what you think of the recipe, what variations you tried, and how much everyone loved them. You can leave a comment below, tag me on social media, or even just send me a message. I’m always so excited to see your creations and hear your feedback.
So go ahead, give these Oreo Cheesecake Cookie Cups a try. I promise you won’t be disappointed. Happy baking! And remember, life is too short to skip dessert, especially when it involves Oreos and cheesecake! I can’t wait to hear all about your baking adventures! Let me know if you have any questions, and happy baking!
Oreo Cheesecake Cookie Cups: The Ultimate Dessert Recipe
Creamy cheesecake filling baked in an Oreo cookie crust, topped with an optional Oreo crumble. Perfect for parties or a sweet treat.
Ingredients
Instructions
Recipe Notes
- Use room temperature ingredients for a smoother filling.
- Don’t overmix the cheesecake filling.
- Bake at a low temperature to prevent cracking.
- Cool slowly in the oven to prevent cracking.
- Chill thoroughly for the best flavor and texture.
- Get creative with toppings!
- These can be made ahead of time.
- Variations: Chocolate, Peanut Butter, Mint, Gluten-Free.
- Troubleshooting tips included for cracked cheesecake, soggy crust, and lumpy filling.
Leave a Comment