
Old Fashioned Butter Mints are more than just a sweet treat; they are tiny bursts of creamy, minty nostalgia that instantly transport you back to simpler times. Have you ever experienced that magical moment when a delicate candy melts on your tongue, leaving behind a delightful burst of flavor and a feeling of pure comfort? That’s precisely the enchanting experience these homemade wonders offer.
These delightful confections have graced countless family gatherings, holiday tables, and special occasions for generations, serving as a charming edible decoration and a beloved party favor. They evoke cherished memories of grandma’s kitchen or elegant tea parties, proving their enduring appeal through decades.
Why We Love These Melt-in-Your-Mouth Treats
I find their irresistible charm lies in their unparalleled melt-in-your-mouth texture, the perfect balance of sweet and refreshing mint, and their surprisingly easy preparation. They’re incredibly simple to make, yet always impress everyone who tries them. This recipe for Old Fashioned Butter Mints is a true classic, promising a perfect batch every time. Whether you’re making them for a holiday gift, a party, or simply to satisfy a sweet craving, they are an absolute delight.

Ingredients:
- 1/2 cup (1 stick) unsalted butter, softened to room temperature. It’s crucial for the butter to be perfectly softened – not melted, but yielding to gentle pressure. This helps in achieving a smooth, lump-free base for our Old Fashioned Butter Mints.
- 4 cups (approximately 1 pound) powdered sugar (confectioners’ sugar), sifted. Sifting is non-negotiable here. Powdered sugar often clumps, and those tiny lumps will make your butter mints grainy. A fine mesh sieve will be your best friend! We start with 4 cups, but you might need a tiny bit more or less depending on humidity and how soft your butter is.
- 1/4 teaspoon fine sea salt. A little bit of salt helps to balance the sweetness and enhances all the other flavors, making our Old Fashioned Butter Mints truly pop.
- 1 teaspoon pure vanilla extract. While many butter mints are solely peppermint, I find a touch of vanilla adds a lovely depth and rounds out the flavor profile beautifully. You can omit it if you prefer a purely peppermint experience.
- 1 teaspoon pure peppermint extract. This is the star flavor for classic butter mints! Make sure it’s a good quality extract for the best taste. You can easily substitute this with other extracts like spearmint, wintergreen, or even almond if you’re feeling adventurous and want to create a variety of “Old Fashioned Butter Mints.”
- 1 to 2 tablespoons heavy cream or milk. This is our liquid binder and helps achieve the perfect consistency. Start with 1 tablespoon and add more drop by drop if needed. Too much liquid will make your dough too sticky to handle.
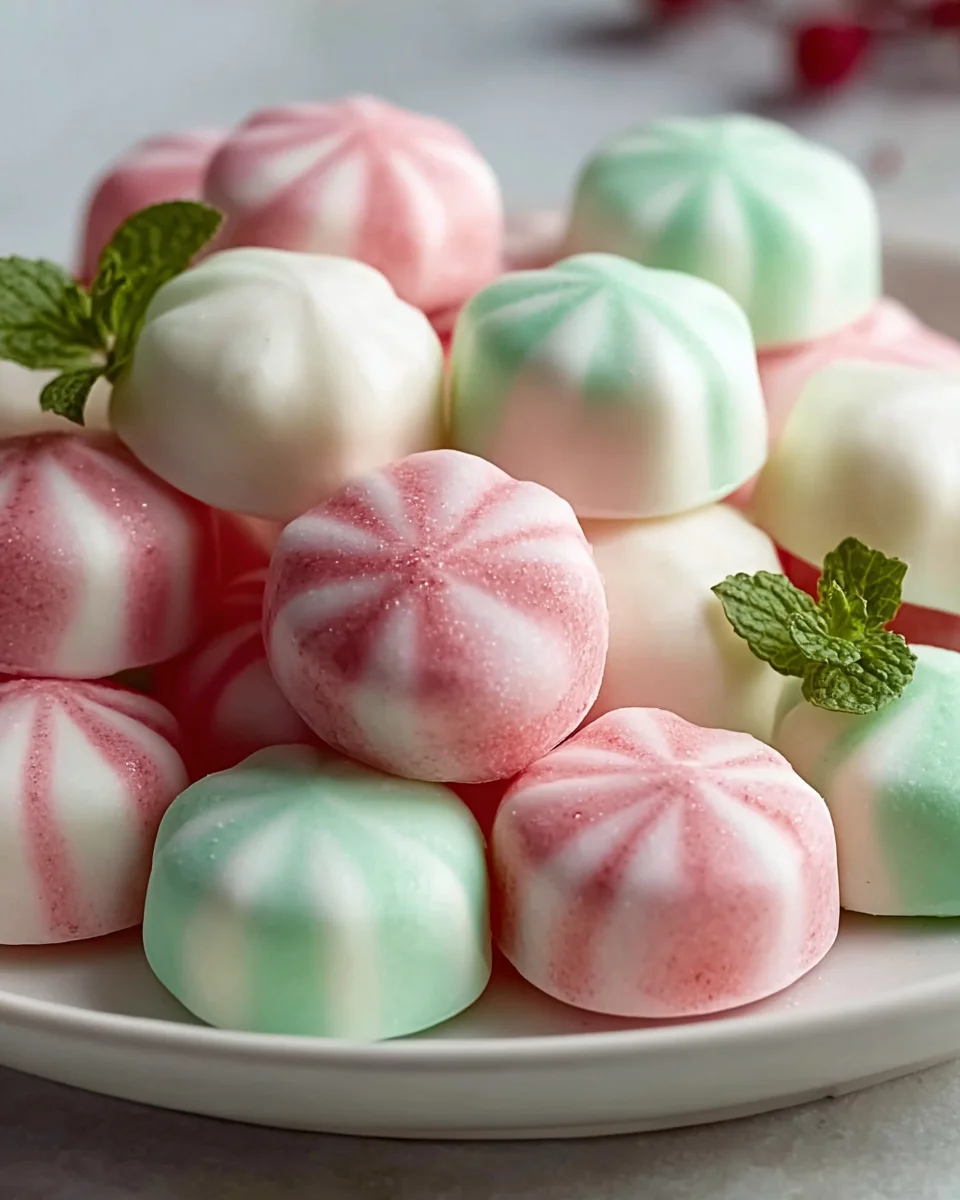
- Food coloring (optional). Gel food coloring works best for vibrant, consistent colors without adding too much extra liquid. Traditional Old Fashioned Butter Mints are often pastel shades like pink, green, yellow, or blue.
- Extra powdered sugar for dusting. This will be used during the shaping process to prevent sticking.
Making the Butter Mint Dough
- Prepare Your Workspace and Ingredients: First things first, let’s get organized! Make sure your butter has been sitting out at room temperature for at least an hour, or until it’s perfectly soft. I usually just leave it on the counter while I gather everything else. Sift your four cups of powdered sugar into a large bowl. Trust me, skipping this step will lead to frustration later with stubborn lumps! Have your measuring spoons ready for extracts and your heavy cream or milk. I also like to line a baking sheet or two with parchment paper now; it saves time later when the dough is ready.
- Cream the Butter: In a large mixing bowl, using either a stand mixer with the paddle attachment or a hand mixer, beat the softened butter on medium speed until it’s light and fluffy. This usually takes about 2-3 minutes. You want it to be pale in color and very smooth. This aeration step is crucial for the tender texture of our Old Fashioned Butter Mints. Don’t skimp on creaming the butter; it sets the foundation for a superior mint!
- Add Initial Dry Ingredients: Reduce the mixer speed to low. Gradually add about half of your sifted powdered sugar to the creamed butter, mixing until just combined. The mixture will be quite thick at this point. Now, add your 1/4 teaspoon of fine sea salt. The salt is a secret weapon; it doesn’t make the mints salty, but rather enhances the sweetness and depth of flavor, giving our Old Fashioned Butter Mints that classic, well-rounded taste.
- Incorporate Extracts: With the mixer still on low, pour in the 1 teaspoon of pure vanilla extract and 1 teaspoon of pure peppermint extract. Mix until they are fully incorporated into the butter and sugar mixture. At this stage, your kitchen will start smelling wonderfully minty, which is always a good sign! If you’re planning on making different flavored mints, you might use different extracts later, but for a foundational batch, this combination is excellent.
- Add Remaining Powdered Sugar and Liquid: Continue adding the remaining half of the sifted powdered sugar, a cup at a time, mixing on low speed until just combined after each addition. The mixture will become very thick and crumbly. Once all the powdered sugar is in, slowly drizzle in 1 tablespoon of heavy cream or milk. Mix on low until the dough starts to come together. You’re looking for a dough that is firm enough to handle but still soft and pliable. The consistency is key here for perfect Old Fashioned Butter Mints!
- Adjust Consistency: If your dough still looks too dry and crumbly, add the second tablespoon of heavy cream or milk, but add it very slowly, perhaps half a teaspoon at a time, mixing thoroughly after each addition. You want to stop as soon as the dough forms a cohesive, slightly tacky ball that pulls away from the sides of the bowl. Be careful not to add too much liquid, as an overly sticky dough will be difficult to shape and will require a lot more powdered sugar, which can make the mints too dense. Conversely, if your dough feels too sticky, you can knead in a tiny bit more sifted powdered sugar, a tablespoon at a time, until it reaches the desired consistency. It should be similar to play-doh – soft, smooth, and easy to mold.
Flavoring and Coloring the Dough
- Divide the Dough (Optional but Recommended): If you want to make different colors and flavors of Old Fashioned Butter Mints, now is the time to divide your freshly made dough. I usually divide it into 2-4 equal portions, depending on how many variations I want. Place each portion in a separate small bowl. If you’re making only one kind of mint, you can skip this step and proceed with the entire batch.
- Add Food Coloring: For each portion of dough, add a tiny drop of gel food coloring. Gel colors are concentrated and won’t add excess moisture to your dough. Start with just a toothpick’s worth – a little goes a long way! Knead the color into the dough thoroughly using your hands. This can be a bit messy, so consider wearing food-safe gloves if you want to avoid stained fingertips. Keep kneading until the color is evenly distributed and no streaks remain. If you desire a deeper shade, add another tiny drop and repeat the kneading process. Achieving beautiful pastel shades for your Old Fashioned Butter Mints adds to their nostalgic charm!
- Introduce Additional Flavors (If Desired): If you chose to divide your dough and want different flavors, add a few drops of a different extract to each portion now. For instance, to one portion you might add a few drops of spearmint extract for a milder minty flavor, to another, perhaps a tiny bit of almond extract for a completely different profile, or even lemon extract for a zesty twist. Knead the extract into the dough just as you did with the food coloring until it’s fully incorporated and the aroma is distinct. Remember, for the very best “Old Fashioned Butter Mints,” quality extracts make all the difference.
- Brief Chill (Optional): While not strictly necessary, if your kitchen is particularly warm or your dough feels a bit too soft, you can wrap each portion tightly in plastic wrap and refrigerate it for about 10-15 minutes. This helps to firm up the butter a bit, making the dough easier to handle during shaping. Don’t chill it for too long, though, as it will become too hard to work with.
Shaping the Old Fashioned Butter Mints
- Prepare for Shaping: Lightly dust your clean work surface with extra sifted powdered sugar. This prevents the dough from sticking while you roll and shape. Have your parchment-lined baking sheets ready nearby. You can also have a small bowl of extra powdered sugar handy for dipping your tools or hands if needed.
- Roll into Ropes: Take one portion of your colored and flavored dough. Roll it between your palms or on the lightly dusted surface into a long, thin rope, about 1/2 inch in diameter. Try to make the rope as uniform in thickness as possible, as this will result in more evenly sized mints. This is the most common and traditional way to shape Old Fashioned Butter Mints.
- Cut into Individual Mints: Once you have a nice rope, use a sharp knife or a clean pair of kitchen scissors to cut the rope into small pieces, about 1/2 inch long. You can make them slightly larger or smaller depending on your preference, but a 1/2-inch cube or cylinder is a classic size for Old Fashioned Butter Mints. As you cut, you might want to lightly dust your knife or scissors with powdered sugar to prevent sticking.
- Shape with a Fork (Traditional Method): This is where they get their signature look! Pick up each cut piece of dough. Gently press it with the tines of a fork to create the distinctive parallel ridges. Don’t press too hard, just enough to leave an imprint. If the dough sticks to the fork, lightly dust the fork with powdered sugar before pressing. Place each shaped mint onto your prepared parchment-lined baking sheets, leaving a little space between each one to allow for air circulation during drying.
-
Alternative Shaping Methods (Optional):
- Tiny Cookie Cutters: For a fancier presentation, you can lightly roll out the dough on a powdered sugar-dusted surface to about 1/4 inch thickness. Then, use very small cookie cutters (like tiny hearts, stars, or flowers) to cut out shapes. This is a bit more labor-intensive but creates beautiful results.
- Candy Molds: If you have silicone candy molds designed for small candies, you can lightly dust them with powdered sugar, press small bits of dough into the cavities, and then gently pop them out. This creates perfectly uniform and intricate Old Fashioned Butter Mints.
- Rolling into Balls: Simply roll small pieces of dough into tiny balls between your palms. This is the quickest method, though they won’t have the traditional fork mark. You can then flatten them slightly if you wish.
No matter which method you choose, make sure to handle the dough gently to maintain its tender consistency.
- Repeat for All Dough: Continue rolling, cutting, and shaping all your dough portions until every single one of your Old Fashioned Butter Mints is neatly placed on the baking sheets. It’s a bit of a repetitive task, but the end result is so worth it!
Drying and Storing the Old Fashioned Butter Mints
- Air Drying the Mints: This step is essential for achieving the classic slightly firm exterior and melt-in-your-mouth interior of Old Fashioned Butter Mints. Leave the baking sheets with the shaped mints uncovered at room temperature in a cool, dry place. Avoid direct sunlight or very humid environments, as these can negatively affect the drying process.
- Drying Time: The drying process typically takes anywhere from 12 to 24 hours, sometimes even up to 48 hours, depending on the humidity in your home and the size of your mints. You’ll know they are ready when they feel firm and dry to the touch on the outside, but still slightly soft on the inside. They should be able to hold their shape without indenting easily when lightly touched. Patience during drying ensures the perfect Old Fashioned Butter Mints texture!
- Testing for Readiness: To test, gently pick up one mint. It should feel solid and not sticky at all. If it still feels soft or tacky on the outside, give it more time to dry. Turning them over once halfway through the drying process can sometimes help ensure even drying, especially if they are larger.
- Storage: Once your Old Fashioned Butter Mints are perfectly dry, they are ready to be enjoyed! Store them in an airtight container at room temperature. Layering them between sheets of parchment paper can help prevent them from sticking together, especially if you live in a slightly more humid climate. They will maintain their freshness and delightful texture for up to 2-3 weeks. For longer storage, you can freeze them in an airtight container for several months. When ready to serve, simply let them thaw at room temperature for a few minutes.
- Enjoy Your Homemade Old Fashioned Butter Mints: Congratulations! You’ve successfully created a batch of these delightful, melt-in-your-mouth candies. They are perfect for after-dinner treats, gifts, or just a sweet little indulgence throughout the day. I find them absolutely irresistible, and I hope you do too!
Conclusion:
And there you have it, my friends! We’ve reached the sweet culmination of our journey into making truly unforgettable confections. This isn’t just another candy recipe; it’s an invitation to create something truly special, something that evokes warmth, comfort, and pure delight with every single bite. I truly believe that once you’ve experienced the melt-in-your-mouth texture and the subtly sweet, buttery flavor of these delightful treats, you’ll understand exactly why I rave about them so much. They’re incredibly simple to make, yet the outcome is so utterly impressive that you might just surprise yourself and everyone you share them with. The satisfaction of crafting these creamy morsels from scratch is unparalleled.
What makes this recipe an absolute must-try, in my humble opinion, is the magical combination of their delicate texture and their profound ability to transport you back to simpler times. They possess a comforting nostalgia, a taste that feels both familiar and exquisitely luxurious. Unlike many store-bought options, these homemade gems offer an unparalleled freshness and a rich, authentic buttery taste that truly shines through. They’re proof that some of the best things in life are indeed those made with love and a few simple ingredients. Whether you’re a seasoned baker or just venturing into the world of confectionery, this recipe for Old Fashioned Butter Mints is remarkably forgiving and yields consistently perfect results every single time. It’s a fantastic project for a quiet afternoon and even more rewarding when you see the joy they bring to others.
Serving Your Delights:
Once your beautiful batch of butter mints has set, the possibilities for enjoying and sharing them are endless! They make for an absolutely charming after-dinner treat, a delicate finish to any meal, and are far more elegant than a typical store-bought sweet. Imagine them nestled in a small bowl on your coffee table during a gathering, or perhaps gracing a holiday dessert platter alongside cookies and chocolates – they’re guaranteed to be a conversation starter. These Old Fashioned Butter Mints also make phenomenal homemade gifts. Package them in a pretty jar or a small cellophane bag tied with a ribbon, and you’ve got a thoughtful, personal present for teachers, neighbors, or hostesses. They are particularly wonderful for bridal showers, baby sprinkles, or even as wedding favors, adding a touch of personalized sweetness to any event. Even for a quiet evening at home, a few of these creamy delights alongside a cup of tea or coffee can elevate an ordinary moment into something truly special.
Get Creative with Variations:
But why stop at the classic? This recipe is incredibly versatile, inviting you to put your own creative spin on things. For instance, you can easily divide your dough and add different food colorings to create a vibrant array of pastel mints perfect for spring or festive colors for holidays like Christmas or Easter. Try adding a tiny drop of a different extract, such as almond for a nutty depth, lemon for a bright tang, or even a hint of espresso for a sophisticated twist. You can press them into small candy molds for intricate shapes, or simply roll them into small balls and flatten them slightly with a fork for a classic look. For an extra touch of fanciness, once they’re set, you could drizzle them with melted dark or white chocolate, or roll them in edible glitter or sprinkles before they fully dry. The base recipe is robust enough to handle these playful alterations, ensuring you can tailor them to any occasion or preference. Embrace the opportunity to experiment and make these Old Fashioned Butter Mints uniquely yours!
So, what are you waiting for? I wholeheartedly encourage you to roll up your sleeves, gather your ingredients, and dive into the wonderful world of homemade butter mints. Trust me, the simple act of transforming a few basic items into such an exquisite confection is incredibly rewarding. Once you’ve made them, I would absolutely love to hear about your experience! Did you stick to the classic, or did you venture into some exciting variations? How did your family and friends react to these delightful treats? Please don’t hesitate to share your stories, tips, and triumphs in the comments below. Your feedback not only helps me, but it also inspires other home bakers in our community. Happy candy making, and I can’t wait to hear all about your delicious success with these amazing Old Fashioned Butter Mints!
Old Fashioned Butter Mints Recipe: Sweet, Melt-in-Your-Mouth!
Old Fashioned Butter Mints are tiny bursts of creamy, minty nostalgia. These sweet, melt-in-your-mouth candies offer a delightful burst of flavor and a feeling of pure comfort, perfect for family gatherings or a sweet indulgence.
Ingredients
Instructions
Important Information
Nutrition Facts (Per Serving)
It is important to consider this information as approximate and not to use it as definitive health advice.
Allergy Information
Please check ingredients for potential allergens and consult a health professional if in doubt.
Leave a Comment