
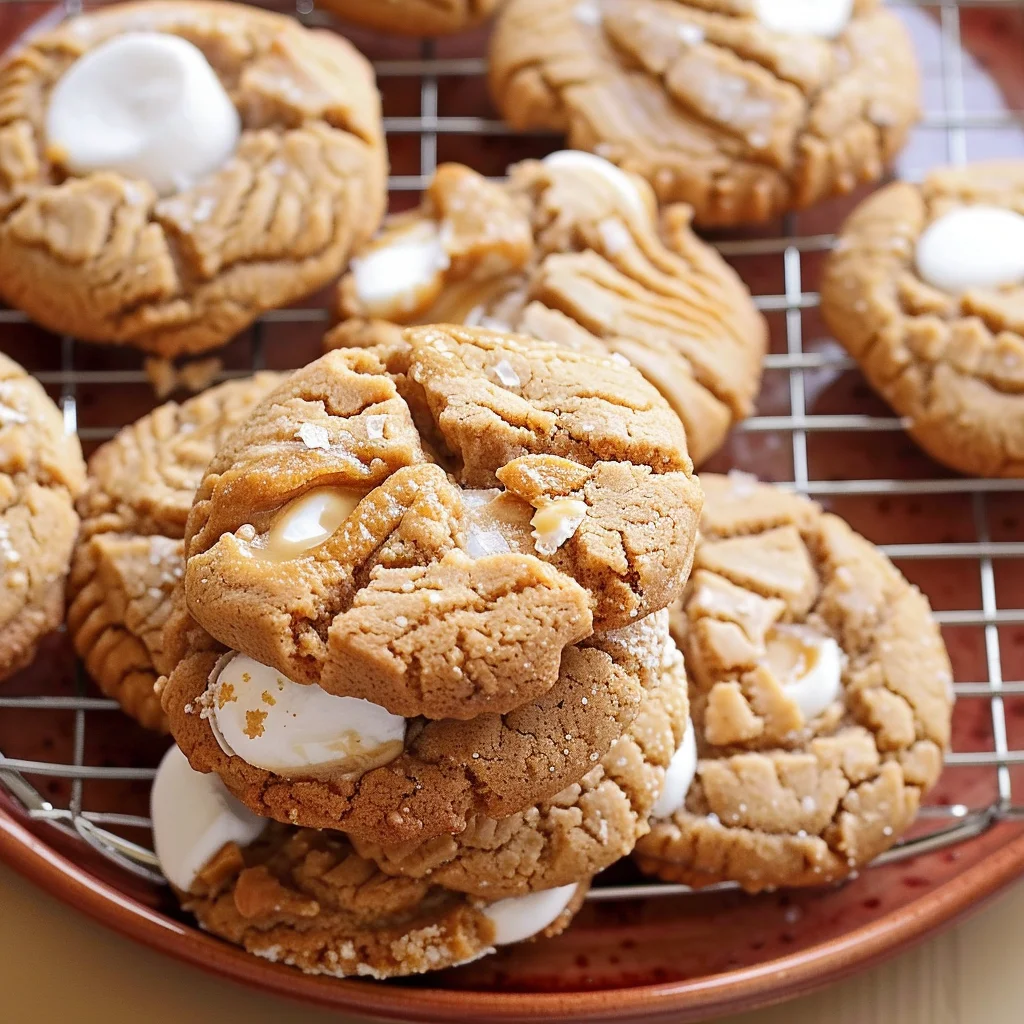
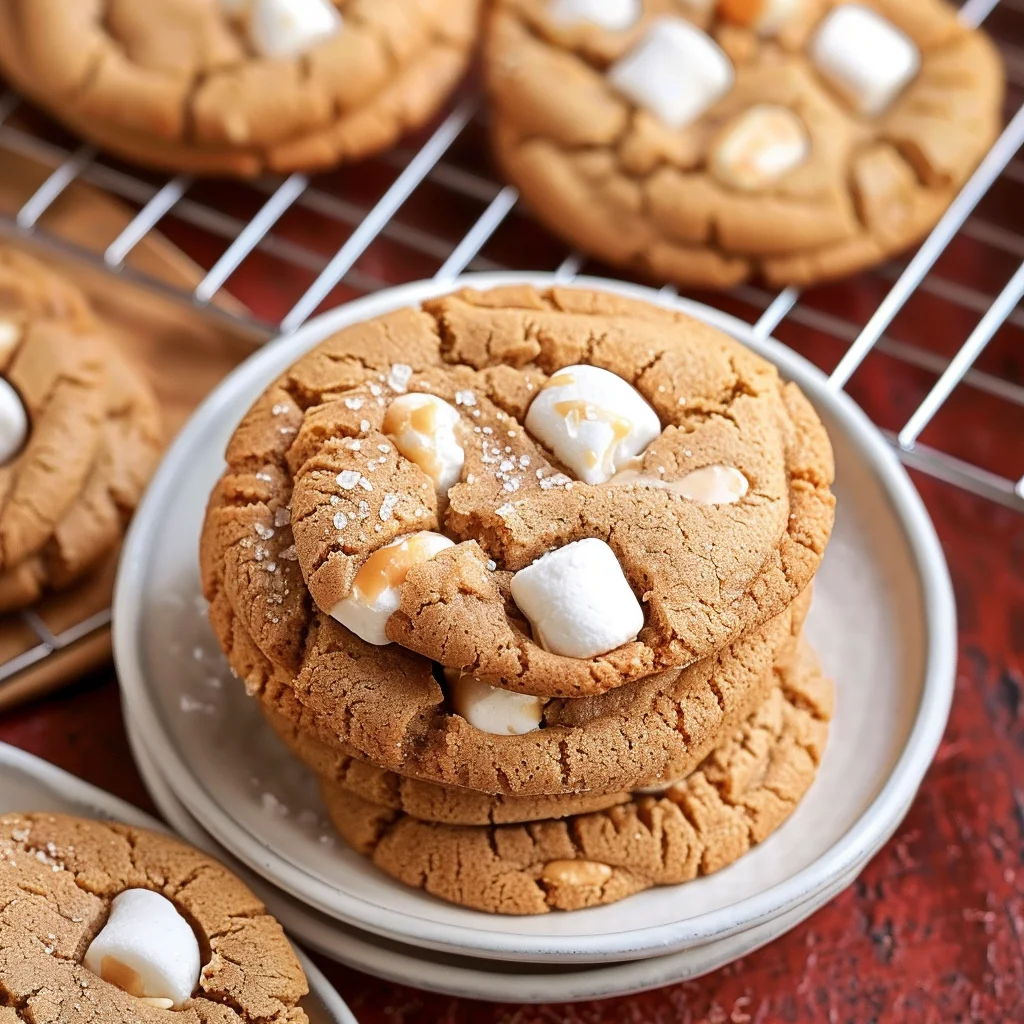
My Favorite Gluten Free Peanut Butter Marshmallow Cookies are not merely a dessert; they are an exquisite culinary experience waiting to unfold. Imagine sinking your teeth into a perfectly chewy, golden-edged cookie, its rich, nutty peanut butter flavor immediately satisfying your palate, only to discover a warm, gooey marshmallow center that melts delightfully in your mouth. This captivating dance of sweet and salty, crisp and soft, creates an irresistible symphony of textures and tastes that is truly unforgettable.
For many, the classic combination of peanut butter and marshmallows evokes a sense of nostalgic comfort, a taste of simpler times. My journey to perfect this recipe was driven by a desire to bring that cherished joy to everyone, especially those navigating a gluten-free lifestyle. It proves that dietary considerations never mean compromising on indulgence or flavor. This particular rendition has been meticulously crafted to ensure every bite delivers pure, unadulterated bliss without any gluten.
Why You’ll Adore My Favorite Gluten Free Peanut Butter Marshmallow Cookies
People genuinely adore these cookies not just for their exceptional taste and melt-in-your-mouth texture, but also for the sheer convenience of a recipe that promises gourmet results with a friendly approach. They offer a comforting familiarity, yet surprise with their delightful marshmallow core, making them perfect for any occasion, from a casual afternoon treat to a show-stopping dessert for guests. Get ready to discover your new signature cookie!

Ingredients:
- 1/2 cup (113g) unsalted butter, softened: Make sure your butter is truly at room temperature. This is crucial for achieving that light and fluffy texture when creaming it with the sugars. I usually leave mine out on the counter for at least an hour before I plan to bake.
- 1/2 cup (100g) granulated sugar: This provides a crispness to the cookie edges and sweetness.
- 1/2 cup (100g) packed light brown sugar: The brown sugar contributes to a chewier cookie and adds a lovely molasses flavor that complements the peanut butter beautifully. Make sure it’s firmly packed into your measuring cup!
- 1 large egg: A binder that helps everything hold together and adds richness.
- 1 teaspoon vanilla extract: Don’t skimp on the vanilla! It enhances all the other flavors in these incredible cookies.
- 1 cup (250g) creamy peanut butter: This is a key player! I always recommend using a processed, creamy peanut butter (like Jif or Skippy) rather than natural, oil-separation-prone varieties. The stabilizers in regular peanut butter really help with the cookie’s structure and prevent them from being too crumbly or oily.
- 1 1/4 cups (150g) gluten-free all-purpose flour blend: For these cookies, it’s vital to use a high-quality gluten-free flour blend. I’ve had the best results with blends that already contain xanthan gum. If your blend doesn’t, add an extra 1/2 teaspoon of xanthan gum to your dry ingredients to give these cookies the right chew and prevent them from crumbling.
- 1 teaspoon baking soda: This helps our cookies rise beautifully and achieve a tender crumb.
- 1/2 teaspoon salt: A little salt is essential to balance the sweetness and really bring out the nutty flavor of the peanut butter.
- 2 cups (300g) mini marshmallows: These are for the glorious topping! You’ll want mini marshmallows because they melt perfectly into a gooey, sweet cloud without overwhelming the cookie.
- 1/2 cup (60g) roasted salted peanuts, roughly chopped (optional): For an extra layer of crunch and peanut flavor on top. I love adding these for texture!
Preparing the Cookie Dough
- Get Ready: Before you even think about mixing, make sure you have all your ingredients measured out and ready to go. This “mise en place” approach makes the baking process so much smoother and more enjoyable. Preheat your oven to 350°F (175°C). Line two large baking sheets with parchment paper or silicone baking mats. This is important for preventing sticking and ensuring even baking, especially when the gooey marshmallows are involved.
- Cream the Butter and Sugars: In a large mixing bowl, either using a stand mixer fitted with the paddle attachment or a hand mixer, combine the softened unsalted butter, granulated sugar, and packed light brown sugar. Beat these together on medium speed for about 2-3 minutes. You’re looking for a mixture that becomes light, fluffy, and pale in color. This creaming step is foundational for My Favorite Gluten Free Peanut Butter Marshmallow Cookies, as it incorporates air into the dough, leading to a softer, more tender cookie. Don’t rush this! Scrape down the sides of the bowl midway through to ensure everything is thoroughly combined.
- Incorporate Wet Ingredients: Once your butter and sugars are beautifully creamed, crack in the large egg and add the vanilla extract. Continue to beat on medium speed until the egg is fully incorporated and the mixture is smooth, about another minute. Again, scrape down the sides of the bowl to ensure no streaks of egg or vanilla are left unmixed. The mixture should look cohesive and slightly glossy.
- Add the Star – Peanut Butter: Now it’s time for the creamy peanut butter to join the party! Add the full cup of creamy peanut butter to the bowl. Beat on low to medium speed until it’s completely smooth and evenly combined with the butter and egg mixture. This might take another 1-2 minutes. The dough will become very thick and luscious at this point, smelling absolutely divine. Make sure there are no streaks of unmixed peanut butter.
- Whisk the Dry Ingredients: In a separate medium bowl, whisk together your gluten-free all-purpose flour blend, baking soda, and salt. If your gluten-free flour blend does not contain xanthan gum, add 1/2 teaspoon of it here. Whisking ensures these dry ingredients are evenly distributed, which is crucial for the cookie’s texture and rise.
- Combine Wet and Dry: Gradually add the dry ingredients to the wet ingredients in the large mixing bowl. Start on low speed, just until the flour mixture begins to disappear, then increase to medium-low. Mix only until just combined. It’s very important not to overmix gluten-free cookie dough. Overmixing can lead to a tougher texture, which we definitely want to avoid for these tender peanut butter cookies. Stop mixing as soon as you see no more dry streaks of flour. The dough will be thick and quite sticky.
- Chill the Dough (Highly Recommended!): Cover the bowl with plastic wrap and refrigerate the dough for at least 30 minutes. While this step isn’t strictly mandatory if you’re in a huge rush, I find that chilling the dough significantly improves the texture and prevents the cookies from spreading too much in the oven. It allows the flour to fully hydrate and the fats to firm up, making the dough easier to handle and resulting in a more uniform, chewy cookie. If you have time, an hour is even better!
Forming and Baking the Cookies
- Prepare for Baking: While your dough is chilling, ensure your oven is preheated to 350°F (175°C) and your baking sheets are lined. Having everything ready means a smooth transition from fridge to oven.
- Scoop and Roll: Remove the chilled dough from the refrigerator. Using a 1.5-tablespoon cookie scoop (or just about 1.5-tablespoon full per cookie), scoop out portions of dough. Gently roll each portion into a smooth ball between your palms. The dough might still be a little sticky, but the chilling helps a lot. Place the dough balls about 2 inches apart on your prepared baking sheets. Don’t flatten them; they’ll spread naturally. You should get about 24-30 cookies, depending on the size of your scoops.
- Initial Bake: Place one baking sheet in the preheated oven. Bake for 9-11 minutes. The exact time will depend on your oven, but you’re looking for the edges to be lightly golden and the centers to appear mostly set but still slightly soft. Do not overbake these cookies! They will continue to set as they cool, and overbaking will make them dry. While the first batch bakes, you can prepare the next sheet of cookies.
- Prepare for Marshmallow Magic: After the initial 9-11 minutes, carefully remove the baking sheet from the oven. Immediately and gently, place 5-7 mini marshmallows on top of each warm cookie. You want to cover the surface of the cookie with marshmallows. Don’t worry if they overlap a little; they’ll melt into a beautiful, cohesive topping.
- Return to Oven for Marshmallow Melting: Return the baking sheet to the oven for another 2-3 minutes. Keep a very close eye on them! The marshmallows will puff up, soften, and begin to turn a lovely golden brown on top. This step is quick, so stand by your oven! You want them lightly toasted, not burnt. The smell of toasting marshmallows combined with the warm peanut butter is absolutely intoxicating at this stage, a true highlight of making My Favorite Gluten Free Peanut Butter Marshmallow Cookies.
- Cooling and Optional Garnish: Once the marshmallows are perfectly toasted, remove the cookies from the oven. While they are still warm and the marshmallows are gooey, you can sprinkle a pinch of the roughly chopped roasted salted peanuts over the top of each cookie, if desired. This adds a fantastic textural contrast and an extra burst of salty peanut flavor. Let the cookies cool on the baking sheet for about 5 minutes. They will be delicate when hot. After 5 minutes, carefully transfer them to a wire rack to cool completely. The marshmallows will firm up slightly as they cool, but will remain wonderfully chewy and sticky.
Finishing Touches and Storage
- Enjoy Fresh: These cookies are undeniably at their absolute best when enjoyed warm, or at least on the day they are baked. The gooey marshmallows, soft peanut butter cookie, and optional crunchy peanuts create a symphony of textures and flavors that is truly irresistible. If you’re sharing them with friends or family, be prepared for rave reviews! My Favorite Gluten Free Peanut Butter Marshmallow Cookies are always a showstopper.
- Storing Leftovers: If you happen to have any cookies left (which is a big “if” in my house!), store them in an airtight container at room temperature. They will remain delicious for up to 3-4 days. It’s worth noting that the marshmallows will firm up significantly over time, becoming chewier rather than gooey. If you prefer a slightly softer marshmallow, you can gently warm individual cookies in the microwave for 10-15 seconds before serving. This revives that wonderful gooey texture beautifully. For longer storage, you can freeze the cooled cookies in a single layer in an airtight container for up to 2 months. Thaw at room temperature and warm briefly if desired.
Conclusion:
And there you have it, my friends! We’ve reached the sweet end of our journey, but for you, it’s just the beginning of a delightful baking adventure. I truly hope you’re as excited as I am about this incredible recipe. What makes these cookies an absolute must-try isn’t just their incredible taste, but also their unique combination of textures and flavors that come together in perfect harmony. Imagine a cookie that’s crispy on the edges, chewy in the center, with that unmistakable gooey, slightly caramelized marshmallow surprise nestled within. The rich, nutty flavor of peanut butter perfectly balances the sweetness of the marshmallow, creating a symphony of taste that’s simply irresistible. And the best part? They’re entirely gluten-free, proving that you don’t have to compromise on flavor or texture to enjoy a treat that caters to dietary needs. This recipe is a testament to the fact that gluten-free baking can be just as, if not more, satisfying than traditional methods.
I’ve poured my heart into perfecting these, ensuring every bite delivers pure joy. They’re designed to be a crowd-pleaser, the kind of cookie that disappears from the plate almost as soon as it’s put out. Whether you’re a seasoned baker or just starting out, the steps are straightforward and the results are consistently spectacular. There’s a certain magic that happens when the marshmallows melt and toast slightly in the oven, creating that golden, sticky center that sets these cookies apart from any other. This isn’t just another cookie recipe; it’s an experience, a little piece of homemade heaven that you’re about to discover. You’ll find yourself reaching for them again and again, and I guarantee they’ll earn a permanent spot in your recipe box, becoming a go-to for any occasion that calls for something truly special.
When it comes to serving these beauties, the possibilities are endless. They are, of course, absolutely divine straight from the oven, still warm and wonderfully gooey. Imagine them paired with a tall glass of cold milk, a steaming cup of coffee, or a cozy mug of hot chocolate on a chilly evening. For a truly decadent dessert, try them with a scoop of vanilla bean ice cream on top – the contrast between the warm, chewy cookie and the cold, creamy ice cream is simply out of this world. You could even get creative and make mini ice cream sandwiches by pressing a small scoop of your favorite ice cream between two cooled cookies. They also make fantastic additions to lunchboxes, a delightful pick-me-up for an afternoon slump, or a much-loved contribution to any potluck or party. Everyone will be asking for the recipe, trust me!
But why stop there? While this recipe is perfect as is, it also offers a fantastic canvas for your own creative variations. Feel free to experiment! For the chocolate lovers out there, a handful of chocolate chips – milk, dark, or even white chocolate – folded into the dough would be an exquisite addition. You could also try swapping out some of the peanut butter for almond butter or cashew butter, though keep in mind that the texture might vary slightly. A sprinkle of flaky sea salt on top before baking really enhances the flavors, adding a sophisticated touch that elevates the sweetness. For a festive twist, consider adding a dash of cinnamon or even a pinch of nutmeg to the dough, especially during the fall or winter months. You could even use different flavored marshmallows, if you can find them, for a unique twist. The core recipe is robust enough to handle these delightful tweaks, so don’t be afraid to make it your own and truly personalize your batch.
Now, it’s your turn! I genuinely can’t wait for you to experience the joy of baking and tasting these cookies for yourself. I truly believe that once you try My Favorite Gluten Free Peanut Butter Marshmallow Cookies, they’ll become a staple in your baking repertoire and perhaps even a new personal favorite. So, preheat your oven, gather your ingredients, and get ready to create something truly magical. The aroma alone will make your kitchen feel like the happiest place on earth, and the first bite? Pure bliss. Baking should be a fun and rewarding experience, and this recipe delivers on both fronts, promising a delicious outcome with minimal fuss. Don’t let anything hold you back from diving into this sweet adventure; you deserve this treat!
Once you’ve whipped up a batch, I would absolutely love to hear about your experience! Did you stick to the original recipe, or did you venture into some delicious variations? What did your family and friends think? Please don’t hesitate to share your thoughts, tips, and even photos in the comments below. Your feedback means the world to me and helps build our wonderful baking community. If you encountered any questions or had a particular success, let us know! We can all learn and get inspired by each other’s culinary journeys. Happy baking, and enjoy every single gooey, peanut buttery, marshmallowy bite!
My Favorite Gluten Free Peanut Butter Marshmallow Cookies
These gluten-free peanut butter marshmallow cookies offer an exquisite culinary experience. Imagine a perfectly chewy, golden-edged cookie with a rich, nutty peanut butter flavor, complimented by a warm, gooey marshmallow center. This captivating dance of sweet and salty, crisp and soft, creates an irresistible symphony of textures and tastes.
Ingredients
-
1 ¼ cup Gluten-Free Flour
-
1 teaspoon Baking Soda
-
½ teaspoon Sea Salt
-
½ cup unsalted Butter, softened
-
½ cup Granulated Sugar
-
¾ cup packed Brown Sugar
-
¾ cup Creamy Peanut Butter
-
1 large Egg
-
2 teaspoons Vanilla Extract
-
1 ¼ cups Mini Marshmallows, frozen
Instructions
-
Step 1
Preheat oven to 350°F (175°C) and line two baking sheets with parchment paper. -
Step 2
In a large bowl, cream softened butter, granulated sugar, and brown sugar until light and fluffy (2-3 minutes). -
Step 3
Beat in egg and vanilla extract until smooth. -
Step 4
Mix in creamy peanut butter until fully combined. -
Step 5
In a separate bowl, whisk together gluten-free flour, baking soda, and sea salt. -
Step 6
Gradually add dry ingredients to wet, mixing on low speed until just combined. Do not overmix. -
Step 7
Cover dough and refrigerate for at least 30 minutes. -
Step 8
Scoop 1.5-tablespoon portions of chilled dough, roll into balls, and place 2 inches apart on prepared baking sheets. -
Step 9
Bake for 9-11 minutes, until edges are lightly golden and centers are mostly set. -
Step 10
Remove from oven and immediately place 5-7 mini marshmallows on top of each warm cookie. -
Step 11
Return to oven for 2-3 minutes until marshmallows are puffed and lightly golden. -
Step 12
Remove from oven. (Optional: sprinkle roughly chopped roasted salted peanuts for garnish). Let cool on baking sheet for 5 minutes, then transfer to a wire rack to cool completely. -
Step 13
Serve warm. Store leftovers in an airtight container at room temperature for 3-4 days. Warm briefly in microwave to re-soften marshmallows if desired.
Important Information
Nutrition Facts (Per Serving)
It is important to consider this information as approximate and not to use it as definitive health advice.
Allergy Information
Please check ingredients for potential allergens and consult a health professional if in doubt.
Leave a Comment