
Maple Donut Bars The Ultimate Guide To Baking Delicious Treats is not just a recipe; it’s an invitation to experience pure, unadulterated comfort in every bite. Have you ever dreamed of biting into the soft, sweet embrace of a classic maple donut, but wished it was easier to bake and share?
I certainly have, and that’s precisely why these donut bars have become a cherished favorite in my kitchen. The distinctive, rich flavor of maple syrup has a long and storied history, deeply ingrained in North American culinary traditions, evoking images of cozy mornings and wholesome goodness. While traditional donuts hold a special place in our hearts, these bars offer an innovative and delightfully convenient way to enjoy that beloved taste. They capture all the nostalgic joy of a freshly baked, old-fashioned donut – that tender, cake-like crumb – but presented in a simple, shareable bar form.
Why are these Maple Donut Bars so universally adored?
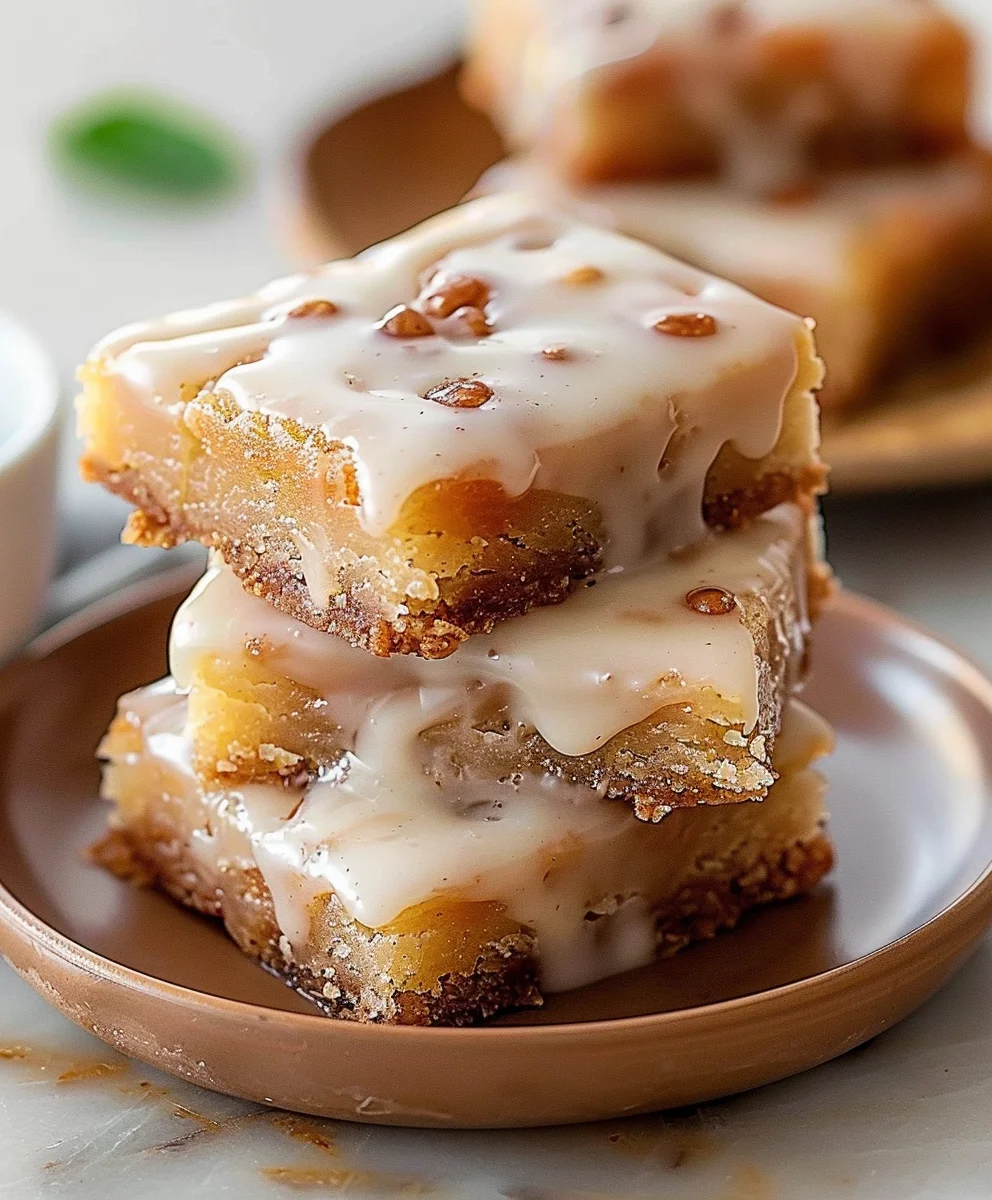
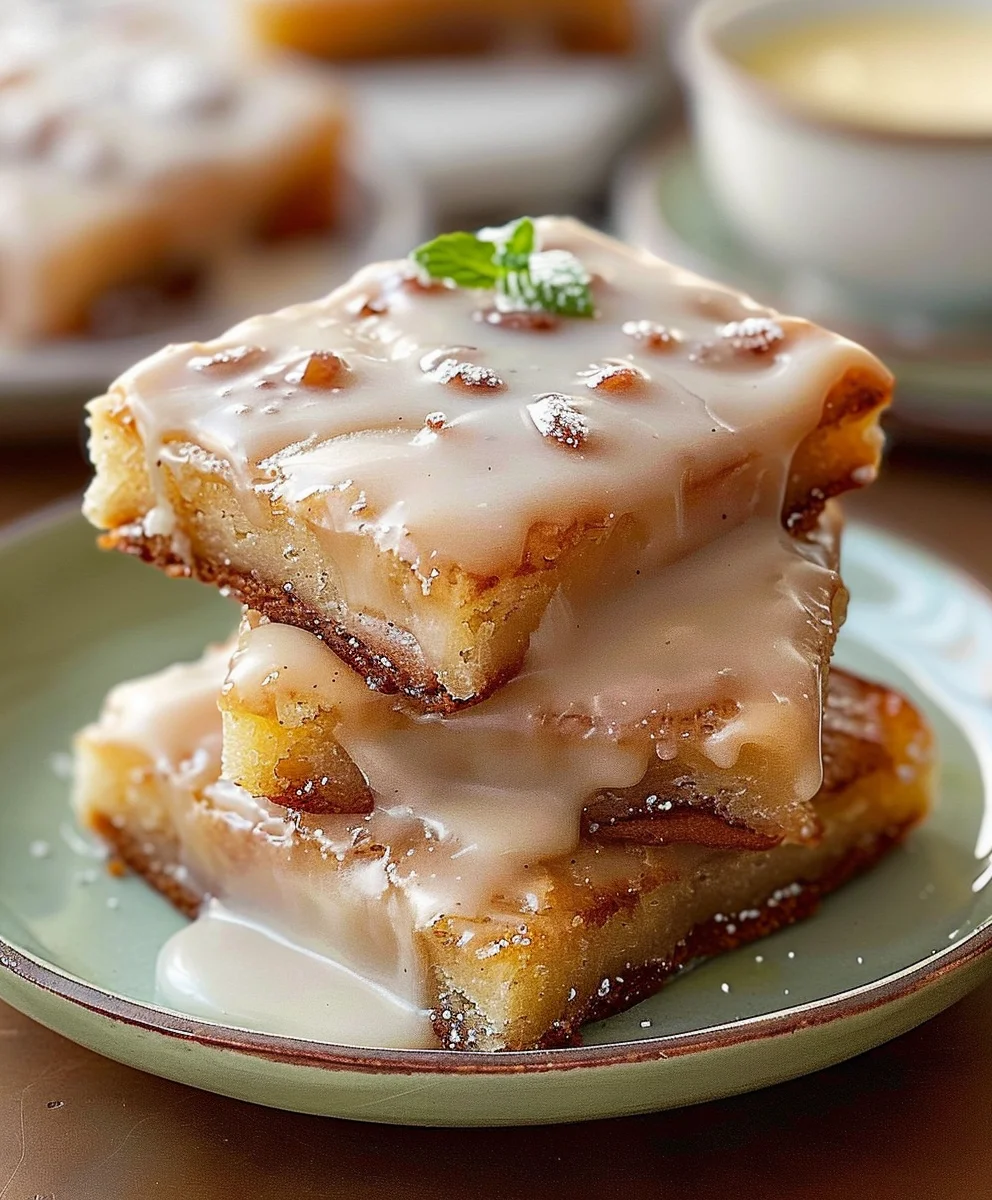
For me, it’s the perfect harmony of textures and flavors. Each bar boasts a melt-in-your-mouth interior, generously crowned with a luxurious, shimmering maple glaze that adds an irresistible sweetness and a beautiful sheen. They deliver all the deliciousness without the fuss of individual frying or intricate shaping, making them an absolute dream for any home baker, from novice to expert. Prepare to embark on Maple Donut Bars The Ultimate Guide To Baking Delicious Treats, where I’ll walk you through every step to ensure your baking success. The intoxicating aroma filling your home will be just the beginning of this delightful culinary journey!

Ingredients:
- For the Irresistibly Soft Donut Dough:
- 3 ½ cups (420g) all-purpose flour, plus more for dusting – I always recommend sifting your flour for the lightest, airiest dough!
- ½ cup (100g) granulated sugar – This provides sweetness and helps activate the yeast, giving our Maple Donut Bars that perfect touch of sweetness.
- 2 ¼ teaspoons (1 packet) active dry yeast – Ensure it’s fresh for the best rise.
- ¾ cup (180ml) lukewarm milk (105-115°F / 40-46°C) – The temperature here is crucial; too hot will kill the yeast, too cold won’t activate it. It should feel like a warm bath on your wrist.
- 2 large eggs, at room temperature – Room temperature eggs emulsify better into the dough, leading to a smoother, more uniform texture.
- 6 tablespoons (85g) unsalted butter, melted and cooled – Don’t let it be hot, just liquid and no longer warm to the touch. This adds richness and tenderness.
- 1 teaspoon salt – Essential for balancing the sweetness and enhancing all the flavors in the dough.
- 1 teaspoon pure vanilla extract – For an extra layer of delicious aroma and flavor.
- For Baking (for that perfect bar texture):
- Non-stick cooking spray or additional butter for greasing the pan – Ensures our beautiful bars don’t stick.
- Parchment paper – A true baker’s best friend for easy cleanup and release.
- For the Velvety Maple Glaze:
- 2 cups (240g) powdered sugar (confectioners’ sugar), sifted – Sifting is key for a lump-free, silky smooth glaze. Trust me on this one!
- ½ cup (120ml) pure maple syrup – This is the star of the show! Make sure it’s high-quality pure maple syrup, not pancake syrup, for the best authentic maple flavor.
- 2 tablespoons (28g) unsalted butter, melted – Adds richness and a lovely sheen to the glaze.
- 2-4 tablespoons milk or heavy cream, as needed – To achieve that perfect pourable consistency for your Maple Donut Bars.
- ½ teaspoon pure vanilla extract – Complements the maple beautifully.
- Pinch of salt – A tiny touch to make all the sweet flavors pop.
Preparing the Irresistibly Soft Donut Dough
- Activate the Yeast: In a medium-sized bowl, gently combine your lukewarm milk and one teaspoon of the granulated sugar. Sprinkle the active dry yeast over the top. Give it a gentle stir and let it sit for 5-10 minutes. You’ll know it’s ready when the mixture becomes foamy and bubbly, a clear sign that the yeast is alive and ready to work its magic. If it doesn’t foam, your yeast might be old or the milk temperature was off, and you’ll need to start again. This step is absolutely critical for fluffy Maple Donut Bars!
- Combine Dry Ingredients: While your yeast is blooming, in the bowl of a stand mixer fitted with the dough hook attachment (or a large mixing bowl if kneading by hand), whisk together the sifted all-purpose flour, the remaining granulated sugar, and the salt. Give it a good whisk to ensure everything is evenly distributed. This dry base will form the structure of our delightful treats.
- Prepare Wet Ingredients: To your activated yeast mixture, add the room temperature eggs, the cooled melted butter, and the pure vanilla extract. Whisk gently until just combined. You want to avoid over-mixing here; we’re just bringing the liquids together before introducing them to our dry ingredients.
- Mix and Knead the Dough: Pour the wet ingredients into the dry ingredients in your stand mixer. Begin mixing on low speed for 2 minutes until a shaggy dough forms. Increase the speed to medium-low and continue kneading for 8-10 minutes. If you’re kneading by hand, turn the dough out onto a lightly floured surface and knead vigorously for 12-15 minutes. The dough should transform from sticky to smooth, elastic, and slightly tacky to the touch. A well-kneaded dough is the secret to a light, airy texture for your Maple Donut Bars. You can perform the “windowpane test”: gently stretch a small piece of dough; if you can stretch it thin enough to see light through it without tearing, your dough is perfectly kneaded!
- First Rise (Proofing): Lightly grease a large bowl with cooking spray or a touch of butter. Transfer the kneaded dough to this bowl, turning it once to coat the entire surface. Cover the bowl tightly with plastic wrap or a clean kitchen towel. Place the bowl in a warm, draft-free spot. I often use my oven with just the light on, or a warm spot near a sunny window. Let the dough rise for 1-1.5 hours, or until it has beautifully doubled in size. This first rise develops the flavor and creates that wonderful airy texture we crave in donut bars. Patience truly pays off here!
Shaping and Second Proofing Your Maple Donut Bars
- Punch Down and Prepare Pan: Once your dough has doubled, gently punch it down to release the air. This isn’t aggressive; just a gentle deflate to prepare it for shaping. Lightly grease a 9×13-inch baking pan and line it with parchment paper, leaving an overhang on the sides. This overhang will act as handles, making it incredibly easy to lift your baked donut bars out of the pan.
- Roll Out the Dough: Turn the dough out onto a lightly floured surface. Using a rolling pin, roll the dough into a rectangle roughly the size of your 9×13-inch baking pan (about 1/2 inch thick). Try to make it as even as possible for uniform bars. Take your time here; a well-rolled dough ensures consistent baking.
- Transfer to Baking Pan: Carefully lift the rolled dough and transfer it into your prepared 9×13-inch baking pan. Gently press it into the corners and edges to ensure it fits snugly and evenly across the bottom.
- Cut into Bars: Using a sharp knife or a pizza cutter, gently score the dough into your desired bar shapes. I usually go for 3 rows by 4 columns, making 12 rectangular bars. You’re not cutting all the way through, just deep enough to make distinct sections that will be easy to separate once baked and glazed. This pre-cutting step is vital for the “bar” aspect of our Maple Donut Bars, making them effortless to serve.
- Second Rise (Proofing): Cover the pan loosely with plastic wrap or a clean kitchen towel. Place it back in that warm, draft-free spot for another 30-45 minutes, or until the bars look noticeably puffy and slightly increased in size. This second rise, often called the “proof,” is crucial for achieving an incredibly light and tender crumb. Do not rush this step!
Baking Your Golden Maple Donut Bars
- Preheat Oven: About 15 minutes before the second rise is complete, preheat your oven to 350°F (175°C). Ensure your oven is fully preheated to the correct temperature for even baking.
- Bake the Bars: Remove the plastic wrap from the pan. Place the pan in the preheated oven and bake for 15-20 minutes, or until the tops are beautifully golden brown and the edges look set. The aroma filling your kitchen at this point will be absolutely heavenly – a sure sign that deliciousness is on its way! To check for doneness, a gentle touch on the center should feel springy.
- Cooling: Once baked, remove the pan from the oven. Using the parchment paper overhangs, carefully lift the entire sheet of donut bars out of the pan and transfer it to a wire cooling rack. Let them cool in the pan for about 5-10 minutes before lifting them out. This slight cooling period in the pan prevents them from breaking. Allow them to cool on the wire rack for another 15-20 minutes until they are warm, but not hot. They should be just warm enough to absorb the glaze wonderfully.
Crafting the Velvety Maple Glaze
- Combine Glaze Base: While your donut bars are cooling, let’s make the star of the show: our velvety maple glaze! In a medium bowl, whisk together the sifted powdered sugar and the pure maple syrup. Remember, using high-quality pure maple syrup here makes all the difference for the authentic, rich maple flavor in your Maple Donut Bars.
- Add Remaining Glaze Ingredients: Stir in the melted butter, pure vanilla extract, and a tiny pinch of salt. Whisk until the mixture is smooth and completely free of lumps.
- Adjust Consistency: Gradually add the milk or heavy cream, one tablespoon at a time, whisking well after each addition, until you achieve a smooth, pourable, yet thick consistency. It should be thick enough to coat the back of a spoon and drip slowly, but not so thick it’s difficult to spread. I usually start with 2 tablespoons and add more if needed. Getting the glaze consistency just right is key for that perfect donut shop look and feel.
Glazing and Finishing Your Delicious Maple Donut Bars
- Glaze the Warm Bars: While the donut bars are still warm (this helps them absorb the glaze beautifully), pour the maple glaze evenly over the entire sheet of bars. You can use an offset spatula or the back of a spoon to gently spread the glaze to ensure full coverage. Make sure to get all those nooks and crannies!
- Allow Glaze to Set: Let the glazed bars sit on the wire rack for at least 30 minutes, or until the glaze has set and hardened slightly. This patience is rewarded with a firm, sweet coating that truly makes these Maple Donut Bars shine. If you’re feeling extra fancy, you could sprinkle a few chopped toasted pecans or a dusting of cinnamon at this stage before the glaze fully sets.
- Separate and Serve: Once the glaze is set, gently use a knife to cut through the pre-scored lines to fully separate your individual Maple Donut Bars. The parchment paper will make this process incredibly easy.
- Enjoy and Store: These Maple Donut Bars The Ultimate Guide To Baking Delicious Treats are best enjoyed fresh, ideally on the same day they are made. The soft dough combined with the rich, sweet maple glaze is an absolute dream! Store any leftovers in an airtight container at room temperature for up to 2-3 days. If you find them a little less soft on subsequent days, a quick 10-15 second zap in the microwave can revive their tenderness beautifully. But trust me, they rarely last that long in my house!
Conclusion:
Well, my fellow baking enthusiasts, we’ve journeyed through the delightful process of creating something truly special together. I hope you’ve enjoyed every step of this culinary adventure, from mixing the simple ingredients to watching your kitchen fill with the most inviting aroma. What we’ve just explored isn’t just another recipe; it’s an invitation to experience pure, unadulterated comfort and joy in every single bite. These aren’t just any treats; they are a testament to the fact that sometimes, the simplest pleasures are the most profound. We’ve crafted a masterpiece that balances rustic charm with sophisticated flavor, proving that homemade goodness always wins. The anticipation of that first taste is almost as wonderful as the treat itself, and believe me, it absolutely delivers.
So, why is this recipe an absolute must-try for everyone, regardless of your baking prowess? Firstly, the texture is simply unparalleled. Imagine a bar that boasts the tender, airy chewiness of your favorite yeast-risen donut, but without the fuss and mess of deep-frying. It’s light, fluffy, yet satisfyingly rich, a perfect canvas for the star of our show: the maple. Speaking of maple, the deep, caramelly notes infused into both the dough and the luscious glaze are what truly elevate these bars. It’s not just a hint; it’s a full-bodied embrace of authentic maple flavor that will transport you straight to a cozy autumn morning. This recipe is incredibly forgiving and yields consistently stunning results, making you feel like a master baker even if you’ve never proofed yeast before. It’s designed for success, turning simple pantry staples into an extraordinary indulgence that truly captures the essence of a gourmet treat right in your own kitchen. The ease of preparation, combined with the utterly delicious outcome, makes these bars an instant classic and a guaranteed crowd-pleaser for any occasion, perfect for everything from a casual coffee break to a festive brunch spread. They truly embody the spirit of comforting, homemade baking at its finest.
Now, let’s talk about making these already amazing bars even more uniquely yours! While they are absolutely divine enjoyed fresh and warm straight from the pan, perhaps with a steaming mug of coffee or a tall glass of cold milk, their versatility truly shines with a few creative twists. For a delightful breakfast or brunch offering, imagine serving them alongside fresh berries and a dollop of whipped cream, transforming them into a decadent morning pastry. For an evening dessert, a scoop of vanilla bean ice cream melting gently over a slightly warmed bar is pure bliss, adding a creamy counterpoint to the maple sweetness. Don’t be afraid to experiment with toppings either! A sprinkle of crispy, candied bacon bits would introduce an incredible salty-sweet dynamic, or perhaps some finely chopped toasted pecans or walnuts for an added textural crunch and nutty aroma. For those who adore a bit of spice, a light dusting of cinnamon sugar over the warm glaze before it sets adds another layer of aromatic warmth that complements the maple beautifully. You could even infuse your glaze with a tiny splash of bourbon or a hint of orange zest for an unexpected burst of flavor that will surely impress your guests and awaken their palates. These bars are your canvas; feel free to paint with your favorite flavors and textures! For a truly festive touch during the holidays, consider cutting them into holiday-themed shapes with cookie cutters before baking, just adjusting the baking time slightly for smaller pieces. Or, for a truly decadent treat, drizzle a little melted dark chocolate over the finished maple glaze once it’s set – a combination that never disappoints and adds a touch of sophistication.
So, there you have it! My heartfelt encouragement for you to dive into your kitchen and experience the magic of these incredible maple donut bars for yourself. I promise, the reward of seeing those golden-brown bars emerge from your oven, filling your home with an intoxicating aroma, is worth every moment of effort. This truly is Maple Donut Bars The Ultimate Guide To Baking Delicious Treats, offering you everything you need for success and a truly delightful baking experience. Once you’ve had a chance to bake and taste them, I would absolutely love to hear about your experience. Did you add a special twist? Did they disappear instantly? What did your family and friends think? Share your successes, your serving ideas, or any fun variations you come up with in the comments below or on social media! Snap a photo, tag me, and let’s celebrate the joy of homemade baking together. There’s nothing more rewarding than seeing our culinary community grow and inspire each other, sharing our triumphs and learning from each other’s creative endeavors. So grab your apron, gather your ingredients, and get ready to create some unforgettable memories and, of course, some truly irresistible treats. Happy baking, my friends!
Maple Donut Bars The Ultimate Guide To Baking Delicious Treats
Experience pure, unadulterated comfort with these Maple Donut Bars. They capture all the nostalgic joy of a freshly baked, old-fashioned donut – that tender, cake-like crumb – but presented in a simple, shareable bar form, topped with a luxurious, shimmering maple glaze. A delightful and convenient treat for any home baker.
Ingredients
-
3 cups all-purpose flour, plus more for dusting
-
2 tsp baking powder
-
1 tsp baking soda
-
1/2 tsp salt
-
1/2 tsp ground nutmeg
-
1 cup granulated sugar
-
1/2 cup (1 stick) unsalted butter, melted and cooled
-
2 large eggs
-
1 cup buttermilk
-
1 tsp vanilla extract (for bars)
-
4 cups powdered sugar, sifted
-
1/2 cup pure maple syrup
-
1/4 cup milk (or more, as needed)
-
2 tbsp unsalted butter, melted (for glaze)
-
1 tsp vanilla extract (for glaze)
Instructions
-
Step 1
Preheat your oven to 350°F (175°C). Lightly grease a 9×13-inch baking pan and line it with parchment paper, leaving an overhang on the sides for easy lifting. -
Step 2
In a large bowl, whisk together the all-purpose flour, baking powder, baking soda, salt, ground nutmeg, and granulated sugar until well combined. -
Step 3
In a separate medium bowl, whisk together the melted and cooled unsalted butter, large eggs, buttermilk, and 1 teaspoon of vanilla extract until smooth. -
Step 4
Pour the wet ingredients into the dry ingredients. Mix gently with a spatula or spoon until just combined and no streaks of dry flour remain. Be careful not to overmix. -
Step 5
Spread the batter evenly into the prepared 9×13-inch baking pan. Bake for 20-25 minutes, or until the top is golden brown and a toothpick inserted into the center comes out clean. -
Step 6
Remove the pan from the oven and let the bars cool in the pan for 10 minutes. Using the parchment paper overhangs, carefully lift the entire sheet of donut bars out of the pan and transfer to a wire cooling rack. Allow to cool slightly while preparing the glaze. -
Step 7
In a medium bowl, whisk together the sifted powdered sugar, pure maple syrup, 2 tablespoons of melted unsalted butter, 1 teaspoon of vanilla extract, and 1/4 cup milk until smooth and pourable. Add more milk, one tablespoon at a time, if a thinner consistency is desired. -
Step 8
While the donut bars are still warm, pour the maple glaze evenly over the entire sheet of bars, spreading with an offset spatula if needed. Let the glazed bars sit on the wire rack for at least 30 minutes, or until the glaze has set. -
Step 9
Once the glaze is set, use a sharp knife to cut the bars into your desired shapes. Serve and enjoy! Store any leftovers in an airtight container at room temperature for up to 2-3 days.
Important Information
Nutrition Facts (Per Serving)
It is important to consider this information as approximate and not to use it as definitive health advice.
Allergy Information
Please check ingredients for potential allergens and consult a health professional if in doubt.
Leave a Comment