
Lofty Griddle Cakes, those pillowy clouds of breakfast bliss, are about to become your new weekend obsession. Imagine waking up to the aroma of warm vanilla and the promise of a stack of these incredibly light and airy delights. Forget those flat, dense pancakes you’ve suffered through in the past; we’re talking about griddle cakes that practically float off the plate!
While the exact origins of griddle cakes are debated, similar flatbreads cooked on hot stones or griddles have been enjoyed for centuries across various cultures. They represent a simple, comforting food, often associated with family gatherings and cozy mornings. In America, they evolved into the fluffy pancakes we know and love, with regional variations adding unique twists.
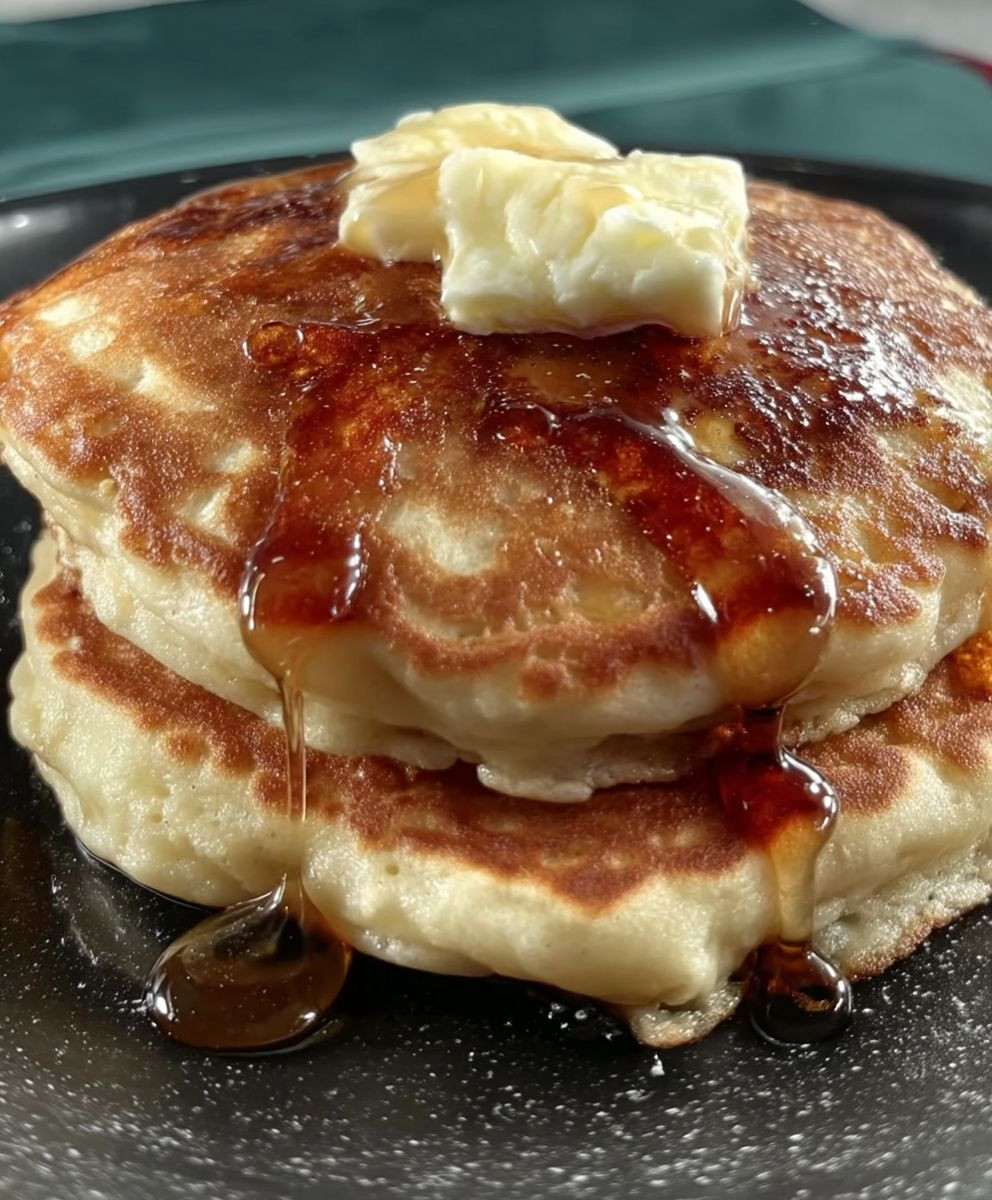
But what makes lofty griddle cakes so irresistible? It’s the perfect combination of a slightly crisp, golden-brown exterior and an unbelievably soft, almost sponge-like interior. The subtle sweetness is a blank canvas for your favorite toppings – maple syrup, fresh berries, whipped cream, or even a dollop of Nutella. Beyond the taste, they’re surprisingly easy to make, requiring just a few simple ingredients and minimal effort. So, ditch the boxed mix and prepare to experience pancake perfection!

Ingredients:
- 1 ½ cups all-purpose flour
- 3 ½ teaspoons baking powder
- 1 teaspoon salt
- 1 tablespoon white sugar
- 1 ¼ cups milk
- 1 large egg
- 3 tablespoons melted butter, plus more for greasing the griddle
- 1 teaspoon vanilla extract
Preparing the Batter:
Alright, let’s get started with the most important part – the batter! This is where the magic happens, and we’ll make sure it’s perfect for those lofty griddle cakes.
- Combine the Dry Ingredients: In a large mixing bowl, whisk together the flour, baking powder, salt, and sugar. Make sure everything is evenly distributed. This ensures that the baking powder works its magic throughout the entire batter, giving us that beautiful rise we’re after. I like to use a whisk for this because it helps to aerate the flour and prevent any clumps from forming.
- Incorporate the Wet Ingredients: In a separate bowl, whisk together the milk, egg, melted butter, and vanilla extract. The melted butter is crucial for adding richness and flavor to the pancakes. Don’t skip the vanilla extract either; it adds a subtle sweetness and aroma that elevates the entire dish.
- Combine Wet and Dry: Now, gently pour the wet ingredients into the dry ingredients. Using a spatula or a whisk, mix until just combined. Be careful not to overmix! Overmixing develops the gluten in the flour, which can result in tough, flat pancakes. A few lumps are perfectly fine; in fact, they’re preferable. We want a light and airy batter, not a dense one.
- Let the Batter Rest (Optional but Recommended): This is a little secret I’ve learned over the years. Letting the batter rest for about 5-10 minutes allows the gluten to relax and the baking powder to fully activate. This results in even lighter and fluffier pancakes. While the batter rests, you can prepare your griddle and get everything else ready.
Cooking Process:
Now for the fun part – cooking the pancakes! This is where you’ll see all your hard work pay off as those beautiful, golden-brown griddle cakes start to form.
- Prepare the Griddle: Preheat your griddle or frying pan over medium heat. You want it hot enough so that the pancakes cook evenly and develop a nice golden-brown color, but not so hot that they burn. A good way to test the temperature is to sprinkle a few drops of water onto the griddle. If the water sizzles and evaporates quickly, it’s ready.
- Grease the Griddle: Lightly grease the griddle with melted butter. This prevents the pancakes from sticking and helps them to develop a beautiful, even color. You can also use cooking spray, but I find that butter adds a richer flavor.
- Pour the Batter: Pour ¼ cup of batter onto the hot griddle for each pancake. You can use a measuring cup or a ladle to ensure that each pancake is the same size. Leave enough space between the pancakes so that they don’t run into each other.
- Cook the First Side: Cook for 2-3 minutes, or until bubbles start to form on the surface of the pancakes and the edges begin to look set. This is a sign that the bottom is cooked and ready to be flipped.
- Flip and Cook the Second Side: Gently flip the pancakes with a spatula and cook for another 2-3 minutes, or until golden brown on the other side. The pancakes should be cooked through and spring back when lightly touched.
- Keep Warm (Optional): If you’re making a large batch of pancakes, you can keep them warm in a preheated oven (200°F) until you’re ready to serve them. This will prevent them from getting cold and soggy.
Tips for Perfect Pancakes:
Here are a few extra tips and tricks to help you achieve pancake perfection:
- Don’t Overmix: I can’t stress this enough! Overmixing is the enemy of fluffy pancakes. Mix the batter until just combined, and don’t worry about a few lumps.
- Use Fresh Ingredients: Fresh baking powder is essential for achieving a good rise. Make sure your baking powder is not expired.
- Adjust the Heat: If your pancakes are browning too quickly, reduce the heat. If they’re not browning enough, increase the heat.
- Experiment with Flavors: Feel free to add your favorite flavors to the batter. Chocolate chips, blueberries, bananas, or even a sprinkle of cinnamon can add a delicious twist.
- Serve Immediately: Pancakes are best served fresh off the griddle. Enjoy them while they’re still warm and fluffy.
Serving Suggestions:
Now that you’ve made these amazing lofty griddle cakes, it’s time to serve them up! Here are a few of my favorite serving suggestions:
- Classic Toppings: The classic combination of butter and maple syrup is always a winner.
- Fresh Fruit: Top your pancakes with fresh berries, sliced bananas, or peaches for a healthy and delicious treat.
- Whipped Cream: A dollop of whipped cream adds a touch of indulgence.
- Chocolate Sauce: Drizzle with chocolate sauce for a decadent dessert.
- Nuts: Sprinkle with chopped nuts for added texture and flavor.
- Savory Options: For a savory twist, try topping your pancakes with fried eggs, bacon, or avocado.
Variations:
Want to mix things up a bit? Here are a few variations you can try:
- Buttermilk Pancakes: Substitute the milk with buttermilk for a tangier flavor and even fluffier texture.
- Whole Wheat Pancakes: Replace half of the all-purpose flour with whole wheat flour for a healthier option.
- Chocolate Chip Pancakes: Add ½ cup of chocolate chips to the batter for a chocolatey treat.
- Blueberry Pancakes: Gently fold in 1 cup of fresh or frozen blueberries into the batter.
- Banana Pancakes: Mash one ripe banana and add it to the wet ingredients.
Troubleshooting:
Sometimes, things don’t go exactly as planned. Here are a few common pancake problems and how to fix them:
- Flat Pancakes: This is usually caused by overmixing the batter or using expired baking powder. Make sure to mix the batter until just combined and use fresh baking powder.
- Tough Pancakes: This is also caused by overmixing the batter. Remember to mix gently!
- Burnt Pancakes: The griddle is too hot. Reduce the heat and try again.
- Raw Inside: The griddle is not hot enough. Increase the heat and cook the pancakes for a longer time.
- Sticking Pancakes: The griddle is not properly greased. Make sure to grease the griddle well before pouring the batter.
Storage:
If you have any leftover pancakes, you can store them in the refrigerator for up to 3 days. To reheat, simply microwave them for a few seconds or toast them in a toaster oven.
Freezing:
Pancakes can also be frozen for longer storage. To freeze, place the cooked pancakes in a single layer on a baking sheet and freeze for about 30 minutes, or until solid. Then, transfer the frozen pancakes to a freezer bag or container. They can be stored in the freezer for up to 2 months. To reheat, simply microwave them for a few seconds or toast them in a toaster oven.
Enjoy your Lofty Griddle Cakes!
Conclusion:
So, there you have it! These Lofty Griddle Cakes are more than just breakfast; they’re a weekend ritual waiting to happen. I truly believe this recipe is a must-try for anyone who appreciates a light, fluffy, and utterly satisfying start to their day. The secret ingredient, the technique of gently folding in the whipped egg whites, really does make all the difference, creating a texture that’s almost cloud-like. Forget those dense, heavy pancakes – these are in a league of their own.
But why is this recipe a must-try, you ask? Well, beyond the incredible texture, it’s the versatility. The base recipe is fantastic as is, but it’s also a blank canvas for your culinary creativity. Feeling fruity? Toss in some fresh blueberries, raspberries, or sliced bananas into the batter before cooking. Craving something a little more decadent? Chocolate chips are always a winner, or you could even swirl in a spoonful of Nutella for a hazelnutty delight.
And the serving suggestions are endless! Of course, a classic stack of these Lofty Griddle Cakes topped with butter and maple syrup is always a good choice. But don’t be afraid to experiment. Try serving them with a dollop of whipped cream and fresh berries for a more elegant brunch. Or, for a savory twist, top them with a fried egg, crispy bacon, and a drizzle of hot sauce. My personal favorite is a combination of peanut butter, sliced bananas, and a sprinkle of chopped nuts – it’s like a pancake version of my favorite sandwich!
Another variation I absolutely adore is adding a touch of lemon zest and poppy seeds to the batter. It gives the pancakes a bright, citrusy flavor that’s perfect for spring. You could also try using different types of milk, like almond milk or oat milk, to make them dairy-free. And for a gluten-free option, simply substitute the all-purpose flour with a gluten-free blend. Just be sure to check the blend’s instructions for any additional binding agents that might be needed.
Serving Suggestions:
- Classic: Butter and maple syrup
- Fruity: Fresh berries and whipped cream
- Decadent: Chocolate chips and Nutella
- Savory: Fried egg, bacon, and hot sauce
- Peanut Butter Banana: Peanut butter, sliced bananas, and chopped nuts
- Lemon Poppy Seed: Lemon zest and poppy seeds
I’ve poured my heart into perfecting this recipe, and I’m confident that you’ll love it as much as I do. It’s a recipe that’s been passed down through my family, and it always brings a smile to everyone’s face. It’s the perfect way to start a weekend morning, or even just to treat yourself on a weekday.
So, what are you waiting for? Gather your ingredients, put on your apron, and get ready to whip up a batch of these incredible Lofty Griddle Cakes. I promise you won’t be disappointed. And most importantly, don’t forget to share your experience! I’d love to hear what variations you tried, what toppings you used, and how much you enjoyed them. Leave a comment below, tag me in your photos on social media – I can’t wait to see your creations! Happy cooking, and happy eating! I hope you enjoy making these as much as I do.
Lofty Griddle Cakes: The Ultimate Guide to Fluffy Perfection
Fluffy and delicious homemade pancakes, perfect for a weekend breakfast. This recipe delivers lofty, golden-brown griddle cakes that are sure to please.
Ingredients
Instructions
Recipe Notes
- Don’t overmix the batter.
- Use fresh baking powder.
- Adjust the heat as needed to prevent burning.
- Experiment with flavors like chocolate chips, blueberries, or bananas.
- Serve immediately for the best taste and texture.
- For buttermilk pancakes, substitute milk with buttermilk.
- For whole wheat pancakes, replace half of the all-purpose flour with whole wheat flour.
Leave a Comment