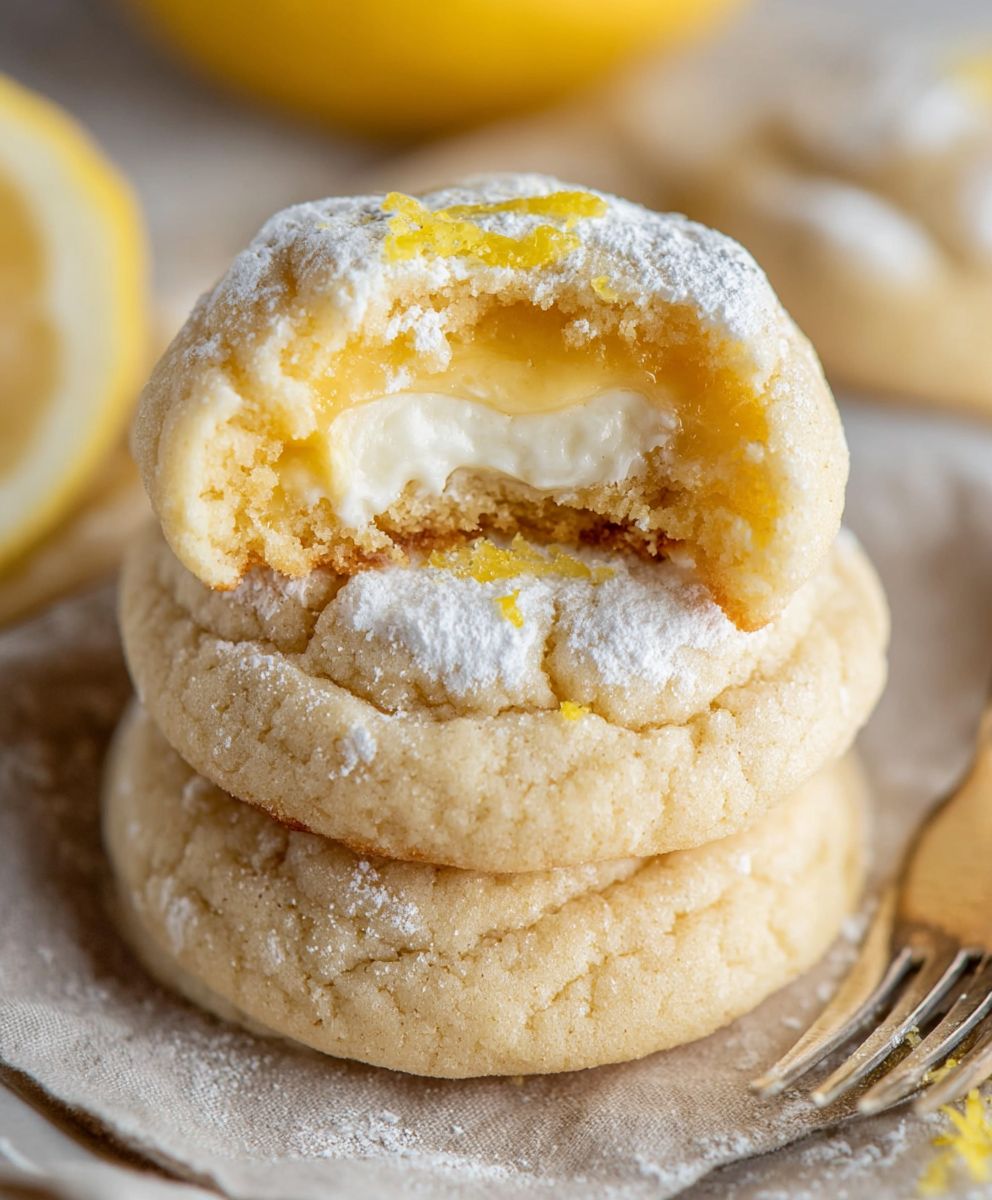
Lemon cheesecake cookies: prepare to meet your new favorite treat! Imagine the tangy brightness of lemon perfectly balanced with the creamy, decadent richness of cheesecake, all nestled within a soft, chewy cookie. Sounds divine, doesn’t it? These aren’t just any cookies; they’re a delightful fusion of two beloved desserts, creating a symphony of flavors and textures that will leave you craving more.
While the exact origins of combining cheesecake and cookies are somewhat shrouded in mystery, the concept draws inspiration from the enduring popularity of both desserts. Cheesecake, with its roots tracing back to ancient Greece, has evolved into countless variations across cultures. Similarly, cookies, a staple in baking traditions worldwide, offer endless possibilities for flavor combinations. Bringing these two together feels like a natural evolution, a culinary marriage made in heaven!
People adore lemon cheesecake cookies for their irresistible combination of sweet and tart. The zesty lemon cuts through the richness of the cheesecake, preventing it from being overly heavy. The soft, slightly chewy texture of the cookie base provides the perfect canvas for these flavors to shine. Plus, they’re incredibly convenient! No need to bake an entire cheesecake when you can enjoy all the deliciousness in a perfectly portioned cookie. Whether you’re looking for a delightful afternoon snack, a crowd-pleasing dessert for a party, or simply a little something to brighten your day, these cookies are guaranteed to hit the spot.
Ingredients:
- For the Cookies:
- 1 ½ cups (192g) all-purpose flour
- ½ teaspoon baking powder
- ¼ teaspoon baking soda
- ½ teaspoon salt
- ½ cup (1 stick, 113g) unsalted butter, softened
- ¾ cup (150g) granulated sugar
- 1 large egg
- 1 teaspoon vanilla extract
- 1 tablespoon lemon zest, finely grated
- For the Cheesecake Filling:
- 4 ounces (113g) cream cheese, softened
- ¼ cup (50g) granulated sugar
- 1 tablespoon lemon juice, freshly squeezed
- ½ teaspoon vanilla extract
- For the Lemon Glaze (Optional):
- 1 cup (120g) powdered sugar
- 2-3 tablespoons lemon juice, freshly squeezed
- ½ teaspoon lemon zest, finely grated (optional)
Preparing the Cookie Dough:
- Combine Dry Ingredients: In a medium bowl, whisk together the flour, baking powder, baking soda, and salt. This ensures that the leavening agents are evenly distributed throughout the dough, resulting in a consistent texture. Set aside for later.
- Cream Butter and Sugar: In a large bowl (or the bowl of a stand mixer), cream together the softened butter and granulated sugar until light and fluffy. This process incorporates air into the mixture, which contributes to the cookies’ tender crumb. I usually cream it for about 3-5 minutes on medium speed. You’ll know it’s ready when it looks pale and feels airy.
- Add Egg and Vanilla: Beat in the egg and vanilla extract until well combined. Make sure to scrape down the sides of the bowl to ensure everything is evenly mixed. The egg adds richness and structure to the cookies, while the vanilla extract enhances the overall flavor.
- Incorporate Lemon Zest: Stir in the lemon zest. The zest is where all the lemon flavor is, so don’t skip this step! It adds a bright, citrusy note that complements the cheesecake filling perfectly.
- Gradually Add Dry Ingredients: Gradually add the dry ingredients to the wet ingredients, mixing on low speed until just combined. Be careful not to overmix, as this can develop the gluten in the flour and result in tough cookies. I usually add the dry ingredients in three additions, mixing until just incorporated after each addition.
- Chill the Dough: Wrap the dough in plastic wrap and chill in the refrigerator for at least 30 minutes. This chilling period allows the gluten to relax, preventing the cookies from spreading too much during baking. It also makes the dough easier to handle. I sometimes chill it for an hour or even longer if I have the time.
Preparing the Cheesecake Filling:
- Cream Cheese and Sugar: In a medium bowl, beat together the softened cream cheese and granulated sugar until smooth and creamy. Make sure your cream cheese is truly softened, or you’ll end up with lumps in your filling.
- Add Lemon Juice and Vanilla: Beat in the lemon juice and vanilla extract until well combined. The lemon juice adds a tangy flavor that balances the sweetness of the cream cheese and sugar.
- Chill the Filling: Cover the bowl and chill the cheesecake filling in the refrigerator while you prepare the cookies. This will help the filling firm up slightly, making it easier to work with.
Assembling and Baking the Cookies:
- Preheat Oven: Preheat your oven to 350°F (175°C). Line baking sheets with parchment paper. Parchment paper prevents the cookies from sticking and makes cleanup a breeze.
- Scoop Cookie Dough: Scoop rounded tablespoons of cookie dough onto the prepared baking sheets, leaving about 2 inches between each cookie. I like to use a cookie scoop to ensure that all the cookies are the same size.
- Create Indentations: Use your thumb or the back of a spoon to create a small indentation in the center of each cookie. This indentation will hold the cheesecake filling.
- Fill with Cheesecake Filling: Spoon about 1 teaspoon of cheesecake filling into each indentation. Be careful not to overfill, as the filling may spread during baking.
- Bake the Cookies: Bake for 10-12 minutes, or until the edges of the cookies are lightly golden brown and the cheesecake filling is set. Keep a close eye on them, as baking times may vary depending on your oven.
- Cool the Cookies: Remove the cookies from the oven and let them cool on the baking sheets for a few minutes before transferring them to a wire rack to cool completely. This prevents the cookies from breaking while they are still warm and soft.
Preparing the Lemon Glaze (Optional):
- Combine Ingredients: In a small bowl, whisk together the powdered sugar and lemon juice until smooth. Add more lemon juice, 1 teaspoon at a time, until you reach your desired consistency. If you want a thicker glaze, use less lemon juice. For a thinner glaze, use more.
- Add Lemon Zest (Optional): Stir in the lemon zest, if using. This adds an extra burst of lemon flavor and visual appeal.
- Drizzle Glaze: Once the cookies are completely cool, drizzle the lemon glaze over the top. You can use a spoon or a piping bag for this step.
- Let Glaze Set: Allow the glaze to set completely before serving. This usually takes about 15-20 minutes.
Tips and Variations:
- Use Room Temperature Ingredients: Using room temperature butter and cream cheese is crucial for achieving a smooth and creamy texture. If your ingredients are too cold, they won’t blend properly.
- Don’t Overmix the Dough: Overmixing the dough can develop the gluten in the flour, resulting in tough cookies. Mix until just combined.
- Chill the Dough: Chilling the dough is essential for preventing the cookies from spreading too much during baking.
- Adjust Sweetness: If you prefer a less sweet cookie, you can reduce the amount of sugar in the dough.
- Add White Chocolate Chips: For an extra touch of sweetness and flavor, add ½ cup of white chocolate chips to the cookie dough.
- Make it Gluten-Free: Substitute the all-purpose flour with a gluten-free all-purpose flour blend. Be sure to use a blend that contains xanthan gum for best results.
- Storage: Store the cookies in an airtight container at room temperature for up to 3 days. You can also freeze them for longer storage.
- Freezing: To freeze the cookies, place them in a single layer on a baking sheet and freeze until solid. Then, transfer them to a freezer-safe bag or container. They can be stored in the freezer for up to 2 months. Thaw completely before serving.
- Lemon Extract: If you want an even stronger lemon flavor, you can add a few drops of lemon extract to the cookie dough or the cheesecake filling. Be careful not to add too much, as lemon extract can be quite potent.
- Lime Variation: Substitute lime zest and lime juice for the lemon zest and lemon juice for a lime cheesecake cookie.
Enjoy your delicious lemon cheesecake cookies! I hope you love them as much as I do. They’re perfect for a special occasion or just a sweet treat any day of the week.
Conclusion:
So, there you have it! These Lemon Cheesecake Cookies are truly something special, and I genuinely believe they deserve a spot in your regular baking rotation. Why? Because they perfectly capture the tangy brightness of lemon, the creamy decadence of cheesecake, and the comforting familiarity of a cookie, all in one delightful bite. It’s a flavor explosion that’s both sophisticated and utterly irresistible. They are also surprisingly easy to make, meaning you don’t need to be a seasoned baker to achieve cookie perfection. Trust me, the minimal effort yields maximum reward!
But the best part? These aren’t just any cookies; they’re incredibly versatile. Imagine serving them alongside a scoop of vanilla bean ice cream for an elegant dessert. Or, picture them gracing a brunch spread, adding a touch of sunshine to your morning. They’re also fantastic with a simple cup of coffee or tea. And if you’re feeling adventurous, why not crumble them over a bowl of fresh berries for a light and refreshing treat?
Looking for variations? I’ve got you covered! For an extra burst of citrus, try adding a teaspoon of lemon zest to the cookie dough. If you’re a fan of white chocolate, fold in some white chocolate chips for added sweetness and creaminess. You could even experiment with different extracts, like almond or vanilla, to create your own unique flavor profile. And for a truly decadent experience, drizzle the cooled cookies with a simple glaze made from powdered sugar and lemon juice. The possibilities are endless!
I’ve also found that these cookies are a huge hit at parties and gatherings. They’re the perfect size for snacking, and their bright, cheerful flavor is sure to please a crowd. Plus, they’re so pretty to look at! I often get asked for the recipe whenever I bring them to potlucks or bake sales.
But don’t just take my word for it. I wholeheartedly encourage you to try this lemon cheesecake cookies recipe for yourself. I’m confident that you’ll fall in love with their unique flavor and texture. They are the perfect treat for any occasion, or even just a little something to brighten your day.
Once you’ve given them a try, I’d absolutely love to hear about your experience! Did you make any variations? What did you think of the flavor? Were they a hit with your family and friends? Please share your thoughts and photos in the comments below. Your feedback is invaluable, and it helps me to continue creating and sharing recipes that you’ll love. Happy baking, and I can’t wait to hear from you!
I am sure that you will love this recipe as much as I do. It is a perfect blend of sweet and tart, and the creamy cheesecake filling makes these cookies irresistible. So go ahead, give them a try, and let me know what you think! I am confident that you will not be disappointed.
Remember to tag me on social media if you share your creations! I love seeing your baking masterpieces. And don’t forget to subscribe to my newsletter for more delicious recipes and baking tips. Happy baking!
Lemon Cheesecake Cookies: The Ultimate Recipe & Baking Guide
Soft, chewy lemon cookies with a tangy cheesecake filling and optional sweet lemon glaze. A delightful citrusy and creamy treat for any occasion.
Ingredients
Instructions
Recipe Notes
- Use room temperature butter and cream cheese for a smooth texture.
- Don’t overmix the dough.
- Chilling the dough is essential to prevent spreading.
- Adjust sweetness by reducing sugar if desired.
- Add ½ cup white chocolate chips to the cookie dough for extra sweetness.
- Substitute all-purpose flour with a gluten-free blend for gluten-free cookies.
- Store cookies in an airtight container at room temperature for up to 3 days or freeze for up to 2 months.
- Add a few drops of lemon extract for a stronger lemon flavor.
- Substitute lime zest and lime juice for a lime cheesecake cookie variation.





Leave a Comment