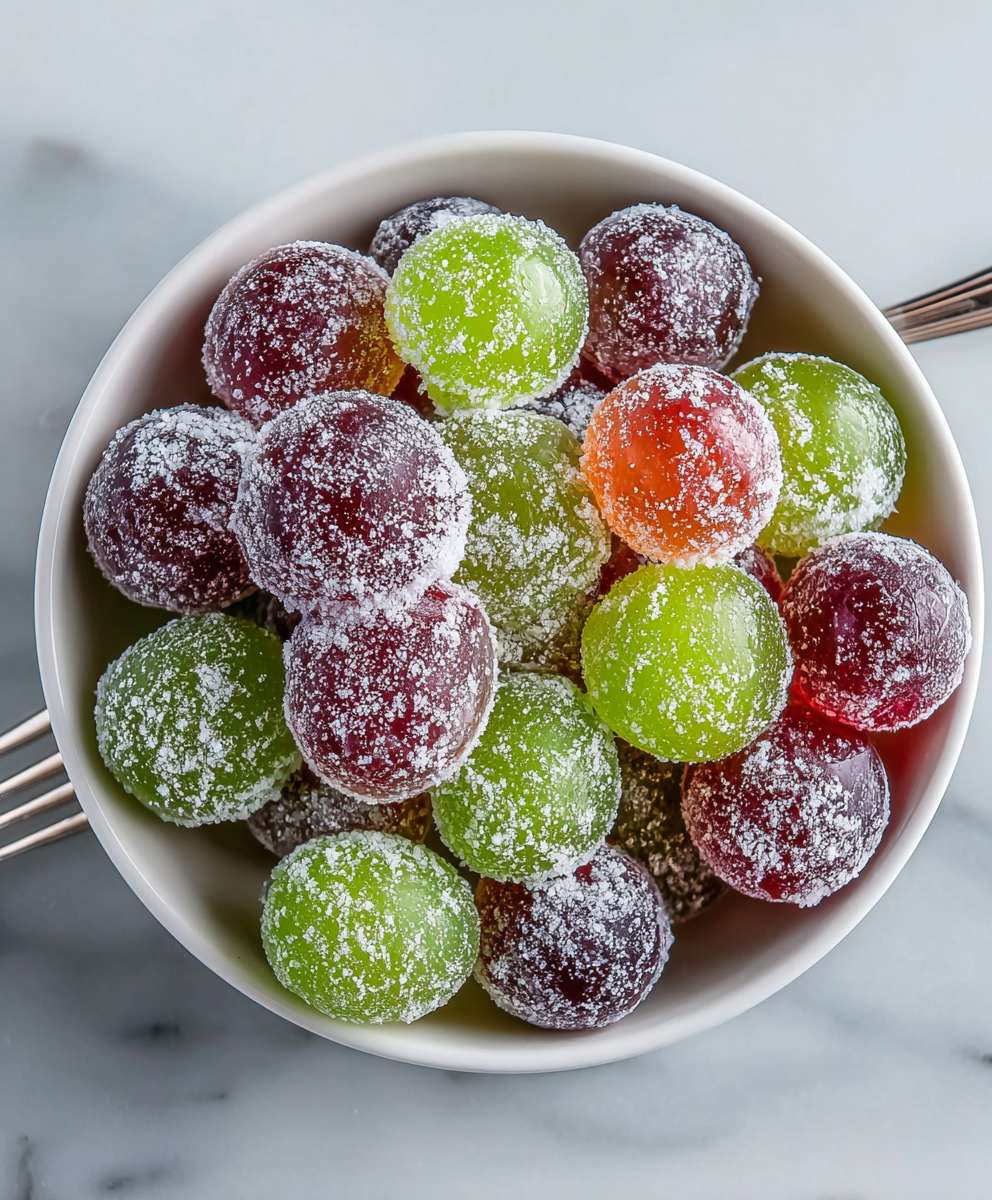
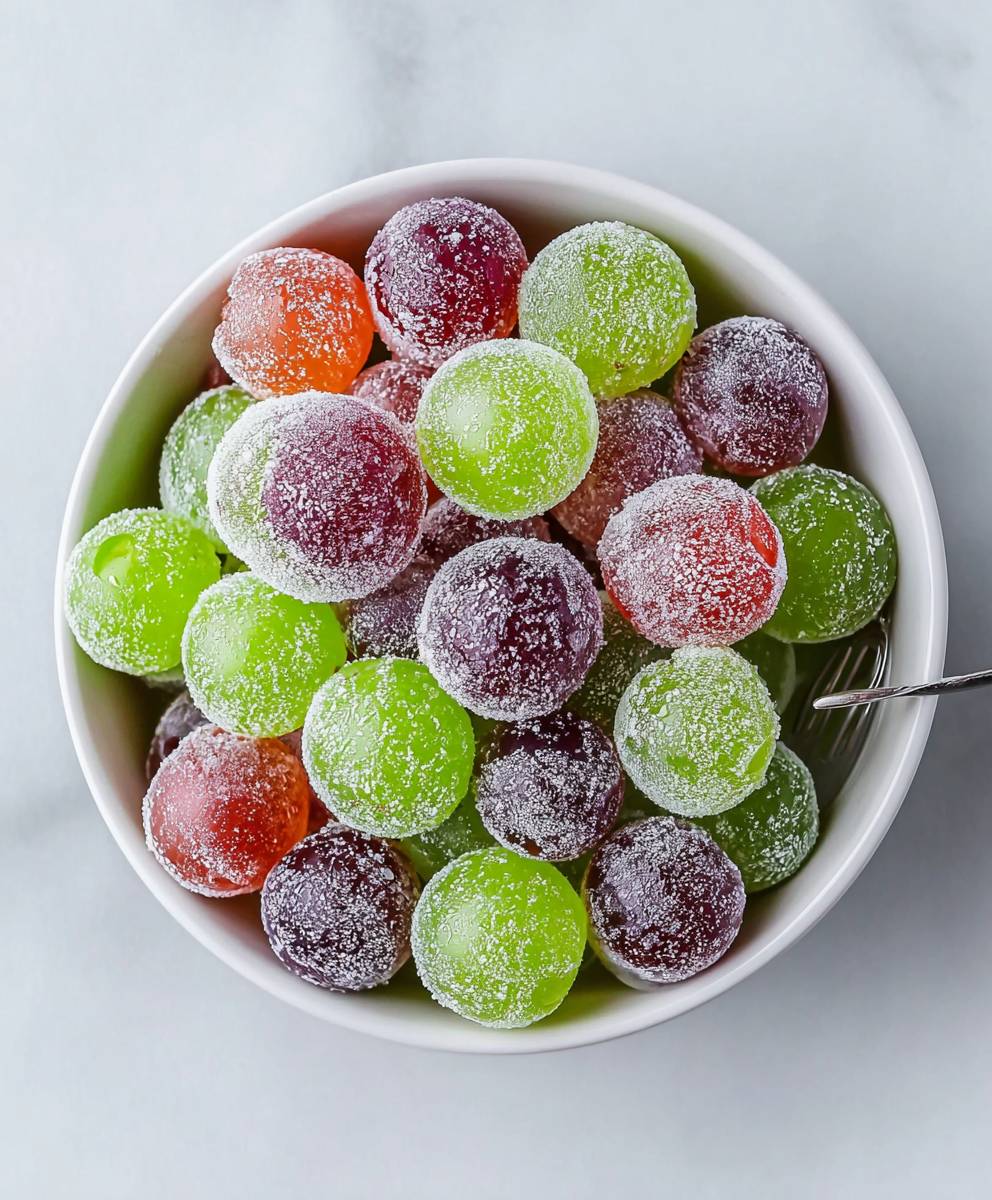
Kool Aid Grapes: Prepare to experience a taste sensation that will transport you back to carefree summer days! These aren’t your average grapes; they’re a vibrant, tangy, and utterly irresistible treat that’s taking the internet by storm. Imagine biting into a plump, juicy grape, only to be met with an explosion of your favorite Kool-Aid flavor. Sounds amazing, right?
While not steeped in ancient history, Kool Aid Grapes represent a modern twist on a classic snack. They embody the spirit of playful experimentation in the kitchen, a desire to elevate simple ingredients into something extraordinary. Think of it as a delicious science experiment that always yields a delightful result!
What makes these grapes so beloved? It’s the perfect combination of textures – the satisfying pop of the grape skin, followed by the burst of sweet and slightly tart Kool-Aid coating. They’re incredibly easy to make, requiring minimal ingredients and effort, making them ideal for a quick snack, a fun party treat, or a colorful addition to a fruit platter. Plus, they’re a fantastic way to get kids (and adults!) to enjoy more fruit. Get ready to pucker up and enjoy this sweet and tangy delight!
Ingredients:
- 2 pounds seedless green grapes (such as Thompson or Sugraone)
- 1 packet (0.13-0.23 oz) unsweetened Kool-Aid powder, any flavor (grape, cherry, blue raspberry, and watermelon are popular choices)
- 1/4 cup granulated sugar (adjust to taste, depending on the Kool-Aid flavor and your desired sweetness)
- 1/4 cup water
Preparing the Kool-Aid Mixture:
Okay, let’s get started! The first thing we need to do is create our Kool-Aid coating. This is where the magic happens, transforming ordinary grapes into a sweet and tangy treat.
- Combine Kool-Aid Powder and Sugar: In a medium-sized bowl, whisk together the Kool-Aid powder and granulated sugar. Make sure there are no clumps of Kool-Aid powder. We want a nice, even mixture so that each grape gets a consistent coating of flavor. The amount of sugar can be adjusted depending on the flavor of Kool-Aid you choose. Some flavors are naturally more tart, so you might want to add a little extra sugar to balance it out. Taste the mixture and adjust as needed.
- Add Water Gradually: Slowly add the water to the Kool-Aid and sugar mixture, whisking constantly. We want to create a thick syrup-like consistency. If you add the water too quickly, you might end up with a watery mixture, which won’t coat the grapes as effectively. Continue whisking until the sugar and Kool-Aid powder are completely dissolved, and the mixture is smooth and free of any gritty particles. The mixture should be thick enough to cling to the grapes but not so thick that it’s difficult to work with.
Preparing the Grapes:
While the Kool-Aid mixture is resting (just kidding, it doesn’t need to rest!), let’s get the grapes ready. This step is crucial because clean, dry grapes will ensure the Kool-Aid coating adheres properly.
- Wash the Grapes Thoroughly: Place the grapes in a colander and rinse them under cold running water. Gently rub the grapes to remove any dirt or debris. Make sure to get all the grapes clean, as any residue can prevent the Kool-Aid coating from sticking.
- Dry the Grapes Completely: This is a super important step! Use paper towels or a clean kitchen towel to thoroughly dry the grapes. Excess moisture will prevent the Kool-Aid mixture from adhering properly, resulting in a soggy, less flavorful treat. I like to spread the grapes out on a large baking sheet lined with paper towels to allow them to air dry for a few minutes after I’ve towel-dried them. This ensures they are completely dry.
- Remove Grapes from Stems: Gently pluck the grapes from their stems. This makes them easier to handle and coat individually. Plus, it’s just more fun to eat them this way! Make sure you don’t damage the grapes in the process.
Coating the Grapes:
Now for the fun part! This is where we transform those plain green grapes into vibrant, flavorful Kool-Aid treats. Get ready to get your hands a little sticky!
- Dip the Grapes: One at a time, dip each grape into the Kool-Aid mixture. Make sure the grape is fully submerged and coated evenly. You can use a fork or a toothpick to help with this process, or you can simply use your fingers. If using your fingers, be prepared for them to get a little sticky!
- Remove Excess Coating: After dipping, gently lift the grape out of the mixture and allow any excess Kool-Aid coating to drip back into the bowl. You don’t want the coating to be too thick, as it can become overly sweet and sticky. A thin, even coating is perfect.
- Place on Parchment Paper: Place the coated grape on a baking sheet lined with parchment paper. The parchment paper will prevent the grapes from sticking to the baking sheet and make cleanup a breeze. Make sure the grapes are not touching each other on the baking sheet, as this can cause them to stick together as they dry.
- Repeat: Repeat steps 1-3 until all the grapes are coated.
Chilling and Setting:
Patience is key! This step allows the Kool-Aid coating to set properly, creating that perfect sweet and tangy shell around the grapes.
- Refrigerate: Place the baking sheet with the coated grapes in the refrigerator. Chill for at least 1-2 hours, or until the Kool-Aid coating is firm and set. The longer you chill them, the firmer the coating will become. I usually chill mine for at least 2 hours, but sometimes I’ll leave them in the fridge overnight for an extra-firm coating.
- Serve and Enjoy: Once the grapes are chilled and the coating is set, they are ready to serve! These Kool-Aid grapes are best enjoyed cold, straight from the refrigerator. They make a perfect snack on a hot day, a fun treat for kids, or a unique addition to any party.
Tips and Variations:
Want to take your Kool-Aid grapes to the next level? Here are a few tips and variations to try:
- Experiment with Flavors: Don’t be afraid to experiment with different Kool-Aid flavors! Grape, cherry, blue raspberry, and watermelon are all popular choices, but you can try any flavor you like. You can even mix and match flavors to create your own unique combinations.
- Add a Tangy Twist: For a tangy twist, try adding a pinch of citric acid to the Kool-Aid mixture. This will enhance the tartness of the Kool-Aid and create a more complex flavor profile.
- Use Different Types of Grapes: While green grapes are the most common choice, you can also use red or black grapes. Just keep in mind that the color of the grapes will affect the final appearance of the Kool-Aid grapes.
- Make them Sparkly: Before the Kool-Aid coating sets, sprinkle the grapes with edible glitter for a sparkly, festive treat. This is a great option for parties or special occasions.
- Freeze them: For an extra refreshing treat, freeze the Kool-Aid grapes after they have chilled. Frozen Kool-Aid grapes are perfect for hot summer days.
- Dipping Chocolate: After the Kool-Aid coating has set, dip the grapes in melted chocolate for an extra decadent treat. White chocolate, milk chocolate, or dark chocolate all work well.
- Storage: Store leftover Kool-Aid grapes in an airtight container in the refrigerator for up to 3 days. Keep in mind that the coating may become slightly sticky over time.
Troubleshooting:
Sometimes things don’t go exactly as planned. Here are a few common issues and how to fix them:
- Coating is too thin: If the Kool-Aid coating is too thin, try adding a little more Kool-Aid powder and sugar to the mixture. You can also try chilling the grapes for a longer period of time to allow the coating to set more firmly.
- Coating is too thick: If the Kool-Aid coating is too thick, try adding a little more water to the mixture. Be careful not to add too much water, as this can make the coating too thin.
- Grapes are sticky: If the grapes are sticky, it means the Kool-Aid coating hasn’t set properly. Try chilling the grapes for a longer period of time. You can also try patting the grapes with a paper towel to remove any excess moisture.
- Kool-Aid mixture is gritty: If the Kool-Aid mixture is gritty, it means the sugar and Kool-Aid powder haven’t dissolved completely. Try whisking the mixture for a longer period of time. You can also try heating the mixture slightly in the microwave to help the sugar and Kool-Aid powder dissolve.
Enjoy your Kool-Aid Grapes!
Conclusion:
So, there you have it! These Kool-Aid Grapes are truly a revelation. I know, I know, it sounds a little…out there. But trust me on this one. The initial burst of tangy Kool-Aid sweetness followed by the juicy pop of the grape is an experience your taste buds won’t soon forget. It’s the perfect balance of fun and flavor, making it an absolute must-try, especially if you’re looking for a unique and refreshing treat to beat the heat.
Why is this recipe a must-try? Well, beyond the sheer novelty, it’s incredibly simple. We’re talking minimal ingredients and practically zero effort. It’s a fantastic way to get kids involved in the kitchen, and let’s be honest, adults will love them just as much. Plus, it’s a surprisingly healthy-ish alternative to overly processed candies. You’re still getting the natural goodness of grapes, just with a little extra pizzazz! It’s a guaranteed crowd-pleaser at parties, picnics, or even just a fun afternoon snack.
Now, let’s talk serving suggestions and variations because the possibilities are endless! For a sophisticated twist, try using green grapes and a sugar-free lemonade Kool-Aid for a tart and tangy treat. Or, for a truly decadent experience, dip the Kool-Aid coated grapes in melted white chocolate and let them harden. The creamy chocolate perfectly complements the fruity sweetness. You could even sprinkle them with edible glitter for an extra touch of sparkle!
Another fun idea is to freeze the Kool-Aid Grapes for an even more refreshing treat on a hot day. They become like little frozen candies, perfect for cooling down after a workout or just lounging by the pool. You can also experiment with different Kool-Aid flavors to find your perfect combination. Watermelon, cherry, grape (of course!), even tropical punch – the choice is yours! Get creative and have fun with it!
For a party, consider arranging the grapes on a platter with other colorful fruits and berries. It’ll create a visually stunning and delicious spread that everyone will rave about. You can also serve them in small cups or bowls for individual portions. And don’t forget to have plenty of napkins on hand – they can get a little sticky!
I truly believe that these Kool-Aid Grapes are a game-changer. They’re fun, easy, and incredibly delicious. So, I urge you to give this recipe a try. I promise you won’t be disappointed. And once you do, please, please, please share your experience! I’d love to hear what flavor combinations you tried, what variations you came up with, and how much everyone enjoyed them. Tag me in your photos on social media – I can’t wait to see your creations! Let’s spread the Kool-Aid Grape love and make this summer the sweetest one yet! Happy snacking!
Kool Aid Grapes: The Ultimate Guide to Making This Viral Treat
Sweet and tangy Kool-Aid grapes are a fun and easy treat made by coating fresh grapes in a flavorful Kool-Aid mixture. Perfect for kids and adults alike!
Ingredients
Instructions
Recipe Notes
- Experiment with different Kool-Aid flavors.
- Add a pinch of citric acid for a tangy twist.
- Use different types of grapes (red or black).
- Sprinkle with edible glitter for a sparkly treat.
- Freeze for an extra refreshing treat.
- Dip in melted chocolate after the Kool-Aid coating has set.
- Store leftover Kool-Aid grapes in an airtight container in the refrigerator for up to 3 days.


Leave a Comment