
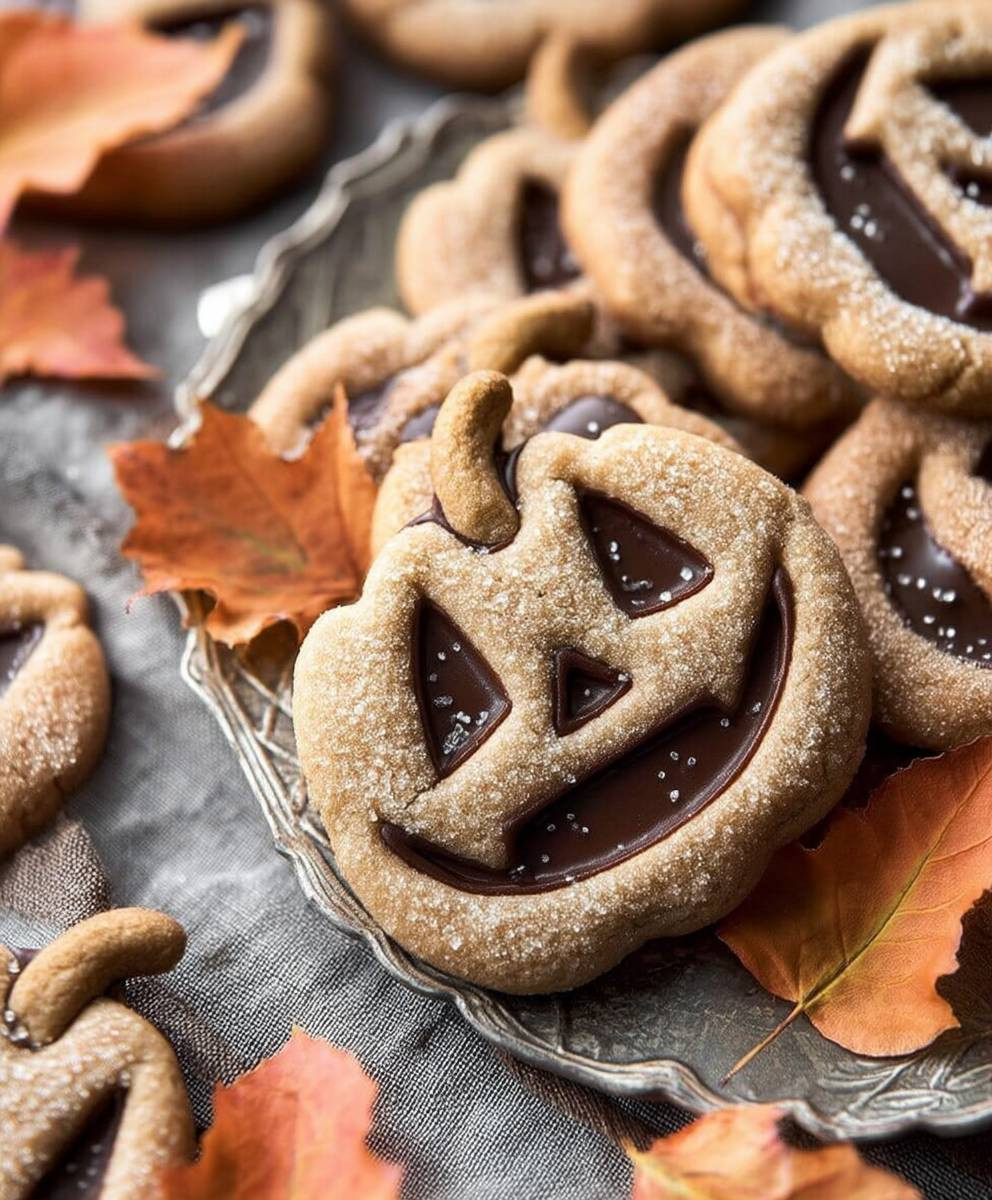
Jack O Lantern Cookies: Aren’t they just the cutest, spookiest, and most delicious way to celebrate Halloween? I think so! Imagine biting into a buttery, melt-in-your-mouth sugar cookie, decorated to resemble a grinning Jack O’ Lantern. It’s pure Halloween magic in every bite.
While the exact origins of decorating cookies for Halloween are a bit murky, the tradition of carving Jack O’ Lanterns themselves dates back centuries. Irish folklore tells the tale of Stingy Jack, who tricked the devil and was doomed to wander the earth with only a burning coal inside a carved-out turnip to light his way. When Irish immigrants arrived in America, they found pumpkins to be a much more suitable carving medium, and the Jack O’ Lantern was born. Now, we’ve taken that iconic image and transformed it into edible art!
What’s not to love about Jack O Lantern Cookies? They are incredibly versatile. You can use your favorite sugar cookie recipe, get creative with the icing, and customize each cookie with unique facial expressions. Plus, they are a fantastic activity to do with kids. The combination of the fun decorating process and the sweet, satisfying taste makes them a Halloween favorite. Whether you’re baking for a party, a school event, or simply a festive treat for your family, these cookies are guaranteed to bring smiles and spread Halloween cheer. So, let’s get baking and create some spooktacular memories!

Ingredients:
- For the Cookies:
- 3 cups all-purpose flour, plus more for dusting
- 1 teaspoon baking powder
- 1/2 teaspoon baking soda
- 1/4 teaspoon salt
- 1 cup (2 sticks) unsalted butter, softened
- 1 1/2 cups granulated sugar
- 2 large eggs
- 1 teaspoon vanilla extract
- 1/2 teaspoon orange extract (optional, but adds a nice flavor!)
- For the Royal Icing:
- 4 cups powdered sugar, sifted
- 3 tablespoons meringue powder
- 1/2 cup warm water, plus more as needed
- Gel food coloring (orange, black, green)
Preparing the Cookie Dough:
- Combine Dry Ingredients: In a medium bowl, whisk together the flour, baking powder, baking soda, and salt. Make sure everything is evenly distributed. This ensures your cookies rise properly and have a consistent texture.
- Cream Butter and Sugar: In a large bowl (or the bowl of a stand mixer), cream together the softened butter and granulated sugar until light and fluffy. This usually takes about 3-5 minutes. Scrape down the sides of the bowl occasionally to ensure everything is evenly mixed. The mixture should be pale and airy.
- Add Eggs and Extracts: Beat in the eggs one at a time, mixing well after each addition. Then, stir in the vanilla extract and orange extract (if using). Don’t overmix at this stage; just combine until everything is incorporated.
- Gradually Add Dry Ingredients: Gradually add the dry ingredients to the wet ingredients, mixing on low speed until just combined. Be careful not to overmix, as this can result in tough cookies. Mix until the flour is just incorporated and no streaks remain.
- Divide and Chill Dough: Divide the dough in half, flatten each half into a disc, wrap tightly in plastic wrap, and refrigerate for at least 2 hours, or preferably overnight. Chilling the dough is crucial because it allows the gluten to relax, preventing the cookies from spreading too much during baking. It also makes the dough easier to handle.
Cutting and Baking the Cookies:
- Preheat Oven and Prepare Baking Sheets: Preheat your oven to 350°F (175°C). Line baking sheets with parchment paper or silicone baking mats. This prevents the cookies from sticking and makes cleanup a breeze.
- Roll Out the Dough: On a lightly floured surface, roll out one disc of dough to about 1/4 inch thickness. Keep the other disc chilled while you work. If the dough is sticking, add a little more flour to your rolling surface.
- Cut Out Shapes: Use a jack-o’-lantern cookie cutter (or any other Halloween-themed cookie cutters you like!) to cut out shapes from the dough. Try to cut the cookies close together to minimize scraps.
- Place on Baking Sheets: Carefully transfer the cut-out cookies to the prepared baking sheets, leaving about 1 inch of space between each cookie.
- Bake: Bake for 8-10 minutes, or until the edges are lightly golden brown. Keep a close eye on them, as baking times can vary depending on your oven.
- Cool: Let the cookies cool on the baking sheets for a few minutes before transferring them to a wire rack to cool completely. Make sure the cookies are completely cool before you start decorating.
- Repeat: Repeat the rolling, cutting, and baking process with the remaining dough, including the scraps. You can re-roll the scraps, but keep in mind that the dough will become tougher each time you re-roll it.
Preparing the Royal Icing:
- Combine Dry Ingredients: In a large bowl (or the bowl of a stand mixer), whisk together the sifted powdered sugar and meringue powder. Sifting the powdered sugar is important to remove any lumps and ensure a smooth icing.
- Add Water: Gradually add the warm water to the dry ingredients, mixing on low speed until combined. Be careful not to add too much water at once, as this can make the icing too thin.
- Beat Until Stiff: Increase the speed to medium and beat for 5-7 minutes, or until the icing is stiff and glossy. The icing should hold its shape when you lift the beater.
- Adjust Consistency: If the icing is too thick, add a little more water, one teaspoon at a time, until you reach the desired consistency. If the icing is too thin, add a little more powdered sugar, one tablespoon at a time.
- Divide and Color: Divide the icing into separate bowls, depending on how many colors you want to use. Add gel food coloring to each bowl and mix well until the color is evenly distributed. Gel food coloring is preferred over liquid food coloring because it won’t change the consistency of the icing as much. I usually make orange for the base, black for the details, and green for the stem.
- Prepare Piping Bags: Transfer each color of icing to a piping bag fitted with a small round tip (or use a zip-top bag and snip off a tiny corner).
Decorating the Cookies:
- Outline the Cookies: Use the orange icing to outline each jack-o’-lantern cookie. This creates a border that will prevent the flood icing from running off the edges.
- Flood the Cookies: Thin the remaining orange icing slightly by adding a few drops of water at a time, until it reaches a “flood” consistency. This means that when you drop a spoonful of icing back into the bowl, it should disappear back into the rest of the icing in about 10-15 seconds.
- Flood the Interior: Use the thinned orange icing to flood the interior of each outlined cookie. Use a toothpick or scribe tool to spread the icing evenly and pop any air bubbles.
- Let the Base Dry: Let the orange base icing dry completely before adding any details. This usually takes at least 2-3 hours, or preferably overnight. This is a crucial step to prevent the colors from bleeding together.
- Add Details: Once the base icing is dry, use the black icing to pipe on the jack-o’-lantern’s face. Get creative with your designs! You can use different tips to create different effects.
- Add Stem (Optional): Use the green icing to pipe on a stem at the top of each jack-o’-lantern.
- Let the Decorations Dry: Let the decorated cookies dry completely before storing them. This usually takes another 1-2 hours.
Tips for Success:
- Use Room Temperature Ingredients: Make sure your butter and eggs are at room temperature for the best results. This helps them to cream together properly and creates a smoother dough.
- Don’t Overmix the Dough: Overmixing the dough can develop the gluten, resulting in tough cookies. Mix until just combined.
- Chill the Dough: Chilling the dough is essential for preventing the cookies from spreading too much during baking.
- Use Parchment Paper or Silicone Baking Mats: This prevents the cookies from sticking and makes cleanup easier.
- Don’t Overbake the Cookies: Overbaked cookies will be dry and crumbly. Bake until the edges are lightly golden brown.
- Let the Cookies Cool Completely: Make sure the cookies are completely cool before decorating them.
- Sift the Powdered Sugar: Sifting the powdered sugar removes any lumps and ensures a smooth icing.
- Use Gel Food Coloring: Gel food coloring is preferred over liquid food coloring because it won’t change the consistency of the icing as much.
- Adjust the Icing Consistency: The consistency of the icing is crucial for decorating. Adjust it as needed by adding a little water or powdered sugar.
- Let the Icing Dry Completely: Let the icing dry completely before storing the cookies.
Storage Instructions:
Store the decorated cookies in an airtight container at room temperature for up to 5 days. You can also freeze the undecorated cookies for up to 3 months. Thaw them completely before decorating.
Conclusion:
So, there you have it! These Jack O Lantern Cookies are more than just a sweet treat; they’re a delightful experience, a burst of autumnal joy in every bite. I truly believe this recipe is a must-try this season, and here’s why: it’s incredibly fun to make, especially if you get the kids involved. The decorating process is a creative outlet, allowing you to personalize each cookie and bring your own artistic flair to the Halloween festivities. Plus, the taste is simply divine – the perfect balance of buttery goodness, warm spices, and that satisfying crunch.
But the best part? These cookies are incredibly versatile! While I’ve outlined my favorite method for creating classic Jack O Lantern faces, feel free to experiment with different designs. Think spooky ghosts, adorable bats, or even intricate spiderwebs. The possibilities are endless!
Serving Suggestions and Variations:
Beyond the basic recipe, there are so many ways to elevate these cookies. For a richer flavor, try adding a tablespoon of molasses to the dough. It will deepen the color and add a lovely caramel note. If you’re a fan of nuts, consider incorporating chopped pecans or walnuts into the dough for added texture and flavor.
When it comes to serving, these cookies are perfect on their own with a glass of cold milk or a warm cup of apple cider. But you can also get creative! Crumble them over ice cream for a festive sundae, use them as a garnish for pumpkin pie, or even pack them in lunchboxes for a spooky surprise.
For a truly decadent treat, try dipping the finished cookies in melted chocolate. White chocolate, milk chocolate, or dark chocolate – the choice is yours! You can even sprinkle them with festive sprinkles or edible glitter for an extra touch of sparkle.
And if you’re looking for a healthier option, you can substitute some of the butter with applesauce or pumpkin puree. This will reduce the fat content and add a subtle sweetness. You can also use whole wheat flour instead of all-purpose flour for added fiber.
Don’t Forget the Icing!
While I used a simple royal icing for decorating, you can also use buttercream frosting or even a store-bought decorating gel. The key is to have fun and let your creativity shine! Experiment with different colors and piping techniques to create truly unique and memorable Jack O Lantern Cookies.
I’m confident that you’ll absolutely love making and eating these cookies. They’re the perfect way to celebrate Halloween and create lasting memories with your loved ones.
So, what are you waiting for? Gather your ingredients, preheat your oven, and get ready to embark on a delicious adventure. I can’t wait to hear about your experience! Please, please, please give these Jack O Lantern Cookies a try.
Once you’ve baked your batch of spooky treats, I’d love to see your creations! Share your photos and stories on social media using [Your Hashtag Here]. Let’s spread the Halloween cheer and inspire others to try this fantastic recipe. And don’t forget to leave a comment below and let me know what you think! What variations did you try? What were your favorite decorating techniques? I’m always eager to hear from my readers and learn from your experiences. Happy baking, and Happy Halloween!
Jack O Lantern Cookies: Spooky & Delicious Halloween Treats
Festive Halloween jack-o'-lantern sugar cookies, perfect for decorating with royal icing.
Ingredients
Instructions
Recipe Notes
- Use room temperature ingredients for the best results.
- Don’t overmix the dough.
- Chilling the dough is essential.
- Use parchment paper or silicone baking mats.
- Don’t overbake the cookies.
- Let the cookies cool completely before decorating.
- Sift the powdered sugar.
- Use gel food coloring.
- Adjust the icing consistency as needed.
- Let the icing dry completely before storing the cookies.
Leave a Comment