
Sourdough Garlic Pull Apart Bread With Crispy Edges
Oh, friends, let me tell you about a bread that’s about to become your new obsession: Sourdough Garlic Pull Apart Bread With Crispy Edges. This isn’t just any bread; it’s a culinary hug, a conversation starter, and quite possibly the most delicious thing you’ll bake all week. Imagine taking the deep, complex tang and incredible chew of a perfectly proofed sourdough, then infusing every nook and cranny with the irresistible aroma of savory garlic. Sounds good, right?
But here’s what truly sets this recipe apart and why I know you’re going to absolutely adore it: the pull-apart format. Each square is a little pillow of garlicky goodness, designed for effortless sharing and pure indulgence. No slicing required, just tear and enjoy! And then there are those glorious crispy edges. Ah, the crispy edges! They offer the most delightful contrast, a satisfying crunch that gives way to the soft, airy, fragrant interior. It’s a textural symphony that will have everyone reaching for just one more piece.
In a nutshell, we’re taking the beloved sourdough, slathering it with an aromatic garlic butter, arranging it artfully, and baking it until it’s golden brown with those craveable, crunchy outer bits. It’s perfect for dipping into a rich beef stew or simply devouring on its own as a truly special treat. Get ready to impress yourself and everyone around your table!

Ingredient Notes
Making Sourdough Garlic Pull Apart Bread with Crispy Edges is truly a labor of love, but the ingredients themselves are wonderfully straightforward. Here’s a closer look at what you’ll need and why each component is key to achieving that perfect loaf.
- Active Sourdough Starter: This is the heart of our bread! You’ll want an active, bubbly starter that’s been fed within the last 4-8 hours. It provides that signature sourdough tang, incredible rise, and a beautiful open crumb. If your starter isn’t super active, you can use sourdough discard for flavour and supplement with a little instant yeast (about 1/4 – 1/2 teaspoon) to ensure a good rise.
- Strong Bread Flour: I always recommend using a high-protein bread flour for this recipe. Its higher gluten content develops a strong network, which is essential for a chewy, airy crumb that holds up beautifully in a pull-apart format. All-purpose flour can work in a pinch, but your bread might be a little less chewy and robust.
- Water: Simple, but crucial. Use filtered water if your tap water is heavily chlorinated, as chlorine can inhibit sourdough activity. The water hydrates the flour and helps the gluten develop.
- Fine Sea Salt: Salt isn’t just for flavor; it also strengthens the gluten structure and controls fermentation. Don’t skimp on it, but don’t add too much!
- Unsalted Butter: Oh, butter! This is where the magic for those crispy edges and rich flavour happens. We’ll be using a generous amount for the garlic butter mixture. Unsalted butter allows you to control the overall saltiness of the dish. If you only have salted, simply reduce the amount of added salt in your garlic butter mixture.
- Fresh Garlic: Absolutely non-negotiable for true garlic bread flavor. Freshly minced garlic provides a pungent, aromatic punch that garlic powder simply cannot replicate. Aim for large, juicy cloves.
- Fresh Parsley: This adds a lovely fresh, herbaceous note and a pop of color. Flat-leaf (Italian) parsley is my preference for its robust flavour. Chives or fresh dill can make lovely substitutions if you’re looking to change things up.
- Optional Add-ins: For extra indulgence, consider adding grated Parmesan or sharp cheddar cheese to your garlic butter mixture. A sprinkle of red pepper flakes can also add a delightful subtle warmth.
Step-by-Step Instructions
Crafting this Sourdough Garlic Pull Apart Bread is a truly satisfying process. Here’s how I get those perfectly tender, garlicky pieces with irresistible crispy edges:
- Prepare Your Sourdough Dough: In a large mixing bowl, combine your active sourdough starter, warm water, and bread flour. Mix until just combined and shaggy – no dry spots remain. Cover the bowl and let it rest for 30 minutes (this is called autolyse). After the rest, sprinkle the salt over the dough. With wet hands, gently incorporate the salt by squeezing and folding the dough for a few minutes until it feels slightly smoother. Cover and let it rest for another 30 minutes.
- Bulk Fermentation & Folds: Over the next 3-4 hours (or longer, depending on your kitchen temperature and starter activity), perform 3-4 sets of “stretch and folds” every 30-45 minutes. To do this, lightly wet your hands, grab a portion of the dough, gently stretch it upwards, and fold it over itself. Rotate the bowl and repeat 3-4 times until you’ve worked your way around the dough. After the final fold, cover the bowl and let the dough continue to bulk ferment until it has visibly increased in size (usually 30-50% larger), feels airy, and has a domed top. This could take anywhere from 4 to 8 hours depending on conditions.
- Overnight Cold Proof (Optional, but Recommended): For deeper flavor development and easier handling, lightly oil your proofing bowl or container. Gently transfer the dough, cover tightly, and refrigerate for 8-16 hours. If you’re skipping the cold proof, proceed to step 4 once the dough has finished its bulk ferment.
- Make the Garlic Butter: While your dough is finishing its cold proof or bulk ferment, prepare your garlic butter. In a small saucepan or microwave-safe bowl, melt the unsalted butter. Mince your fresh garlic very finely and finely chop your fresh parsley. Stir the minced garlic and parsley into the melted butter. Season with a pinch of salt and black pepper. Set aside.
- Shape the Pull-Apart Bread: Lightly flour your work surface. Gently turn out your dough. Carefully roll it into a large rectangle, about 1/4 to 1/3 inch thick. Don’t worry about perfect edges.
- Butter and Layer: Generously brush about two-thirds of the garlic butter mixture evenly over the entire surface of the rolled-out dough.
- Cut and Stack: Using a sharp knife or pizza cutter, cut the buttered dough into approximately 2-inch wide strips. Stack these strips on top of each other, one by one. Once you have a stack, cut the stack again into approximately 2-inch wide segments. You’ll end up with little squares or rectangles, all buttered and ready to be arranged.
- Arrange in Loaf Pan: Grease a 9×5 inch loaf pan well. Take each stack of buttered dough segments and carefully arrange them upright in the loaf pan, side-by-side, creating rows of layered dough. Don’t pack them too tightly, as they will need room to expand.
- Second Proof: Cover the loaf pan loosely with plastic wrap or a clean kitchen towel. Let the dough proof in a warm spot for 1.5-3 hours, or until it looks puffy and has risen significantly. It should fill out the pan well. This is your final proof.
- Preheat Oven & Bake: Preheat your oven to 400°F (200°C) with a rack in the middle. Once preheated, uncover the loaf pan and brush the top of the dough with the remaining garlic butter mixture. Bake for 20 minutes, then reduce the oven temperature to 375°F (190°C) and continue baking for another 20-30 minutes, or until the top is deeply golden brown and the internal temperature reaches 200-210°F (93-99°C). For extra crispy edges, you can often hear a slight sizzling from the butter, and the bottom should also be golden.
- Cool and Serve: Once baked, carefully remove the bread from the oven. If you like, brush with a little more melted butter (or even a tiny bit of olive oil for shine). Let it cool in the pan for about 10-15 minutes before carefully transferring it to a wire rack. Serve warm and enjoy pulling apart those delicious, crispy-edged pieces!
Tips & Suggestions
To truly elevate your Sourdough Garlic Pull Apart Bread and ensure those coveted crispy edges, I’ve gathered a few specific tips:
- Don’t Skimp on the Butter: For really crispy, flavorful edges, don’t be shy with the garlic butter! Brush it generously on your rolled-out dough and save some for brushing over the top before baking. The fat helps to fry the exterior, creating that desired crispness.
- Hot Start, Then Reduce: Beginning the bake at a higher temperature (like 400°F/200°C) helps the bread “spring” quickly and encourages browning and crisping of the exterior. Reducing the temperature allows the interior to cook through without burning the crust.
- Use a Metal Loaf Pan: Darker metal pans tend to conduct heat better and can contribute to crispier edges compared to glass or ceramic.
- Flavor Boosters: For an even more intense garlic flavor, you can roast some of your garlic first, mash it, and then incorporate it into the melted butter mixture. This sweetens the garlic and deepens its complexity.
- Cheese Please! Sprinkle some finely grated Parmesan or aged cheddar cheese between the layers of dough when you’re assembling the loaf. The cheese will melt, creating delicious gooey pockets and extra crispiness where it touches the pan.
- Serving Suggestions: This bread is incredible on its own as an appetizer. It also pairs wonderfully with hearty beef stews, pasta dishes, or a simple green salad. I love dipping the warm pieces in extra virgin olive oil seasoned with a little non-alcohol balsamic glaze.
Storage
While this bread is truly best enjoyed warm and fresh from the oven, you can absolutely save any leftovers for another time:
- Room Temperature: Store any leftover bread in an airtight container or a large zip-top bag at room temperature for up to 1-2 days. The crispy edges might soften slightly, but the flavour will still be fantastic.
- Refrigerator: For longer storage, you can keep it in an airtight container in the refrigerator for up to 3-4 days.
- Freezer: To freeze, wrap individual slices or the entire loaf tightly in plastic wrap, then again in aluminum foil. It will keep well in the freezer for up to 1 month. Thaw at room temperature before reheating.
- Reheating for Crispness: To revive that lovely crisp exterior, I recommend reheating the bread in a preheated oven at 350°F (175°C) for 10-15 minutes, or until warmed through and the edges begin to crisp up again. You can also pop individual pieces in a toaster oven.
Final Thoughts
There’s truly nothing quite like the experience of pulling apart a warm loaf of Sourdough Garlic Pull Apart Bread With Crispy Edges. The satisfying tang of the sourdough, the irresistible aroma of roasted garlic, and that glorious crunch on the edges combine to create a bread experience that’s simply unforgettable.
This isn’t just a side dish; it’s a centerpiece, a conversation starter, and a comforting treat all rolled into one. I promise you, taking the time to create this magnificent Sourdough Garlic Pull Apart Bread With Crispy Edges will be incredibly rewarding. It’s perfect for sharing with loved ones, tearing into at a family dinner, or simply enjoying piece by glorious piece yourself.
So go ahead, embrace the journey, and prepare to fall in love with the unique combination of flavors and textures that only Sourdough Garlic Pull Apart Bread With Crispy Edges can deliver. Happy baking, and enjoy every savory, crispy bite!

Irresistible Sourdough Garlic Pull Apart Bread with Crispy Edges
- Total Time: 50 minute
- Yield: 1 loaf
Description
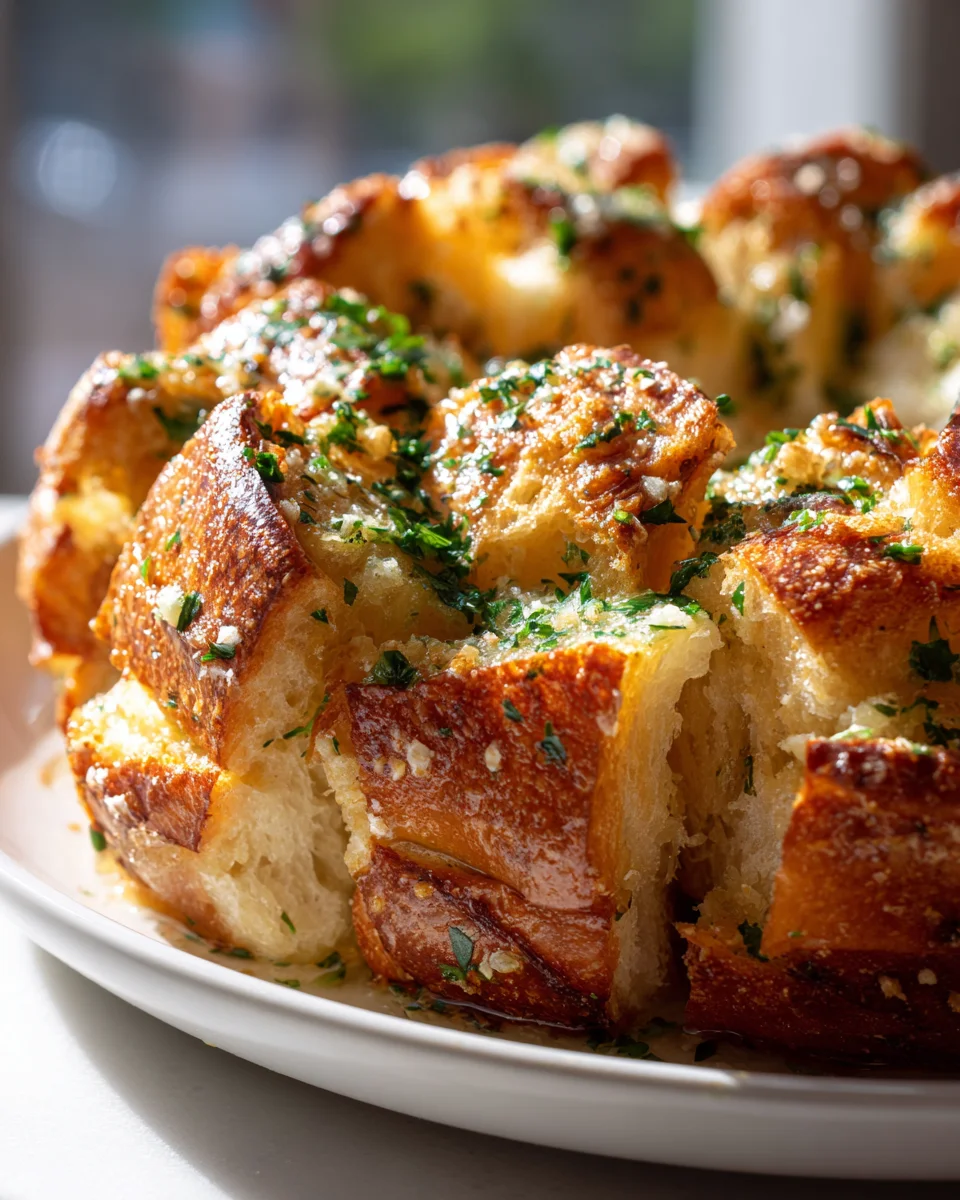
This Sourdough Garlic Pull Apart Bread is a delightful combination of chewy sourdough infused with savory garlic and topped with crispy edges. Perfect for sharing, this bread is an indulgent treat that will impress everyone at your table.
Ingredients
- Active Sourdough Starter
- Strong Bread Flour
- Water
- Fine Sea Salt
- Unsalted Butter
- Fresh Garlic
- Fresh Parsley
- Optional Add-ins: Grated Parmesan or sharp cheddar cheese, red pepper flakes
Instructions
- In a large mixing bowl, combine your active sourdough starter, warm water, and bread flour. Mix until just combined and shaggy – no dry spots remain. Cover the bowl and let it rest for 30 minutes (this is called autolyse). After the rest, sprinkle the salt over the dough. With wet hands, gently incorporate the salt by squeezing and folding the dough for a few minutes until it feels slightly smoother. Cover and let it rest for another 30 minutes.
- Over the next 3-4 hours (or longer, depending on your kitchen temperature and starter activity), perform 3-4 sets of 'stretch and folds' every 30-45 minutes. To do this, lightly wet your hands, grab a portion of the dough, gently stretch it upwards, and fold it over itself. Rotate the bowl and repeat 3-4 times until you’ve worked your way around the dough. After the final fold, cover the bowl and let the dough continue to bulk ferment until it has visibly increased in size (usually 30-50% larger), feels airy, and has a domed top. This could take anywhere from 4 to 8 hours depending on conditions.
- For deeper flavor development and easier handling, lightly oil your proofing bowl or container. Gently transfer the dough, cover tightly, and refrigerate for 8-16 hours. If you're skipping the cold proof, proceed to step 4 once the dough has finished its bulk ferment.
- While your dough is finishing its cold proof or bulk ferment, prepare your garlic butter. In a small saucepan or microwave-safe bowl, melt the unsalted butter. Mince your fresh garlic very finely and finely chop your fresh parsley. Stir the minced garlic and parsley into the melted butter. Season with a pinch of salt and black pepper. Set aside.
- Lightly flour your work surface. Gently turn out your dough. Carefully roll it into a large rectangle, about 1/4 to 1/3 inch thick. Don't worry about perfect edges.
- Generously brush about two-thirds of the garlic butter mixture evenly over the entire surface of the rolled-out dough.
- Using a sharp knife or pizza cutter, cut the buttered dough into approximately 2-inch wide strips. Stack these strips on top of each other, one by one. Once you have a stack, cut the stack again into approximately 2-inch wide segments. You'll end up with little squares or rectangles, all buttered and ready to be arranged.
- Grease a 9×5 inch loaf pan well. Take each stack of buttered dough segments and carefully arrange them upright in the loaf pan, side-by-side, creating rows of layered dough. Don't pack them too tightly, as they will need room to expand.
- Cover the loaf pan loosely with plastic wrap or a clean kitchen towel. Let the dough proof in a warm spot for 1.5-3 hours, or until it looks puffy and has risen significantly. It should fill out the pan well. This is your final proof.
- Preheat your oven to 400°F (200°C) with a rack in the middle. Once preheated, uncover the loaf pan and brush the top of the dough with the remaining garlic butter mixture. Bake for 20 minutes, then reduce the oven temperature to 375°F (190°C) and continue baking for another 20-30 minutes, or until the top is deeply golden brown and the internal temperature reaches 200-210°F (93-99°C). For extra crispy edges, you can often hear a slight sizzling from the butter, and the bottom should also be golden.
- Once baked, carefully remove the bread from the oven. If you like, brush with a little more melted butter (or even a tiny bit of olive oil for shine). Let it cool in the pan for about 10-15 minutes before carefully transferring it to a wire rack. Serve warm and enjoy pulling apart those delicious, crispy-edged pieces!
- Prep Time: 15 mins
- Cook Time: 40-50 mins
- Category: Bread
- Method: Baking
- Cuisine: American
Nutrition
- Serving Size: 1 piece
- Calories: 200
- Sugar: 1 g
- Sodium: 300 mg
- Fat: 10 g
- Saturated Fat: 6 g
- Unsaturated Fat: 4 g
- Trans Fat: 0 g
- Carbohydrates: 25 g
- Fiber: 1 g
- Protein: 5 g
- Cholesterol: 20 mg
Keywords: For really crispy, flavorful edges, don't be shy with the garlic butter! Brush it generously on your rolled-out dough and save some for brushing over the top before baking. Darker metal pans tend to conduct heat better and can contribute to crispier edges compared to glass or ceramic.
Leave a Comment