
Chocolate Chip Cookie Dough Cheesecake Bars
Oh my goodness, where do I even begin with these? If you, like me, have ever found yourself torn between the chewy, chocolatey delight of a warm chocolate chip cookie and the velvety, tangy perfection of a classic cheesecake, then get ready because your dessert dreams are about to come true! I’ve created something truly magical here, something that brings together the best of both worlds in one irresistible package.
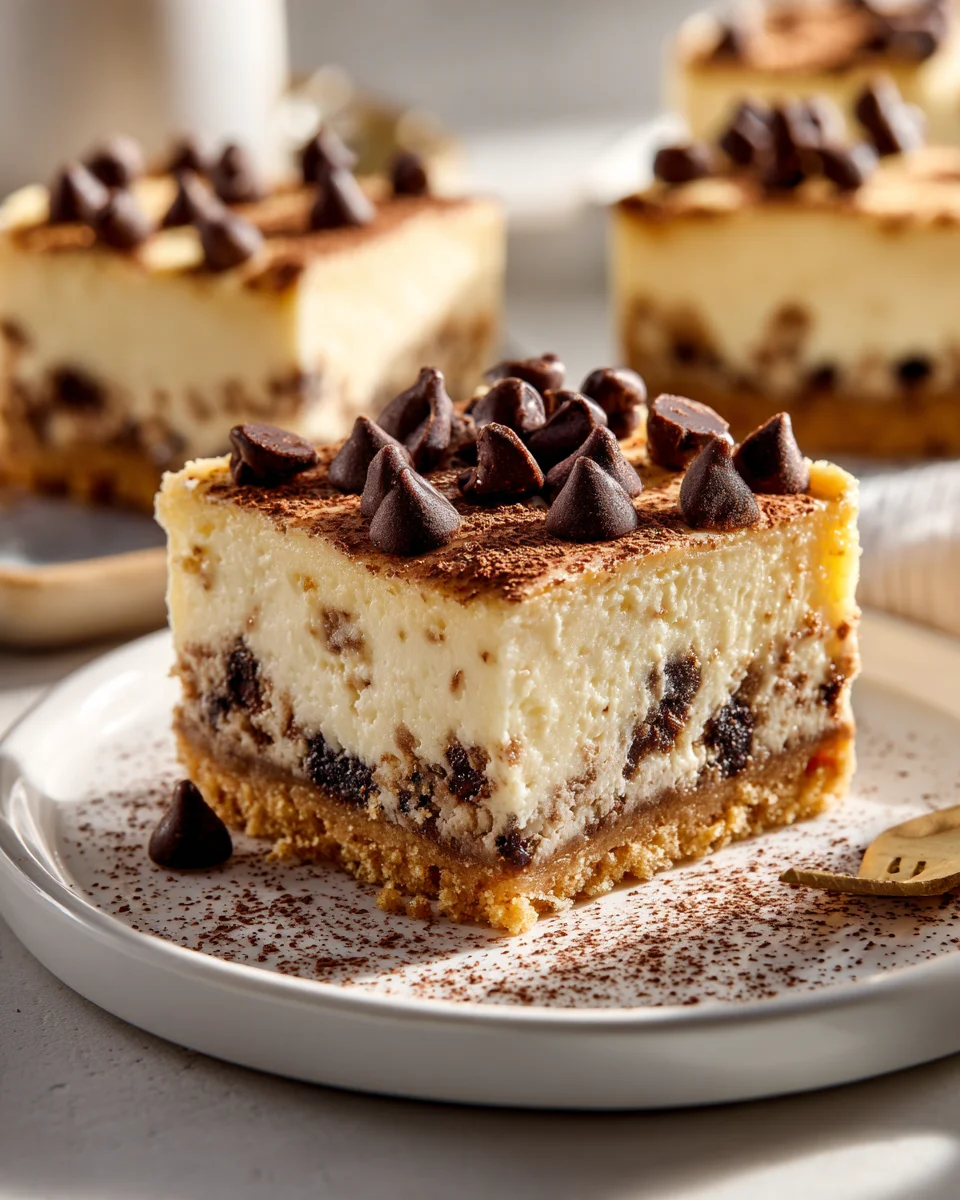
Imagine sinking your teeth into a luscious, creamy cheesecake layer that’s perfectly tangy and sweet, all sitting on a buttery, golden chocolate chip cookie crust. But wait, there’s more! What truly elevates these bars to legendary status is the generous sprinkling of safe-to-eat, sweet chocolate chip cookie dough chunks baked right on top. Each bite is an explosion of textures and flavors — the soft cookie crust, the smooth cheesecake, and those delightful, chewy pockets of cookie dough. These aren’t just any dessert bars; they’re an experience, a celebration of pure indulgence that’s surprisingly easy to make and even easier to devour. You’ll love how they combine comforting nostalgia with sophisticated flavors, making them absolutely perfect for sharing (or not!).

Ingredient Notes
Creating these delightful Chocolate Chip Cookie Dough Cheesecake Bars is a true joy, and understanding the role of each ingredient will help you achieve perfection. I’ve found that using good quality ingredients truly makes a difference in the final taste and texture of these decadent treats.
For the Irresistible Cookie Dough Layer
- All-Purpose Flour: This forms the base of our cookie dough. I always use unbleached all-purpose flour for consistency. If you’re looking for a gluten-free option, a 1:1 gluten-free baking flour blend designed for cookies can often be substituted successfully, just be sure it contains xanthan gum.
- Unsalted Butter: Softened to room temperature, butter is crucial for the tender crumb of the cookie dough. If you only have salted butter, you can use it, but reduce the added salt in the recipe by about ¼ teaspoon to avoid it being too salty. Make sure it’s properly softened, not melted, for the best texture.
- Granulated Sugar & Light Brown Sugar: The combination of both sugars gives our cookie dough that classic chewy yet slightly crispy edge and rich flavor. The brown sugar adds moisture and chewiness, thanks to its molasses content. I prefer light brown sugar for a balanced flavor, but dark brown sugar can be used for a deeper, more pronounced molasses note.
- Egg: A large egg at room temperature binds the dough together and adds richness. Room temperature eggs emulsify better with the butter and sugar, leading to a smoother dough.
- Vanilla Extract: Pure vanilla extract is non-negotiable for me! It truly elevates the flavor of the cookie dough. Don’t skimp on this; a good quality vanilla makes all the difference.
- Baking Soda: This leavening agent helps the cookie dough spread and rise just a little, giving it the perfect texture. Ensure your baking soda is fresh for optimal results.
- Salt: A pinch of salt balances the sweetness and enhances all the other flavors in the cookie dough.
- Chocolate Chips: I love using a mix of semi-sweet and milk chocolate chips for varied chocolatey goodness. Mini chocolate chips work wonderfully for ensuring chocolate in every bite, especially since we’re using this dough as a crust and topping. You could also try dark chocolate chips or even chopped chocolate bars for different flavor profiles.
For the Creamy Cheesecake Filling
- Full-Fat Cream Cheese: This is the star of our cheesecake filling. It’s absolutely essential to use full-fat brick-style cream cheese, softened to room temperature. Low-fat cream cheese contains more water and can lead to a runnier, less luxurious filling that might not set properly. Room temperature cream cheese mixes smoothly, preventing lumps.
- Granulated Sugar: Sweetens our cheesecake and contributes to its silky texture.
- Large Eggs: Room temperature eggs are vital here, just like with the cookie dough. They help set the cheesecake and add to its richness. Adding them one at a time and mixing minimally prevents over-aerating the batter, which can cause cracks.
- Vanilla Extract: Again, pure vanilla extract is key for that classic, warm cheesecake flavor.
- Sour Cream: This ingredient adds a lovely tang and a wonderfully smooth, creamy texture to the cheesecake. It also helps prevent cracking. Make sure it’s full-fat and at room temperature. A great substitute if you don’t have sour cream is plain full-fat Greek yogurt, or even heavy cream, though the latter will result in a slightly less tangy flavor.
Step-by-Step Instructions
Let’s get baking! Here’s how I bring these incredible Chocolate Chip Cookie Dough Cheesecake Bars to life. Follow these steps for a perfect batch every time.
- Prepare Your Pan: First things first, preheat your oven to 350°F (175°C). Line a 9×13 inch baking pan with parchment paper, leaving an overhang on the sides. This “sling” will make it incredibly easy to lift the entire batch of bars out of the pan once they’re baked and chilled. You can lightly grease the pan first to help the parchment stick.
- Make the Cookie Dough: In a large mixing bowl, using an electric mixer, cream together the softened unsalted butter, granulated sugar, and light brown sugar until the mixture is light and fluffy. This usually takes about 2-3 minutes.
- Add Wet Ingredients to Cookie Dough: Beat in the room temperature egg and pure vanilla extract until just combined. Scrape down the sides of the bowl to ensure everything is well incorporated.
- Combine Dry Ingredients: In a separate medium bowl, whisk together the all-purpose flour, baking soda, and salt. Gradually add the dry ingredients to the wet ingredients, mixing on low speed until just combined. Be careful not to overmix; overmixing can lead to tough cookies.
- Fold in Chocolate Chips: Gently fold in your chosen chocolate chips until evenly distributed throughout the dough.
- Form the Crust: Divide the cookie dough in half. Press one half of the cookie dough evenly into the bottom of your prepared 9×13 inch pan. It helps to use a piece of plastic wrap or the bottom of a glass to get an even layer.
- Pre-Bake the Crust: Bake the cookie dough crust for about 10-12 minutes, or until it’s lightly golden around the edges. This step is important to ensure the crust holds up to the creamy cheesecake filling. Remove from the oven and set aside while you prepare the cheesecake filling. Reduce the oven temperature to 325°F (160°C).
- Prepare the Cheesecake Filling: While the crust is pre-baking, in a large clean mixing bowl, beat the softened full-fat cream cheese on medium speed until it’s completely smooth and creamy, with no lumps. This is where room temperature cream cheese truly shines!
- Add Sugar and Flavor: Gradually add the granulated sugar to the cream cheese, beating until well combined and smooth. Then, mix in the pure vanilla extract until fully incorporated.
- Incorporate Eggs and Sour Cream: Beat in the room temperature eggs one at a time, mixing on low speed only until each egg is just combined. Be very careful not to overmix the cheesecake batter once the eggs are added, as this can incorporate too much air, leading to cracks in the finished cheesecake. Finally, gently stir in the room temperature sour cream until just combined.
- Assemble the Bars: Pour the cheesecake filling evenly over the pre-baked cookie dough crust. Take the remaining half of the cookie dough and crumble it evenly over the top of the cheesecake filling. Don’t worry about making it perfectly uniform; the rustic crumbled look is part of its charm!
- Bake the Bars: Place the pan back into the preheated 325°F (160°C) oven. Bake for 45-55 minutes, or until the edges of the cheesecake are set, but the center still has a slight wobble when gently shaken.
- Cool and Chill: Remove the pan from the oven and let the bars cool completely on a wire rack at room temperature. This can take a couple of hours. Once fully cooled, transfer the pan to the refrigerator and chill for at least 4 hours, or ideally overnight. Chilling is absolutely crucial for the cheesecake to set properly and for easy, clean slicing.
- Slice and Serve: Once thoroughly chilled, use the parchment paper overhang to lift the entire block of bars out of the pan. Place them on a cutting board and cut into squares or rectangles using a sharp knife. For the cleanest cuts, wipe your knife with a warm, damp cloth between each slice. Enjoy your delicious Chocolate Chip Cookie Dough Cheesecake Bars!
Tips & Suggestions
I’ve made these Chocolate Chip Cookie Dough Cheesecake Bars more times than I can count, and along the way, I’ve picked up a few tricks that I love to share. These tips will help you achieve the most perfect, delicious bars every single time!
- Room Temperature Ingredients are Your Best Friend: I cannot stress this enough, especially for the cream cheese, butter, and eggs. This ensures everything emulsifies beautifully, resulting in a smooth, lump-free batter for both the cookie dough and the cheesecake filling. Cold ingredients will lead to a lumpy cheesecake and a dense cookie dough. Plan ahead and take them out of the fridge at least an hour or two before you start baking.
- Don’t Overmix the Cheesecake: Once you add the eggs to the cream cheese mixture, mix only until they are just combined. Overmixing incorporates too much air, which can cause your cheesecake to puff up too much during baking and then crack as it cools. We want a dense, creamy texture, not an airy soufflé!
- Parchment Paper is Key: Lining your baking pan with parchment paper (with an overhang!) is a game-changer. It makes lifting the entire slab of cooled bars out of the pan incredibly easy, allowing for clean and precise slicing. Trust me, you’ll thank yourself later.
- The Gentle Wobble Test: When checking for doneness, the cheesecake should have a slight “jiggle” or “wobble” in the very center, but the edges should appear set. It will continue to set as it cools. If there’s a liquidy center, it needs more time.
- Cooling and Chilling are Non-Negotiable: This is arguably the most critical step for any cheesecake, and these bars are no exception. Cooling slowly at room temperature first prevents drastic temperature changes that can cause cracking. Then, a thorough chill in the refrigerator (at least 4 hours, but overnight is ideal) allows the cheesecake to fully set and firm up, making for perfectly sliceable bars. Patience is a virtue here!
- Clean Cuts Every Time: For neat, professional-looking squares, use a sharp, thin knife. My secret is to wipe the knife clean with a warm, damp cloth after each cut. This prevents sticking and smearing, giving you perfectly defined edges.
- Flavor Variations: Feel free to experiment with your chocolate chips! While semi-sweet is classic, you could use all milk chocolate, dark chocolate, white chocolate, or even a combination. Adding a sprinkle of flaky sea salt on top of the bars just before serving can really elevate the flavors. For an extra textural element, consider adding a handful of chopped walnuts or pecans to the cookie dough.
- Make Ahead: These bars are fantastic for making in advance! Since they require significant chilling time, they’re a perfect dessert to prepare the day before you plan to serve them.
Storage
Proper storage is essential to keep your Chocolate Chip Cookie Dough Cheesecake Bars tasting fresh and delicious, and to ensure food safety. Since these bars contain a cream cheese filling, they do require refrigeration.
- Refrigeration: Once your bars have been fully chilled and cut, store them in an airtight container in the refrigerator. This will prevent them from drying out and absorbing any unwanted odors from other foods in your fridge. They will stay fresh and delicious for up to 4-5 days.
- Freezing for Longer Storage: These bars freeze beautifully!
- Individual Slices: If you’ve already cut the bars, you can place individual slices on a baking sheet lined with parchment paper and freeze for about an hour, or until solid. This “flash freezing” prevents them from sticking together. Once firm, wrap each slice tightly in plastic wrap, then place them in an airtight freezer-safe container or a heavy-duty freezer bag.
- Whole Slab: If you prefer to freeze the entire slab before cutting, ensure it’s thoroughly chilled. Wrap the whole slab (still in the parchment sling) tightly in several layers of plastic wrap, then an additional layer of aluminum foil.
Frozen bars can be stored for up to 2-3 months.
- Thawing Frozen Bars: When you’re ready to enjoy a frozen bar, simply remove it from the freezer and let it thaw in the refrigerator for a few hours, or at room temperature for about 30-60 minutes. It’s best not to microwave them, as this can alter the texture of the cheesecake.
- Serving: While they are delicious straight from the fridge, some people enjoy letting them sit out for 10-15 minutes before serving to soften slightly and enhance the flavors.
Final Thoughts
Well, my friends, we’ve come to the end of our delicious journey with these incredible Chocolate Chip Cookie Dough Cheesecake Bars. I truly believe this recipe is an absolute game-changer for anyone who loves both classic chocolate chip cookies and luscious cheesecake. The magic truly happens when you combine that comforting, sweet cookie dough layer with the rich, tangy creaminess of the cheesecake, all studded with melty chocolate chips. It’s a textural dream and a flavor explosion that simply can’t be beaten.
Whether you’re baking for a special occasion, a potluck, or just to treat yourself (you deserve it!), these Chocolate Chip Cookie Dough Cheesecake Bars are guaranteed to impress and leave everyone asking for more. Trust me, once you try them, you’ll understand why they’re destined to become a new favorite in your baking repertoire. Go on, give them a try – your taste buds will thank you!
Irresistible Chocolate Chip Cookie Dough Cheesecake Bars
- Total Time: 1 hour 30 minutes
- Yield: 16 servings 1x
Description
These Chocolate Chip Cookie Dough Cheesecake Bars combine the chewy delight of chocolate chip cookies with the creamy perfection of cheesecake. Each bite offers an explosion of textures and flavors, making them perfect for sharing or indulging yourself.
Ingredients
- For the Irresistible Cookie Dough Layer:
- 2 1/4 cups All-Purpose Flour
- 1/2 cup Unsalted Butter, softened to room temperature
- 1/2 cup Granulated Sugar
- 1/2 cup Light Brown Sugar
- 1 large Egg, at room temperature
- 1 tsp Vanilla Extract
- 1 tsp Baking Soda
- 1/4 tsp Salt
- 1 cup Chocolate Chips (mix of semi-sweet and milk chocolate)
- For the Creamy Cheesecake Filling:
- 16 oz Full-Fat Cream Cheese, softened to room temperature
- 1/2 cup Granulated Sugar
- 2 large Eggs, at room temperature
- 1 tsp Vanilla Extract
- 1/2 cup Sour Cream, at room temperature
Instructions
- Preheat your oven to 350°F (175°C). Line a 9×13 inch baking pan with parchment paper, leaving an overhang on the sides.
- In a large mixing bowl, cream together the softened unsalted butter, granulated sugar, and light brown sugar until light and fluffy, about 2-3 minutes.
- Beat in the room temperature egg and pure vanilla extract until just combined. Scrape down the sides of the bowl.
- In a separate medium bowl, whisk together the all-purpose flour, baking soda, and salt. Gradually add the dry ingredients to the wet ingredients, mixing on low speed until just combined.
- Gently fold in your chosen chocolate chips until evenly distributed throughout the dough.
- Divide the cookie dough in half. Press one half of the cookie dough evenly into the bottom of your prepared pan.
- Bake the cookie dough crust for about 10-12 minutes, or until lightly golden around the edges. Remove from the oven and set aside while you prepare the cheesecake filling. Reduce the oven temperature to 325°F (160°C).
- In a large clean mixing bowl, beat the softened full-fat cream cheese on medium speed until completely smooth and creamy.
- Gradually add the granulated sugar to the cream cheese, beating until well combined and smooth. Mix in the pure vanilla extract until fully incorporated.
- Beat in the room temperature eggs one at a time, mixing on low speed only until each egg is just combined. Gently stir in the room temperature sour cream until just combined.
- Pour the cheesecake filling evenly over the pre-baked cookie dough crust. Crumble the remaining half of the cookie dough evenly over the top of the cheesecake filling.
- Bake for 45-55 minutes, or until the edges of the cheesecake are set, but the center still has a slight wobble.
- Remove the pan from the oven and let the bars cool completely on a wire rack at room temperature. Once fully cooled, transfer the pan to the refrigerator and chill for at least 4 hours, or ideally overnight.
- Once thoroughly chilled, use the parchment paper overhang to lift the entire block of bars out of the pan. Cut into squares or rectangles using a sharp knife.
- Prep Time: 30 mins
- Cook Time: 1 hour
- Category: Dessert
- Method: Baking
- Cuisine: American
Nutrition
- Serving Size: 1 bar
- Calories: 320
- Sugar: 20 g
- Sodium: 180 mg
- Fat: 18 g
- Saturated Fat: 10 g
- Unsaturated Fat: 6 g
- Trans Fat: 0 g
- Carbohydrates: 35 g
- Fiber: 1 g
- Protein: 4 g
- Cholesterol: 60 mg
Keywords: Ensure all ingredients are at room temperature for the best texture. Don't overmix the cheesecake once the eggs are added to prevent cracks. Use parchment paper for easy lifting and slicing.
Leave a Comment