
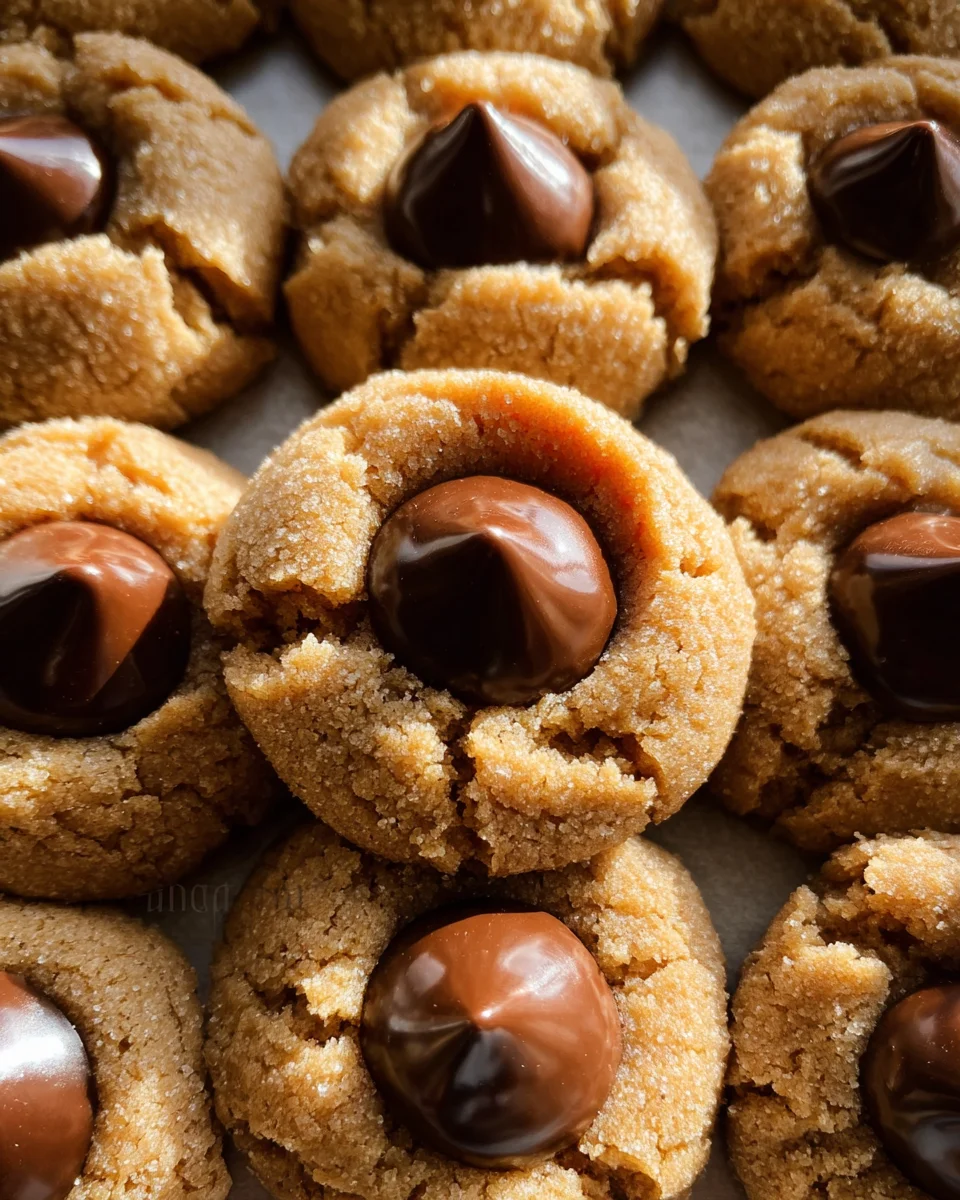
Classic Peanut Butter Blossoms have a special place in the hearts of home bakers everywhere, and for good reason. Just picture it: a perfectly golden, soft, and chewy peanut butter cookie, crowned with a rich, melting chocolate kiss that forms a delightful crater of sweetness in its center. It’s a treat that instantly evokes warmth, comfort, and a touch of nostalgic bliss. I remember the first time I helped my grandmother bake these timeless cookies; the aroma filling the kitchen was absolutely intoxicating!
This iconic cookie actually has a charming origin story, often traced back to Freda Smith from Ohio, who submitted the recipe to the 1957 Pillsbury Bake-Off, making it a beloved staple in American kitchens ever since. People adore these cookies not only for their incredible taste – that perfect balance of sweet and salty, rich peanut butter, and decadent chocolate – but also for their delightful texture and the joy they bring to any gathering. They are simple enough for a beginner but impressive enough for a special occasion.
There’s a universal appeal to the Classic Peanut Butter Blossoms that transcends generations.
Join me as we rediscover the unparalleled delight of biting into a freshly baked Classic Peanut Butter Blossoms.

Ingredients:
- 1/2 cup (1 stick or 113g) unsalted butter, softened to room temperature
- 1/2 cup (100g) granulated sugar, plus extra for rolling
- 1/2 cup (100g) packed light brown sugar
- 1 large egg, room temperature
- 1/2 cup (128g) creamy peanut butter (not natural style, which tends to separate, but a no-stir variety like Jif or Skippy works best for consistency in these Classic Peanut Butter Blossoms)
- 1 3/4 cups (210g) all-purpose flour
- 1 teaspoon baking soda
- 1/2 teaspoon salt
- Approximately 48 Hershey’s Kisses, unwrapped (milk chocolate or your favorite variety for topping your Classic Peanut Butter Blossoms)
Preparing the Classic Peanut Butter Blossom Dough
-
Creaming Butter and Sugars for the Perfect Foundation
My secret to truly tender and chewy Classic Peanut Butter Blossoms starts right here. You’ll want to take your unsalted butter out of the fridge at least an hour, or even two, before you plan to bake. Room temperature butter is absolutely crucial because it creams beautifully with the sugars, incorporating air and creating a light, fluffy base for our cookies. If your butter is too cold, it won’t combine properly, resulting in a dense cookie; if it’s too warm and starting to melt, the texture of your cookies will be greasy and flat. In a large mixing bowl, either with an electric mixer fitted with the paddle attachment or by hand with a sturdy wooden spoon, combine your softened unsalted butter with both the granulated sugar and the packed light brown sugar. Beat on medium speed for about 2-3 minutes, or until the mixture becomes wonderfully pale, light, and fluffy. This process is called creaming, and it’s where we infuse air into the butter and sugar, which helps give our cookies their signature soft chewiness. Make sure to stop occasionally and scrape down the sides and bottom of the bowl with a rubber spatula to ensure everything is evenly incorporated. Don’t skip this step or rush it! It’s foundational for the success of your Classic Peanut Butter Blossoms.
-
Adding the Egg and Peanut Butter for Richness
Once your butter and sugars are perfectly creamed, it’s time to add the next set of wet ingredients. Crack your large egg into a small bowl first to ensure there are no shell fragments, then add it to the creamed mixture. Beat on medium speed for about 30 seconds to 1 minute, until the egg is fully incorporated and the mixture looks smooth and emulsified. The mixture might look a little curdled before the egg is fully mixed in, but keep beating, and it will come together beautifully. Next, add the creamy peanut butter. Again, beat on medium speed until the peanut butter is thoroughly combined with the butter, sugar, and egg mixture. This should take another 1-2 minutes. Scrape down the sides of the bowl once more to ensure everything is evenly mixed. We want that rich, nutty flavor to be distributed perfectly throughout every bite of our Classic Peanut Butter Blossoms.
-
Combining Dry Ingredients for Uniformity
In a separate, medium-sized bowl, whisk together your all-purpose flour, baking soda, and salt. This step is more important than you might think! Whisking the dry ingredients together ensures that the leavening agent (baking soda) and salt are evenly distributed throughout the flour. If you simply dump them in separately, you could end up with pockets of too much salt or, even worse, areas where the cookies don’t rise properly. A good whisk for about 30 seconds will prevent any surprises and guarantee that each of your Classic Peanut Butter Blossoms rises uniformly and has a balanced flavor. Set this bowl aside for a moment.
-
Mixing Wet and Dry Ingredients: The Gentle Approach
Now, it’s time to bring everything together. Gradually add the dry ingredient mixture to the wet mixture in the large bowl. I usually add it in about three batches, mixing on low speed with the electric mixer, or folding gently with a spatula, until just combined after each addition. The key here is to mix until just combined! Overmixing the dough once the flour is added develops the gluten too much, which can lead to tough, dry cookies instead of the soft, tender Classic Peanut Butter Blossoms we’re aiming for. Stop mixing as soon as you no longer see any streaks of dry flour. The dough will be thick and relatively soft, but it should hold its shape when you pinch a piece of it. Give the bowl a final scrape with your spatula to ensure no dry pockets are lurking at the bottom.
-
Chilling the Dough (Highly Recommended for Best Results)
While some recipes might tell you this step is optional, I consider it a vital part of making truly exceptional Classic Peanut Butter Blossoms. Once your dough is mixed, cover the bowl tightly with plastic wrap and refrigerate it for at least 30 minutes, or up to 2 hours. Chilling the dough does a few wonderful things: it firms up the butter, which helps prevent the cookies from spreading too much in the oven, leading to thicker, chewier cookies. It also allows the flour to fully hydrate, resulting in a more flavorful and tender crumb. Furthermore, chilled dough is much easier to handle and roll, which makes the next steps a breeze. If you’re short on time, even 15-20 minutes in the freezer can help firm it up quickly, but 30 minutes in the fridge is ideal.
Forming and Baking the Classic Peanut Butter Blossoms
-
Prepping the Oven and Baking Sheets
About 15 minutes before you plan to bake, preheat your oven to 375°F (190°C). This gives your oven ample time to reach and stabilize at the correct temperature. A properly preheated oven is crucial for even baking. Line two large baking sheets with parchment paper or silicone baking mats. This prevents sticking, promotes even browning on the bottom, and makes cleanup incredibly easy. Avoid using greased pans without parchment, as the bottoms of your Classic Peanut Butter Blossoms might get too dark or stick.
-
Rolling the Dough Balls to Perfection
While your oven preheats, it’s time to shape our beautiful Classic Peanut Butter Blossoms. Remove the chilled dough from the refrigerator. Using a tablespoon measure or a small cookie scoop (about 1.5 tablespoons capacity) for consistency, scoop out portions of the dough. Roll each portion between the palms of your hands to form a smooth ball, about 1 inch in diameter. Consistency in size is key here! Cookies of similar size will bake evenly, ensuring none are underdone while others are overdone. If you find the dough too sticky to roll easily, a quick re-chill in the fridge for another 10-15 minutes can help, or you can lightly flour your hands. Take your time with this step; well-formed balls lead to beautifully round Classic Peanut Butter Blossoms.
-
Coating in Granulated Sugar for that Signature Sparkle
Pour about 1/2 cup of granulated sugar into a small, shallow bowl. Take each perfectly rolled dough ball and gently roll it in the granulated sugar, ensuring it’s completely coated. The sugar coating not only adds a lovely sparkle and sweetness to the exterior of our Classic Peanut Butter Blossoms, but it also provides a delightful textural contrast to the soft interior. This is a classic characteristic of this beloved cookie. Make sure to get a nice, even coating on all sides. Gently shake off any excess sugar before placing the dough ball on the prepared baking sheet.
-
Placing on Baking Sheets with Ample Space
Arrange the sugar-coated dough balls on your prepared baking sheets, leaving about 2 inches of space between each cookie. This spacing is important because the cookies will spread slightly as they bake. Overcrowding the baking sheet can lead to uneven baking and can cause the cookies to merge into one another. I usually fit about 12 cookies on a standard large baking sheet. Patience now will pay off with perfectly separated, golden-brown Classic Peanut Butter Blossoms later! You’ll likely need to bake these in batches, depending on the size of your baking sheets.
-
Baking the Cookies to Golden Perfection
Place one baking sheet at a time into your preheated 375°F (190°C) oven. Bake for 8-10 minutes. The baking time can vary slightly depending on your oven, so keep a close eye on them, especially during your first batch. You’re looking for the edges of the cookies to be lightly golden brown and set, while the centers still appear slightly soft and puffy. It’s crucial not to overbake these Classic Peanut Butter Blossoms! Overbaking will result in dry, crumbly cookies. Remember, they will continue to set up slightly as they cool on the baking sheet. If you’re using two baking sheets simultaneously, rotate them halfway through the baking time for even cooking, or bake them one sheet at a time for the most consistent results. Once baked, carefully remove the baking sheet from the oven.
Finishing and Cooling Your Classic Peanut Butter Blossoms
-
Adding the Chocolate Kisses: The Signature Touch
This is arguably the most exciting part! As soon as you remove the baking sheet from the oven, while the cookies are still hot and soft, gently place an unwrapped Hershey’s Kiss squarely in the center of each cookie. Don’t hesitate! Do this immediately after removing them from the oven. The residual heat from the cookie will gently melt the chocolate, allowing it to adhere beautifully and create that iconic “blossom” effect. You can give the Kiss a very light, gentle press to ensure it’s firmly seated, but don’t press too hard, or the cookie might crack or flatten too much. The chocolate will soften and become shiny, but it won’t melt into a puddle. This is exactly what we want for our beautiful Classic Peanut Butter Blossoms.
-
Cooling the Blossoms for Optimal Texture
Allow the cookies to cool on the baking sheets for about 5-10 minutes. This initial cooling period on the warm baking sheet allows the cookies to firm up enough so they don’t break when you transfer them, and it also allows the chocolate Kiss to set a bit more. After this initial cooling, carefully transfer the Classic Peanut Butter Blossoms to a wire cooling rack to cool completely. Cooling on a wire rack ensures air circulation all around the cookie, preventing sogginess and allowing them to achieve their perfect texture. The chocolate Kiss will fully set as the cookies cool, firming up to its original shape, though it will remain deliciously soft and melty when you take your first bite. Resist the urge to eat them all immediately! While warm is good, completely cooled is best for handling and storage.
-
Storing Your Delicious Treats
Once your delightful Classic Peanut Butter Blossoms have completely cooled, store them in an airtight container at room temperature. They will stay fresh and wonderfully chewy for up to 5-7 days. To keep them even fresher, you can place a slice of bread in the container; the bread will absorb any excess moisture, keeping the cookies soft. These cookies also freeze beautifully! Once completely cooled, you can place them in a single layer in an airtight container or freezer-safe bag, separating layers with parchment paper. They can be frozen for up to 2-3 months. Just thaw them at room temperature before serving. Enjoy the classic taste of homemade peanut butter and chocolate in every bite!
Conclusion:
So there you have it – my absolute favorite recipe for a treat that never fails to bring smiles. I truly believe that if you’re looking for a simple yet profoundly satisfying baking project, this is it. These cookies aren’t just delicious; they’re a comforting hug in edible form, perfectly balancing that rich, nutty peanut butter flavor with the sweet melt of chocolate. The combination of the chewy cookie base, the slightly crisp edges, and the soft, gooey chocolate kiss in the center is pure magic. It’s a testament to timeless baking, something that evokes wonderful memories and creates new ones. Every time I bake a batch, I’m reminded of why these treats have remained so popular for generations – they’re unfussy, undeniably delightful, and universally loved.
Now, once your kitchen is filled with the irresistible aroma of freshly baked cookies and your batch of these incredible delights is cooled, the real fun begins! While they are absolutely perfect just as they are, warm from the oven with a tall glass of cold milk, there are so many ways to enjoy and even customize them. Imagine pairing one with your morning coffee for a little indulgence, or serving them as the crowning glory after a cozy family dinner. For a special occasion, arrange them on a dessert platter alongside some fresh berries or a scoop of vanilla bean ice cream; the contrast of temperatures and textures is divine. Don’t be afraid to experiment with the chocolate on top! While a Hershey’s Kiss is classic for these “Classic Peanut Butter Blossoms,” a mini Reese’s peanut butter cup pressed into the warm cookie offers an extra layer of peanut buttery goodness, or try a white chocolate kiss for a visual and taste variation. You could even drizzle them with melted dark chocolate or sprinkle them with a little flaky sea salt right after adding the chocolate for an elevated gourmet touch. For an extra festive touch, consider rolling them in colored sugar before baking, especially around holidays.
The possibilities truly are endless for making these already fantastic cookies uniquely yours.
I genuinely hope you feel inspired to roll up your sleeves and give this recipe a try. There’s an immense sense of satisfaction that comes from creating something so wonderfully delicious from scratch. Whether you’re a seasoned baker or just starting your culinary journey, these cookies are incredibly forgiving and rewarding. They’re perfect for sharing with loved ones, bringing to a potluck, or simply enjoying all by yourself with a good book. And when you do bake them, I would absolutely love to hear about your experience! Did you stick to the traditional method, or did you put your own unique spin on them? Did you try a different type of chocolate or add a pinch of cinnamon to the dough? Please, share your stories, your photos, and any tips or tricks you discover along the way. Your feedback truly brightens my day and helps foster a wonderful community of fellow food enthusiasts. So go on, preheat that oven, gather your ingredients, and prepare to bake some joy. You won’t regret bringing these delightful cookies into your life! Happy baking!
Classic Peanut Butter Blossoms
A perfectly golden, soft, and chewy peanut butter cookie, crowned with a rich, melting chocolate kiss that forms a delightful crater of sweetness in its center. A treat that instantly evokes warmth and nostalgic bliss.
Ingredients
Instructions
Important Information
Nutrition Facts (Per Serving)
It is important to consider this information as approximate and not to use it as definitive health advice.
Allergy Information
Please check ingredients for potential allergens and consult a health professional if in doubt.
Leave a Comment