
Greek Yogurt Bagels: Prepare to be amazed! Imagine sinking your teeth into a chewy, perfectly textured bagel, but without the lengthy proofing process or complicated ingredients. That’s the magic of these incredibly simple, yet utterly satisfying bagels. I’m so excited to share this recipe with you because it’s a game-changer for busy mornings and anyone craving a homemade bagel experience without the fuss.
While traditional bagels have a rich history rooted in Jewish communities of Eastern Europe, requiring boiling and baking for that signature crust and chew, this modern twist offers a shortcut without sacrificing flavor or texture. The addition of Greek yogurt not only simplifies the dough-making process but also adds a subtle tang and keeps the bagels surprisingly moist.
What’s not to love? People adore these Greek Yogurt Bagels because they are incredibly easy to make, requiring only two main ingredients (plus a little seasoning, of course!). They’re also a healthier alternative to store-bought bagels, often packed with preservatives and excess sugar. The taste is fantastic – a delightful balance of chewy and soft, perfect for slathering with cream cheese, topping with avocado, or enjoying as a sandwich. Whether you’re a seasoned baker or a kitchen novice, this recipe is guaranteed to become a new favorite. Get ready to enjoy fresh, homemade bagels in under 30 minutes!

Ingredients:
- 1 cup (240g) self-rising flour, plus more for dusting
- 1 cup (240g) plain Greek yogurt (non-fat or low-fat works best)
- 1 large egg, beaten (for egg wash, optional)
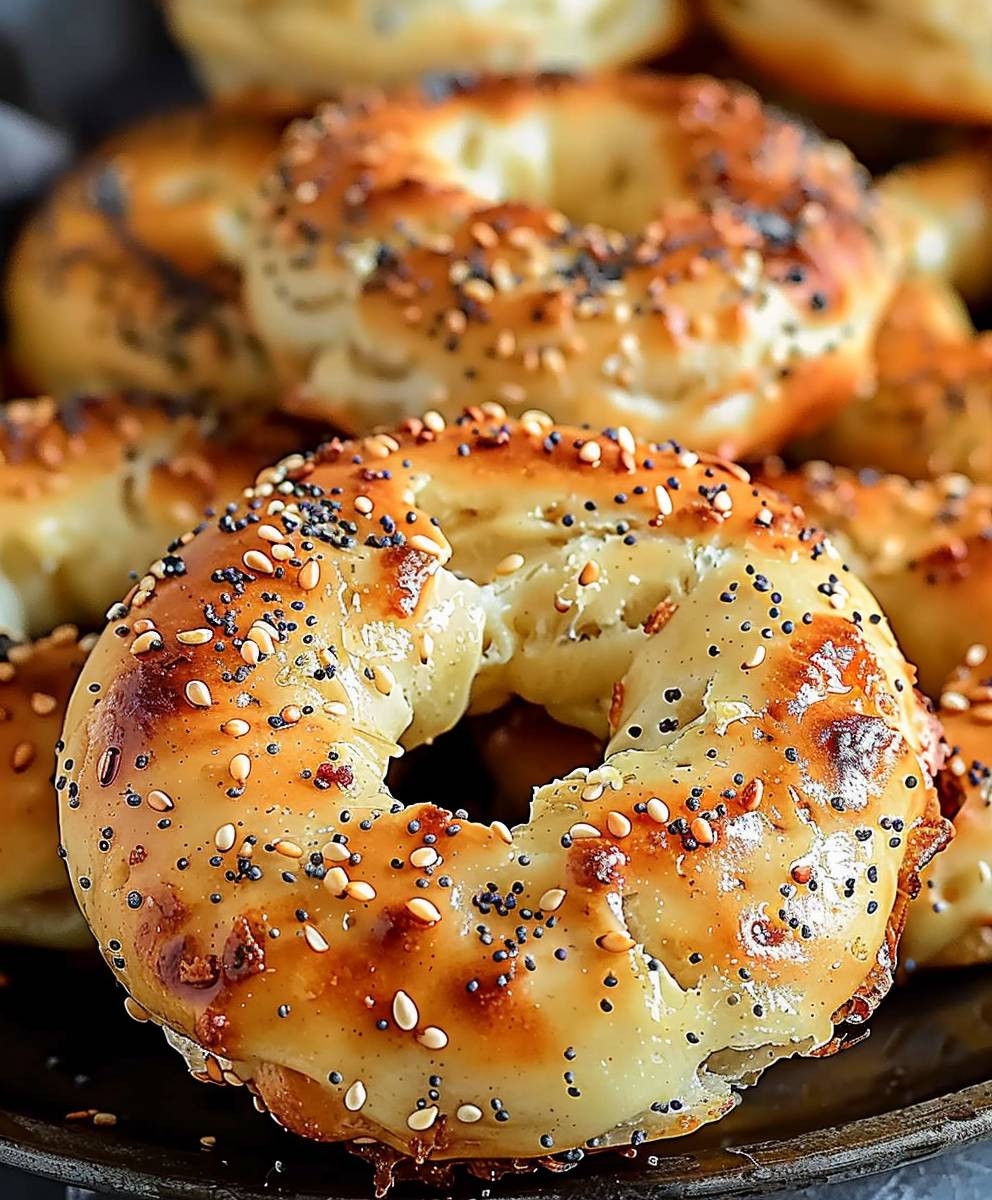
- Everything bagel seasoning, sesame seeds, poppy seeds, or other toppings (optional)
- Pinch of salt (optional, especially if your self-rising flour is low sodium)
Preparing the Dough:
Okay, let’s get started! This recipe is surprisingly simple, and you’ll be amazed at how quickly you can whip up a batch of these bagels. The key is to not overwork the dough, so we’ll be gentle with it.
- Combine the Flour and Yogurt: In a large bowl, add the self-rising flour. If you’re adding a pinch of salt, do it now. Then, add the Greek yogurt.
- Mix Until Just Combined: Using a spatula or wooden spoon, gently mix the flour and yogurt together. The mixture will initially look shaggy and dry, but keep stirring. It will gradually come together to form a dough. Don’t worry if it’s a little sticky at this stage; that’s perfectly normal.
- Knead Lightly (If Needed): Turn the dough out onto a lightly floured surface. If the dough is very sticky, add a little more flour, a tablespoon at a time, until it’s manageable. Gently knead the dough for just a minute or two, until it forms a smooth ball. Avoid over-kneading, as this can make the bagels tough. The goal is to just bring the dough together.
- Let the Dough Rest: Cover the dough with a clean kitchen towel or plastic wrap and let it rest for about 10 minutes. This allows the gluten to relax, making the bagels easier to shape.
Shaping the Bagels:
Now comes the fun part – shaping the bagels! There are a couple of ways to do this, so choose the method you prefer. I’ll walk you through both.
- Divide the Dough: After the dough has rested, divide it into 4 equal pieces. You can use a knife or a dough scraper for this.
- Method 1: The Rope Method:
- Roll each piece of dough into a long rope, about 8-10 inches long.
- Bring the ends of the rope together to form a circle, overlapping the ends slightly.
- Pinch the overlapping ends together firmly to seal the bagel shape. Make sure the seal is secure, or the bagel might come apart during baking.
- Method 2: The Ball Method:
- Roll each piece of dough into a smooth ball.
- Use your thumb or finger to poke a hole through the center of the ball.
- Gently stretch and widen the hole to create a bagel shape. Aim for a hole that’s about 1-2 inches in diameter, as it will shrink slightly during baking.
- Prepare for Toppings (Optional): If you’re using toppings like everything bagel seasoning, sesame seeds, or poppy seeds, now’s the time to prepare them. Place the toppings in a shallow dish or plate.
- Egg Wash (Optional): If you want a shiny, golden-brown crust, brush the tops of the bagels with a beaten egg. This step is optional, but it does add a nice visual appeal.
- Add Toppings (Optional): If you’re using toppings, dip the tops of the bagels into the toppings, pressing gently to help them adhere. You can also sprinkle the toppings over the bagels.
Baking the Bagels:
Alright, we’re almost there! Baking is the final step, and it’s crucial for getting that perfect bagel texture.
- Preheat the Oven: Preheat your oven to 375°F (190°C).
- Prepare the Baking Sheet: Line a baking sheet with parchment paper. This will prevent the bagels from sticking.
- Arrange the Bagels: Place the shaped bagels on the prepared baking sheet, leaving some space between them.
- Bake: Bake for 20-25 minutes, or until the bagels are golden brown. The exact baking time will depend on your oven, so keep an eye on them.
- Cool: Once the bagels are baked, remove them from the oven and let them cool on a wire rack for at least 10 minutes before slicing and serving. This allows the bagels to firm up slightly and prevents them from being too soft.
Tips and Variations:
Here are a few extra tips and ideas to customize your Greek yogurt bagels:
- Flavor Variations:
- Cinnamon Raisin: Add 1/4 cup of raisins and 1 teaspoon of cinnamon to the dough.
- Everything Bagel: Use everything bagel seasoning for a classic flavor.
- Jalapeño Cheddar: Add 1/4 cup of shredded cheddar cheese and 1 tablespoon of finely chopped jalapeño to the dough.
- Garlic Herb: Add 1 tablespoon of minced garlic and 1 tablespoon of chopped fresh herbs (such as rosemary, thyme, or oregano) to the dough.
- Sweet Bagels: For a sweeter bagel, add 1-2 tablespoons of sugar or honey to the dough.
- Gluten-Free Option: While I haven’t tested it myself, you might be able to use a gluten-free self-rising flour blend. Keep in mind that the texture may be slightly different.
- Air Fryer Option: You can also bake these bagels in an air fryer! Preheat your air fryer to 350°F (175°C). Place the bagels in the air fryer basket (you may need to do this in batches) and cook for 12-15 minutes, or until golden brown.
- Storage: Store the bagels in an airtight container at room temperature for up to 2 days, or in the refrigerator for up to 5 days. You can also freeze them for longer storage. To freeze, wrap the bagels individually in plastic wrap and then place them in a freezer bag.
- Reheating: To reheat, toast the bagels in a toaster or toaster oven until warm. You can also microwave them for a few seconds, but be careful not to overcook them, or they will become tough.
- Serving Suggestions:
- Serve the bagels with cream cheese, butter, or your favorite spread.
- Make a breakfast sandwich with eggs, cheese, and bacon or sausage.
- Use the bagels to make a delicious lunch sandwich.
- Enjoy them plain as a quick and easy snack.
- Troubleshooting:
- Dough is too sticky: Add a little more flour, a tablespoon at a time, until the dough is manageable.
- Bagels are too tough: Avoid over-kneading the dough.
- Bagels are not rising: Make sure your self-rising flour is fresh.
- Bagels are burning: Lower the oven temperature slightly.
Enjoy Your Homemade Bagels!
There you have it! A simple and delicious recipe for Greek yogurt bagels. I hope you enjoy making and eating these as much as I do. They’re perfect for a quick breakfast, a satisfying lunch, or a tasty snack. Don’t be afraid to experiment with different flavors and toppings to create your own unique bagel creations. Happy baking!
Conclusion:
And there you have it! These Greek Yogurt Bagels are truly a game-changer. I know, I know, you might be thinking, “Another bagel recipe?” But trust me on this one. The simplicity of the ingredients combined with the surprisingly chewy and satisfying texture makes this recipe a must-try for anyone looking for a healthier, quicker, and frankly, more delicious bagel experience. Forget kneading for hours and waiting for dough to rise – this recipe delivers incredible results with minimal effort.
Why is this recipe a must-try? Well, beyond the ease of preparation, these bagels are incredibly versatile. They’re perfect for a quick breakfast, a satisfying lunch, or even a light dinner. Plus, they’re significantly lower in calories and carbohydrates than traditional bagels, making them a guilt-free indulgence. The tanginess of the Greek yogurt adds a subtle depth of flavor that complements both sweet and savory toppings beautifully.
But the real magic lies in the texture. You get that satisfying chewiness you expect from a bagel, without the dense, sometimes heavy feeling. It’s a lighter, brighter bagel experience that will leave you feeling energized and ready to tackle your day.
So, how can you enjoy these delightful creations? The possibilities are endless! For a classic breakfast, try topping them with cream cheese and smoked salmon, or a smear of peanut butter and a drizzle of honey. If you’re feeling adventurous, create a mini pizza bagel with marinara sauce, mozzarella cheese, and your favorite toppings. For lunch, they make fantastic sandwich carriers – think turkey and avocado, or ham and Swiss.
Looking for variations? Absolutely! Feel free to experiment with different types of Greek yogurt. Full-fat yogurt will result in a slightly richer and more tender bagel, while non-fat yogurt will keep the calorie count even lower. You can also add different seasonings to the dough. Everything bagel seasoning is an obvious choice, but don’t be afraid to get creative with garlic powder, onion powder, dried herbs, or even a sprinkle of cinnamon and sugar for a sweeter treat.
Another fun variation is to add a handful of shredded cheese to the dough before baking. Cheddar, mozzarella, or even Parmesan would all work beautifully. You could also incorporate some chopped vegetables, like sun-dried tomatoes or olives, for a savory twist.
Don’t be afraid to play around with the recipe and make it your own. That’s the beauty of cooking, right? It’s all about experimenting and finding what you love.
I truly believe that once you try these Greek Yogurt Bagels, you’ll be hooked. They’re so easy to make, so delicious, and so much healthier than store-bought bagels. They’re the perfect solution for busy mornings, quick lunches, or anytime you’re craving a satisfying and guilt-free treat.
So, what are you waiting for? Get in the kitchen and give this recipe a try! I promise you won’t be disappointed. And when you do, please share your experience with me! I’d love to hear what toppings you tried, what variations you created, and how much you enjoyed these amazing bagels. Tag me in your photos on social media, or leave a comment below. I can’t wait to see your creations! Happy baking!
Greek Yogurt Bagels: The Ultimate Guide to Baking Them
Easy 2-ingredient bagels made with self-rising flour and Greek yogurt. A quick and delicious breakfast or snack!
Ingredients
Instructions
Recipe Notes
- Flavor Variations: Cinnamon Raisin (add 1/4 cup raisins and 1 tsp cinnamon), Everything Bagel (use everything bagel seasoning), Jalapeño Cheddar (add 1/4 cup shredded cheddar and 1 tbsp chopped jalapeño), Garlic Herb (add 1 tbsp minced garlic and 1 tbsp chopped fresh herbs).
- Sweet Bagels: Add 1-2 tablespoons of sugar or honey to the dough.
- Gluten-Free: May be able to use gluten-free self-rising flour blend.
- Air Fryer: Preheat air fryer to 350°F (175°C). Cook for 12-15 minutes, or until golden brown.
- Storage: Store in an airtight container at room temperature for up to 2 days, or in the refrigerator for up to 5 days. Freeze for longer storage.
- Reheating: Toast in a toaster or toaster oven. Microwave for a few seconds (be careful not to overcook).
- Serving Suggestions: Serve with cream cheese, butter, or your favorite spread. Make a breakfast or lunch sandwich.
- Troubleshooting:
- Dough is too sticky: Add more flour, a tablespoon at a time.
- Bagels are too tough: Avoid over-kneading.
- Bagels are not rising: Make sure your self-rising flour is fresh.
- Bagels are burning: Lower the oven temperature slightly.
Leave a Comment