
Frozen Brownie Ice Cream Cake: Just the name alone conjures up images of decadent indulgence, doesn’t it? Imagine sinking your fork into layers of rich, fudgy brownie, creamy, cold ice cream, and maybe even a drizzle of chocolate sauce. This isn’t just dessert; it’s an experience!
While the exact origins of the ice cream cake are shrouded in a bit of mystery, its popularity exploded in the mid-20th century, becoming a staple at birthday parties and celebrations. It’s a testament to our enduring love for both brownies and ice cream, two treats that, when combined, create something truly magical. Think of it as the ultimate expression of childhood joy, all grown up and ready to impress.
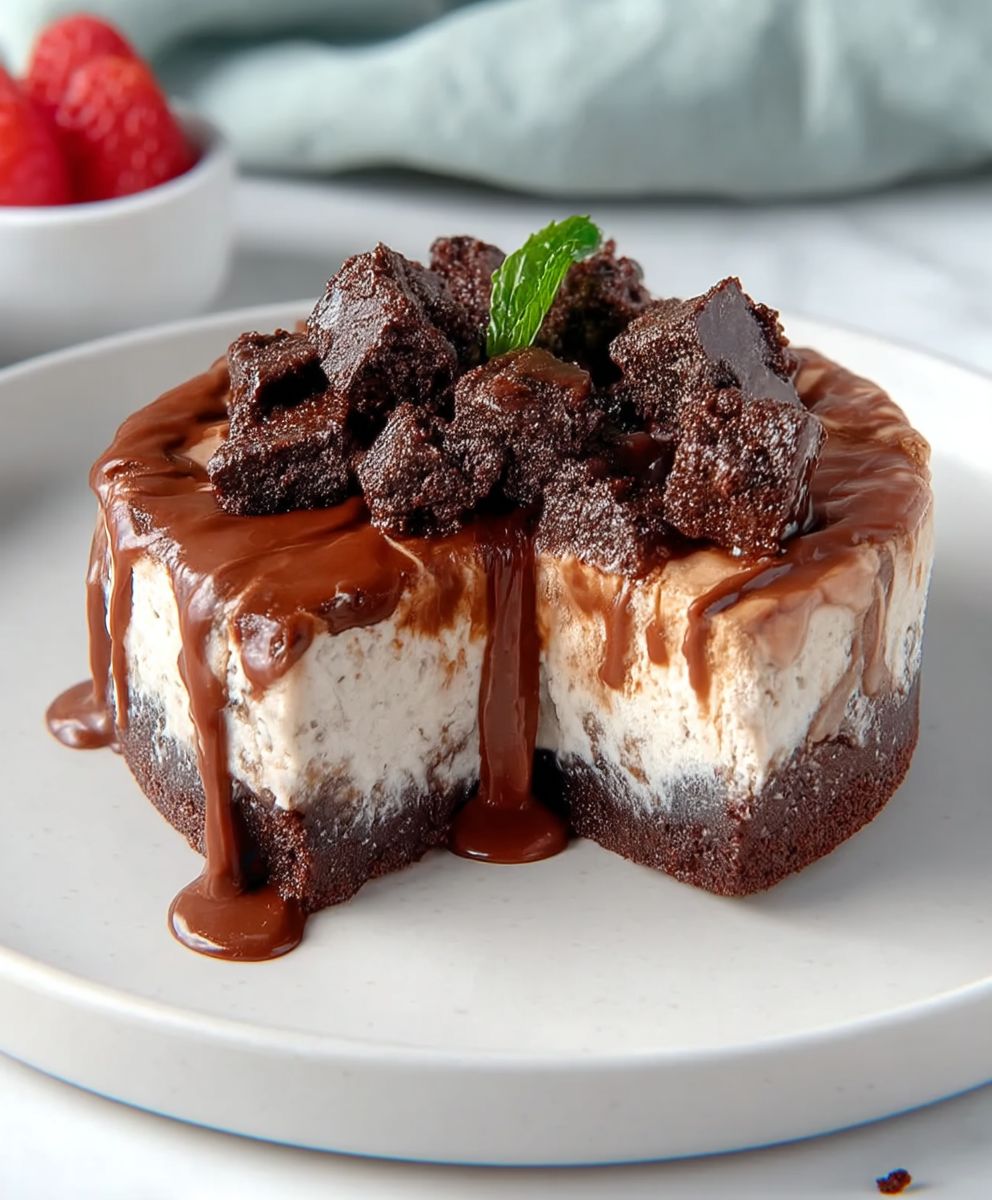
What makes a Frozen Brownie Ice Cream Cake so irresistible? It’s the perfect marriage of textures and temperatures. The warm, chewy brownie contrasts beautifully with the cool, smooth ice cream. The rich, chocolatey flavor is balanced by the refreshing chill. And let’s be honest, who can resist the convenience of a make-ahead dessert that’s guaranteed to be a crowd-pleaser? Whether you’re looking for a show-stopping centerpiece for your next gathering or simply a delightful treat to enjoy on a warm evening, this recipe is sure to become a new favorite. Get ready to create a dessert masterpiece that will have everyone begging for seconds!

Ingredients:
- For the Brownie Base:
- 1 cup (2 sticks) unsalted butter, melted
- 2 cups granulated sugar
- 1 cup unsweetened cocoa powder
- 1/2 teaspoon salt
- 1 teaspoon vanilla extract
- 4 large eggs
- 1 cup all-purpose flour
- For the Ice Cream Layer:
- 1/2 gallon (8 cups) of your favorite brownie-flavored ice cream, softened
- 1/2 cup hot fudge sauce, warmed
- 1/4 cup chopped walnuts or pecans (optional)
- For the Chocolate Ganache Topping:
- 1 cup heavy cream
- 12 ounces semi-sweet chocolate chips
- 1 tablespoon unsalted butter
- Optional Garnishes:
- Whipped cream
- Chocolate shavings
- Maraschino cherries
- Extra chopped nuts
Preparing the Brownie Base:
- Preheat and Prep: First things first, preheat your oven to 350°F (175°C). Grease and flour a 9×13 inch baking pan. This will prevent the brownie from sticking and make it easier to remove later. You can also line the pan with parchment paper, leaving an overhang on the sides, for even easier removal.
- Melt the Butter: In a large bowl, melt the butter. You can do this in the microwave in 30-second intervals, stirring in between, or in a saucepan over low heat. Be careful not to burn the butter!
- Combine Sugar, Cocoa, and Salt: Add the granulated sugar, unsweetened cocoa powder, and salt to the melted butter. Whisk everything together until it’s well combined and there are no lumps of cocoa powder. The mixture will be quite thick.
- Add Vanilla and Eggs: Stir in the vanilla extract. Then, add the eggs one at a time, mixing well after each addition. Make sure each egg is fully incorporated before adding the next. This helps create a smooth and even brownie batter.
- Incorporate the Flour: Gradually add the all-purpose flour to the wet ingredients, mixing until just combined. Be careful not to overmix the batter, as this can result in a tough brownie. A few streaks of flour are okay at this stage.
- Pour into Pan and Bake: Pour the brownie batter into the prepared baking pan and spread it evenly. Bake for 25-30 minutes, or until a toothpick inserted into the center comes out with moist crumbs attached. The baking time may vary depending on your oven, so keep an eye on it.
- Cool Completely: Once the brownie is baked, remove it from the oven and let it cool completely in the pan. This is crucial for preventing the ice cream from melting when you add it later. You can speed up the cooling process by placing the pan in the refrigerator for an hour or two.
Assembling the Ice Cream Layer:
- Soften the Ice Cream: While the brownie is cooling, take your brownie-flavored ice cream out of the freezer and let it soften slightly. You want it to be soft enough to spread easily, but not completely melted. This usually takes about 15-20 minutes at room temperature.
- Spread the Ice Cream: Once the brownie is completely cool, spread the softened ice cream evenly over the top. Use an offset spatula or the back of a spoon to create a smooth and even layer.
- Drizzle with Hot Fudge (Optional): If you’re using hot fudge sauce, warm it up slightly in the microwave or in a saucepan. Drizzle it over the ice cream layer. This adds an extra layer of chocolatey goodness.
- Sprinkle with Nuts (Optional): If you’re using chopped walnuts or pecans, sprinkle them evenly over the hot fudge sauce (or directly onto the ice cream if you’re not using hot fudge).
- Freeze: Cover the pan tightly with plastic wrap and freeze for at least 4 hours, or preferably overnight. This will allow the ice cream to firm up completely and make it easier to slice.
Making the Chocolate Ganache Topping:
- Heat the Heavy Cream: In a saucepan, heat the heavy cream over medium heat until it just begins to simmer. Do not let it boil.
- Pour over Chocolate Chips: Remove the saucepan from the heat and pour the hot heavy cream over the semi-sweet chocolate chips in a heatproof bowl.
- Let Sit: Let the mixture sit for 1-2 minutes to allow the heat from the cream to melt the chocolate chips.
- Stir Until Smooth: Gently stir the mixture until the chocolate chips are completely melted and the ganache is smooth and glossy. If there are any stubborn pieces of chocolate that won’t melt, you can microwave the mixture in 15-second intervals, stirring in between, until it’s completely smooth.
- Add Butter: Stir in the unsalted butter until it’s fully incorporated into the ganache. This will add shine and richness to the topping.
- Cool Slightly: Let the ganache cool slightly at room temperature for about 15-20 minutes. This will allow it to thicken slightly, making it easier to spread over the ice cream cake.
Assembling the Final Cake:
- Remove from Freezer: Take the frozen brownie ice cream cake out of the freezer.
- Spread the Ganache: Pour the slightly cooled chocolate ganache over the ice cream layer, spreading it evenly with an offset spatula or the back of a spoon. The ganache will harden quickly as it comes into contact with the frozen ice cream, so work quickly.
- Garnish (Optional): If you’re using any optional garnishes, such as whipped cream, chocolate shavings, maraschino cherries, or extra chopped nuts, add them now. Get creative and make it look beautiful!
- Freeze Again: Return the cake to the freezer for at least 30 minutes to allow the ganache to set completely. This will make it easier to slice and serve.
Serving and Storing:
- Slice and Serve: To slice the cake, run a large knife under hot water and dry it with a clean towel. This will help you make clean cuts. Slice the cake into squares or rectangles and serve immediately.
- Storage: Store any leftover cake in the freezer, tightly wrapped in plastic wrap or in an airtight container. It will keep for up to a week. You may need to let it sit at room temperature for a few minutes before slicing if it’s very hard.
Conclusion:
This Frozen Brownie Ice Cream Cake is truly a showstopper, and I wholeheartedly believe it deserves a spot on your dessert rotation. It’s the perfect balance of rich, fudgy brownie, creamy, cool ice cream, and that satisfying crunch – a textural symphony that will have everyone begging for seconds. Forget complicated baking projects; this recipe is all about ease and maximum impact. It’s a guaranteed crowd-pleaser for birthdays, holidays, or simply a “just because” treat.
Why is this a must-try? Because it’s ridiculously easy to make, requires minimal baking (just the brownies!), and delivers a decadent dessert experience that rivals anything you’d find in a fancy bakery. Plus, it’s completely customizable! You can tailor it to your specific tastes and preferences, making it a truly unique creation every time.
Think of the possibilities! For a peanut butter lover’s dream, swirl some peanut butter into the ice cream before freezing and top with chopped Reese’s cups. If you’re a fan of mint chocolate chip, use mint chocolate chip ice cream and add a drizzle of chocolate ganache. For a more sophisticated flavor profile, try using coffee ice cream and adding a sprinkle of espresso powder to the brownie batter. You could even incorporate fresh berries for a burst of fruity freshness. The options are truly endless!
Serving suggestions? A simple dollop of whipped cream and a sprinkle of chocolate shavings are always a classic choice. But don’t be afraid to get creative! A drizzle of caramel sauce, a handful of chopped nuts, or even a scoop of your favorite fruit compote would be fantastic additions. For a truly decadent experience, serve each slice with a warm chocolate sauce on the side.
I’ve poured my heart into perfecting this recipe, and I’m so excited for you to try it. It’s a guaranteed winner, and I know you’ll love it as much as I do. The beauty of this Frozen Brownie Ice Cream Cake lies in its simplicity and adaptability. It’s a blank canvas for your culinary creativity, so don’t be afraid to experiment and make it your own.
So, what are you waiting for? Gather your ingredients, preheat your oven, and get ready to create a dessert masterpiece. I promise you won’t regret it! And most importantly, have fun with it! Baking should be enjoyable, and this recipe is designed to be just that.
Once you’ve made your own version of this delicious Frozen Brownie Ice Cream Cake, I’d absolutely love to hear about it! Share your photos and experiences in the comments below. Let me know what variations you tried, what your family and friends thought, and any tips or tricks you discovered along the way. I’m always eager to learn from your experiences and see your creative interpretations of my recipes. Happy baking (or rather, assembling)! I can’t wait to hear from you!
Frozen Brownie Ice Cream Cake: The Ultimate Dessert Recipe
Decadent brownie ice cream cake with a rich brownie base, brownie-flavored ice cream layer, and smooth chocolate ganache topping. Perfect for special occasions!
Ingredients
Instructions
Recipe Notes
- For easier brownie removal, line the baking pan with parchment paper, leaving an overhang.
- Do not overmix the brownie batter, as this can result in a tough brownie.
- Make sure the brownie is completely cool before adding the ice cream to prevent melting.
- Soften the ice cream just enough to spread easily, but not completely melted.
- Work quickly when spreading the ganache, as it will harden quickly on the frozen ice cream.
- If the ganache is too thick, add a tablespoon of warm milk or cream to thin it out.
- For clean slices, run a large knife under hot water and dry it before each cut.
Leave a Comment