
Vampire Bread isn’t just a recipe; it’s an invitation to a world of tantalizing aroma and unforgettable flavor. Imagine a bread so potent, so deeply aromatic, that it could ward off any culinary dullness and perhaps even impress the most discerning palates. That’s precisely the experience we’re about to embark on together!
The Legendary Appeal of Garlic
While no actual vampires were harmed in the making of this delightful dish, the name “Vampire Bread” playfully alludes to its generous, glorious use of garlic. Historically, garlic has been revered across diverse cultures not only for its incredible taste and medicinal properties but also for its legendary protective qualities. This recipe is a delicious, modern homage to that ancient belief, transforming a humble loaf into something truly extraordinary and wonderfully robust.
What makes this specific Vampire Bread an absolute favorite among countless enthusiasts? It’s the irresistible, mouth-watering aroma that will undoubtedly fill your kitchen, promising a feast even before the first bite. It’s the perfect golden-brown, slightly crisp crust that gives way to an incredibly soft, airy interior, thoroughly infused with a luxurious, savory garlicky butter. Whether you’re serving it alongside a hearty pasta, a robust soup, or simply tearing off a warm piece to enjoy on its own, its rich, comforting flavor profile is universally adored. It’s the ultimate comfort food, surprisingly easy to prepare, and guaranteed to disappear quickly from any table, leaving everyone craving more. Truly, this is more than just bread; it’s an experience.

Ingredients:
- For the Dough:
- Warm Milk: 1 ½ cups, ideally between 105-115°F (40-46°C). This temperature is absolutely crucial for waking up our yeast friends; too hot and you’ll kill them, too cold and they’ll stay dormant.
- Granulated Sugar: 2 tablespoons. This isn’t just for a hint of sweetness; it’s vital food for the yeast, helping it activate properly and contributing to that desirable golden-brown crust on our finished Vampire Bread.
- Active Dry Yeast: 2 ¼ teaspoons, which is typically one standard packet. Always check the expiration date to ensure your yeast is fresh and active for the best rise!
- All-Purpose Flour: 4 ½ to 5 cups, plus a little extra for dusting your work surface. I always recommend starting with the lower amount and gradually adding more as needed to achieve the perfect dough consistency – it’s much easier to add flour than to take it away.
- Salt: 1 ½ teaspoons. Don’t even think about skipping the salt! It’s essential for bringing out all the delicious flavors in our bread and also plays an important role in controlling the yeast’s activity, leading to a much better texture and crumb.
- Large Egg: 1, at room temperature. A room-temperature egg incorporates far more easily and smoothly into the dough, contributing wonderfully to its richness, tenderness, and beautiful golden color.
- Unsalted Butter: ¼ cup (½ stick), melted and then allowed to cool slightly. It’s important that it’s not piping hot when it meets the yeast, but also not solid, as we want it to blend seamlessly into the dough.
- For the Garlic-Herb Infusion (Our “Vampire Slayer” Butter):
- Unsalted Butter: 1 stick (½ cup), softened to room temperature. This makes it incredibly easy to cream and mix with our other flavorful additions, ensuring a uniform distribution.
- Fresh Garlic: 8-10 cloves, minced very finely or pressed through a garlic press. Yes, that’s a generous amount, and it’s absolutely, unequivocally necessary for our Vampire Bread! The more the merrier when it comes to warding off those mythical creatures (or just enjoying unbelievably garlicky bread).
- Fresh Parsley: ¼ cup, finely chopped. This adds a beautiful burst of freshness, a lovely peppery note, and a vibrant green color that contrasts wonderfully with the red elements.
- Fresh Chives: 2 tablespoons, finely chopped. Their delicate, mild oniony flavor complements the intense garlic perfectly without overpowering it, adding another layer of aromatic complexity.
- Fresh Oregano: 1 tablespoon, finely chopped. This is an optional addition, but I highly recommend it as it lends a wonderful, earthy, aromatic depth that truly elevates the overall flavor profile of this bread.
- Red Pepper Flakes: ½ teaspoon, or to taste. This adds just a hint of warmth and a subtle, playful bite, like a gentle vampire’s kiss, without making the bread overtly spicy. You can adjust this to your personal heat preference.
- Salt: ½ teaspoon. To properly season our incredibly flavorful compound butter and ensure every bite is perfectly balanced.
- Black Pepper: ¼ teaspoon, freshly ground. Always, always use fresh for the best aroma and a subtle kick of spice that marries well with the other seasonings.
- For the Crimson Filling (Optional, but highly recommended for the full “Vampire” aesthetic):
- Roasted Red Peppers: ½ cup, finely diced. You can use high-quality pre-jarred ones, drained very well to avoid excess moisture, or for an even deeper, sweeter flavor, roast your own fresh red peppers until tender and slightly charred. Their sweet, smoky notes are fantastic with garlic.
- Sun-Dried Tomatoes: ¼ cup, oil-packed, drained thoroughly and finely chopped. These provide an intense, concentrated tomato flavor, a delightful chewiness, and a beautiful deep red hue that truly enhances the “vampire” theme.
- Grated Parmesan Cheese: ½ cup. This adds a lovely savory, umami kick and helps all the filling ingredients meld together beautifully inside the bread, creating pockets of cheesy, tangy goodness.
- For the Topping:
- Melted Butter: 2 tablespoons. For brushing on after baking, giving our Vampire Bread a glorious, shiny finish and an extra layer of richness that makes it utterly irresistible.
- Flaky Sea Salt: ½ teaspoon. A generous sprinkle on top provides a delightful textural contrast and further enhances all the savory flavors, making each bite sing.
- Extra Fresh Parsley or Chives: For garnish. A final flourish of bright green makes this bread look as utterly appealing and delicious as it tastes.
Preparing the Dough for Your Vampire Bread
Let’s get started on the foundation of our amazing Vampire Bread – the dough! This is where patience and proper technique truly pay off.
- Activate the Yeast: In a large mixing bowl (or the bowl of your stand mixer if you’re using one), combine the warm milk and granulated sugar. Give it a gentle stir with a spoon or whisk just to dissolve the sugar evenly. Now, sprinkle the active dry yeast over the top of the liquid. Do not stir it in at this point. Let it sit undisturbed for 5-10 minutes. You’ll know your yeast is alive, active, and ready for action when it becomes visibly foamy and bubbly on the surface, resembling a tiny, yeasty volcano ready to erupt! If, after 10 minutes, you don’t see any foam, your milk might have been too hot or too cold, or your yeast might be expired. In that unfortunate event, it’s best to start over with fresh yeast and properly tempered milk.
- Combine Wet Ingredients: Once your yeast has confirmed its vitality with a nice layer of foam, add the room-temperature egg and the slightly cooled melted butter to the foamy milk mixture. Use a whisk to gently but thoroughly combine everything until it forms a uniform liquid. This well-mixed liquid base is going to be the secret to our incredibly soft, tender, and rich Vampire Bread.
- Introduce Dry Ingredients: In a separate medium bowl, whisk together the 4 ½ cups of all-purpose flour and the salt. This step ensures that the salt is evenly distributed throughout the flour, preventing pockets of overly salty or bland dough. Gradually add this dry mixture to your wet ingredients, about a cup at a time. If you’re using a stand mixer, mix on low speed with the dough hook attachment. If you’re mixing by hand, use a sturdy wooden spoon or a Danish dough whisk. Continue mixing until a shaggy dough begins to form and most of the flour is incorporated.
- Knead the Dough: This is a crucial step for developing the gluten structure that gives bread its characteristic chew and texture. If using a stand mixer, increase the speed to medium-low and knead for about 7-10 minutes. If you’re kneading by hand, turn the shaggy dough out onto a lightly floured surface and knead vigorously for 10-15 minutes. The dough should gradually transform from sticky and rough to smooth, elastic, and no longer tacky to the touch. It should feel soft and pliable, almost like a baby’s bottom! As you knead, if the dough is still too sticky to handle, add the remaining ½ cup of flour, one tablespoon at a time, until it reaches the desired consistency. The key here is to add just enough flour to prevent excessive stickiness without making the dough tough or dry. To test for proper kneading, gently poke the dough with your finger; it should spring back slowly. This thorough kneading ensures a well-developed gluten network, which is essential for that perfect, airy bread texture.
- First Rise (The Beauty Sleep): Lightly grease a clean large bowl with a tiny bit of neutral oil (like vegetable or canola oil). Place your beautifully kneaded dough into the bowl, turning it over once to ensure the entire surface is coated with a thin layer of oil. This prevents the dough from drying out and forming a crust during its rise. Cover the bowl tightly with plastic wrap or a clean, damp kitchen towel. Now, find a warm, draft-free spot in your kitchen. A popular trick is to place the bowl in an oven that’s turned off, with just the oven light on; this creates a perfectly cozy and consistent environment. Let the dough rise for 1 to 1 ½ hours, or until it has noticeably doubled in size. This “first rise,” also known as bulk fermentation, is where the yeast does its primary magic, creating ample air pockets, developing deep, complex flavors, and giving our Vampire Bread its light and airy texture. It’s truly a satisfying moment to see your dough puff up so magnificently!
Crafting the Garlic-Herb Butter and Crimson Filling
While our dough is happily having its beauty sleep, let’s prepare the irresistible heart and soul of our Vampire Bread – the flavor-packed garlic-herb butter and the vibrant crimson filling.
- Prepare the Garlic-Herb Butter: In a small bowl, combine the softened unsalted butter. Ensure it’s truly at room temperature, as this makes it much easier to incorporate the other ingredients smoothly. Add the finely minced fresh garlic, finely chopped fresh parsley, finely chopped fresh chives, the optional but highly recommended finely chopped fresh oregano, red pepper flakes, salt, and freshly ground black pepper. Use a fork or a small spatula to mash and mix everything together thoroughly until it’s completely combined and looks like a vibrant, aromatic paste. You want all those incredible flavors to be evenly distributed throughout the butter. If you’re feeling adventurous, taste a tiny, tiny bit (be warned, raw garlic is potent!) and adjust any seasonings if needed. This “Vampire Slayer” butter is where a significant portion of our bread’s amazing, pungent, and fresh flavor will come from, so don’t be shy with the herbs and garlic! This glorious mixture will literally infuse every single bite of our Vampire Bread with deliciousness.
- Prepare the Crimson Filling (If Using): If you’ve decided to embrace the full “Vampire Bread” aesthetic and are adding the optional roasted red pepper and sun-dried tomato filling, grab another small bowl. Combine the finely diced roasted red peppers (ensure they are very well drained to avoid introducing too much moisture into the dough), the finely chopped sun-dried tomatoes (also well drained if oil-packed), and the grated Parmesan cheese. Stir everything together thoroughly until all the ingredients are evenly distributed. The combination of the sweet, smoky roasted red peppers, the intensely tangy sun-dried tomatoes, and the salty, umami Parmesan will add a wonderful, complex layer of flavor and, crucially, a beautiful, striking deep red color to the interior of our Vampire Bread. This vibrant “crimson” filling truly elevates the visual appeal and enhances the “Vampire” theme, making each cross-section a delight to behold.
Assembling Your Vampire Bread
Now comes the truly fun and creative part – transforming our perfectly risen dough into individual, garlic-infused pockets that will become our show-stopping Vampire Bread!
- Punch Down and Divide: Once your dough has majestically doubled in size during its first rise, gently but firmly punch it down. This action releases the built-up gasses, helps to redistribute the yeast evenly, and contributes to a finer, more consistent crumb texture in the final bread. Turn the dough out onto a lightly floured work surface. Knead it very briefly, just a few times, to gently form it into a smooth log. Now, using a sharp knife or, even better, a bench scraper, divide the dough into approximately 24 equal pieces. Don’t stress too much about being perfectly precise; a little rustic charm is definitely part of the appeal of homemade Vampire Bread! Aim for pieces that are roughly the size of a golf ball or a large walnut.
- Shape and Fill Each Piece: Take one of the divided dough pieces and, using your fingers or a mini rolling pin, flatten it into a small circle or oval, about 3-4 inches in diameter. You want it thin enough to spread the butter and filling but not so thin that it tears easily.
- For each piece: Spread a generous teaspoon of the prepared garlic-herb butter (our “Vampire Slayer” butter!) evenly over the entire surface of the flattened dough. Don’t be shy here; this is where a huge amount of flavor comes from!
- If you’re using the crimson filling, place about ½ teaspoon of the roasted red pepper and sun-dried tomato mixture directly in the center of the buttered dough. You can optionally add a small pinch of grated Parmesan cheese on top of the crimson filling, even if you mixed it into the main crimson filling batch; a little extra cheese is never a bad thing!
- Carefully fold the edges of the dough over the filling, bringing them together at the top, and then firmly pinch them securely to seal, forming a neat, small ball. It’s incredibly important to make sure the filling is completely enclosed within the dough, or else it might leak out during baking, which we definitely want to avoid. This step requires a bit of care and precision, but the burst of flavor in every bite of a perfectly sealed piece is absolutely worth the effort.
- Repeat this entire process with all the remaining dough pieces, butter, and fillings until every little ball of dough is a treasure trove of garlic, herbs, and crimson goodness.
- Arrange in a Baking Pan: Lightly grease a 9×5-inch loaf pan or, for a truly spectacular pull-apart display, a 9-inch round springform pan. I personally adore using a round springform pan for that gorgeous, communal pull-apart effect, but a loaf pan works perfectly too for a more traditional sliceable bread. Arrange the filled dough balls in the prepared pan. You can place them somewhat haphazardly for a more organic look, or in neat, concentric rows for a more structured appearance. The goal is to fill the pan snugly but not pack them too tightly, as they will expand significantly during the second rise and again during baking. Think of them as a cozy family of garlic bread balls, snuggling together.
- Second Rise (The Final Nap): Once all your dough balls are nestled comfortably in the pan, cover the baking pan loosely with plastic wrap or a clean, damp kitchen towel. Return it to your warm, draft-free spot for the second rise. This usually takes about 30-45 minutes, or until the dough balls have noticeably puffed up, are touching each other, and beautifully fill the pan. They should look light, airy, and visibly expanded. While it might be tempting to rush this step, this second rise is absolutely crucial for achieving that wonderfully tender, fluffy, and light texture in your finished Vampire Bread.
- Preheat Oven: About 15 minutes before you anticipate the end of the second rise, preheat your oven to 375°F (190°C). This ensures the oven is at the correct temperature when your bread is ready to bake, leading to a consistent and beautiful bake.
Baking the Vampire Bread
The moment of truth is finally here! Get ready for your kitchen to be filled with the most incredibly intoxicating aroma imaginable.
- Bake to Golden Perfection: Carefully place the baking pan containing your beautifully risen Vampire Bread dough into the preheated oven. Bake for 30-35 minutes, or until the top of the bread is a glorious golden brown and the internal temperature, when measured with an instant-read thermometer inserted into the center, reaches 200-210°F (93-99°C). Keep a watchful eye on it; if you notice the top browning too quickly before the inside is fully cooked, you can loosely tent it with a piece of aluminum foil during the last 10-15 minutes of baking. The aroma filling your home right now will be absolutely intoxicating – a potent, mouth-watering blend of toasted bread, pungent fresh garlic, and fragrant herbs that will have everyone gravitating towards the kitchen.
- Cooling: Once baked to perfection, carefully remove the pan from the oven. Let the bread cool in the pan for about 10-15 minutes. This cooling period is important as it allows the internal structure of the bread to set and prevents it from collapsing when removed from the pan. It also makes it easier to handle and ensures the individual pieces retain their shape.
- Final Touch: While the Vampire Bread is still wonderfully warm, gently brush the entire top surface with the 2 tablespoons of melted butter. This step adds a beautiful, glossy sheen, an extra layer of richness, and helps the flaky sea salt adhere perfectly. Now, generously sprinkle the flaky sea salt over the top. The crunch of the salt will provide a delightful textural contrast and further enhance all those savory flavors. If desired, scatter some extra fresh parsley or chives over the top for a final pop of vibrant color and an added burst of freshness, making your Vampire Bread not just delicious, but also visually stunning.
- Serve Warm: After the initial cooling period in the pan, carefully invert the bread onto a wire rack to cool completely, or serve it warm directly from the pan. For a pull-apart bread, it is almost always best enjoyed warm, as the individual pieces separate with effortless ease, revealing the luscious, garlicky, and herb-filled interior that is just begging to be devoured.
Serving Suggestions for Your Vampire Bread
Congratulations, you’ve just created a masterpiece! This Vampire Bread isn’t merely a loaf of bread; it’s a culinary experience, a testament to the power of fresh ingredients and a bit of love in the kitchen. Here are a few fantastic ways to enjoy your incredible, aromatic creation:
- As a Standalone Star: Honestly, this Vampire Bread is so incredibly flavorful, rich, and satisfying on its own, it can easily be the star of any meal, appetizer spread, or casual gathering. Just place it proudly on a beautiful cutting board or serving platter, and watch as friends and family eagerly pull apart the individual, soft, pillowy pieces, each bursting with garlic and herbs. The sheer aroma alone is enough to draw a crowd and pique everyone’s interest!
- Alongside Hearty Soups and Stews: Its robust and comforting flavors make it an absolutely exceptional companion to a variety of hearty soups, simmering stews, or even a classic chili. Imagine the pure bliss of dipping a warm, garlic-infused piece into a rich, savory tomato bisque, a rustic lentil stew, or a creamy potato soup – the soft, airy interior is absolutely perfect for soaking up every last delicious drop.
- Elevate Your Pasta Dishes: Forget boring, store-bought garlic bread! This Vampire Bread takes your pasta night to a whole new level of gourmet. It pairs beautifully with classic Italian-American dishes like spaghetti and meatballs, a rich chicken alfredo, or even a simple, fresh pesto pasta. The potent fresh garlic and vibrant herbs complement both rich, creamy sauces and bright, acidic tomato-based sauces wonderfully.
- Part of a Mezze Platter or Antipasto: For a more social and interactive dining experience, cut the Vampire Bread into smaller, bite-sized chunks or encourage guests to pull off their own pieces. Serve it alongside an array of olives, assorted cheeses, delicate cured meats, and various dips like creamy hummus, smoky baba ghanoush, or a tangy tzatziki. Its vibrant, savory flavors will fit right into any Mediterranean or European-inspired spread.
- A Unique Brunch or Breakfast Treat: While perhaps a bit unconventional for a morning meal, I’ve personally discovered that any leftover (if you’re lucky enough to have any!) Vampire Bread makes a fantastic savory toast. A quick re-heat in a warm oven or a toaster oven can revive its glorious texture and incredible aroma, perhaps even served with a perfectly fried or poached egg on top for a truly decadent breakfast.
- A Ghoulish Halloween Must-Have: Given its evocative name, this Vampire Bread is an absolute must-have for any Halloween-themed gathering, spooky dinner party, or autumnal celebration. Its slightly “bloody” interior from the roasted red peppers and sun-dried tomatoes, combined with the potent, “vampire-warding” garlic, makes it perfectly themed and a fun conversation starter. Present it with a dramatic flair on a dark platter for maximum impact!
- Pair with a Simple Salad: Sometimes, all you need is a fresh, crisp green salad dressed with a light, tangy vinaigrette to perfectly balance the richness and intensity of the Vampire Bread. It creates a complete, utterly satisfying, and surprisingly elegant meal that is both comforting and fresh.
No matter how you choose to enjoy it, this Vampire Bread is guaranteed to be a sensational hit with everyone who tries it. It’s a comforting, incredibly aromatic, and deeply flavorful bread that embodies everything wonderful and heartwarming about homemade baking. The delightful blend of textures – the slightly crisp, golden crust giving way to a soft, utterly pull-apart interior bursting with the unmistakable taste of fresh garlic and fragrant herbs – is truly addictive. It’s more than just a bread; it’s an invitation to gather, share, and wholeheartedly enjoy the simple, profound pleasures of good food made with love and a dash of playful creativity. So go ahead, bake a batch, and prepare for an outpouring of rave reviews. Your culinary prowess, especially with this unique Vampire Bread, will be nothing short of legendary!
Conclusion:
And there you have it, my friends! We’ve journeyed through the simple steps to create something truly magical in your kitchen. This isn’t just another loaf of bread; it’s an experience, a delightful fusion of robust flavors and comforting textures that will undoubtedly become a staple in your home. I truly believe that once you pull this golden-brown masterpiece from your oven, filling your kitchen with its irresistible aroma, you’ll understand why I’m so passionate about it. It’s the kind of bread that makes you close your eyes and savor every single bite, a testament to how simple ingredients, when treated with a little love, can produce extraordinary results. The rich, savory notes, combined with the perfectly tender crumb, are nothing short of spectacular. This recipe isn’t just about following instructions; it’s about embracing the joy of baking and creating something truly special that will bring warmth and happiness to your table.
Why This Recipe is an Absolute Must-Try:
First and foremost, the flavor profile of this bread is simply unparalleled. It strikes a magnificent balance between savory depth and a subtle, satisfying sweetness that comes from the natural caramelization during baking. The crust is wonderfully crisp, offering a delightful crackle with every slice, while the interior remains astonishingly soft and airy. It’s incredibly versatile, capable of standing proudly on its own, or serving as the perfect complement to a wide array of dishes. What’s more, the process itself is wonderfully therapeutic. There’s something immensely satisfying about kneading the dough, watching it rise, and finally, witnessing it transform into this magnificent loaf. It’s a confidence-boosting bake, even for those who might consider themselves novice bakers, delivering consistently incredible results that will impress everyone who tries it. Furthermore, it’s a fantastic conversation starter, unique enough to pique curiosity, yet universally appealing. I find that the aroma alone, as it bakes, is enough to gather everyone in the kitchen, eagerly awaiting the first slice.
Unleash Your Creativity: Serving Suggestions & Variations
Now that you’ve got a fresh loaf of this incredible bread, let’s talk about how to truly make it sing. This bread is incredibly versatile, making it perfect for countless culinary adventures. My absolute favorite way to enjoy it is simply slathered with a generous helping of good quality butter, perhaps a sprinkle of flaky sea salt, allowing its inherent flavors to shine. It also makes an exceptional base for garlic bread; just brush slices with melted butter, minced garlic, and fresh parsley before a quick toast. Imagine it alongside a hearty bowl of tomato soup on a chilly evening, or as the star player in a gourmet grilled cheese sandwich, perhaps with some sharp cheddar and caramelized onions. For breakfast, consider toasting a slice and topping it with a poached egg and a sprinkle of chives – pure bliss! Don’t limit yourself to savory applications; a slice toasted and spread with a fruit preserve or honey can be surprisingly delicious too, thanks to its subtle sweetness. For those feeling adventurous, why not try adding different herbs to the dough? Rosemary, thyme, or even a hint of dried oregano can introduce exciting new dimensions. You could also experiment with cheese – a handful of grated Parmesan or sharp cheddar folded into the dough before the second rise would create an incredibly decadent loaf. Another fantastic variation is to turn it into a savory bread pudding, using leftover slices with eggs, milk, and your favorite vegetables for a comforting brunch or dinner. This bread also freezes beautifully, so don’t hesitate to bake a double batch and keep some on hand for whenever a craving strikes. Its robust structure means it holds up wonderfully when thawed and gently reheated, maintaining its exquisite texture and flavor. This truly is a chameleon in the kitchen, ready to adapt to whatever culinary mood strikes you, proving that good bread is the foundation of so many wonderful meals. The possibilities are genuinely endless, ensuring that this recipe will never get boring.
I genuinely can’t wait for you to experience the magic of baking and tasting this exceptional bread. It’s a recipe that promises not only a delicious outcome but also a truly rewarding baking journey. Please, give this Vampire Bread a try in your own kitchen! I’m confident you’ll fall in love with its irresistible charm and robust flavor just as I have. Once you’ve baked it and shared it with your loved ones, I would be absolutely thrilled to hear about your experience. Did you try a unique serving suggestion? Did you add a twist of your own? What did your family and friends think? Share your stories, your photos, and your triumphs! Your feedback is invaluable and inspires me endlessly. Happy baking, and enjoy every glorious crumb!
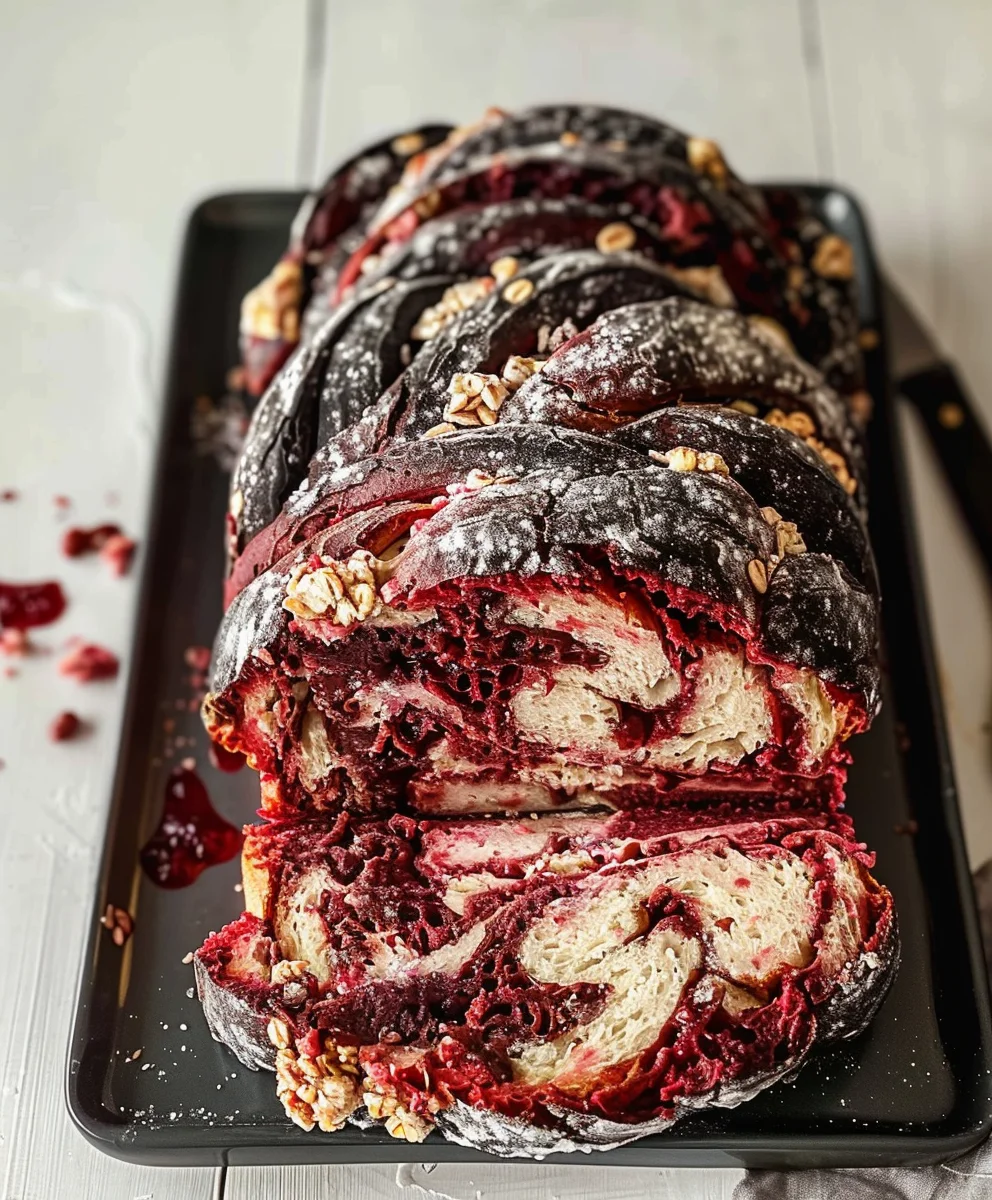
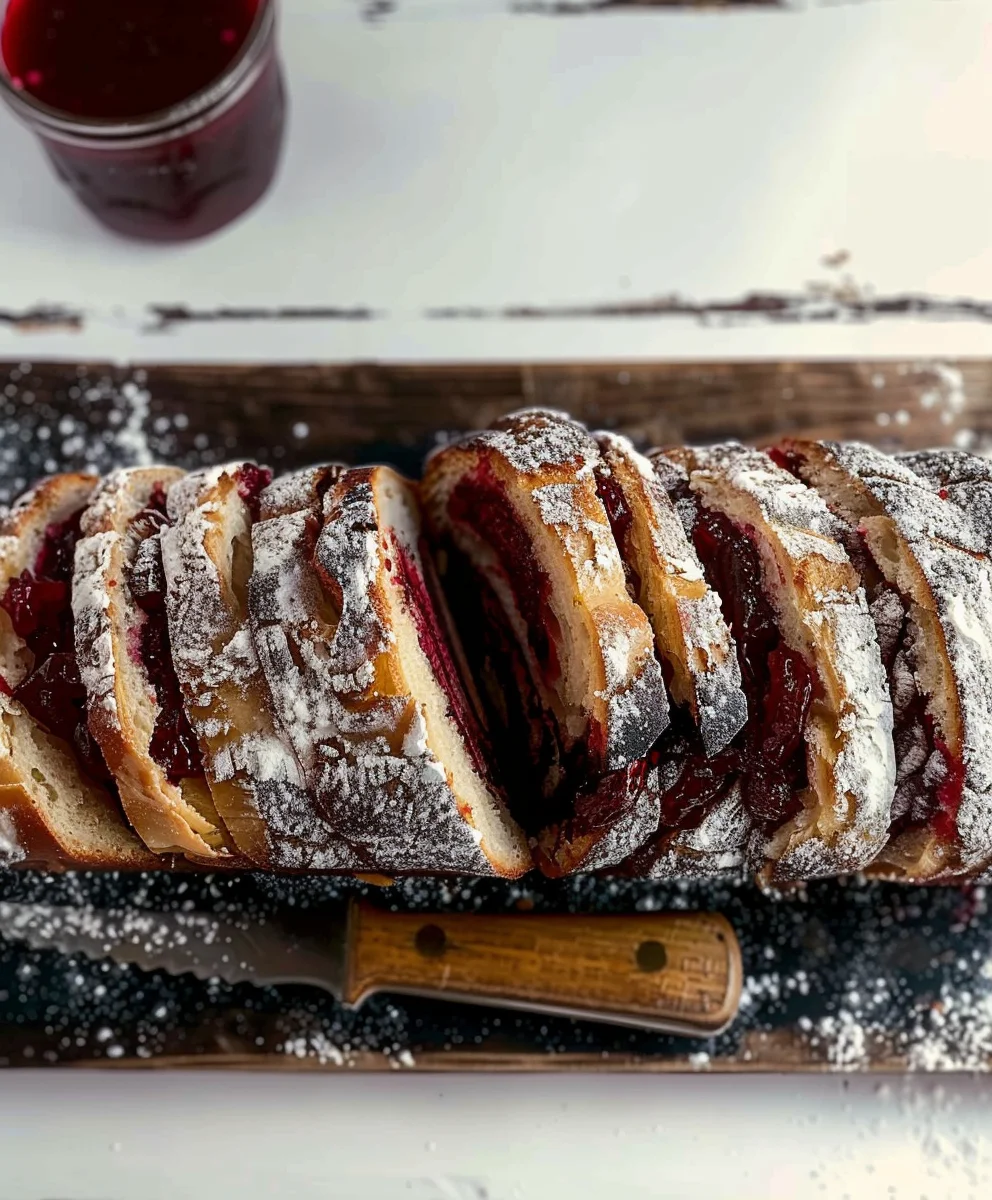
Easy Vampire Bread Recipe
A visually striking Vampire Bread recipe, featuring dough infused with black and red food coloring to create a unique aesthetic. This soft, pull-apart loaf is perfect for any occasion, offering a simple yet captivating homemade bread experience.
Ingredients
-
1 cup Hot Reduced Fat Milk
-
1 Egg Yolk
-
3 cups All-Purpose Flour
-
2 1/2 tablespoons Sugar
-
2 1/4 teaspoons Active Dry Yeast
-
1 1/2 tablespoons Butter, melted and cooled
-
1 teaspoon Salt
-
Black food coloring, a few drops
-
Red food coloring, a few drops
Instructions
-
Step 1
In a large bowl, combine 1 cup hot reduced fat milk and 2 1/2 tablespoons sugar. Sprinkle 2 1/4 teaspoons active dry yeast over top; let sit undisturbed for 5-10 minutes until visibly foamy. -
Step 2
Add 1 egg yolk and 1 1/2 tablespoons melted butter to the foamy yeast mixture. In a separate bowl, whisk together 3 cups all-purpose flour and 1 teaspoon salt. Gradually add the dry mixture to the wet ingredients, mixing until a shaggy dough begins to form. -
Step 3
Turn the shaggy dough out onto a lightly floured surface and knead vigorously for 10-15 minutes until it transforms into a smooth, elastic, and no longer tacky dough. -
Step 4
Lightly grease a clean large bowl with oil. Place the kneaded dough into the bowl, turning once to coat. Cover tightly with plastic wrap or a damp kitchen towel. Let the dough rise in a warm, draft-free spot for 1 to 1 1/2 hours, or until it has doubled in size. -
Step 5
Gently punch down the risen dough. Divide it into two equal portions. Knead black food coloring into one portion and red food coloring into the other until desired vibrant colors are achieved and evenly distributed throughout each dough portion. -
Step 6
Divide each colored dough portion into small balls, roughly golf ball size. Arrange alternating colored dough balls snugly in a lightly greased 9×5-inch loaf pan or a 9-inch round springform pan. Cover loosely and let rise for 30-45 minutes, or until the dough balls have noticeably puffed up and fill the pan. -
Step 7
Preheat your oven to 375°F (190°C). Carefully place the pan into the preheated oven and bake for 30-35 minutes, or until the top of the bread is golden brown and the internal temperature reaches 200-210°F (93-99°C). -
Step 8
Once baked, carefully remove the pan from the oven. Let the bread cool in the pan for about 10-15 minutes before inverting it onto a wire rack. Serve warm, allowing guests to pull apart the colorful pieces.
Important Information
Nutrition Facts (Per Serving)
It is important to consider this information as approximate and not to use it as definitive health advice.
Allergy Information
Please check ingredients for potential allergens and consult a health professional if in doubt.
Leave a Comment