
Roasted Tomato Soup is not just another dish; it’s an experience that transforms humble ingredients into a culinary masterpiece. Imagine a bowl of vibrant, intensely flavored soup, each spoonful a symphony of sweet, smoky, and savory notes, perfectly balanced and utterly comforting. This isn’t the simple canned soup of childhood memories; this is a revelation. While tomato soup has been a staple in kitchens worldwide for centuries, cherished for its simplicity and nourishment, the act of roasting the tomatoes beforehand elevates it to an entirely new echelon of flavor. This technique, though seemingly modern, harkens back to ancient cooking wisdom, where intense, dry heat was used to concentrate and deepen natural flavors, turning the ordinary into the extraordinary.
People absolutely adore this dish because the roasting process caramelizes the natural sugars within the tomatoes, garlic, and onions, creating an incredible depth and a delightful char that adds a unique, irresistible smokiness. This complex flavor profile, combined with a luxuriously smooth and velvety texture, makes my Roasted Tomato Soup a truly soul-warming creation. It’s a versatile delight, perfect as a cozy meal on a chilly evening, a sophisticated starter for a dinner party, or even a light, refreshing lunch. You’ll be amazed at how such simple steps can yield such profoundly delicious results, filling your home with an aroma that promises pure comfort.

Ingredients:
- For the Roasted Vegetables:
- 2.5 – 3 pounds (approx. 1.2 – 1.4 kg) ripe tomatoes: I love using a mix here for depth of flavor! Roma tomatoes are fantastic for their low water content and rich sweetness, but vine-ripened or even cherry tomatoes will work beautifully. Choose what looks best and smells fragrant.
- 1 large yellow onion: Or two medium ones. Don’t worry about perfect chopping, we’ll be blending it all later.
- 6-8 cloves garlic: Unpeeled, or peeled and lightly smashed. Roasting garlic whole in its skin gives it an incredibly mellow, sweet flavor. If you peel them, be sure to keep them fairly large so they don’t burn.
- 1/4 cup (60ml) extra virgin olive oil: A good quality olive oil makes a noticeable difference here, as it’s a key flavor component.
- 1 teaspoon dried oregano: Or 2 teaspoons fresh, chopped.
- 1/2 teaspoon dried thyme: Or 1 teaspoon fresh, chopped.
- 1 teaspoon sea salt: Or to taste. We’ll adjust later, but this initial salting helps draw out moisture and season the vegetables as they roast.
- 1/2 teaspoon freshly ground black pepper: To taste. Freshly ground makes a big difference in aroma and flavor.
- For the Soup Base and Finishing:
- 4 cups (960ml) vegetable broth or chicken broth: Use a good quality, low-sodium broth so you can control the salt content yourself.
- 1-2 tablespoons balsamic vinegar (optional, but highly recommended): This tiny addition brightens all the flavors and adds a wonderful subtle tang. Don’t skip it if you have it!
- 1 teaspoon sugar or maple syrup (optional): Depending on the sweetness of your tomatoes, a pinch can balance out the acidity beautifully.
- 1/2 cup (120ml) heavy cream, half-and-half, or full-fat coconut milk (optional): For that luxurious, creamy finish. If you prefer a lighter soup, you can omit this or use less.
- 1/4 cup fresh basil leaves: Roughly chopped, for stirring in at the end and for garnish. This adds a beautiful fresh, aromatic note that is quintessential with tomato soup.
- Additional salt and freshly ground black pepper: To taste, for final seasoning adjustments.
- Red pepper flakes (optional): A pinch for a subtle warmth and kick.
Preparing for the Roast: The Foundation of Flavor
Preheat Your Oven and Prep the Tomatoes
First things first, let’s get that oven roaring! Preheat your oven to 400°F (200°C). While it’s heating up, grab your beautiful tomatoes. Give them a good wash under cool water. For the larger tomatoes, I typically cut them into halves or quarters. If you’re using Roma tomatoes, halving them lengthwise is perfect. Cherry tomatoes can be left whole. The goal here is to expose some of their inner flesh to the heat, allowing their natural sugars to caramelize and intensify. Don’t fuss too much about perfection; rustic cuts are part of the charm of roasted vegetables. Just make sure they’re roughly similar in size so they roast evenly. If any tomatoes have tough cores, you can carefully remove them now, but it’s not strictly necessary as everything will be blended later. The more surface area exposed, the better the browning and flavor development!
Prepare the Onion and Garlic
Next up, the onion. Peel the large yellow onion and cut it into thick wedges, about 1-inch thick. You don’t want them too small, or they might burn before the tomatoes are ready. For the garlic, you have a couple of options. My personal favorite is to leave the cloves unpeeled; the papery skin protects them from burning and steams them beautifully, making them incredibly soft and sweet inside. You can simply smash them lightly with the side of a knife to release a bit of their aroma. If you prefer to peel them, ensure they are fairly large cloves, or cut them in half if they are massive. Place these prepped onions and garlic alongside your tomatoes on a large baking sheet. I often line my baking sheet with parchment paper for easier cleanup, but it’s not essential.
Season and Toss Everything Together
Now for the magic coating! Drizzle the 1/4 cup of extra virgin olive oil generously over all the vegetables on the baking sheet. Olive oil is key here, not just for preventing sticking, but for carrying flavor and helping with that gorgeous caramelization we’re after. Sprinkle the dried oregano, dried thyme, sea salt, and freshly ground black pepper evenly over the vegetables. Using your clean hands (my favorite kitchen tool!), gently toss everything together directly on the baking sheet. Make sure all the tomato pieces, onion wedges, and garlic cloves are well coated in the oil and seasonings. You want a single layer of vegetables on the baking sheet to ensure they roast rather than steam. If your baking sheet is too crowded, use two! This is crucial for achieving that deeply roasted flavor.
The Roasting Magic Begins
Slide the baking sheet (or sheets) into your preheated oven. Let the vegetables roast for 30-40 minutes. The exact time will depend on your oven and the size of your tomato pieces. I usually start checking around the 30-minute mark. What you’re looking for is a beautiful transformation: the tomatoes should be softened, slightly shriveled, and their edges should be gloriously caramelized and browned. The onions should be tender and sweet, and the garlic cloves, whether peeled or unpeeled, should be incredibly soft and fragrant. You might even see some delicious, darkened juices bubbling on the pan. This browning is where the majority of your soup’s rich flavor comes from, so don’t rush this step! If the garlic (especially if peeled) starts to get too dark too quickly, you can remove it earlier or cover it loosely with a small piece of foil.
Bringing it All Together: Simmering and Blending
Transfer to a Soup Pot
Once your vegetables are beautifully roasted and your kitchen smells absolutely incredible, carefully remove the baking sheet from the oven. Using a spatula, transfer all the roasted vegetables – tomatoes, onions, garlic (squeeze the soft flesh out of the skins if you roasted them unpeeled, discarding the skins), and all those delicious pan juices – into a large, heavy-bottomed soup pot or Dutch oven. Don’t leave any of those caramelized bits behind! Those browned bits are packed with concentrated flavor, so scrape the bottom of the pan thoroughly. If there are really stubborn, flavorful bits stuck to the bottom of your baking sheet, you can add a tablespoon or two of hot water or broth to the pan and gently scrape them up – this is called “deglazing” and it captures every last drop of deliciousness.
Add Broth and Simmer
Pour the 4 cups of vegetable or chicken broth into the pot with the roasted vegetables. If you’re using the optional balsamic vinegar and sugar/maple syrup, now is the time to add them. The balsamic vinegar really brightens the soup and adds a lovely depth, while the sugar can help balance any acidity, especially if your tomatoes weren’t super sweet. Give everything a good stir. Bring the mixture to a gentle simmer over medium heat. Once simmering, reduce the heat to low, cover, and let it cook gently for about 10-15 minutes. This simmering phase allows all the flavors to meld together even further and ensures that any slightly firmer pieces of vegetable become perfectly tender for blending. It’s a crucial step for developing a truly cohesive and rich flavor profile.
The Blending Process
This is where your soup transforms into its smooth, creamy glory! You have two main options for blending:
- Immersion Blender: If you have an immersion blender (also known as a stick blender), this is the easiest method. Simply immerse the blender directly into the soup pot. Hold the head of the blender just off the bottom of the pot and blend until the soup reaches your desired consistency. Be careful not to splash yourself with hot liquid! Blend until it’s as smooth as you like it. Some people prefer a slightly chunkier, rustic soup, while others want it absolutely velvety. I aim for silky smooth. Move the blender around to ensure all solids are incorporated. This method is great because you don’t have to transfer hot liquid.
- Regular Blender: If using a standard upright blender, you’ll need to work in batches. It is extremely important to exercise caution with hot liquids in a blender. Fill the blender jar no more than halfway with the hot soup mixture. Remove the center cap from the blender lid (or crack the lid slightly) and cover the opening with a kitchen towel. This allows steam to escape and prevents pressure from building up, which could blow the lid off. Blend on a low setting first, then gradually increase to high until smooth. Pour the blended soup into a clean pot or a large heatproof bowl and repeat with the remaining batches. Once all batches are blended, return all the soup to your original (now likely clean) soup pot.
Regardless of your blending method, ensure you blend until no large chunks remain, creating a luscious, uniform texture.
Return to Pot and Refine
If you used a regular blender and transferred batches out, gather all your beautifully blended soup back into your clean soup pot. If you used an immersion blender, you’re already there! Give the soup a good stir. At this point, the soup is essentially ready, but we’ll take a few more steps to elevate it to perfection.
The Grand Finale: Finishing Touches and Serving
Adjusting Consistency and Flavor
Take a moment to assess the soup’s consistency. If it’s too thick for your liking, you can thin it out by stirring in a little more vegetable broth or even hot water, a quarter cup at a time, until it reaches your desired pourable consistency. Next, and this is perhaps the most crucial step for a truly outstanding soup, taste it! This is your chance to really make it sing. Does it need more salt? A bit more pepper? Perhaps a tiny splash more balsamic vinegar for brightness? Or maybe a pinch more sugar if the tomatoes were particularly acidic? Adjust the seasonings to your personal preference. Remember, a perfectly seasoned soup is balanced, highlighting all the flavors without any one ingredient overpowering the others.
Creaminess (Optional but Recommended)
If you desire a truly luxurious and creamy texture, stir in the 1/2 cup of heavy cream, half-and-half, or full-fat coconut milk now. The cream adds a wonderful richness and mellows the acidity of the tomatoes beautifully. If you’re going for a dairy-free option, full-fat coconut milk provides a similar creaminess without an overpowering coconut flavor, especially in a bold tomato base. Stir it in gently until it’s fully incorporated and the soup takes on a lovely, slightly paler orange hue. Once you’ve added the cream, avoid bringing the soup to a hard boil, as this can sometimes cause dairy to curdle or separate. Just a gentle simmer is all you need.
Final Simmer and Infusion
Let the soup gently simmer for another 5 minutes on low heat. This allows all the newly added flavors (especially the cream and any final seasoning adjustments) to fully meld and warm through. Just before serving, stir in the roughly chopped fresh basil leaves. The heat of the soup will gently wilt the basil, releasing its wonderfully fresh, aromatic oils and brightening the entire dish. I love adding fresh herbs right at the end for maximum impact on flavor and aroma. If you enjoy a little warmth, a pinch of red pepper flakes can also be stirred in now.
Serving with Panache
Your homemade roasted tomato soup is now ready to be enjoyed! Ladle the hot soup into bowls. For an extra touch of elegance and flavor, garnish each serving with a swirl of fresh basil leaves, a drizzle of your best extra virgin olive oil, a sprinkle of freshly cracked black pepper, or even some homemade croutons. A dollop of extra cream or a sprinkle of grated Parmesan cheese is also a delightful addition. This soup is absolutely divine on its own, but it truly shines when paired with a classic grilled cheese sandwich (the ultimate pairing!), a crusty baguette for dipping, or even just a simple green salad. Embrace the warmth, the richness, and the comforting flavors you’ve created from scratch. Enjoy every spoonful! This soup also reheats wonderfully and often tastes even better the next day, making it perfect for meal prepping.

Conclusion:
And there you have it, friends! We’ve reached the culmination of what I truly believe is not just a recipe, but an experience. If you’ve followed along, you’re now standing on the precipice of culinary delight, ready to bring something truly special into your kitchen. This isn’t just another dish to add to your repertoire; it’s destined to become a beloved staple, a comforting friend on a chilly evening, or a bright, vibrant star at your next lunch gathering. The beauty of this recipe lies in its elegant simplicity, yet it delivers a depth of flavor that genuinely surprises and satisfies. It’s the kind of meal that whispers tales of sun-drenched gardens and slow, deliberate cooking, even if it comes together with surprising ease.
Why is this a must-try, you ask? Well, beyond the incredible taste, it’s about the transformation. Taking humble, ripe ingredients and coaxing out their very best, creating something far greater than the sum of its parts. The rich, concentrated sweetness that develops during the roasting process is simply unparalleled, forming the heart and soul of this magnificent creation. It’s comforting without being heavy, flavorful without being overwhelming, and sophisticated without being intimidating. Every spoonful is a testament to the magic that happens when quality ingredients are treated with a little love and respect. It’s truly a hug in a bowl, a dish that nourishes not just the body, but the spirit too. You’ll find yourself craving its distinctive warmth and robust, earthy notes long after the last drop is savored. It’s a testament to the fact that sometimes, the most profound flavors come from the most straightforward techniques, making it a guaranteed crowd-pleaser and a personal favorite for any day of the week.
Elevate Your Dining Experience with Versatile Servings
Now, let’s talk about taking this masterpiece to the next level. While it’s absolutely divine on its own, a few thoughtful accompaniments can truly elevate your meal. My personal favorite, of course, is a classic grilled cheese sandwich, perfectly toasted with gooey, melted cheese – the ultimate dipping companion! But don’t stop there. Imagine a sprinkle of fresh basil leaves, finely chopped, adding a burst of aromatic freshness. A dollop of crème fraîche, sour cream, or even a swirl of coconut milk can introduce a creamy counterpoint, tempering the acidity and adding a luxurious texture. For a bit of crunch, homemade croutons (perhaps tossed with garlic and herbs) are always a winner, or even a handful of toasted pumpkin seeds. For a heartier meal, consider serving it alongside a crisp green salad with a light vinaigrette, or with thick slices of crusty artisan bread, perfect for soaking up every last drop of goodness. And for those cooler evenings, a sprinkle of red pepper flakes can add a subtle, warming kick that’s incredibly inviting. Don’t hesitate to think outside the box; a garnish of crumbled feta or goat cheese can also add a delightful tang and creaminess.
Unleash Your Creativity: Exciting Variations to Explore
The beauty of this recipe also lies in its adaptability. Once you’ve mastered the core method, the possibilities for variation are endless! For a smokier flavor, a pinch of smoked paprika or even a roasted poblano pepper can be a fantastic addition. If you love a bit of heat, consider adding a finely minced jalapeño or a dash of your favorite hot sauce during the blending stage. To make it a bit more substantial, you could stir in cooked pasta – small shells or orzo work wonderfully – transforming it into a hearty pasta soup. For a vegan twist, ensure you use vegetable broth and swirl in some cashew cream or a rich coconut cream at the end for that decadent texture. You could even roast other vegetables alongside your tomatoes – bell peppers, carrots, or even a sweet potato – to add different layers of sweetness and complexity. Imagine a batch made with heirloom tomatoes of various colors, offering a visual feast as well as a taste sensation. The core flavor of this Roasted Tomato Soup is so robust and forgiving that it welcomes your creative touch. Don’t be afraid to experiment with different herbs either; thyme, oregano, or even a bay leaf simmered in the broth can impart unique aromatic notes. For a truly unique twist, try adding a splash of balsamic vinegar or a hint of orange zest to brighten up the flavors even further. Each variation offers a new adventure, ensuring this soup never gets boring!
So, what are you waiting for? This is your invitation to step into the kitchen, embrace the joy of cooking, and create something truly memorable. I promise you, the aroma alone as it simmers will make your home feel incredibly cozy and inviting. This recipe is an affirmation that some of the best culinary experiences come from simple, honest ingredients, transformed with a little care. Don’t just read about it; make it. Experience the warmth, the flavor, and the sheer satisfaction of creating such a delightful dish. And when you do, please, please share your experience with me! I absolutely adore hearing about your kitchen triumphs. What did you pair it with? Did you try a new variation? Tag me, comment below, or send me a message – let’s celebrate the magic of home cooking together. Happy cooking, everyone!
Roasted Tomato Soup
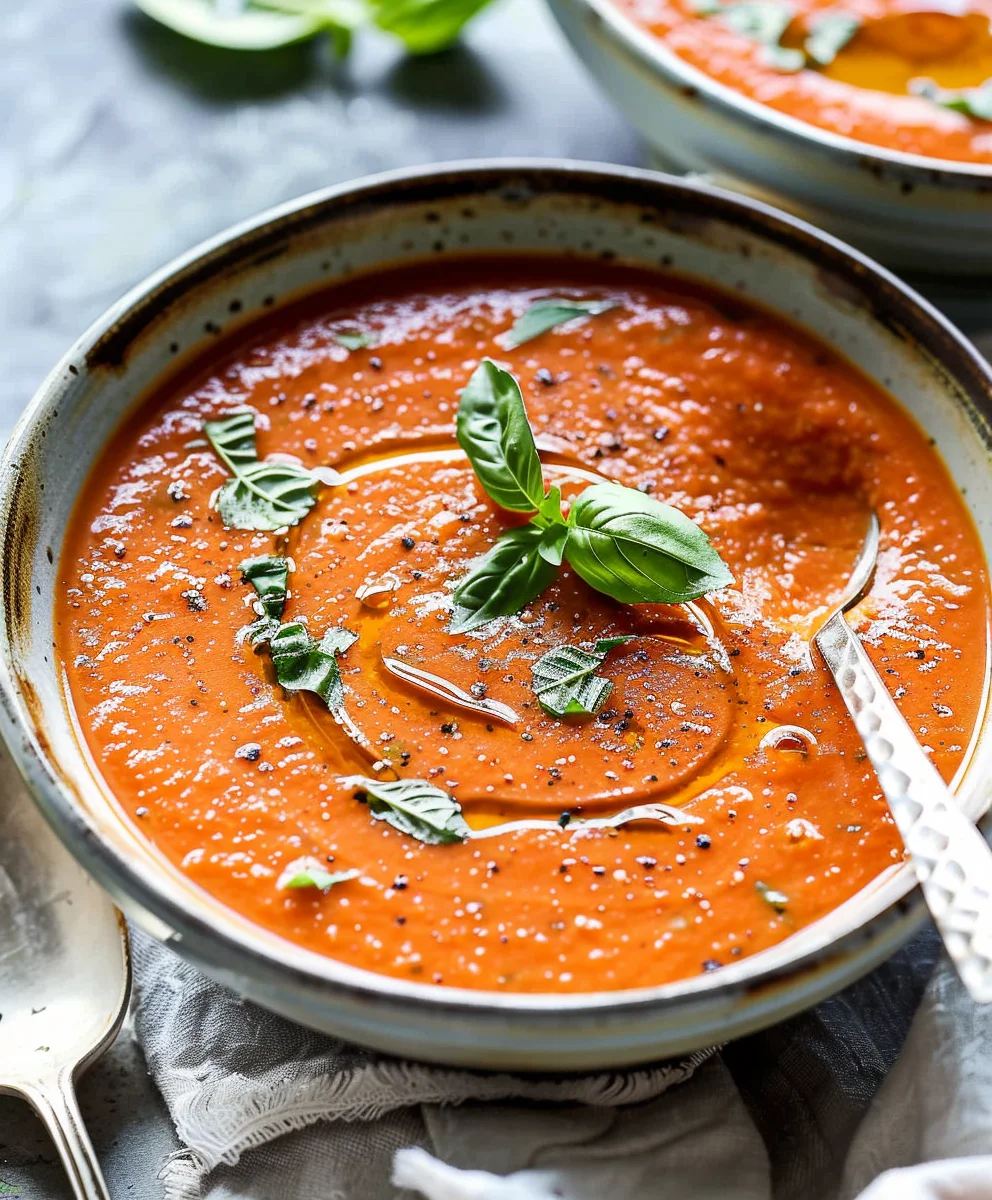
A vibrant, intensely flavored soup where roasting tomatoes, garlic, and onions transforms humble ingredients into a rich, sweet, and smoky culinary masterpiece. This soul-warming soup is perfect as a cozy meal or sophisticated starter, offering a luxurious, velvety texture.
Ingredients
-
1 kg (2 lb) fresh Roma tomatoes, quartered
-
1 large onion, diced
-
3 garlic cloves, minced
-
2 tbsp olive oil
-
1 tsp smoked paprika
-
1 liter (4 cups) chicken or vegetable broth
-
250 ml (1 cup) heavy cream, optional
-
Salt to taste
-
Black pepper to taste
-
Fresh basil leaves, for garnish
Instructions
-
Step 1
Preheat oven to 400°F (200°C). Quarter tomatoes, dice onion, and mince/smash garlic. Place all vegetables on a large baking sheet. -
Step 2
Toss vegetables with olive oil, smoked paprika, salt, and pepper. Roast for 30-40 minutes until caramelized and tender. -
Step 3
Transfer roasted vegetables and all pan juices to a large pot. Add broth and simmer for 10-15 minutes to meld flavors. -
Step 4
Carefully blend the soup using an immersion blender or standard blender (in batches) until smooth and uniform. -
Step 5
Return soup to pot. Stir in heavy cream (if using) and fresh basil. Adjust seasoning with additional salt and pepper to taste. -
Step 6
Serve hot, garnished with extra basil. Pairs wonderfully with grilled cheese or crusty bread.
Important Information
Nutrition Facts (Per Serving)
It is important to consider this information as approximate and not to use it as definitive health advice.
Allergy Information
Please check ingredients for potential allergens and consult a health professional if in doubt.
Leave a Comment