
Old Fashioned Blueberry Pancakes
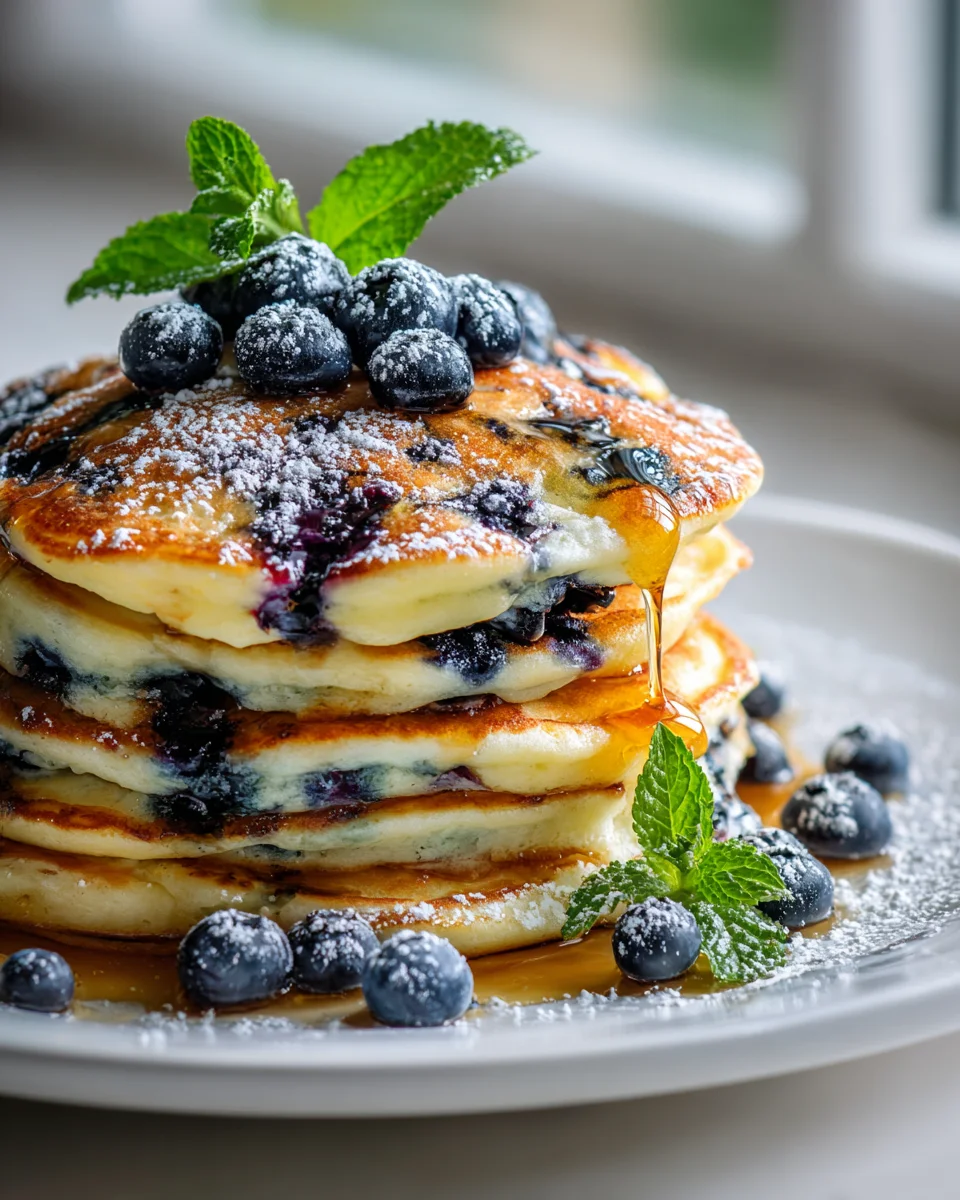
Oh, Old Fashioned Blueberry Pancakes. Just saying the name brings a smile to my face and a comforting warmth to my kitchen. This isn’t just any pancake recipe; it’s a trip back in time, a culinary hug that reminds me of slow weekend mornings and the simple joy of a home-cooked breakfast. What makes these pancakes so incredibly special? It’s that perfect balance of light, airy fluffiness and a slightly crisp edge, absolutely bursting with juicy, sun-kissed blueberries in every single bite. We’re talking about golden-brown discs of pure delight, not too thick, not too thin, but just right – like they came straight out of a cherished family cookbook.
I promise you, dear reader, you are going to fall head over heels for this recipe. There’s something truly magical about the aroma of these beauties sizzling on the griddle, filling your home with an irresistible sweetness. It’s the kind of dish that makes everyone gather around the table, eager for that first stack, drizzled generously with maple syrup. These Old Fashioned Blueberry Pancakes are designed to be effortlessly delicious, giving you that nostalgic taste of perfection without any fuss. Get ready to create some truly wonderful breakfast memories!

Welcome to the delightful world of old-fashioned blueberry pancakes! There’s something incredibly comforting about a stack of these golden, fluffy beauties, bursting with sweet blueberries. This recipe is designed to bring you back to basics, focusing on simple ingredients and techniques that yield the most tender, flavorful pancakes imaginable. Forget those dense, gummy excuses for breakfast; we’re aiming for light, airy pancakes with that perfect buttermilk tang, ready to soak up all your favorite toppings. Let’s get cooking!
Ingredient Notes
Crafting truly old-fashioned blueberry pancakes starts with understanding the role of each ingredient. My approach here emphasizes classic components for that nostalgic flavor and texture you crave.
- All-Purpose Flour: This is the backbone of our pancakes. I stick to regular all-purpose flour for its consistent results, providing a tender crumb. For a slightly different texture, you could try substituting up to a quarter of the all-purpose flour with whole wheat pastry flour, but for true “old fashioned,” I prefer to keep it classic.
- Leavening Agents (Baking Powder & Baking Soda): This dynamic duo is crucial for achieving that characteristic light and fluffy texture. Baking powder provides the initial lift, while baking soda reacts with the acidity in the buttermilk to create even more bubbles, ensuring our pancakes are wonderfully airy. Don’t skip either!
- Granulated Sugar: Just a touch of sugar in the batter enhances the overall sweetness and helps with browning. You’re not looking for a dessert-level sweetness in the pancake itself; the toppings will handle that. If you prefer a less sweet pancake, you can reduce it slightly, but I find this amount to be perfect.
- Salt: A pinch of salt is absolutely essential. It balances the flavors, making the blueberries and buttermilk shine. Without it, the pancakes can taste a bit flat.
- Eggs: Eggs act as a binder, helping to hold the pancakes together, and also contribute to their richness and tender texture. I always use large eggs for consistency in my recipes.
- Buttermilk: This is my secret weapon for truly “old-fashioned” flavor and incredibly tender pancakes. The acidity in buttermilk reacts beautifully with the baking soda, creating a light, fluffy pancake with a subtle tang that plain milk simply can’t replicate. If you don’t have buttermilk on hand, don’t fret! You can easily make a homemade substitute: add 1 tablespoon of white vinegar or lemon juice to a measuring cup, then fill the rest of the cup with regular milk (any fat percentage is fine) to the 1-cup line. Let it sit for 5-10 minutes until it curdles slightly.
- Melted Butter: Butter adds richness and a wonderful flavor that sets these pancakes apart. I melt it and then let it cool slightly before adding it to the wet ingredients. Vegetable oil can be used as a substitute for a neutral flavor, but butter truly elevates the taste.
- Blueberries: The star of the show! Both fresh and frozen blueberries work beautifully. If using frozen, there’s no need to thaw them fully; I actually prefer adding them frozen as they hold their shape better and don’t bleed as much color into the batter. However, a light dusting with flour can help prevent them from sinking to the bottom.
Step-by-Step Instructions
Creating these delightful blueberry pancakes is a straightforward process. Follow these steps for perfect results every time!
- Prepare Your Dry Ingredients: In a large mixing bowl, whisk together the all-purpose flour, granulated sugar, baking powder, baking soda, and salt. Whisking ensures everything is evenly distributed, which is key for consistent lift and flavor. Set this bowl aside.
- Combine Wet Ingredients: In a separate medium bowl, whisk the eggs until they are lightly beaten. Then, pour in the buttermilk and the cooled melted butter. Whisk these wet ingredients together until they are well combined.
- Gently Combine Wet and Dry: Pour the wet ingredient mixture into the bowl with the dry ingredients. Using a spatula or a whisk, mix them together just until the flour is moistened. It’s absolutely crucial not to overmix the batter. Lumps are your friends here! Overmixing develops the gluten in the flour, leading to tough, chewy pancakes rather than the light, fluffy ones we’re aiming for. A few streaks of flour are perfectly fine.
- Fold in the Blueberries: Gently fold in your fresh or frozen blueberries. If using frozen blueberries, a light dusting of flour before adding them to the batter can help prevent them from sinking. Be gentle to avoid crushing them and tinting the batter too much.
- Rest the Batter (Optional but Recommended): For even fluffier pancakes, let the batter rest at room temperature for about 10-15 minutes. This allows the gluten to relax and the leavening agents to start working their magic, resulting in a more tender and airy final product.
- Heat Your Griddle: While the batter rests (or before if you’re skipping the rest), heat a lightly oiled griddle or large non-stick skillet over medium-low to medium heat. You want it hot enough to cook the pancakes through but not so hot that they burn before the inside is done. A good test is to drop a tiny bit of water on the surface; it should sizzle and evaporate quickly.
- Cook the Pancakes: Pour or scoop about 1/4 to 1/3 cup of batter per pancake onto the hot griddle. Give them enough space so they don’t touch. Cook for 2-3 minutes on the first side, or until you see bubbles forming on the surface and the edges look set. The bottom should be golden brown.
- Flip and Finish: Carefully flip the pancakes with a spatula and cook for another 1-2 minutes on the second side, or until golden brown and cooked through. Repeat with the remaining batter, adjusting the heat as needed.
- Serve Immediately: Transfer the cooked pancakes to plates and serve warm with your favorite toppings like maple syrup, a dollop of butter, or a sprinkle of powdered sugar. Enjoy!
Tips & Suggestions
To truly master these old-fashioned blueberry pancakes and ensure every batch is perfect, here are a few of my favorite tips and suggestions:
- Don’t Overmix the Batter: I cannot stress this enough! Lumps in the batter are a sign of perfectly mixed pancakes. Overmixing develops gluten, leading to dense, rubbery pancakes instead of light, fluffy ones. Mix just until the wet and dry ingredients are combined.
- Let the Batter Rest: While not strictly necessary, allowing the batter to rest for 10-15 minutes at room temperature allows the flour to fully hydrate and the gluten to relax. It also gives the leavening agents a head start, resulting in an even more tender and airy pancake.
- Achieving the Perfect Griddle Temperature: This is crucial for evenly cooked, beautifully golden pancakes. If your griddle is too hot, the pancakes will burn on the outside before cooking through; too cool, and they’ll be pale and greasy. I aim for medium-low to medium heat. You can test it by dropping a small amount of water on the surface: it should sizzle and evaporate within a few seconds. If it vanishes instantly, it’s too hot; if it just sits there, it’s too cool.
- Preventing Blueberries from Sinking: If you’re using fresh or slightly thawed frozen blueberries, toss them lightly with a tablespoon of the dry flour mixture before adding them to the batter. This light coating helps them suspend more evenly throughout the batter and prevents them from all sinking to the bottom.
- Keep Pancakes Warm: If you’re cooking a large batch, you can keep the finished pancakes warm while you cook the rest. Place them on a baking sheet in a single layer in a preheated oven at its lowest setting (around 200°F or 95°C). Cover loosely with foil to prevent drying out.
- Get Creative with Toppings: While classic maple syrup and butter are always a hit, don’t hesitate to get creative! Try a dusting of powdered sugar, a dollop of whipped cream, a sprinkle of fresh lemon zest to complement the blueberries, or even a berry compote.
- Use a Scoop for Uniform Pancakes: For consistently sized pancakes, I highly recommend using an ice cream scoop or a 1/4-cup measuring cup to portion out the batter onto the griddle.
Storage
One of the best things about old-fashioned blueberry pancakes is how well they store and reheat, making them perfect for meal prepping a quick breakfast throughout the week. You’ll thank yourself later!
- Refrigeration: Once your pancakes have completely cooled, you can store them in an airtight container or a resealable bag in the refrigerator for up to 3-4 days. I like to place a piece of parchment paper between each pancake to prevent them from sticking together.
- Freezing: For longer storage, freezing is an excellent option. Again, ensure the pancakes are completely cool. Stack them with a piece of parchment paper between each pancake, then wrap the entire stack tightly in plastic wrap, followed by aluminum foil, or place them in a freezer-safe bag or container. They can be frozen for up to 2-3 months. Freezing them individually on a baking sheet before transferring them to a bag can also prevent sticking and makes it easy to grab just one or two at a time.
- Reheating from the Refrigerator:
- Toaster: This is my preferred method for crispy edges! Pop individual pancakes into a toaster on a medium setting until warm and lightly crisp.
- Microwave: For a quick reheat, place 1-2 pancakes on a microwave-safe plate and microwave for 30-60 seconds, or until heated through. Be careful not to overcook, as they can become tough.
- Oven/Toaster Oven: Preheat your oven or toaster oven to 350°F (175°C). Place pancakes in a single layer on a baking sheet and heat for 5-10 minutes, or until warmed through.
- Reheating from the Freezer:
- Toaster: Frozen pancakes can often go directly into the toaster. You might need to toast them on a lower setting for slightly longer, or for two cycles, until they are hot and crisp.
- Microwave: Microwave frozen pancakes for 1-2 minutes, flipping halfway through, or until heated through.
- Oven/Toaster Oven: Preheat your oven or toaster oven to 350°F (175°C). Place frozen pancakes in a single layer on a baking sheet and heat for 10-15 minutes, or until warmed through.
Final Thoughts
And there you have it! My hope is that you’re now ready to bring the delightful aroma and taste of these Old Fashioned Blueberry Pancakes into your own kitchen. There’s truly something magical about a stack of these golden beauties, each bite bursting with plump, sweet blueberries and that comforting, classic pancake fluffiness that only an old-fashioned recipe can deliver. They’re more than just breakfast; they’re a warm hug on a plate, a nostalgic journey, and a perfect start to any day.
I truly believe these Old Fashioned Blueberry Pancakes are a must-try because they perfectly balance simplicity with an unforgettable flavor experience. So go ahead, whip up a batch, gather your loved ones, and savor every single bite. I know you’ll fall in love with them just as much as I have!
Easy Old Fashioned Blueberry Pancakes – A Fluffy Classic!
- Total Time: 30 minutes
- Yield: 4 servings 1x
Description
These Old Fashioned Blueberry Pancakes are a nostalgic treat that brings comfort and joy to your breakfast table. Bursting with juicy blueberries and featuring a perfect balance of fluffiness and crispness, they are sure to become a family favorite.
Ingredients
- 1 1/2 cups all-purpose flour
- 2 tablespoons granulated sugar
- 2 teaspoons baking powder
- 1/2 teaspoon baking soda
- 1/2 teaspoon salt
- 2 large eggs
- 1 1/4 cups buttermilk
- 3 tablespoons melted butter
- 1 cup blueberries (fresh or frozen)
Instructions
- In a large mixing bowl, whisk together the all-purpose flour, granulated sugar, baking powder, baking soda, and salt.
- In a separate medium bowl, whisk the eggs until lightly beaten. Then, pour in the buttermilk and the cooled melted butter. Whisk until well combined.
- Pour the wet ingredient mixture into the bowl with the dry ingredients. Mix together just until the flour is moistened, being careful not to overmix.
- Gently fold in the blueberries, being cautious not to crush them.
- Let the batter rest at room temperature for about 10-15 minutes for fluffier pancakes.
- Heat a lightly oiled griddle or large non-stick skillet over medium-low to medium heat.
- Pour or scoop about 1/4 to 1/3 cup of batter per pancake onto the hot griddle. Cook for 2-3 minutes or until bubbles form on the surface.
- Carefully flip the pancakes and cook for another 1-2 minutes until golden brown.
- Transfer the cooked pancakes to plates and serve warm with your favorite toppings.
- Prep Time: 15 mins
- Cook Time: 15 mins
- Category: Breakfast
- Method: Griddling
- Cuisine: American
Nutrition
- Serving Size: 1 pancake
- Calories: 200
- Sugar: 5 g
- Sodium: 300 mg
- Fat: 7 g
- Saturated Fat: 4 g
- Unsaturated Fat: 2 g
- Trans Fat: 0 g
- Carbohydrates: 30 g
- Fiber: 1 g
- Protein: 5 g
- Cholesterol: 50 mg
Keywords: Avoid overmixing the batter to keep pancakes light and fluffy. Letting the batter rest enhances texture, and tossing blueberries in flour can help prevent them from sinking.
Leave a Comment