
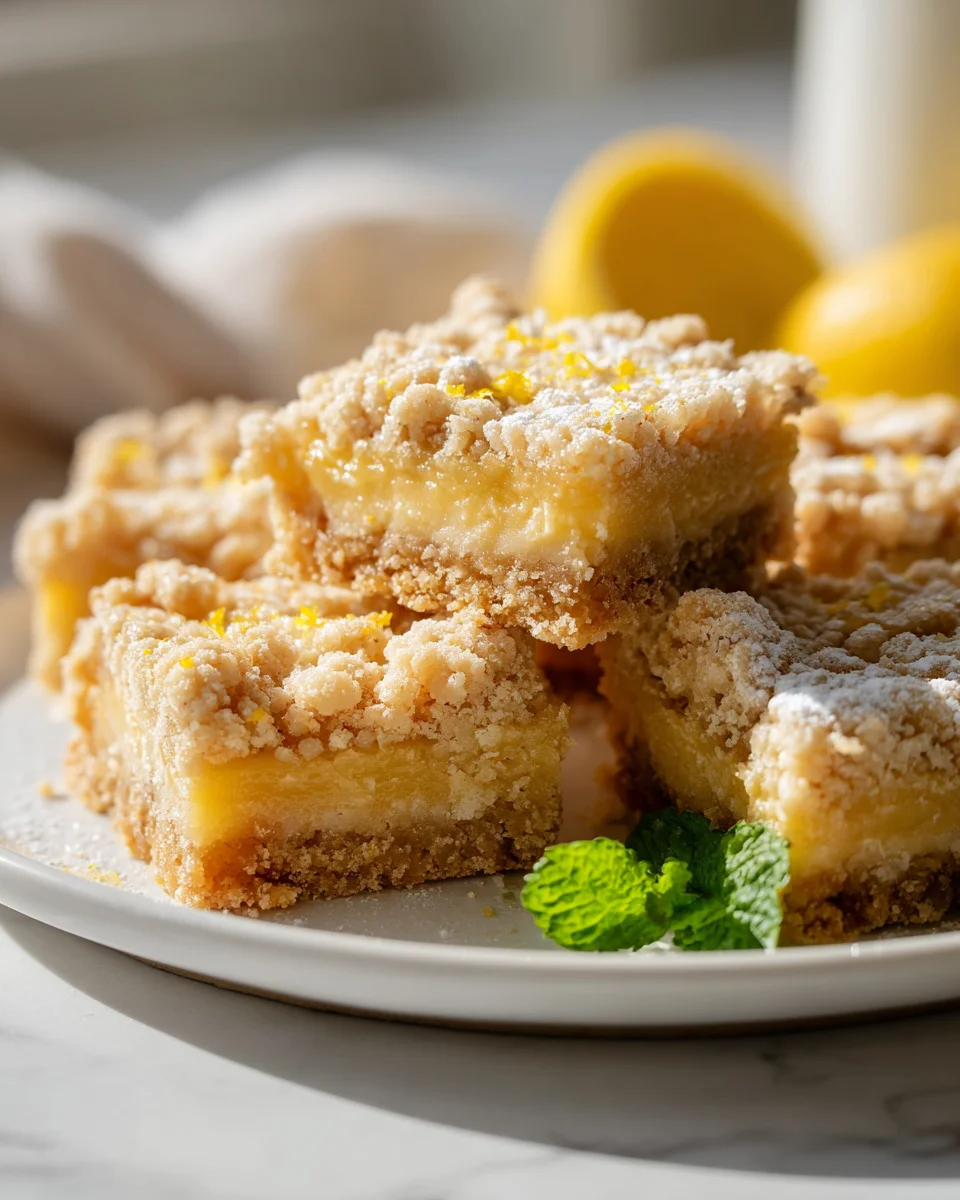
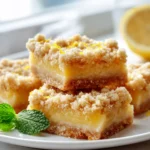
Homemade Lemon Crum extractb Bars
Oh, prepare yourselves, because you’re about to fall head over heels for my Homemade Lemon Crum extractb Bars! Seriously, these aren’t just any lemon bars; they’re a sunshine-filled symphony of flavors and textures that I know you’ll absolutely adore. What makes them so incredibly special? It’s that irresistible dance between the vibrant, zesty tang of a homemade lemon filling and the comforting sweetness of a buttery, crumbly topping and crust. Each bite delivers that perfect puckery punch followed by a melt-in-your-mouth crumbly goodness that will have you reaching for another.
I just know you’ll love how these bars bring a ray of sunshine to any day, whether it’s grey and dreary or already bright! They’re effortlessly elegant enough for a special gathering or a potluck but comforting enough for a cozy afternoon treat with a cup of tea or coffee. Imagine sinking your teeth into a thick, gooey layer of luscious, tangy lemon curd, perfectly balanced by a sweet, golden, and utterly irresistible crumb. It’s truly the best of both worlds – a classic shortbread-style base, a decadent lemon center, and that delightful, golden crumbly top, all made from scratch with love. Get ready to bake up some pure joy!

Oh, these Homemade Lemon Crum extractb Bars are truly a treat! They’re the perfect blend of zesty lemon tang, a buttery shortbread crust, and that irresistible crumbly topping. Whenever I make a batch, they disappear almost instantly. There’s something so comforting and yet so bright about them, making them ideal for any occasion, from a casual afternoon tea to a special dessert spread. Let me walk you through how I make these delightful bars, sharing all my best tips along the way!
Ingredient Notes
Crafting the perfect Homemade Lemon Crum extractb Bars starts with understanding the role each ingredient plays. For a recipe that’s all about texture and vibrant flavor, quality truly makes a difference.
- All-Purpose Flour: This is the backbone of both our buttery crust and that delightful crumb topping. I use standard unbleached all-purpose flour.
- Substitution: If you’re catering to gluten-free friends or family, a good quality 1:1 gluten-free baking blend works wonderfully here. Just make sure it contains xanthan gum for structure.
- Granulated Sugar: We use sugar in three places: the crust, the lemon filling, and the crumb topping. It provides sweetness and helps with the tender texture of the crust and the structure of the filling.
- Substitution: For alternative sweeteners, a granulated erythritol blend or similar 1:1 sugar substitute can be used, though the texture might be slightly different. Keep in mind that natural sugars often contribute to browning and chewiness, which can be altered with substitutes.
- Unsalted Cold Butter: This is a non-negotiable for a truly “crumble” bar! Using very cold, unsalted butter, cut into small pieces, is essential for creating that flaky, tender, and crumbly texture in both the crust and the topping. When the butter slowly melts in the oven, it creates pockets of steam, resulting in that desirable crumb. Unsalted butter allows me to control the salt content precisely.
- Substitution: For a dairy-free version, a solid plant-based butter alternative that comes in sticks (not a spread) can be used. Ensure it’s very cold and has a high fat content for the best results.
- Salt: A pinch of salt in the crust and crumble balances the sweetness and really enhances all the other flavors. Don’t skip it!
- Large Eggs: These are crucial for the lemon filling. They provide richness, help thicken the filling, and give it that lovely custardy texture. I always use large eggs at room temperature for the best emulsification.
- Fresh Lemon Juice: This is where the magic happens for the “lemon” part of our Homemade Lemon Crum extractb Bars! Freshly squeezed lemon juice is absolutely essential. Bottled lemon juice just doesn’t deliver the same vibrant, zesty, and bright flavor. Trust me, it’s worth the effort to juice fresh lemons.
- Lemon Zest: For an intense lemon flavor, I always add plenty of finely grated lemon zest to the filling. The zest contains oils that carry a deeper, more aromatic lemon essence than just the juice alone. Make sure to only zest the yellow part, avoiding the bitter white pith.
- A Touch More Flour (for the filling): Just a couple of tablespoons of flour are whisked into the lemon filling. This helps to stabilize it, ensuring it sets up beautifully and isn’t too runny, while still maintaining that luscious, smooth texture.
Step-by-Step Instructions
Let’s get baking! Here’s how I bring these Homemade Lemon Crum extractb Bars to life, step by delightful step.
- Prepare Your Pan and Oven: First things first, preheat your oven to 350°F (175°C). Then, line a 9×13 inch baking pan with parchment paper, leaving an overhang on the sides. This makes lifting the cooled bars out incredibly easy. I often spray the pan lightly before lining to help the parchment stick.
- Make the Buttery Crumble Base and Topping: In a large mixing bowl, whisk together the flour, granulated sugar, and salt for the crumble. Now, add your very cold, diced butter. Using a pastry blender, your fingertips, or a food processor, cut the butter into the dry ingredients until the mixture resembles coarse crumbs with some pea-sized pieces of butter remaining. This texture is key for a truly “crumbly” result.
- Form the Crust: Press about two-thirds of this crumb mixture evenly into the bottom of your prepared pan. Gently pat it down to form a compact crust. Don’t press too hard, as we want it tender. Reserve the remaining one-third of the crumb mixture for our topping later. Pop the pan with the crust into the preheated oven and par-bake it for 12-15 minutes, or until the edges are just lightly golden. This step helps create a sturdy, perfectly baked base.
- Whip Up the Zesty Lemon Filling: While your crust is par-baking, it’s time to make the star of the show! In a medium bowl, whisk together the eggs, granulated sugar, fresh lemon juice, lemon zest, and those couple of tablespoons of flour until the mixture is completely smooth and well combined. You’ll smell that bright lemon aroma already!
- Assemble and Bake: Once the crust is par-baked, carefully remove the pan from the oven. Pour the lemon filling evenly over the warm crust. Then, take your reserved one-third of the crumble mixture and sprinkle it evenly over the top of the lemon filling.
- Final Bake: Return the pan to the oven and bake for another 25-30 minutes, or until the lemon filling is set (it shouldn’t jiggle much in the center when gently shaken) and the crumb topping is beautifully golden brown. The filling will continue to set as it cools.
- Cool Completely and Chill: This step is vital for perfectly sliceable Homemade Lemon Crum extractb Bars! Allow the bars to cool completely in the pan on a wire rack at room temperature. This can take a couple of hours. Once cool, transfer the pan to the refrigerator and chill for at least 2-3 hours, or even better, overnight. Chilling allows the filling to fully set and makes for much cleaner cuts.
- Slice and Serve: Once thoroughly chilled, use the parchment paper overhang to carefully lift the entire slab of bars out of the pan. Place it on a cutting board. For really clean slices, I often wipe my knife with a hot, damp cloth between each cut. Cut the slab into squares or rectangles. Dust with a little powdered sugar right before serving, if you like, for an extra touch of elegance!
Tips & Suggestions
Having made these Homemade Lemon Crum extractb Bars countless times, I’ve picked up a few tricks to ensure they turn out absolutely perfect every single time:
- Embrace the Cold Butter: I cannot stress this enough! For that ideal crumbly texture in both the crust and the topping, your butter must be very cold. If it gets too warm while you’re cutting it in, pop the bowl into the fridge for 10-15 minutes to chill it down again. This helps prevent a tough crust and ensures those beautiful crumbs.
- Fresh is Best for Lemons: Always, always use fresh lemons for both the juice and the zest. The flavor difference compared to bottled juice is truly night and day. Before zesting, roll the lemons firmly on your countertop to help release more juice. When zesting, only remove the bright yellow part, as the white pith underneath is bitter.
- Don’t Overmix the Crumble: When combining the butter with the dry ingredients for the crust and topping, mix only until coarse crumbs form. Overmixing can develop the gluten in the flour, leading to a tough, less tender crust.
- Prevent Cracks in Your Filling: The key to a smooth, uncracked lemon filling is not to overbake it. Remove the bars from the oven when the center is just set but still has a slight, almost imperceptible jiggle. The residual heat will continue to cook it as it cools. Also, allowing the bars to cool slowly at room temperature before chilling helps prevent drastic temperature changes that can cause cracks.
- For Clean Slices: A warm, sharp knife is your best friend here. Dip your knife in hot water, wipe it clean, and then make your cut. Repeat for each slice. This prevents the filling from sticking to the knife and gives you beautiful, neat edges.
- Serving Suggestions: While these Homemade Lemon Crum extractb Bars are fantastic on their own, a dusting of powdered sugar adds a pretty finish and a touch more sweetness. They also pair wonderfully with fresh berries, a dollop of whipped cream, or even a scoop of vanilla bean ice cream for an extra indulgent treat.
- Flavor Variations: Feel free to experiment a little! You could add a teaspoon of vanilla extract to the crust mixture for a subtle warmth, or a pinch of ground ginger to the crumble for an unexpected spicy kick. A mix of lemon and lime juice in the filling could also be a delicious twist!
Storage
Proper storage is essential to keep your Homemade Lemon Crum extractb Bars fresh and delicious. Because of the egg-based lemon filling, refrigeration is a must!
- Countertop Storage: I don’t recommend storing these bars at room temperature for more than a couple of hours, especially in warmer climates, due to the custard-like filling.
- Refrigerator Storage: Once completely cooled and chilled, transfer the bars (cut or uncut) to an airtight container. They will stay wonderfully fresh in the refrigerator for up to 4-5 days. Be sure to keep them covered to prevent them from drying out or absorbing other odors from your fridge.
- Freezing Instructions: Yes, you can freeze Homemade Lemon Crum extractb Bars! This is a great option if you’ve made a large batch or want to have some on hand for later.
- First, make sure the bars are fully chilled and cut into individual portions.
- Arrange the cut bars in a single layer on a baking sheet lined with parchment paper and freeze until solid (this prevents them from sticking together).
- Once frozen, transfer the bars to an airtight, freezer-safe container or a heavy-duty freezer bag. You can place parchment paper between layers to prevent sticking.
- They will keep well in the freezer for up to 2-3 months.
- To thaw, simply take the desired number of bars from the freezer and let them sit at room temperature for about 30-60 minutes, or thaw overnight in the refrigerator. They taste just as delicious as fresh!
- Serving Chilled or Room Temp: While they need to be stored in the fridge, I often find the flavor of the Homemade Lemon Crum extractb Bars is most vibrant if you let them sit out for 10-15 minutes at room temperature before serving. This takes the chill off the filling and allows the lemon notes to really shine.
Final Thoughts
There’s something truly magical about the combination of bright, zesty lemon and a sweet, crumbly texture, and that’s exactly what you get with these Homemade Lemon Crum extractb Bars. I promise you, once you take that first bite, you’ll understand why this recipe is an absolute keeper. The delightful tanginess of the lemon filling perfectly balances with the satisfying crunch of the crumb topping, creating a dessert that feels both comforting and incredibly refreshing. They’re perfect for any occasion, from a simple afternoon treat to a show-stopping dessert at your next gathering. So go ahead, treat yourself and your loved ones to the pure joy of these Homemade Lemon Crum extractb Bars – I know you won’t regret it!
Easy Homemade Lemon Crumble Bars: Zesty Dessert Recipe
- Total Time: 1 hour 5 minutes
- Yield: 12 servings 1x
Description
These Homemade Lemon Crumble Bars are a delightful blend of zesty lemon filling and a buttery, crumbly topping. Perfect for any occasion, they bring a ray of sunshine to your dessert table!
Ingredients
- 2 cups All-Purpose Flour
- 1 cup Granulated Sugar
- 1/2 cup Unsalted Cold Butter, cut into small pieces
- 1/4 teaspoon Salt
- 2 Large Eggs, at room temperature
- 1/2 cup Fresh Lemon Juice
- 2 tablespoons Lemon Zest
- 2 tablespoons A Touch More Flour (for the filling)
Instructions
- Preheat your oven to 350°F (175°C) and line a 9×13 inch baking pan with parchment paper, leaving an overhang on the sides.
- In a large mixing bowl, whisk together the flour, granulated sugar, and salt for the crumble. Add the very cold, diced butter and cut it into the dry ingredients until the mixture resembles coarse crumbs.
- Press about two-thirds of the crumb mixture evenly into the bottom of your prepared pan to form a compact crust. Reserve the remaining one-third of the crumb mixture for topping later. Par-bake the crust for 12-15 minutes until lightly golden.
- In a medium bowl, whisk together the eggs, granulated sugar, fresh lemon juice, lemon zest, and the couple of tablespoons of flour until smooth.
- Once the crust is par-baked, pour the lemon filling evenly over the warm crust. Sprinkle the reserved crumb mixture evenly over the top of the lemon filling.
- Return the pan to the oven and bake for another 25-30 minutes until the lemon filling is set and the crumb topping is golden brown.
- Allow the bars to cool completely in the pan on a wire rack at room temperature. Once cool, transfer to the refrigerator and chill for at least 2-3 hours.
- Use the parchment paper overhang to lift the bars out of the pan, place on a cutting board, and slice into squares or rectangles. Dust with powdered sugar before serving if desired.
- Prep Time: 20 mins
- Cook Time: 45 mins
- Category: Dessert
- Method: Baking
- Cuisine: American
Nutrition
- Serving Size: 1 square
- Calories: 200
- Sugar: 15 g
- Sodium: 50 mg
- Fat: 10 g
- Saturated Fat: 6 g
- Unsaturated Fat: 4 g
- Trans Fat: 0 g
- Carbohydrates: 25 g
- Fiber: 1 g
- Protein: 2 g
- Cholesterol: 50 mg
Keywords: For best results, use very cold butter and fresh lemons for the best flavor. A warm knife helps achieve clean slices.
Leave a Comment