
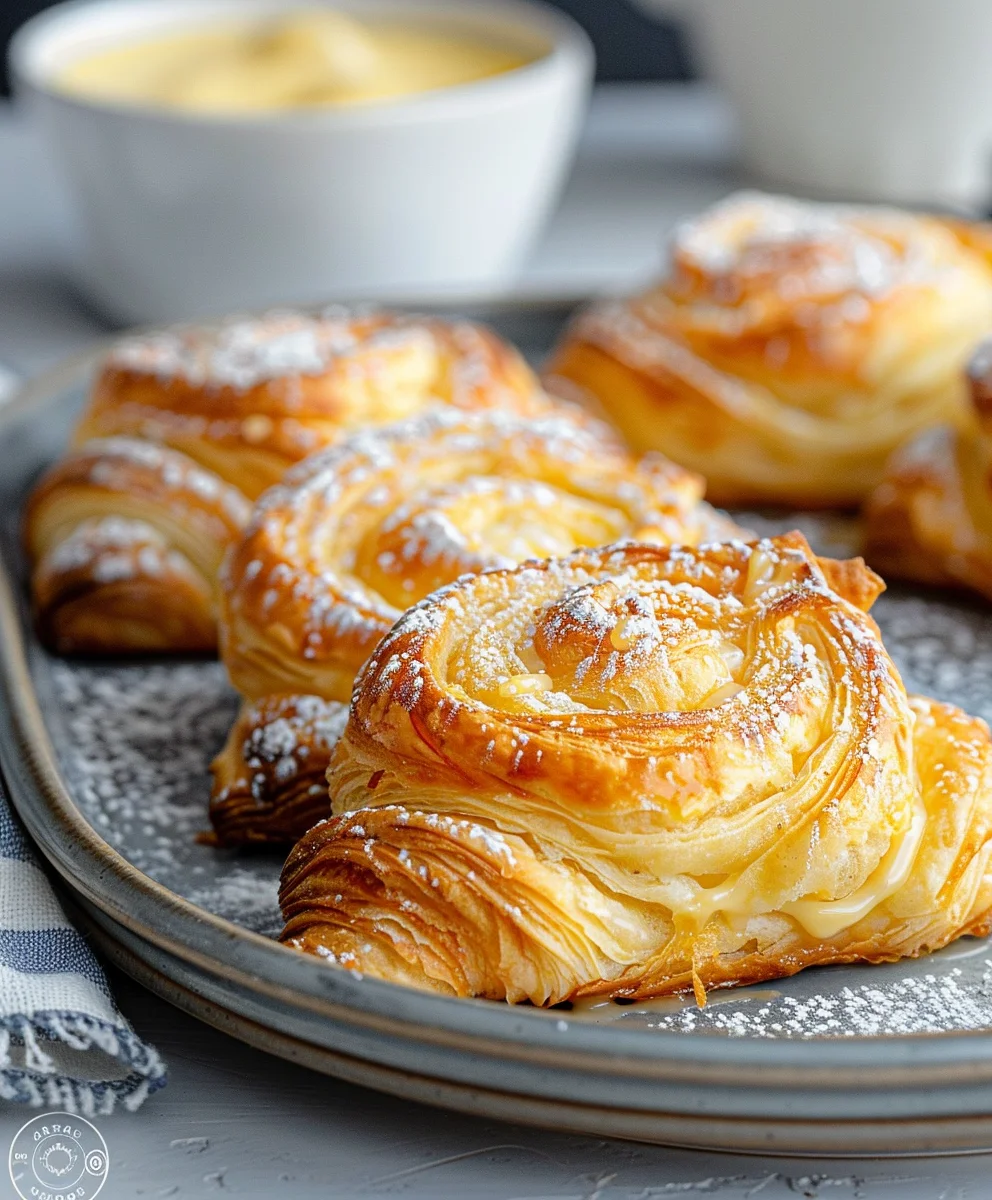
Homemade Danish—the very phrase conjures images of delicate, buttery layers, rich fruit fillings, and a morning made truly special. I’m absolutely thrilled to share with you the secrets to creating this iconic pastry right in your own kitchen. While many associate these delightful treats exclusively with Denmark, their true origin story actually traces back to Austrian bakers who introduced similar techniques to Denmark in the mid-19th century. The Danes, however, perfected and personalized them, making them an indispensable part of their culinary heritage and a symbol of cozy “hygge.”
There’s an undeniable magic to a freshly baked Danish, a captivating experience that goes beyond mere taste. People adore them not just for their exquisite flavor—that perfect balance of sweet and tangy fillings encased in a miraculously flaky, tender dough—but also for the impressive sense of accomplishment in crafting something so beautiful from scratch. Every bite offers a delightful contrast in textures, from the crisp exterior to the soft, yielding interior, making a Homemade Danish an unparalleled indulgence for breakfast, brunch, or an afternoon treat. I promise you, the journey of making your own will be as rewarding as the very first heavenly bite.

Ingredients:
-
For the Dough:
- 1 cup (240ml) whole milk, lukewarm (about 105-115°F / 40-46°C)
- 2 ¼ teaspoons (1 packet) active dry yeast
- ¼ cup (50g) granulated sugar, plus 1 teaspoon for yeast activation
- 1 large egg, room temperature
- 3 ½ cups (420g) all-purpose flour, plus more for dusting
- 1 teaspoon salt
- ¼ cup (57g) unsalted butter, melted and cooled slightly
-
For the Butter Block:
- 16 tablespoons (226g or 2 sticks) unsalted butter, very cold
-
For the Cream Cheese Filling:
- 8 ounces (226g) full-fat cream cheese, softened
- ½ cup (100g) granulated sugar
- 1 large egg yolk
- 1 teaspoon pure vanilla extract
- Pinch of salt
-
For the Fruit Filling (Cherry or Raspberry):
- 1 ½ cups (about 250g) fresh or frozen cherries (pitted) or raspberries
- ¼ cup (50g) granulated sugar (adjust to taste based on fruit sweetness)
- 1 tablespoon cornstarch
- 1 tablespoon water or lemon juice
-
For the Egg Wash:
- 1 large egg
- 1 tablespoon water or milk
-
For the Glaze:
- 1 ½ cups (180g) powdered sugar
- 2-3 tablespoons milk or water
- ½ teaspoon pure vanilla extract (optional)
Preparing the Dough Base for Your Homemade Danish:
- Activate the Yeast: In a medium bowl, or the bowl of your stand mixer, combine the lukewarm milk and 1 teaspoon of granulated sugar. Sprinkle the active dry yeast over the top. Stir gently and let it sit for 5-10 minutes until it becomes frothy. This tells you your yeast is active and ready to make some beautiful Homemade Danish. If it doesn’t foam, your yeast might be old, or your milk might have been too hot or too cold. Start over with fresh yeast.
- Combine Wet Ingredients: Once the yeast is frothy, add the remaining ¼ cup of granulated sugar, the room temperature egg, and the melted and cooled butter to the yeast mixture. Whisk everything together until well combined.
- Add Dry Ingredients: In a separate large bowl, whisk together the all-purpose flour and salt. Gradually add the dry ingredients to the wet ingredients, mixing with a wooden spoon or using the dough hook attachment of your stand mixer on low speed. Mix until a shaggy dough forms.
- Knead the Dough: Turn the dough out onto a lightly floured surface and knead by hand for about 5-7 minutes, or continue kneading with a stand mixer on medium-low speed for about 5 minutes, until the dough is smooth, elastic, and no longer sticky. It should spring back slowly when poked.
- First Rise: Lightly grease a large bowl with a little oil. Place the dough in the bowl, turning it once to coat. Cover the bowl tightly with plastic wrap or a damp kitchen towel. Let the dough rise in a warm place for 1 to 1 ½ hours, or until it has doubled in size. This initial rise is important for flavor and texture.
- Chill the Dough: Gently punch down the risen dough to release the air. Shape it into a flat rectangle, about 8×6 inches, wrap it tightly in plastic wrap, and refrigerate for at least 2 hours. Chilling the dough thoroughly is absolutely crucial for the lamination process that follows, as it makes the dough easier to handle and prevents the butter from melting too quickly. You can even chill it overnight for best results; it helps develop more flavor in your Homemade Danish.
Preparing the Butter Block for Lamination:
- Prepare the Butter: While the dough is chilling, prepare your butter block. Take the very cold butter (16 tablespoons) and place it between two sheets of parchment paper. Using a rolling pin, pound and roll the butter into an even 8×6-inch rectangle. It’s important that this butter is pliable but still very cold. If it gets too soft, pop it back into the fridge for a few minutes. This perfectly prepared butter block is key to achieving those beautiful, flaky layers in your Homemade Danish.
- Chill the Butter Block: Place the butter block, still wrapped in parchment, back into the refrigerator until you’re ready to use it.
The Lamination Process: Creating Flaky Layers
This is where the magic happens for truly exceptional Homemade Danish. Lamination involves repeatedly folding and rolling the butter into the dough to create hundreds of delicate layers. Be patient, take your time, and don’t rush the chilling steps!
- Encase the Butter: Remove the chilled dough from the refrigerator. On a lightly floured surface, roll the dough into a 16×8-inch rectangle. Remove the butter block from the parchment paper and place it directly in the center of the rolled-out dough. The butter should cover two-thirds of the dough, leaving a third of the dough exposed on one side and a bit of a border on all edges.
- First Fold (Book Fold): Fold the exposed dough flap over the butter. Then, fold the other side (with the butter peeking out) over the first fold, like closing a book. Pinch the edges to seal the butter completely inside the dough. You should now have a roughly 8×6-inch rectangle again. This is called your first “turn” or “fold.”
- First Chill: Wrap the dough tightly in plastic wrap and refrigerate for 30 minutes. This chilling period is vital to relax the gluten in the dough and firm up the butter, making it easier to roll without tearing or melting. Do not skip this!
- Second Fold (Single Fold): Lightly flour your work surface and the top of the dough. With the short side of the dough facing you, roll the dough evenly into a 16×8-inch rectangle. Visually divide the dough into three sections. Fold one third of the dough over the middle third, then fold the remaining third over that. You’ve now completed a single fold. This technique helps build more layers.
- Second Chill: Wrap the dough tightly again in plastic wrap and refrigerate for another 30 minutes.
- Third Fold (Single Fold): Repeat step 10: Lightly flour your work surface and the top of the dough. With the short side facing you, roll the dough evenly into a 16×8-inch rectangle. Perform another single fold (fold one third over the middle, then the remaining third over that).
- Final Chill: Wrap the dough tightly in plastic wrap and refrigerate for at least 1 hour, or preferably overnight. This longer chill is crucial for the dough to fully relax and for the butter to firm up completely, ensuring perfect layers when you finally bake your Homemade Danish.
Preparing Your Fillings:
While your dough is on its final chill, it’s a great time to prepare the delicious fillings for your Homemade Danish.
For the Cream Cheese Filling:
- Combine Ingredients: In a medium bowl, combine the softened cream cheese, granulated sugar, egg yolk (if using), vanilla extract, and a pinch of salt.
- Mix Until Smooth: Using a hand mixer or a whisk, beat the ingredients together until the mixture is completely smooth, creamy, and free of lumps. Make sure not to overmix, as this can incorporate too much air.
- Chill: Cover the bowl with plastic wrap and refrigerate until ready to use. This makes it easier to pipe or spoon onto the Danish.
For the Fruit Filling:
- Combine Fruit and Sugar: In a small saucepan, combine the cherries or raspberries with the granulated sugar.
- Thicken: In a very small bowl, whisk together the cornstarch and water (or lemon juice) until smooth. Add this slurry to the fruit mixture in the saucepan.
- Cook: Place the saucepan over medium heat, stirring frequently. Bring the mixture to a gentle simmer. Continue to cook, stirring, for 3-5 minutes, until the fruit softens and the sauce thickens to a jam-like consistency.
- Cool: Remove from heat and transfer the fruit filling to a bowl. Let it cool completely before using. You can speed this up by placing it in the refrigerator.
Shaping and Assembling Your Homemade Danish:
Now comes the fun part – turning your beautifully laminated dough into individual Danish pastries! I’ll describe a classic square shape, which is straightforward and beautiful.
- Prepare Work Surface: Remove the chilled dough from the refrigerator. Lightly flour your work surface.
- Roll Out Dough: Gently unwrap the dough and place it on your floured surface. Roll the dough into a large rectangle, approximately 18×12 inches, and about ⅛ inch thick. Try to maintain an even thickness throughout. If the dough resists, cover it with plastic wrap and let it rest for 5-10 minutes before continuing to roll.
- Trim Edges (Optional): For neater Danish, you can lightly trim the very edges of the rectangle with a sharp knife or pizza cutter. This exposes the beautiful layers and helps with a more even rise.
- Cut Squares: Using a ruler and a sharp knife or pizza cutter, cut the dough into 9 equal squares, each about 4×4 inches.
- Shape the Danish (Square Method): Take one square of dough. Make two parallel cuts from opposite corners towards the center, stopping about ½ inch from the center point. Do not cut all the way through. You’ll have a cross shape in the middle.
- Add Filling: Spoon about 1-2 tablespoons of your chosen filling (cream cheese or fruit) into the very center of each dough square.
- Fold Corners: Gently fold one corner from each of the cut flaps over the filling towards the center. Press down lightly in the center to help secure them. This creates a charming “envelope” look for your Homemade Danish.
- Arrange on Baking Sheets: Line two large baking sheets with parchment paper. Carefully transfer the shaped Danish pastries to the prepared baking sheets, leaving about 2 inches between each, as they will expand during proofing and baking.
Proofing and Baking Your Homemade Danish:
Almost there! The final rise and baking will bring your Homemade Danish to life.
- Prepare Egg Wash: In a small bowl, whisk together the egg and water (or milk) for the egg wash.
- Second Rise (Proofing): Loosely cover the baking sheets with plastic wrap or a clean kitchen towel. Let the Danish rise in a warm, draft-free place for about 45-60 minutes, or until visibly puffy and slightly larger. They won’t double in size like bread, but you should see a noticeable change. This step is crucial for a light and airy texture.
- Preheat Oven: While the Danish are proofing, preheat your oven to 400°F (200°C).
- Egg Wash: Once proofed, gently brush the exposed dough parts of each Danish with the egg wash. This will give them a beautiful golden-brown shine. Be careful not to disturb the delicate layers.
- Bake: Bake the Danish one sheet at a time (if your oven is not large enough for two sheets) for 15-20 minutes, or until they are deeply golden brown and the filling is set. If they start to brown too quickly, you can loosely tent them with aluminum foil. Rotate the baking sheet halfway through baking for even browning.
- Cool: Once baked, transfer the Homemade Danish to a wire rack to cool completely before glazing.
Finishing Touch: The Glaze
A simple sweet glaze is the perfect way to finish off your incredible Homemade Danish.
- Make the Glaze: In a small bowl, whisk together the powdered sugar, 2 tablespoons of milk or water, and vanilla extract (if using) until smooth and pourable. If it’s too thick, add more liquid ½ teaspoon at a time. If it’s too thin, add a bit more powdered sugar.
- Glaze the Danish: Once the Danish are completely cool, drizzle or spread the glaze over the tops.
- Serve: Allow the glaze to set for a few minutes, then serve your spectacular Homemade Danish! They are best enjoyed the same day but can be stored in an airtight container at room temperature for up to 2 days, or refrigerated if they contain cream cheese filling. You can gently rewarm them in a toaster oven for a fresh-baked experience.
Conclusion:
Well, my friends, we’ve come to the culmination of a truly rewarding culinary journey. This isn’t just another recipe you’ll scroll past; this is the blueprint for creating pure, unadulterated bliss right in your own kitchen. I know the thought of making something as seemingly intricate as a Danish from scratch might have felt a little intimidating at first, but trust me when I say the effort is not just worth it, it’s absolutely transformative. What you’re about to experience, or perhaps have already experienced by now, is the magic of pastry. We’re talking about layer upon layer of delicate, golden pastry, each one gossamer-thin and infused with that irresistible buttery richness that melts in your mouth. This isn’t the dense, often dry, mass-produced version you might reluctantly pick up from a supermarket shelf. No, this is an entirely different league.
The unparalleled freshness alone makes this recipe a non-negotiable must-try. Imagine pulling a tray of these beauties from your oven, the aroma of warm butter, sweet filling, and hints of vanilla or almond wafting through your home – it’s an olfactory symphony that promises deliciousness before you even take the first bite. And that first bite? It’s a revelation. The crisp shatter of the outer layers giving way to a tender, airy interior, perfectly complemented by whatever luscious filling you’ve chosen. This recipe delivers a pastry that is both incredibly elegant and surprisingly approachable, making it perfect for impressing guests at brunch or simply elevating a quiet morning coffee into a moment of pure luxury for yourself. It’s an act of self-care, a moment of slowing down and creating something truly special with your own hands. The pride you’ll feel when you bite into your perfect creation is immense, and that’s something a store-bought pastry can never replicate. The sheer satisfaction of mastering such an iconic pastry is a reward in itself, proving that with a little patience and love, your kitchen can rival the finest patisseries.
Now, let’s talk about the fun part: making it your own! While the base dough provides a magnificent canvas, the true artistry often lies in the fillings and finishes. For a classic experience, serve your freshly baked Danish warm, perhaps with a simple dusting of powdered sugar or a light lemon glaze. A strong cup of coffee or a fragrant tea is its natural companion. But why stop there? The possibilities for customization are virtually endless. Think seasonal fruit fillings: vibrant strawberry or raspberry in the summer, tender apple or pear with a hint of cinnamon in the fall, or luscious cherry year-round. You can use fresh fruits, gently stewed, or even good quality canned fruit fillings for convenience.
Don’t be afraid to experiment with creamy fillings like a sweetened cream cheese enhanced with orange zest or a rich almond paste mixture that adds a wonderful nutty depth.
For a touch of indulgence, a swirl of chocolate hazelnut spread or a sprinkle of mini chocolate chips before baking can transform your Danish into a decadent treat. And don’t forget the toppings! Beyond the simple glaze, consider a crunchy streusel made with butter, flour, and sugar, or a scattering of toasted slivered almonds for added texture and visual appeal. You could even get adventurous and explore a savory twist by using a pesto and cheese filling, though for me, the sweet variations truly embody the spirit of a proper Danish, especially when enjoyed during a leisurely breakfast.
So, what are you waiting for? Take the plunge! Gather your ingredients, clear your counter, and prepare for an incredibly satisfying baking adventure. I promise you, the aroma filling your home, the flaky texture, and the exquisite taste of your very own Homemade Danish will be a memory you’ll cherish and a skill you’ll be proud to master. Don’t worry if your first batch isn’t absolutely perfect; baking is a journey of learning and refinement. Each time you make it, you’ll discover new nuances, new tricks, and new ways to make it even better. The joy of creating something so beautiful and delicious from scratch is truly unparalleled. I absolutely love hearing about your baking triumphs, so please, once you’ve made these magnificent pastries, come back and share your experience with me! What fillings did you choose? What serving suggestions did you discover? Did you manage to snap a photo before they all disappeared?
Your stories and variations inspire me, and I genuinely believe this recipe will become a cherished one in your kitchen, bringing joy to countless breakfasts and brunches for years to come.
Happy baking, and I can’t wait to hear all about your delicious creations!
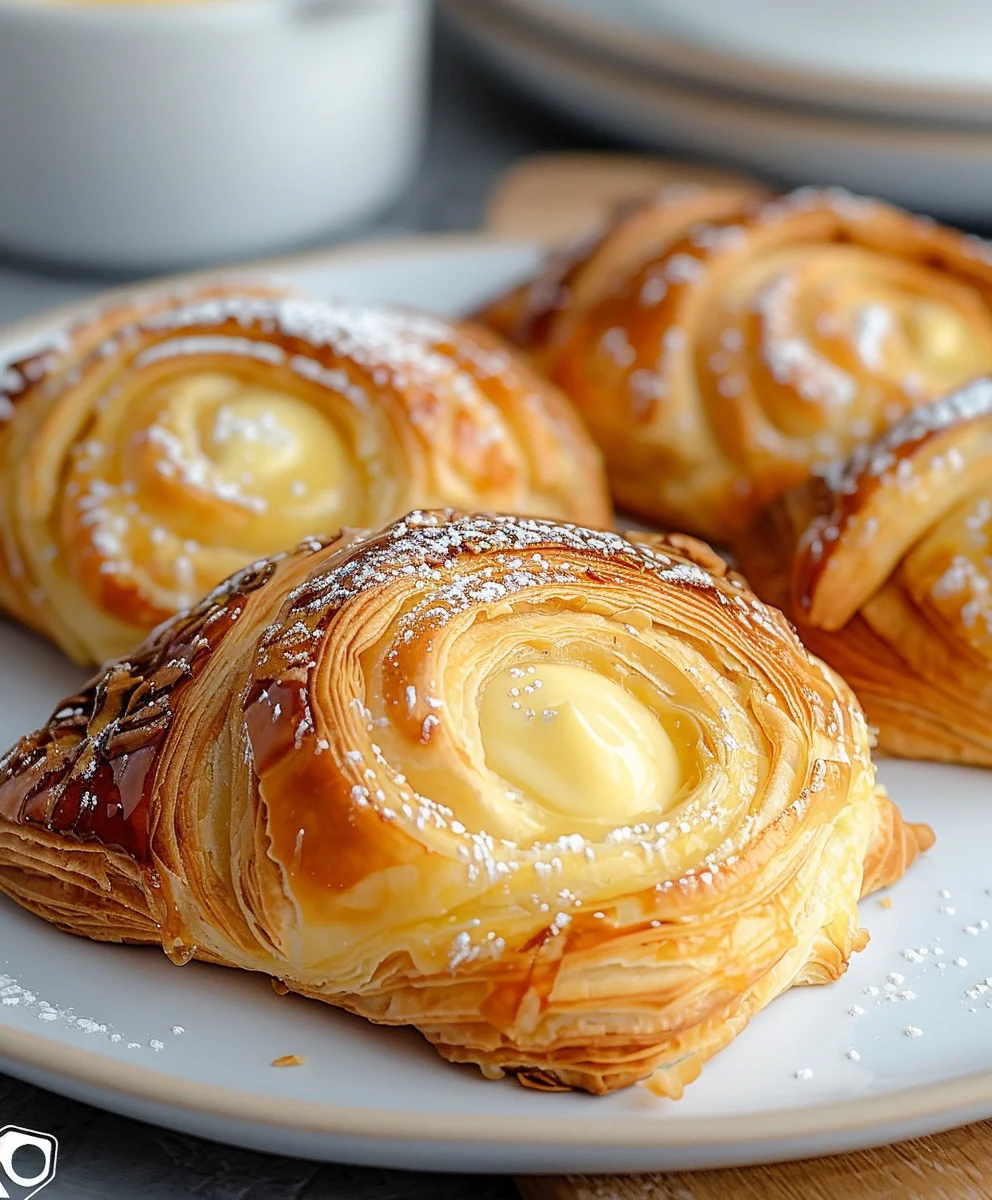
Easy Homemade Danish Pastry Recipe: Flaky & Delicious Treat
Indulge in the magic of homemade Danish pastry! This recipe guides you through creating delicate, buttery layers with a rich cream cheese filling, a true symbol of cozy ‘hygge’. Perfect for breakfast, brunch, or a special afternoon treat, the journey of making your own will be as rewarding as the very first heavenly bite.
Ingredients
-
4 cups (500g) all-purpose flour
-
1/3 cup (75g) granulated sugar
-
1 tsp salt
-
1 tbsp (10g) active dry yeast
-
1 cup (240ml) warm whole milk
-
1 large egg, room temperature
-
1 cup + 2 tbsp (250g) cold unsalted butter
-
7 oz (200g) softened cream cheese
-
1/4 cup (50g) granulated sugar
-
1 tsp vanilla extract
-
Zest of 1 lemon (optional)
-
1 cup (100g) powdered sugar
-
1–2 tbsp milk or lemon juice
-
1/2 tsp vanilla extract
-
Optional: Fruit preserves, fresh berries, or sliced almonds for topping
Instructions
- Step 1
In a bowl, combine 1 cup warm milk, 1 tbsp active dry yeast, and a pinch of granulated sugar; let sit 5-10 minutes until frothy. Mix in 1 large egg and remaining 1/3 cup granulated sugar. Gradually add 4 cups all-purpose flour and 1 tsp salt, then knead for 5-7 minutes until smooth and elastic. Lightly grease a bowl, add dough, cover, and let rise 1 to 1.5 hours until doubled. Punch down dough, shape into an 8×6 inch rectangle, wrap, and chill at least 2 hours (or overnight). - Step 2
Place 1 cup + 2 tbsp cold unsalted butter between two sheets of parchment paper. Pound and roll the butter into an even 8×6-inch rectangle. Chill until ready to use. - Step 3
On a lightly floured surface, roll chilled dough to a 16×8 inch rectangle. Place the butter block in the center, covering two-thirds of the dough. Fold the exposed dough flap over the butter, then fold the remaining side (with butter peeking) over the first fold, like closing a book. Pinch edges to seal. Wrap tightly and refrigerate for 30 minutes. - Step 4
Lightly flour work surface and dough. With the short side facing you, roll dough evenly into a 16×8 inch rectangle. Visually divide into three sections. Fold one third of the dough over the middle third, then fold the remaining third over that (single fold). Wrap tightly and refrigerate for another 30 minutes. - Step 5
Repeat the previous step: Lightly flour, roll dough to 16×8 inches (short side facing you), perform another single fold. Wrap tightly and refrigerate for at least 1 hour (preferably overnight) to fully relax the dough. - Step 6
In a medium bowl, combine 7 oz softened cream cheese, 1/4 cup granulated sugar, 1 tsp vanilla extract, and optional lemon zest. Beat until completely smooth and creamy. Cover and chill until ready to use. - Step 7
Remove chilled dough and roll into an 18×12 inch rectangle, about 1/8 inch thick. Trim edges if desired for neatness. Cut the dough into 9 equal 4×4 inch squares. For each square, make two parallel cuts from opposite corners towards the center, stopping about ½ inch from the center point. Spoon 1-2 tablespoons of cream cheese filling into the center. Gently fold one corner from each of the cut flaps over the filling towards the center, pressing lightly to secure. Transfer shaped pastries to parchment-lined baking sheets, spacing 2 inches apart. - Step 8
Loosely cover the baking sheets with plastic wrap or a clean towel and let Danish rise in a warm, draft-free place for 45-60 minutes until visibly puffy. Preheat oven to 400°F (200°C). Gently brush exposed dough with an egg wash (using an egg whisked with a tablespoon of water or milk, if desired, though not in the ingredient list). Bake for 15-20 minutes, or until deeply golden brown and the filling is set. Cool completely on a wire rack. - Step 9
In a small bowl, whisk together 1 cup powdered sugar, 1-2 tablespoons milk or lemon juice, and 1/2 tsp vanilla extract until smooth and pourable. Drizzle or spread the glaze over the completely cooled Danish pastries. Allow the glaze to set for a few minutes before serving your spectacular Homemade Danish! Best enjoyed the same day. Store leftovers in an airtight container at room temperature for up to 2 days, or refrigerate if they contain cream cheese filling.
Important Information
Nutrition Facts (Per Serving)
It is important to consider this information as approximate and not to use it as definitive health advice.
Allergy Information
Please check ingredients for potential allergens and consult a health professional if in doubt.
Leave a Comment