
Fun Graveyard Dirt Cake Cups are the perfect treat to bring a playful twist to any Halloween gathering or spooky celebration. These delightful desserts offer a whimsical take on the classic dirt cake, transforming it into a mini graveyard scene that not only tantalizes the taste buds but also sparks imagination. With layers of rich chocolate pudding, crushed cookies, and gummy worms peeking out from the “dirt,” Fun Graveyard Dirt Cake Cups are a hit with kids and adults alike. This recipe has become a beloved staple at parties, thanks to its fun presentation and the joy it brings to those who indulge in it. Whether you’re hosting a Halloween bash, a birthday party, or simply want to surprise your family with a creative dessert, Fun Graveyard Dirt Cake Cups are sure to steal the show.
What Is Fun Graveyard Dirt Cake Cups
Fun Graveyard Dirt Cake Cups are an adorable and delicious dessert made to look like a spooky graveyard. This treat typically features layers of creamy chocolate pudding, crumbled chocolate cookies that mimic dirt, and playful decorations like gummy worms and edible gravestones. The texture is a delightful mix of smooth and crunchy, with a rich chocolate flavor that is perfectly complemented by the sweetness of the toppings. Unlike traditional cakes, these individual cups make serving easy and allow for a bit of creativity in decorating each one. They are reminiscent of the classic dirt cake we all know and love but add a fun, thematic twist that makes them perfect for any spooky occasion.
Why You’ll Fall in Love with This Recipe
- Easy to prepare: Minimal cooking and no baking required!
- Family-friendly: Kids can help with layering and decorating.
- Customizable: Use different toppings to create unique graveyard scenes.
- Deliciously indulgent: Rich chocolate flavor that satisfies any sweet tooth.
How Does It Taste?
The flavor profile of Fun Graveyard Dirt Cake Cups is a heavenly combination of sweet and creamy chocolate pudding layered with the crunch of crushed chocolate cookies. Each bite delivers a burst of chocolatey goodness, complemented by the chewy texture of gummy worms and the occasional surprise of a candy decoration. The distinct layers create a delightful contrast that keeps each mouthful exciting. It’s a perfect balance of textures and flavors that will leave you craving more!
Health & Ingredient Benefits
While Fun Graveyard Dirt Cake Cups are primarily a treat, some of the key ingredients offer simple health benefits:
- Chocolate pudding: Rich in antioxidants, it can provide a comforting sweet experience.
- Low-fat cream cheese: Offers a creamy texture while being lower in fat than traditional cream.
- Crushed chocolate cookies: Provides a source of quick energy and satisfaction in moderation.
These elements make the Fun Graveyard Dirt Cake Cups not just a tasty treat, but also a fun way to enjoy some of your favorite ingredients!

Ingredients You’ll Need
- 1 package chocolate cake mix (15.25 oz) – This is the base of our dirt cake, providing rich chocolate flavor and a soft, moist texture.
- 1 cup water – Essential for preparing the cake mix, helping to activate the ingredients for a perfect bake.
- 1/2 cup vegetable oil – This adds moisture and richness to the cake, ensuring it stays soft.
- 3 large eggs – Eggs help bind the cake together, adding structure and moisture.
- 1 package (8 oz) cream cheese, softened – This forms the base of our creamy layer, contributing a delicious tangy flavor.
- 1 cup powdered sugar – Sweetens the cream cheese mixture, balancing the richness.
- 1 cup whipped topping – This lightens the cream cheese mixture, adding a fluffy texture.
- 1 package chocolate sandwich cookies (Oreos) – Crushed to create the ‘dirt’ topping, adding a classic chocolate flavor.
- Gummy worms – These fun edible decorations give our graveyard theme a playful touch.
- Plastic grave markers (optional) – For decoration, these can be found at party supply stores, adding to the spooky presentation.
Tools You’ll Need
- Mixing bowls – For combining the cake ingredients and cream cheese mixture.
- Electric mixer – To easily whip together the cream cheese and whipped topping.
- Measuring cups and spoons – For accurate ingredient measurement.
- 9×13 inch baking pan – Needed for baking the chocolate cake.
- Large spoon or spatula – For mixing and serving the cake cups.
- Cupcake liners or serving cups – To hold and present your dirt cake cups.
Optional Substitutions & Additions
- Dairy-free options: Substitute cream cheese with a dairy-free cream cheese alternative and use coconut whipped cream instead of whipped topping.
- Gluten-free option: Use a gluten-free chocolate cake mix to cater to those with gluten intolerance.
- Add-ins: Consider adding a layer of chocolate pudding for extra richness or sprinkle in some chopped nuts for added texture.
- Flavor variations: Experiment with different flavored cake mixes, such as red velvet for a spooky blood-like effect.
How to Make Fun Graveyard Dirt Cake Cups
Step 1: Prepare the Cake
Preheat your oven to 350°F (175°C). In a large mixing bowl, combine the chocolate cake mix, water, vegetable oil, and eggs. Using a whisk or electric mixer, mix until well combined and smooth, about 2 minutes. Pour the batter into a greased 9×13 inch baking pan and bake for 30-35 minutes, or until a toothpick inserted in the center comes out clean. Allow the cake to cool completely.
Step 2: Make the Cream Cheese Mixture
While the cake is cooling, in another mixing bowl, beat the softened cream cheese with an electric mixer until smooth. Gradually add the powdered sugar, mixing until well incorporated. Gently fold in the whipped topping until the mixture is light and fluffy.
Step 3: Crush the Cookies
Place the chocolate sandwich cookies in a zip-top bag and crush them into fine crumbs using a rolling pin or your hands. This will serve as the ‘dirt’ for your graveyard cups.
Step 4: Assemble the Cups
Once the cake has cooled, crumble it into small pieces. In your serving cups or bowls, layer the ingredients starting with a layer of chocolate cake crumbles, followed by a layer of the cream cheese mixture, and then a layer of crushed cookies. Repeat the layers until the cups are filled, finishing with a layer of cookie crumbs on top.
Step 5: Decorate
To give your dirt cake cups a spooky touch, insert gummy worms into the dirt topping and place plastic grave markers on top for added decoration. Get creative with the arrangement!
What to Serve With
These Fun Graveyard Dirt Cake Cups pair wonderfully with themed drinks such as ‘witches’ brew’ punch or apple cider. For a complete Halloween spread, consider serving alongside savory treats like pumpkin soup or mini meat pies.
Tips for Success
- Make sure the cake is completely cooled before assembling to prevent the cream cheese mixture from melting.
- For a more decadent flavor, try adding a layer of chocolate pudding between the cake and cream cheese layers.
- Use a variety of serving cups for a whimsical effect, such as mason jars or clear plastic cups.
- Don’t skimp on the cookie crumbs; they provide the essential dirt look and delicious chocolate flavor!
Common Mistakes to Avoid
- Not allowing the cake to cool completely, which can result in a soupy mixture.
- Overmixing the cream cheese mixture, which can lead to a dense texture instead of a light and fluffy one.
- Using stale cookies for the ‘dirt’ layer, which can affect the freshness and flavor of the dessert.
- Forgetting to add the gummy worms and decorations, as they are key to the fun presentation!
How to Store & Reheat
Storing
Store the assembled Fun Graveyard Dirt Cake Cups in an airtight container in the refrigerator. They can last for up to 3-4 days, but the earlier you enjoy them, the fresher they will taste!
Reheating
This dessert is best enjoyed cold, so there is no need to reheat. If you prefer a warm dessert, consider serving a warm chocolate sauce on the side for drizzling over the layers just before serving.
Frequently Asked Questions
- Can I make the cake ahead of time? Yes! You can bake the cake a day in advance and store it in the refrigerator until you’re ready to assemble the cups.
- How can I make this gluten-free? Use a gluten-free chocolate cake mix and ensure your cookies are gluten-free as well.
- Can I use a different flavor of cake mix? Absolutely! Feel free to experiment with flavors like vanilla or red velvet for a unique spin.
- How do I make it less sweet? Reduce the amount of powdered sugar in the cream cheese mixture or use unsweetened whipped cream.
Nutritional Info
Each Fun Graveyard Dirt Cake Cup contains approximately 350 calories, with 15g of fat, 45g of carbohydrates, and 5g of protein. Keep in mind that these values may vary based on ingredient substitutions and portion sizes.
Final Thoughts
If you’re looking for a delightful and spooky treat that will bring smiles to faces of all ages, the Fun Graveyard Dirt Cake Cups are a must-try! These charming dessert cups combine layers of rich chocolate pudding, crushed cookies, and creamy whipped topping, making them not only delicious but also visually fun. The creative touch of gummy worms and edible decorations adds a playful twist that’s perfect for Halloween parties, school events, or just a fun family night in. I can’t recommend this recipe enough; it’s an easy-to-make dessert that promises to be a hit with everyone. So gather your ingredients and get ready to impress your friends and family with these adorable Fun Graveyard Dirt Cake Cups!
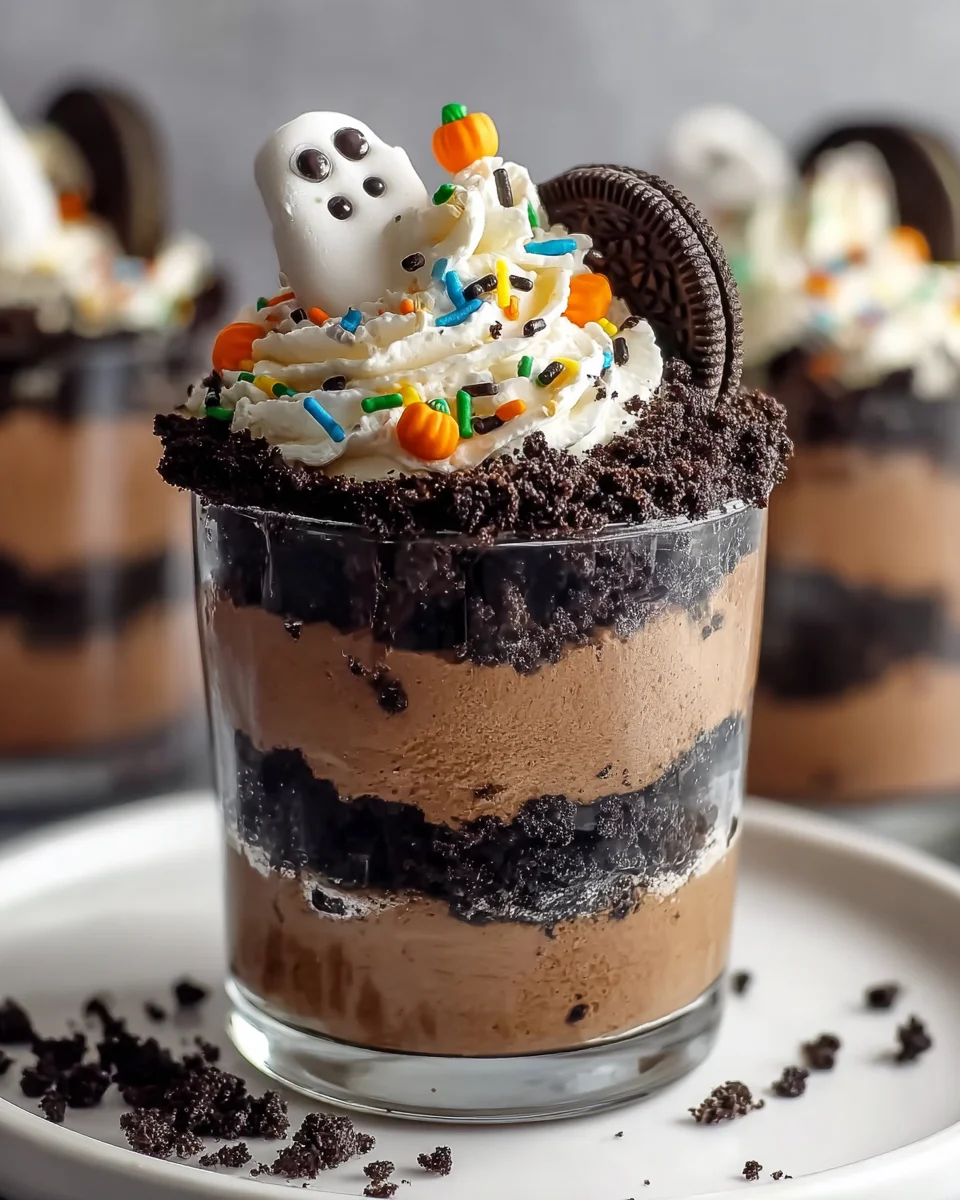
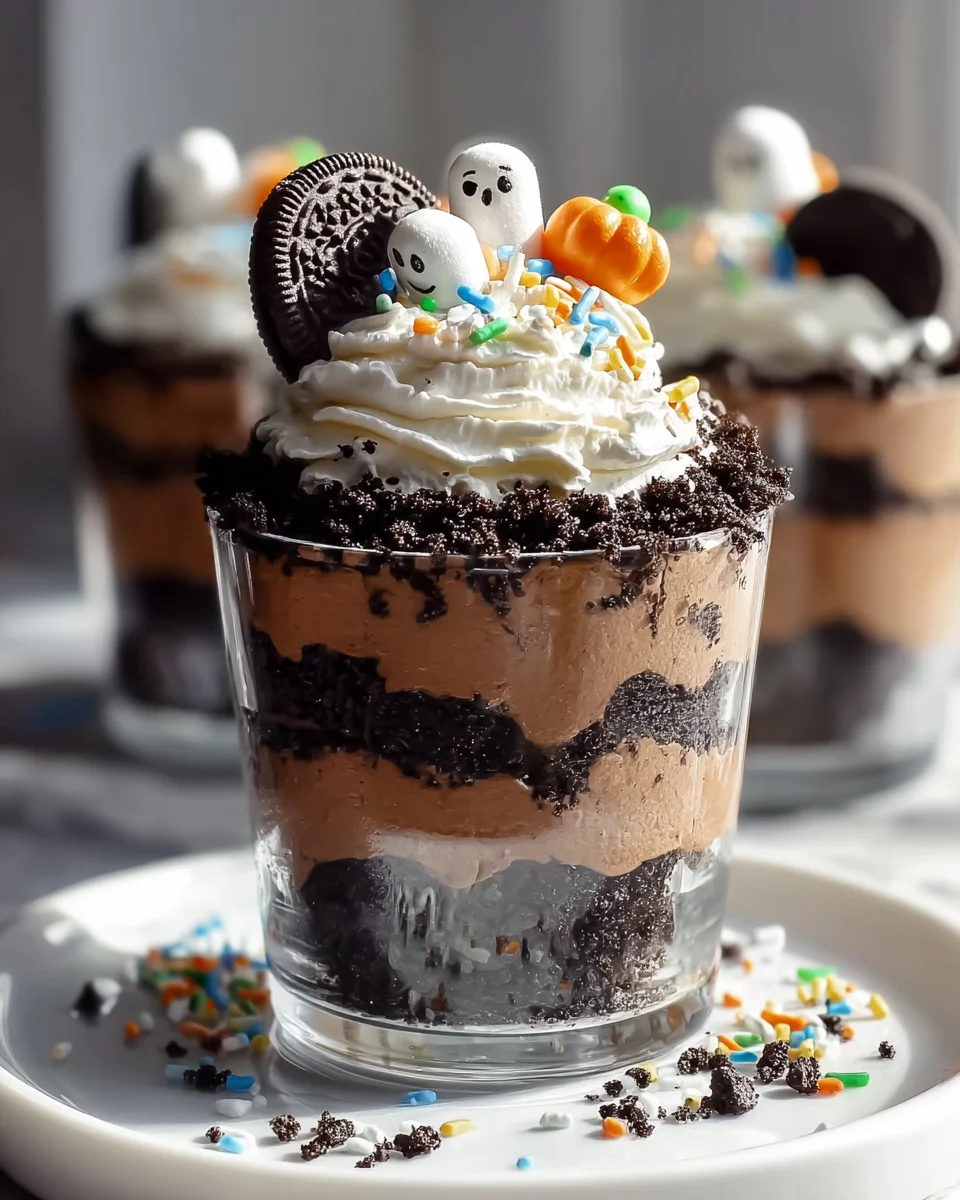
Fun Graveyard Dirt Cake Cups
Delicious Fun Graveyard Dirt Cake Cups are a playful twist on traditional dirt cake, perfect for Halloween celebrations.
Ingredients You’ll Need
- 2 packages (19.1 oz each) Oreo cookies
- 1 cup chocolate syrup (divided)
- 4 cups whole milk
- 2 packages (3.9 oz each) instant chocolate pudding mix
- 16 oz whipped topping, thawed
- Milano cookies
- Black cookie decorating icing
- Ghost-shaped marshmallow treats (peeps)
- Mini pumpkin-shaped candies
- Assorted Halloween-themed sprinkles
Instructions
- Step 1
Crush Oreo cookies and set aside. - Step 2
In a bowl, mix chocolate pudding with whole milk and half of the chocolate syrup until smooth. - Step 3
Fold in whipped topping until combined. - Step 4
In serving cups, layer crushed cookies, pudding mixture, and additional toppings. - Step 5
Decorate with Milano cookies, icing, marshmallow treats, candies, and sprinkles.
Important Information
Nutrition Facts
Per serving: ~350 calories. Based on a 2000 calorie diet.
Allergy Information
Always check labels for specific allergen information.
Leave a Comment