
Fresh Apple Cake With Cream Cheese Frosting Recipe
Welcome to my kitchen, where the sweet aroma of freshly baked goods fills the air! Today, I’m thrilled to share with you my cherished Fresh Apple Cake With Cream Cheese Frosting Recipe. This delightful cake is not just any dessert; it’s a warm hug in a slice, celebrating the crisp, juicy apples that are so abundant in the fall. What makes this recipe truly special is the perfect balance of tender cake and luscious cream cheese frosting, creating a harmony of flavors that will have you coming back for seconds—maybe even thirds!
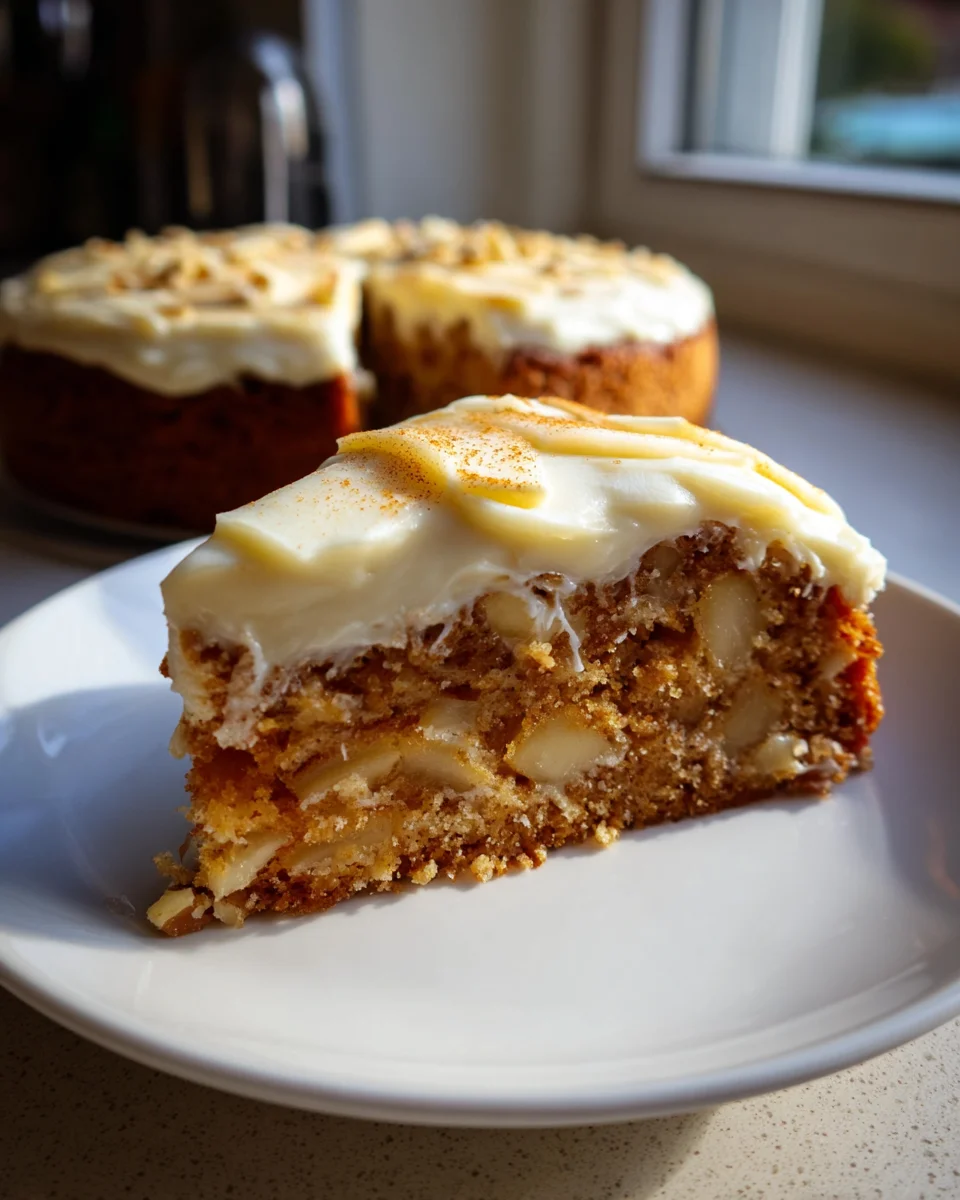
Imagine biting into a slice of this moist apple cake, where each bite bursts with chunks of fresh apples and a hint of cinnamon. It’s like autumn on a plate! The creamy frosting adds an indulgent touch that complements the cake’s natural sweetness without overwhelming it. I can assure you, whether you’re baking for a family gathering, a cozy afternoon treat, or just because you crave something delicious, this recipe will become your go-to. So, let’s roll up our sleeves and get started on this delightful journey of baking!

Ingredient Notes
For my Fresh Apple Cake with Cream Cheese Frosting, I love using fresh, tart apples for the best flavor. Here are the key ingredients and some helpful substitutions you can consider:
- Apples: Granny Smith or Honeycrisp are my favorites for their balance of sweetness and tartness. If you prefer a sweeter cake, you can also use Fuji or Gala apples.
- Flour: All-purpose flour works great, but you can substitute with whole wheat flour for a healthier option. Just keep in mind it may alter the texture slightly.
- Sugar: Granulated sugar is standard, but for a richer flavor, I sometimes mix in some brown sugar. You can also use coconut sugar for a lower glycemic option.
- Eggs: They help bind the cake together. If you’re looking for a vegan alternative, you can replace each egg with 1/4 cup of unsweetened applesauce.
- Cream Cheese: For the frosting, regular cream cheese gives the best flavor, but you can also use low-fat cream cheese or a dairy-free alternative if you need it to be vegan.
- Spices: Cinnamon is essential for that warm flavor, but feel free to add nutmeg or allspice for extra depth.
Step-by-Step Instructions
Now that we have our ingredients sorted out, let’s get baking!
- Preheat the Oven: Start by preheating your oven to 350°F (175°C). Grease and flour a 9×13 inch baking pan to prepare it for the batter.
- Prepare the Apples: Peel, core, and chop about 3 cups of apples. You can leave them in small chunks or thin slices, depending on your preference.
- Mix Dry Ingredients: In a large bowl, whisk together 2 cups of all-purpose flour, 1 teaspoon of baking soda, 1 teaspoon of baking powder, 1 teaspoon of cinnamon, and a pinch of salt. This will ensure even distribution of the leavening agents and spices.
- Combine Wet Ingredients: In another bowl, whisk together 1 cup of granulated sugar, 1/2 cup of brown sugar, and 1/2 cup of vegetable oil until well mixed. Add in 3 large eggs and mix until smooth.
- Combine Mixtures: Gradually add the dry mixture to the wet ingredients. Stir until just combined, and then gently fold in the apples until they are evenly distributed throughout the batter.
- Bake: Pour the batter into the prepared baking pan and spread it out evenly. Bake in the preheated oven for 40-45 minutes, or until a toothpick inserted into the center comes out clean.
- Cool the Cake: Once baked, remove the cake from the oven and let it cool in the pan for about 10 minutes. Then, transfer it to a wire rack to cool completely.
- Make the Frosting: While the cake cools, beat together 8 oz of softened cream cheese and 1/2 cup of unsalted butter until creamy. Gradually add in 4 cups of powdered sugar and 1 teaspoon of vanilla extract, mixing until smooth and fluffy.
- Frost the Cake: Once the cake is completely cool, spread the cream cheese frosting generously over the top. You can also decorate it with chopped nuts or additional apple slices if you like.
Tips & Suggestions
Here are some tips to make your Fresh Apple Cake even more delightful:
- Apple Choice: Experiment with different apple varieties to find your favorite flavor combination. A mix of sweet and tart apples can add complexity.
- Adding Nuts: Consider folding in some chopped walnuts or pecans for added texture and flavor.
- Make it Ahead: This cake keeps well and can be made a day in advance. The flavors tend to deepen and improve overnight!
- Serving Suggestions: Serve slices warm or at room temperature. A scoop of vanilla ice cream on the side pairs beautifully with the cake.
Storage
To store your Fresh Apple Cake with Cream Cheese Frosting:
- Room Temperature: If you plan to enjoy it within a couple of days, you can keep it covered at room temperature. Just be sure it’s in an airtight container to maintain freshness.
- Refrigerator: For longer storage, place the cake in the fridge where it will last for about a week. The cream cheese frosting can be sensitive to heat, so refrigeration is a good idea.
- Freezing: If you want to store it for an extended period, you can freeze the cake without the frosting. Wrap it tightly in plastic wrap and then in aluminum foil. It can stay frozen for up to three months. When ready to eat, thaw it in the refrigerator overnight and frost it before serving.
Enjoy your baking adventure with this delicious Fresh Apple Cake with Cream Cheese Frosting!
Final Thoughts
If you’re looking for a delightful dessert that perfectly balances sweet and tart flavors, then the Fresh Apple Cake With Cream Cheese Frosting Recipe is an absolute must-try! This cake brings the essence of fresh apples into every bite, combined with the creamy richness of the frosting that takes it to another level of deliciousness. It’s not just a cake; it’s a warm hug on a plate that reminds us of cozy autumn days. Whether you’re baking for family gatherings or simply treating yourself, this recipe will surely impress and satisfy. I can’t wait for you to experience the joy of baking and sharing the Fresh Apple Cake With Cream Cheese Frosting Recipe with your loved ones!
Leave a Comment