
Chocolate Ganache Drip Birthday Layer Cake
Your Next Celebration’s Masterpiece!
Oh, friends, if there’s one cake that truly captures the magic of a special celebration, it’s this one! I’m absolutely thrilled to share with you the secrets to creating a dessert that isn’t just a cake, but a work of art that will have everyone reaching for their phones before their forks.
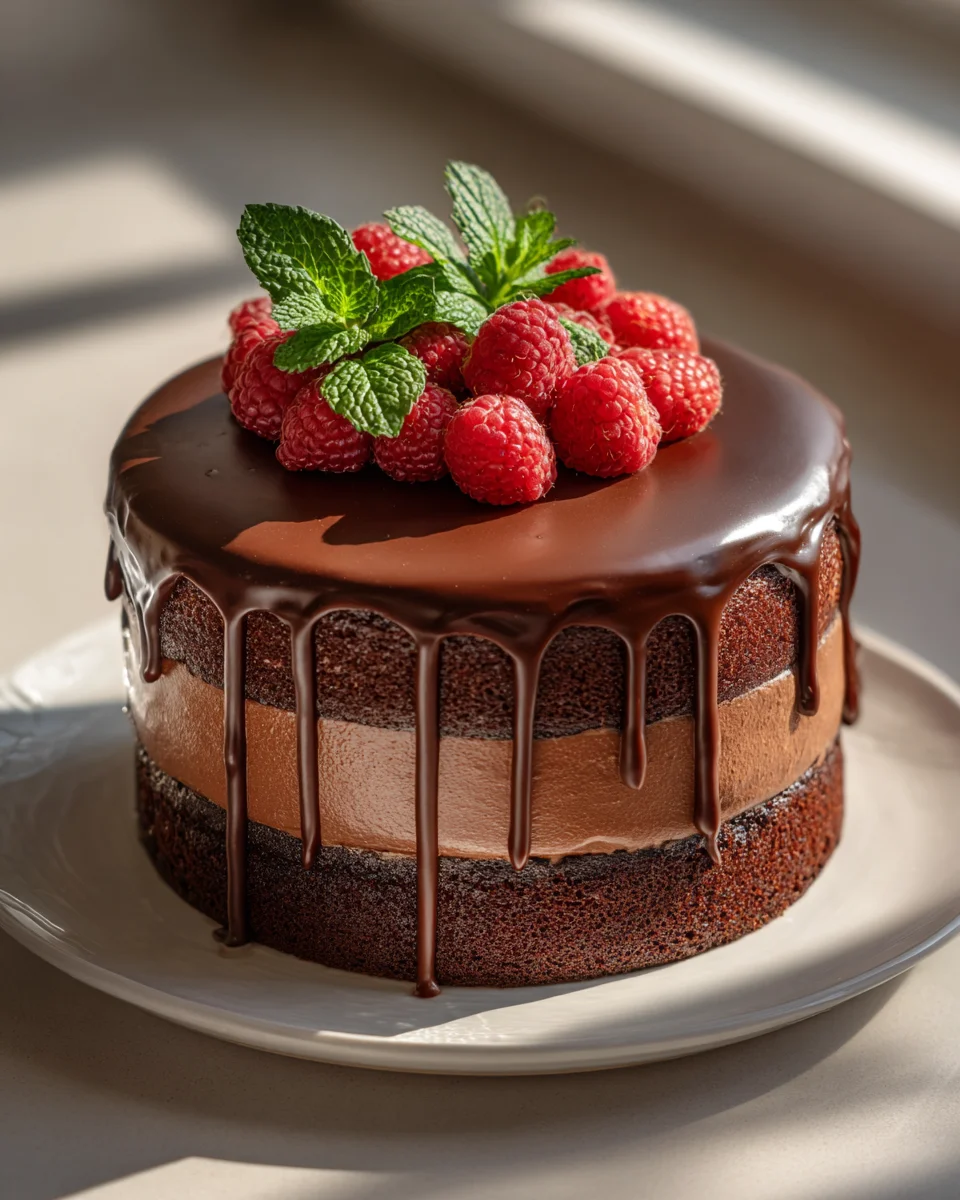
What makes this particular recipe so incredibly special, you ask? It’s all about that show-stopping chocolate ganache drip! That perfectly flowing, glossy cascade of chocolate down the sides of a tall, beautiful layer cake makes it look like it came straight from a fancy bakery, but trust me, it’s totally achievable in your own kitchen. And let’s not forget the layers themselves – moist, rich chocolate cake perfectly paired with a velvety smooth filling and frosting, all crowned with that irresistible ganache. You’ll love the feeling of pride when you present this masterpiece, and even more when you see the delighted faces of your loved ones.
In a nutshell, we’re talking about multiple decadent layers of chocolate sponge, generously filled and frosted with a delightful buttercream, and then, for the grand finale, adorned with a luxurious, glistening chocolate ganache that artfully drips down the sides. It’s truly the ultimate centerpiece for any birthday or special occasion, promising an unforgettable experience with every single slice. Get ready to bake some serious joy!

Welcome to my ultimate guide for creating a show-stopping Chocolate Ganache Drip Birthday Layer Cake! This recipe combines a rich, moist chocolate cake with a creamy buttercream frosting and that irresistible cascading ganache drip. It’s truly a celebration in every slice, perfect for any birthday star!
Ingredient Notes
Crafting this beautiful layer cake starts with understanding your ingredients. Each component plays a crucial role in achieving that perfect balance of flavor and texture.
- For the Chocolate Cake Layers:
- All-Purpose Flour: The backbone of our cake. Sifting it ensures a light, airy crumb.
- Unsweetened Cocoa Powder: I always recommend using a good quality natural unsweetened cocoa powder for a deep chocolate flavor. Dutch-processed can work too, but adjust leavening agents if necessary (natural cocoa reacts with baking soda).
- Baking Soda & Baking Powder: Our leavening duo! Baking soda reacts with the acidic cocoa and buttermilk (or its substitute), while baking powder provides extra lift.
- Granulated Sugar: Sweetness and moisture. Don’t skimp!
- Eggs: Room temperature eggs emulsify better with other ingredients, leading to a smoother batter and a more tender cake.
- Buttermilk: Essential for a moist, tender crumb and to activate the baking soda. If you don’t have buttermilk, simply mix 1 tablespoon of white vinegar or lemon juice with regular milk and let it sit for 5-10 minutes until it slightly curdles.
- Vegetable Oil: Contributes to an incredibly moist cake that stays fresh longer than butter-based cakes. You can use any neutral-flavored oil.
- Pure Vanilla Extract: Enhances all the chocolatey goodness. For those avoiding alcohol, an alcohol-free vanilla extract works perfectly.
- Hot Water or Coffee: This ingredient is key! Hot liquid ‘blooms’ the cocoa, intensifying its flavor. Coffee (even decaf) further deepens the chocolate notes without making the cake taste like coffee.
- For the Vanilla Buttercream Frosting:
- Unsalted Butter: Room temperature is critical! It should be soft enough to indent with your finger but not melted. This forms the base of our fluffy buttercream.
- Powdered Sugar (Confectioners’ Sugar): Sifted! This prevents lumps and ensures a smooth, creamy frosting.
- Heavy Cream or Milk: Adjusts the consistency of your buttercream to make it perfectly spreadable.
- Pure Vanilla Extract: A classic pairing with chocolate.
- For the Chocolate Ganache Drip:
- High-Quality Chocolate: This is where it counts! Use a good quality semi-sweet or dark chocolate (around 60-70% cocoa solids) in chip form or finely chopped. Better chocolate equals better flavor and a smoother drip. Avoid using milk chocolate as it won’t set up quite right for a clean drip.
- Heavy Cream: You need a cream with at least 36% milk fat to create a stable ganache. Do not substitute with half-and-half or milk.
- For Decoration: Sprinkles, fresh berries, chocolate shavings, or candies – let your birthday imagination run wild!
Step-by-Step Instructions
Creating this stunning cake is a joyful process. Follow these steps for a perfect birthday masterpiece!
1. Prepare and Bake the Cake Layers
- Preheat your oven to 350°F (175°C). Grease and flour three 8-inch round cake pans, or line the bottoms with parchment paper and grease the sides.
- In a large bowl, whisk together the flour, granulated sugar, cocoa powder, baking soda, baking powder, and salt. Make sure there are no lumps.
- In a separate medium bowl, whisk together the eggs, buttermilk, vegetable oil, and pure vanilla extract until well combined.
- Pour the wet ingredients into the dry ingredients and mix on low speed with an electric mixer (or by hand) until just combined. Do not overmix!
- Gradually add the hot water or hot coffee to the batter, mixing until smooth. The batter will be thin, this is normal.
- Divide the batter evenly among the prepared cake pans.
- Bake for 28-32 minutes, or until a wooden skewer inserted into the center comes out with only a few moist crumbs.
- Let the cakes cool in the pans for 10-15 minutes before inverting them onto a wire rack to cool completely. Cooling completely is crucial before frosting!
2. Prepare the Vanilla Buttercream Frosting
- In a large bowl, using an electric mixer, beat the room temperature unsalted butter on medium speed until light and fluffy (about 3-5 minutes).
- Gradually add the sifted powdered sugar, one cup at a time, beating well after each addition until smooth.
- Add the pure vanilla extract and 1 tablespoon of heavy cream or milk. Beat until incorporated. Add more cream/milk, a teaspoon at a time, until your buttercream reaches a smooth, spreadable consistency. Beat on high speed for another 2-3 minutes until it’s super light and fluffy.
3. Assemble and Frost the Cake
- Once your cake layers are completely cool, use a serrated knife to level any domes off the tops, creating flat surfaces.
- Place one cake layer on your serving plate or cake stand. Spread about 3/4 cup of buttercream evenly over the top.
- Place the second cake layer on top and repeat with another 3/4 cup of buttercream.
- Add the final cake layer. Apply a thin layer of buttercream all over the top and sides of the cake – this is your “crumb coat.” It traps any loose crumbs.
- Chill the cake in the refrigerator for 20-30 minutes to set the crumb coat.
- Once chilled, apply the remaining buttercream generously and smoothly over the entire cake. Use an offset spatula or bench scraper to achieve a smooth finish on the sides and top. Chill the frosted cake again for at least 30 minutes. This firm buttercream base is essential for a clean ganache drip.
4. Make the Chocolate Ganache Drip
- Place the finely chopped chocolate or chocolate chips in a heatproof bowl.
- Heat the heavy cream in a small saucepan over medium heat until it just begins to simmer around the edges (do not boil vigorously).
- Pour the hot cream over the chocolate. Let it sit for 5 minutes without stirring.
- After 5 minutes, gently whisk the mixture from the center outwards until completely smooth and glossy. If it’s not fully melted, you can microwave it in 15-second intervals, stirring in between, until smooth.
- Let the ganache cool down to room temperature, stirring occasionally. This is the MOST CRITICAL step for a perfect drip! It should be thick enough to coat the back of a spoon but still pourable. Test the consistency on the back of a chilled plate – it should drip slowly and beautifully. This usually takes about 20-30 minutes of cooling.
5. Apply the Drip and Decorate
- Once your ganache has reached the perfect dripping consistency and your cake is well-chilled, it’s time for the fun part!
- Using a spoon, carefully drizzle the ganache around the top edge of the cake, allowing it to drip down the sides. For more control, you can transfer the ganache to a squeeze bottle with a small opening or a piping bag with a tiny hole snipped off the end.
- Once you’ve created your desired drip pattern around the edges, pour the remaining ganache onto the top of the cake and gently spread it evenly with an offset spatula.
- Immediately after applying the ganache, decorate your birthday cake with sprinkles, fresh berries, candies, or whatever makes the birthday person happy! The ganache will set quite quickly.
- Allow the ganache to set completely, either at room temperature or in the refrigerator for a quicker set.
Tips & Suggestions
A few extra pointers to make your Chocolate Ganache Drip Birthday Layer Cake absolutely perfect:
- Room Temperature Ingredients: Always ensure your butter and eggs are at room temperature for the cake and buttercream. This helps everything emulsify properly, leading to a smoother batter and creamier frosting.
- Don’t Overmix: When making the cake batter, mix until just combined. Overmixing develops the gluten in the flour, resulting in a tough cake.
- Leveling Your Cakes: Investing in a cake leveler or using a long serrated knife to level your cake layers will make stacking and frosting so much easier, giving you a professional-looking finish.
- The Crumb Coat is Your Friend: Do not skip the crumb coat! It seals in any loose crumbs, ensuring your final layer of frosting is perfectly smooth and crumb-free. Chilling it makes it even more effective.
- Ganache Temperature is KEY: I can’t stress this enough! If your ganache is too hot, it will be too thin and run straight off the cake. If it’s too cool, it will be too thick and chunky. Test on a cold plate or the side of an overturned bowl. It should flow slowly and beautifully.
- Practice the Drip: If you’re nervous about the drip, practice on the side of a chilled glass or an overturned bowl first. You’ll get a feel for the ganache consistency and how quickly it flows.
- Use a Turntable: A rotating cake stand makes frosting and applying the ganache drip significantly easier and helps achieve an even finish.
- Get Creative with Decorations: It’s a birthday cake! Don’t be afraid to add extra flair with colorful sprinkles, chocolate curls, fresh fruit, or even edible flowers.
Storage
To keep your beautiful Chocolate Ganache Drip Birthday Layer Cake fresh and delicious:
- Room Temperature: If your kitchen isn’t too warm (below 75°F/24°C), the cake can be stored at room temperature, loosely covered with plastic wrap or in a cake dome, for up to 2 days.
- Refrigerator: For longer storage, or if your home is warm, store the cake in the refrigerator for up to 5-7 days. Ensure it’s covered tightly with plastic wrap or in an airtight cake carrier to prevent it from drying out or absorbing odors.
- Serving: Always allow refrigerated cake to come to room temperature for at least 30-60 minutes before serving. This ensures the cake layers are moist and the buttercream and ganache are soft and enjoyable.
- Freezing: Individual slices or even whole unfrosted cake layers can be frozen. Wrap them tightly in plastic wrap, then aluminum foil, and store in an airtight container for up to 2-3 months. Thaw in the refrigerator overnight before decorating or serving.
Final Thoughts
And there you have it! I truly hope you feel inspired to create this magnificent Chocolate Ganache Drip Birthday Layer Cake. For me, it’s not just a cake; it’s a centerpiece, a joyous declaration for any celebration. The beauty of its elegant ganache drip combined with the rich, decadent chocolate layers makes every single slice a luxurious experience. It’s the kind of dessert that makes people gasp with delight when they see it and sigh with contentment when they taste it. I promise you, the joy of presenting this stunning Chocolate Ganache Drip Birthday Layer Cake to friends and family, seeing their smiles and hearing their compliments, is absolutely priceless. Go on, give it a try – you’re going to love bringing this showstopper to life!
Decadent Chocolate Ganache Drip Birthday Layer Cake
- Total Time: 1 hour 2 minutes
- Yield: 12 servings
Description
This show-stopping Chocolate Ganache Drip Birthday Layer Cake combines rich chocolate layers with creamy buttercream and a luxurious ganache drip. Perfect for any celebration, it’s a dessert that will impress everyone!
Ingredients
- All-Purpose Flour
- Unsweetened Cocoa Powder
- Baking Soda
- Baking Powder
- Granulated Sugar
- Eggs
- Buttermilk
- Vegetable Oil
- Pure Vanilla Extract
- Hot Water or Coffee
- Unsalted Butter
- Powdered Sugar (Confectioners' Sugar)
- Heavy Cream or Milk
- High-Quality Chocolate
- Heavy Cream
- Sprinkles
- Fresh Berries
- Chocolate Shavings
- Candies
Instructions
- Preheat your oven to 350°F (175°C). Grease and flour three 8-inch round cake pans, or line the bottoms with parchment paper and grease the sides.
- In a large bowl, whisk together the flour, granulated sugar, cocoa powder, baking soda, baking powder, and salt. Make sure there are no lumps.
- In a separate medium bowl, whisk together the eggs, buttermilk, vegetable oil, and pure vanilla extract until well combined.
- Pour the wet ingredients into the dry ingredients and mix on low speed with an electric mixer (or by hand) until just combined. Do not overmix!
- Gradually add the hot water or hot coffee to the batter, mixing until smooth. The batter will be thin, this is normal.
- Divide the batter evenly among the prepared cake pans.
- Bake for 28-32 minutes, or until a wooden skewer inserted into the center comes out with only a few moist crumbs.
- Let the cakes cool in the pans for 10-15 minutes before inverting them onto a wire rack to cool completely. Cooling completely is crucial before frosting!
- In a large bowl, using an electric mixer, beat the room temperature unsalted butter on medium speed until light and fluffy (about 3-5 minutes).
- Gradually add the sifted powdered sugar, one cup at a time, beating well after each addition until smooth.
- Add the pure vanilla extract and 1 tablespoon of heavy cream or milk. Beat until incorporated. Add more cream/milk, a teaspoon at a time, until your buttercream reaches a smooth, spreadable consistency. Beat on high speed for another 2-3 minutes until it's super light and fluffy.
- Once your cake layers are completely cool, use a serrated knife to level any domes off the tops, creating flat surfaces.
- Place one cake layer on your serving plate or cake stand. Spread about 3/4 cup of buttercream evenly over the top.
- Place the second cake layer on top and repeat with another 3/4 cup of buttercream.
- Add the final cake layer. Apply a thin layer of buttercream all over the top and sides of the cake – this is your 'crumb coat.' It traps any loose crumbs.
- Chill the cake in the refrigerator for 20-30 minutes to set the crumb coat.
- Once chilled, apply the remaining buttercream generously and smoothly over the entire cake. Use an offset spatula or bench scraper to achieve a smooth finish on the sides and top. Chill the frosted cake again for at least 30 minutes. This firm buttercream base is essential for a clean ganache drip.
- Place the finely chopped chocolate or chocolate chips in a heatproof bowl.
- Heat the heavy cream in a small saucepan over medium heat until it just begins to simmer around the edges (do not boil vigorously).
- Pour the hot cream over the chocolate. Let it sit for 5 minutes without stirring.
- After 5 minutes, gently whisk the mixture from the center outwards until completely smooth and glossy. If it's not fully melted, you can microwave it in 15-second intervals, stirring in between, until smooth.
- Let the ganache cool down to room temperature, stirring occasionally. This is the MOST CRITICAL step for a perfect drip! It should be thick enough to coat the back of a spoon but still pourable. Test the consistency on the back of a chilled plate – it should drip slowly and beautifully. This usually takes about 20-30 minutes of cooling.
- Once your ganache has reached the perfect dripping consistency and your cake is well-chilled, it's time for the fun part!
- Using a spoon, carefully drizzle the ganache around the top edge of the cake, allowing it to drip down the sides. For more control, you can transfer the ganache to a squeeze bottle with a small opening or a piping bag with a tiny hole snipped off the end.
- Once you've created your desired drip pattern around the edges, pour the remaining ganache onto the top of the cake and gently spread it evenly with an offset spatula.
- Immediately after applying the ganache, decorate your birthday cake with sprinkles, fresh berries, candies, or whatever makes the birthday person happy! The ganache will set quite quickly.
- Allow the ganache to set completely, either at room temperature or in the refrigerator for a quicker set.
- Prep Time: 30 mins
- Cook Time: 32 mins
- Category: Dessert
- Method: Baking
- Cuisine: American
Nutrition
- Serving Size: 1 slice
- Calories: 450
- Sugar: 35 g
- Sodium: 200 mg
- Fat: 25 g
- Saturated Fat: 15 g
- Unsaturated Fat: 5 g
- Trans Fat: 0 g
- Carbohydrates: 50 g
- Fiber: 3 g
- Protein: 5 g
- Cholesterol: 70 mg
Keywords: Ensure all ingredients are at room temperature for best results. Don't skip the crumb coat to achieve a smooth finish. Test ganache consistency before applying for the perfect drip.
Leave a Comment