
Chocolate Fudge Pop Tarts
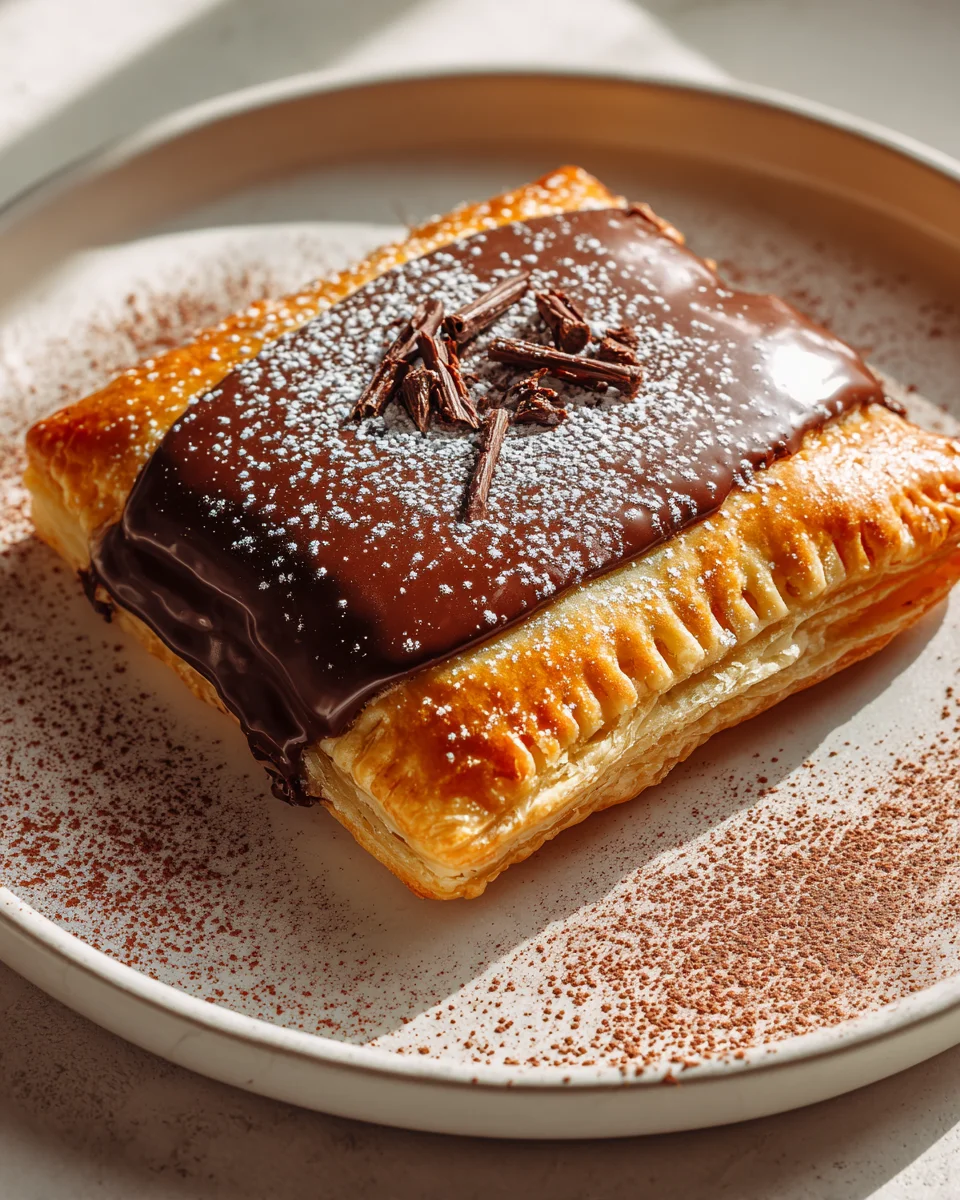
Oh boy, get ready because I’m about to introduce you to something truly magical: homemade Chocolate Fudge Pop Tarts! Forget everything you thought you knew about those foil-wrapped breakfast pastries, because we’re taking them to a whole new level. What makes this recipe so incredibly special, you ask? Well, imagine a buttery, flaky pastry – crisp on the outside, tender on the inside – hugging a warm, gooey, intensely rich chocolate fudge filling that practically melts in your mouth. Then, we crown it all with a smooth, sweet chocolate glaze, perhaps with a sprinkle of joy on top.
You are going to absolutely adore these because they’re the ultimate comfort food, a delightful trip down memory lane, but with an upscale twist. It’s like your favorite childhood treat grew up and became incredibly sophisticated and delicious. Perfect for a decadent breakfast, a surprisingly easy dessert, or just a treat to brighten your day, these Chocolate Fudge Pop Tarts are a labor of love that tastes like pure bliss. Get ready to bake up some happiness!

Ingredient Notes
Oh, these homemade Chocolate Fudge Pop Tarts! They are truly a labor of love, but every single bite makes it worth it. To get that perfect balance of flaky pastry and rich, gooey fudge, picking the right ingredients is key. Here’s a little rundown of what I find works best for this recipe:
For the Pastry Dough:
- All-Purpose Flour: This is my go-to for a reliable, tender crust. You can certainly experiment with pastry flour for an even more delicate texture, but all-purpose will give you that classic Pop Tart chew.
- Unsalted Butter: This is non-negotiable for a truly flaky pastry. It absolutely must be cold and cut into small pieces. The colder the butter, the flakier your dough will be. If you’re looking for a dairy-free option, a good quality plant-based butter substitute that’s solid when cold will work beautifully. Just ensure it has a high fat content.
- Granulated Sugar: A touch of sugar helps with browning and adds a hint of sweetness to the pastry, balancing the rich fudge filling.
- Ice Water: This is another crucial element for a flaky crust. Using ice water helps keep the butter cold as you mix, preventing it from melting too early. Have a little more on hand than you think you’ll need, but add it gradually!
- Salt: Just a pinch enhances all the flavors. Don’t skip it!
For the Chocolate Fudge Filling:
- Chocolate Chips or Chopped Chocolate: For that deep, rich chocolate fudge flavor, I recommend using a good quality semi-sweet or dark chocolate. You can use chocolate chips, but if you have a baking bar, chopping it yourself often melts more smoothly and provides a richer taste. Milk chocolate can be used for a sweeter, milder fudge, but adjust the sugar content if you do.
- Unsweetened Cocoa Powder: This really amps up the chocolate intensity and gives the fudge a lovely depth of flavor. Dutch-processed cocoa powder will give you a darker, smoother-tasting fudge, while natural cocoa powder will result in a slightly fruitier, more intense chocolate flavor. Either works!
- Granulated Sugar & Brown Sugar: A combination works wonders. Granulated sugar provides sweetness, while brown sugar adds a subtle molasses note and helps keep the fudge moist and chewy.
- Heavy Cream or Whole Milk: For that creamy, rich fudge texture. Heavy cream makes a more decadent filling, but whole milk can be used for a slightly lighter version without sacrificing too much richness. For a dairy-free alternative, full-fat coconut milk or a rich oat milk can be substituted.
- Unsalted Butter: Again, for richness and to help the fudge set up nicely.
- Vanilla Extract: A classic pairing with chocolate. Good quality pure vanilla extract really makes the chocolate sing.
- Salt: Essential for balancing the sweetness and enhancing the chocolate flavor.
For the Chocolate Glaze:
- Powdered Sugar (Confectioners’ Sugar): For a smooth, lump-free glaze.
- Unsweetened Cocoa Powder: To give us that lovely chocolatey top.
- Milk or Cream: Just a touch to achieve the right consistency. Start with a small amount and add more as needed. Again, dairy-free milk works perfectly here too.
- Vanilla Extract: A little more vanilla never hurt anyone!
- Sprinkles: Totally optional, but highly encouraged for that authentic Pop Tart look and extra fun factor!
Step-by-Step Instructions
Making these Chocolate Fudge Pop Tarts from scratch is a rewarding process, and I promise, each step is totally manageable. Let’s get baking!
1. Make the Pastry Dough:
- In a large bowl, or the bowl of a food processor, combine 2 ½ cups of all-purpose flour, ¼ cup granulated sugar, and 1 teaspoon of salt. If using a food processor, pulse a few times to combine.
- Add 1 cup (2 sticks) of very cold unsalted butter, cut into ½-inch cubes, to the dry ingredients. If using a food processor, pulse until the butter is the size of small peas. If mixing by hand, use a pastry blender or your fingertips to cut the butter into the flour mixture until crumbly, with some pea-sized pieces of butter remaining.
- Gradually add 6-8 tablespoons of ice water, one tablespoon at a time, mixing until the dough just comes together. Be careful not to overmix! The dough should be shaggy but hold together when squeezed.
- Divide the dough in half, flatten each half into a disc, wrap tightly in plastic wrap, and refrigerate for at least 30 minutes, or up to 2 days. This chilling step is crucial for flaky pastry.
2. Prepare the Chocolate Fudge Filling:
- In a medium saucepan, combine 1 cup chocolate chips (or chopped chocolate), ½ cup unsweetened cocoa powder, ½ cup granulated sugar, ¼ cup packed brown sugar, ½ cup heavy cream, 2 tablespoons unsalted butter, and ¼ teaspoon salt.
- Heat the mixture over medium-low heat, stirring constantly, until the butter is melted and the chocolate is smooth and fully combined. Bring it to a gentle simmer for 1-2 minutes, stirring to prevent scorching.
- Remove from heat and stir in 1 teaspoon vanilla extract. The fudge should be thick but spreadable. Let it cool for at least 15-20 minutes to allow it to thicken further before filling the tarts. It should not be hot when you use it.
3. Assemble the Pop Tarts:
- Preheat your oven to 375°F (190°C) and line two baking sheets with parchment paper.
- On a lightly floured surface, roll out one disc of chilled dough into a large rectangle, about ⅛-inch thick (roughly 10×14 inches).
- Using a sharp knife or a pizza cutter, trim the edges to create a neat rectangle, then cut the dough into 8 smaller rectangles (each approximately 3.5 x 4.5 inches). Repeat with the second disc of dough, yielding another 8 rectangles. You’ll have 16 rectangles in total.
- Spoon about 1 ½ to 2 tablespoons of the cooled chocolate fudge filling onto the center of 8 of the dough rectangles, leaving a ½-inch border around the edges. Don’t overfill, or they’ll burst!
- Lightly brush the edges of the filled rectangles with a little water. Place the remaining 8 dough rectangles on top of the filled ones.
- Press firmly around the edges to seal, then use a fork to crimp all around the edges, securing the filling inside and creating that classic Pop Tart look.
- Carefully transfer the assembled pop tarts to the prepared baking sheets. Using a fork or skewer, prick the tops of each pop tart 3-4 times. This allows steam to escape and prevents puffing.
4. Bake the Pop Tarts:
- Bake for 15-20 minutes, or until the pastry is golden brown and cooked through.
- Once baked, transfer the pop tarts to a wire rack to cool completely before glazing. This is important to prevent the glaze from melting.
5. Prepare the Chocolate Glaze:
- While the pop tarts cool, whisk together 1 ½ cups powdered sugar, ⅓ cup unsweetened cocoa powder, 2-3 tablespoons milk (or cream), and ½ teaspoon vanilla extract in a small bowl until smooth and of a spreadable consistency. If it’s too thick, add more milk a tiny bit at a time; if too thin, add more powdered sugar.
- Once the pop tarts are completely cool, spread a generous layer of chocolate glaze over the top of each one.
- If desired, immediately scatter some colorful sprinkles over the wet glaze. Let the glaze set for about 15-20 minutes before serving or storing.
Tips & Suggestions
Making homemade Chocolate Fudge Pop Tarts is incredibly rewarding, and a few little tricks can make all the difference. Here are my favorite tips for getting them just right:
- Keep Your Dough Cold: I can’t stress this enough! Cold butter means flaky pastry. If your kitchen is warm, or you’re a slow worker like me, pop the dough back into the fridge for 10-15 minutes if it starts to get too soft while rolling or assembling. Even chilling your flour and tools before starting can help!
- Don’t Overfill: It’s tempting to load them up with that delicious chocolate fudge, but overfilling is the number one cause of leaky pop tarts. Stick to the recommended 1 ½ to 2 tablespoons, and make sure to leave that crucial ½-inch border for sealing.
- Seal Them Well: Take your time pressing the edges together, and use that fork to crimp firmly. A good seal prevents the filling from bubbling out during baking. A little water on the edges helps the two pieces of dough stick together better.
- Prick, Prick, Prick: Those fork holes on top aren’t just for looks; they’re essential vents. They allow steam to escape from the filling and prevent your pop tarts from puffing up like balloons and potentially bursting.
- Cool Completely Before Glazing: Patience is a virtue here! If you glaze hot pop tarts, the glaze will melt and run right off, leaving you with a sticky mess rather than a beautiful, set frosting.
- Get Creative with Fillings: While we’re all about chocolate fudge here, don’t be afraid to experiment! A dollop of peanut butter could go into the fudge for a chocolate-peanut butter pop tart, or a tiny sprinkle of sea salt on top of the fudge before baking can really enhance the flavor. A tiny amount of espresso powder in the fudge can also deepen the chocolate flavor beautifully.
- Uniformity for Even Baking: Try to make your pop tarts as similar in size and thickness as possible. This ensures they bake evenly and look consistently great.
- Make Ahead Dough: The pastry dough can be made a day or two in advance and stored in the fridge, or even frozen for up to a month. Just thaw it in the fridge overnight before rolling. This breaks up the work and makes for a less stressful baking day!
- Re-Roll Scraps Smartly: If you re-roll your dough scraps, combine them gently rather than kneading. Overworking the dough can make it tough. The re-rolled dough might not be quite as flaky, but it’s still delicious!
Storage
So, you’ve made these incredible Chocolate Fudge Pop Tarts, and now you need to know how to keep them fresh? I’ve got you covered!
- Room Temperature: Once the chocolate glaze has fully set (this usually takes about 15-20 minutes), you can store your homemade pop tarts in an airtight container at room temperature for up to 3 days. Layer them gently between sheets of parchment paper if you’re stacking them, to prevent sticking and keep the glaze intact.
- Refrigeration: If you want them to last a bit longer, or if your kitchen is particularly warm, you can store them in an airtight container in the refrigerator for up to 5-7 days. The pastry might firm up slightly in the fridge, but they’re still delicious.
- Freezing (Baked & Glazed): Yes, you can freeze fully baked and glazed pop tarts! Once the glaze is completely firm, flash freeze them on a baking sheet until solid (about 1-2 hours). Then, transfer them to a freezer-safe airtight container or bag, again, layering with parchment paper. They’ll keep well for up to 1-2 months. Thaw at room temperature or warm gently.
- Freezing (Baked & Unglazed): If you prefer to glaze them fresh, you can freeze the baked, unglazed pop tarts. Wrap them individually in plastic wrap, then store them in a freezer-safe bag or container for up to 2 months. Thaw at room temperature, then glaze and serve.
- Reheating: For that warm, fresh-baked experience, gently reheat your pop tarts.
- Oven: Place them on a baking sheet and warm in a 300°F (150°C) oven for about 5-10 minutes, or until just warm through. Be careful not to overheat if they are glazed, as the glaze can get sticky.
- Toaster Oven: My preferred method! Use a low setting and toast for 1-3 minutes until warm. Watch them closely to prevent burning.
- Microwave: This will soften the pastry but is the quickest option. Microwave for 10-15 seconds.
Final Thoughts
So there you have it – my incredible recipe for homemade Chocolate Fudge Pop Tarts! I truly believe this is a culinary adventure you absolutely must embark on. Forget any preconceived notions from the boxed versions; nothing, and I mean nothing, compares to the warm, gooey, intensely chocolatey bliss of a freshly baked Chocolate Fudge Pop Tart. The perfect balance of crisp pastry and that luscious, rich fudge filling makes for an unforgettable treat. Whether it’s a special breakfast, an afternoon pick-me-up, or a delightful dessert, these Chocolate Fudge Pop Tarts are guaranteed to bring a smile to your face. Seriously, give them a try; you won’t regret experiencing this level of chocolatey perfection!

Decadent Chocolate Fudge Pop Tarts: Easy Homemade Recipe
- Total Time: 50 minutes
- Yield: 16 pop tarts 1x
Description
Indulge in the rich, gooey goodness of homemade Chocolate Fudge Pop Tarts that elevate your breakfast experience. These delightful pastries feature a buttery, flaky crust filled with a luscious chocolate fudge and topped with a smooth chocolate glaze.
Ingredients
- 2 ½ cups all-purpose flour
- ¼ cup granulated sugar
- 1 teaspoon salt
- 1 cup (2 sticks) unsalted butter, very cold, cut into ½-inch cubes
- 6–8 tablespoons ice water
- 1 cup chocolate chips or chopped chocolate
- ½ cup unsweetened cocoa powder
- ½ cup granulated sugar
- ¼ cup packed brown sugar
- ½ cup heavy cream or whole milk
- 2 tablespoons unsalted butter
- ¼ teaspoon salt
- 1 teaspoon vanilla extract
- 1 ½ cups powdered sugar (confectioners' sugar)
- ⅓ cup unsweetened cocoa powder
- 2–3 tablespoons milk or cream
- ½ teaspoon vanilla extract
- Sprinkles (optional)
Instructions
- In a large bowl, or the bowl of a food processor, combine 2 ½ cups of all-purpose flour, ¼ cup granulated sugar, and 1 teaspoon of salt. If using a food processor, pulse a few times to combine.
- Add 1 cup (2 sticks) of very cold unsalted butter, cut into ½-inch cubes, to the dry ingredients. If using a food processor, pulse until the butter is the size of small peas. If mixing by hand, use a pastry blender or your fingertips to cut the butter into the flour mixture until crumbly, with some pea-sized pieces of butter remaining.
- Gradually add 6-8 tablespoons of ice water, one tablespoon at a time, mixing until the dough just comes together. Be careful not to overmix! The dough should be shaggy but hold together when squeezed.
- Divide the dough in half, flatten each half into a disc, wrap tightly in plastic wrap, and refrigerate for at least 30 minutes, or up to 2 days.
- In a medium saucepan, combine 1 cup chocolate chips (or chopped chocolate), ½ cup unsweetened cocoa powder, ½ cup granulated sugar, ¼ cup packed brown sugar, ½ cup heavy cream, 2 tablespoons unsalted butter, and ¼ teaspoon salt.
- Heat the mixture over medium-low heat, stirring constantly, until the butter is melted and the chocolate is smooth and fully combined. Bring it to a gentle simmer for 1-2 minutes, stirring to prevent scorching.
- Remove from heat and stir in 1 teaspoon vanilla extract. Let it cool for at least 15-20 minutes to allow it to thicken further before filling the tarts.
- Preheat your oven to 375°F (190°C) and line two baking sheets with parchment paper.
- On a lightly floured surface, roll out one disc of chilled dough into a large rectangle, about ⅛-inch thick (roughly 10×14 inches).
- Using a sharp knife or a pizza cutter, trim the edges to create a neat rectangle, then cut the dough into 8 smaller rectangles (each approximately 3.5 x 4.5 inches). Repeat with the second disc of dough, yielding another 8 rectangles.
- Spoon about 1 ½ to 2 tablespoons of the cooled chocolate fudge filling onto the center of 8 of the dough rectangles, leaving a ½-inch border around the edges.
- Lightly brush the edges of the filled rectangles with a little water. Place the remaining 8 dough rectangles on top of the filled ones.
- Press firmly around the edges to seal, then use a fork to crimp all around the edges.
- Carefully transfer the assembled pop tarts to the prepared baking sheets. Using a fork or skewer, prick the tops of each pop tart 3-4 times.
- Bake for 15-20 minutes, or until the pastry is golden brown and cooked through.
- Once baked, transfer the pop tarts to a wire rack to cool completely before glazing.
- While the pop tarts cool, whisk together 1 ½ cups powdered sugar, ⅓ cup unsweetened cocoa powder, 2-3 tablespoons milk (or cream), and ½ teaspoon vanilla extract in a small bowl until smooth.
- Once the pop tarts are completely cool, spread a generous layer of chocolate glaze over the top of each one.
- If desired, immediately scatter some colorful sprinkles over the wet glaze. Let the glaze set for about 15-20 minutes before serving or storing.
- Prep Time: 30 mins
- Cook Time: 20 mins
- Category: Dessert
- Method: Baking
- Cuisine: American
Nutrition
- Serving Size: 1 pop tart
- Calories: 250
- Sugar: 15 g
- Sodium: 150 mg
- Fat: 12 g
- Saturated Fat: 7 g
- Unsaturated Fat: 3 g
- Trans Fat: 0 g
- Carbohydrates: 32 g
- Fiber: 1 g
- Protein: 3 g
- Cholesterol: 30 mg
Keywords: Keep your dough cold for a flaky pastry. Don't overfill the tarts to prevent leaks, and ensure they cool completely before glazing.
Leave a Comment