
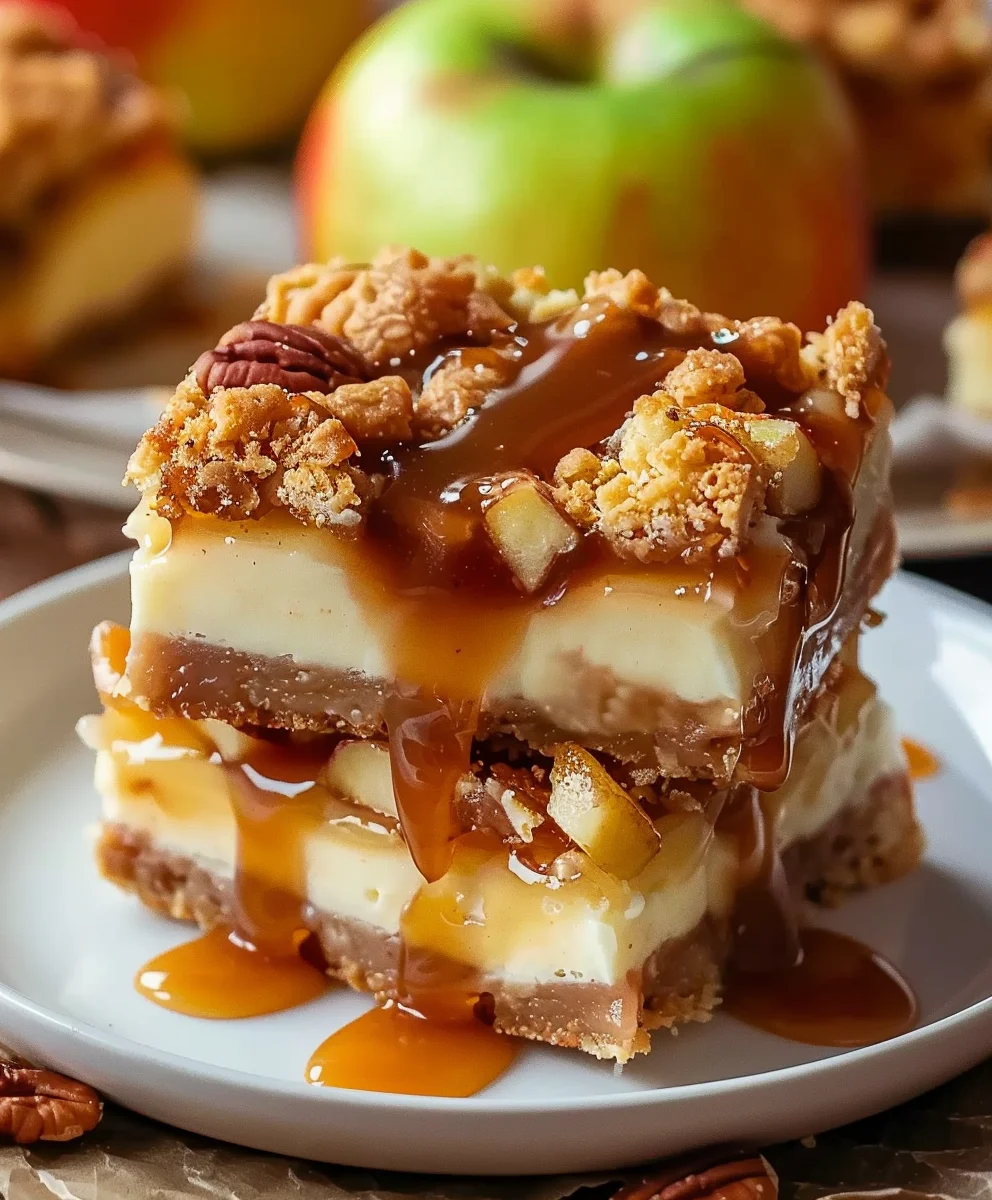
Caramel Apple Cheesecake Bars are more than just a dessert; they are a delightful celebration of autumn’s bounty, encapsulating the very essence of crisp days and cozy evenings. Imagine sinking your teeth into a treat where the nostalgic charm of a caramel apple meets the sophisticated indulgence of a rich, creamy cheesecake. This isn’t just any fall dessert; it’s a harmonious blend of textures and flavors that will undoubtedly become a new favorite in your recipe repertoire.
While the classic caramel apple evokes childhood memories of bustling fall fairs and Halloween festivities, and cheesecake boasts a history stretching back to ancient Greece, our beloved Caramel Apple Cheesecake Bars bring these two iconic concepts together in a remarkably convenient and utterly irresistible form. People adore this dish not only for its incredible taste – the perfect balance of sweet, gooey caramel, tender, tart apples, and a silky smooth cream cheese filling – but also for its delightful textural contrasts. The buttery, graham cracker crust provides a satisfying crunch, complementing the luscious cheesecake layer and the soft apple chunks, all crowned with that glorious caramel drizzle. These bars are incredibly versatile, perfect for potlucks, family gatherings, or simply a cozy evening at home, offering all the joy of a homemade pie with the elegance of a specialty dessert. I am confident you’ll find them as enchanting as I do!

Ingredients:
-
For the Graham Cracker Crust:
- 1 ½ cups (about 12-14 full sheets) finely crushed graham cracker crumbs
- ¼ cup granulated sugar
- ½ teaspoon ground cinnamon (optional, but it adds a lovely warmth!)
- 6 tablespoons (¾ stick) unsalted butter, melted
- Pinch of salt
-
For the Cheesecake Filling:
- 24 ounces (three 8-ounce packages) full-fat cream cheese, softened to room temperature
- ¾ cup granulated sugar
- 1 teaspoon pure vanilla extract
- 2 large eggs, at room temperature
- ¼ cup sour cream, at room temperature
- 1 tablespoon fresh lemon juice (optional, for brightness)
-
For the Caramel Apple Topping:
- 3 medium apples (I love using Honeycrisp or Granny Smith for a nice tart-sweet balance and firm texture), peeled, cored, and diced into ½-inch pieces
- 2 tablespoons unsalted butter
- ¼ cup light brown sugar, packed
- ½ teaspoon ground cinnamon
- ¼ teaspoon ground nutmeg (optional, but highly recommended!)
- Pinch of salt
- 1 tablespoon fresh lemon juice
-
For the Caramel Drizzle:
- ½ cup good quality caramel sauce (store-bought or homemade), warmed slightly for drizzling
- Flaky sea salt (optional, for garnish)
Preparing the Crust
Let’s get started on these delicious Caramel Apple Cheesecake Bars! The first step to any great bar recipe is a fantastic foundation, and our graham cracker crust delivers just that. It’s buttery, slightly sweet, and provides the perfect base for our creamy cheesecake filling.
- First things first, preheat your oven to 350°F (175°C). While the oven is warming up, grab a 9×13-inch baking pan. I like to line mine with parchment paper or aluminum foil, leaving an overhang on the sides. This creates “handles” that make lifting the entire cheesecake out of the pan much easier later on, making for clean cuts and beautiful bars. A light spray with non-stick cooking spray on the foil or parchment is also a good idea.
- Next, prepare your graham cracker crumbs. You can achieve finely crushed crumbs in a few ways. My go-to is a food processor; it makes quick work of it. Just pulse the graham cracker sheets until they resemble fine sand. If you don’t have a food processor, place the crackers in a large zip-top bag, seal it, and crush them with a rolling pin or the bottom of a heavy pan until equally fine. We’re aiming for 1 ½ cups of crumbs.
- In a medium-sized bowl, combine the finely crushed graham cracker crumbs, ¼ cup of granulated sugar, and the optional but delightful ½ teaspoon of ground cinnamon, along with a tiny pinch of salt. Give these dry ingredients a good stir with a fork to ensure everything is evenly distributed.
- Now, it’s time for the butter. Melt your 6 tablespoons of unsalted butter. You can do this in the microwave in short bursts or in a small saucepan on the stove. Once melted, pour the butter directly into your graham cracker mixture. Stir everything together thoroughly until all the crumbs are moistened and resemble wet sand. This butter is what binds the crust together, so make sure every crumb gets coated!
- Transfer the moistened graham cracker mixture into your prepared 9×13-inch baking pan. Using the bottom of a measuring cup or a flat-bottomed glass, press the mixture down very firmly and evenly across the bottom of the pan. The key here is firm pressing – you want a compact crust that won’t fall apart when you slice the bars. Make sure it extends to the edges.
- Bake the crust in your preheated oven for about 8-10 minutes, or until it’s lightly golden brown and fragrant. This partial baking step, often called blind baking, helps to set the crust, making it less likely to get soggy once the cheesecake filling is added.
- Once baked, remove the crust from the oven and set it aside to cool completely while we prepare the cheesecake filling. It’s important for the crust to be cool to prevent the cheesecake filling from melting prematurely on contact.
Crafting the Creamy Cheesecake Filling
The star of our Caramel Apple Cheesecake Bars, beyond the luscious apple topping, is undoubtedly the rich, velvety cheesecake filling. Achieving that perfect, smooth texture requires a few crucial steps and a little patience. Pay close attention to ingredient temperatures – it makes all the difference!
- First and foremost, ensure all your cheesecake ingredients – the cream cheese, eggs, and sour cream – are at true room temperature. This is perhaps the most critical tip for a lump-free, perfectly smooth cheesecake filling. Cold cream cheese will inevitably result in lumps, no matter how much you beat it. I usually take these ingredients out of the fridge at least 1-2 hours before I plan to start baking.
- In a large mixing bowl, using an electric mixer (either a stand mixer with the paddle attachment or a hand mixer), beat the 24 ounces of softened cream cheese on medium speed for about 2-3 minutes. You want it to be incredibly smooth, light, and fluffy, with no lumps whatsoever. Scrape down the sides and bottom of the bowl frequently to ensure even mixing.
- Gradually add the ¾ cup of granulated sugar to the cream cheese, continuing to beat on medium speed. Mix for another 2-3 minutes until the sugar is fully incorporated and the mixture is even lighter and fluffier. Again, make sure to scrape the bowl well.
- Next, beat in the 1 teaspoon of pure vanilla extract and the optional 1 tablespoon of fresh lemon juice. The lemon juice isn’t just for flavor; it subtly brightens the cheesecake and helps balance the richness. Mix until just combined.
- Now, let’s incorporate the eggs. Add the 2 large eggs, one at a time, beating on low speed until each egg is just combined before adding the next. It’s very important not to overmix at this stage once the eggs are in! Overmixing introduces too much air, which can cause the cheesecake to puff up too much during baking and then crack as it cools. We’re aiming for just combined, not aeration.
- Finally, gently fold in the ¼ cup of room temperature sour cream. Use a spatula for this, incorporating it until just blended. Sour cream adds a lovely tang, moisture, and an incredibly smooth texture to our cheesecake.
- Once your cheesecake filling is silky smooth and lump-free, pour it evenly over your completely cooled graham cracker crust in the prepared baking pan. Gently tap the pan on the counter a couple of times to release any trapped air bubbles and ensure the top is level.
Preparing the Caramel Apple Topping
This is where the “apple” in our Caramel Apple Cheesecake Bars truly shines! The warm, spiced, and tender apple topping provides a wonderful textural and flavor contrast to the creamy cheesecake. Choosing the right apples is key – I love a firm apple that holds its shape well, like Honeycrisp or Granny Smith, for that perfect bite.
- Begin by preparing your apples. Peel, core, and then dice the 3 medium apples into ½-inch pieces. Try to keep the pieces roughly the same size so they cook evenly. As you dice them, transfer them to a bowl and toss them with 1 tablespoon of fresh lemon juice. This prevents them from browning and adds a touch of brightness.
- In a medium non-stick skillet or sauté pan, melt 2 tablespoons of unsalted butter over medium heat. Once the butter is melted and slightly foamy, add the diced apples to the pan.
- Sprinkle the apples with ¼ cup of packed light brown sugar, ½ teaspoon of ground cinnamon, the optional ¼ teaspoon of ground nutmeg, and a tiny pinch of salt. Stir well to coat all the apple pieces evenly with the spice mixture.
- Cook the apples, stirring occasionally, for about 8-12 minutes, or until they are tender when pierced with a fork but still hold their shape. We don’t want them to turn into applesauce; they should still have a slight bite and some structural integrity. The brown sugar and butter will create a beautiful, rich syrup around them. Taste an apple piece – if you like them a bit softer, cook for another minute or two.
- Once the apples are cooked to your desired tenderness, remove the skillet from the heat and allow the apple topping to cool slightly. It doesn’t need to be completely cold, but it shouldn’t be piping hot when you add it to the cheesecake. A lukewarm temperature is perfect.
Assembly and Baking the Caramel Apple Cheesecake Bars
Now comes the magical part – bringing all these wonderful components together to create our show-stopping Caramel Apple Cheesecake Bars! The baking process for cheesecake requires a little patience and attention to detail to achieve that signature smooth, uncracked top.
- Once your apple topping has cooled slightly, carefully spoon it evenly over the prepared cheesecake filling in the pan. Distribute the apple pieces and any delicious syrupy sauce over the entire surface of the cheesecake.
- Gently place your baking pan into your preheated 350°F (175°C) oven. We’re going to start at a slightly higher temperature to give the cheesecake a good initial set, then reduce it.
- Bake for 15 minutes at 350°F (175°C).
- After 15 minutes, reduce the oven temperature to 325°F (160°C) WITHOUT opening the oven door. Continue to bake for an additional 35-45 minutes.
- How to tell if your cheesecake is done? The edges should appear set and slightly puffed, but the very center (an area of about 2-3 inches in diameter) should still have a slight JIGGLE when you gently nudge the pan. If there’s no jiggle at all, it’s likely overcooked. If the whole thing is still liquidy, it needs more time.
- Once you’ve reached the perfect jiggle, turn off the oven but leave the cheesecake inside with the oven door propped open a few inches (a wooden spoon works perfectly for this). This gradual cooling in the oven prevents drastic temperature changes that can lead to cracking. Let it sit in the cooling oven for at least 1 hour.
- After the hour in the oven, remove the pan and place it on a wire rack to cool completely at room temperature for another 1-2 hours. This slow cooling process is crucial for preventing cracks and achieving that smooth, creamy texture.
- Once cooled to room temperature, cover the pan tightly with plastic wrap and transfer it to the refrigerator. These bars need to chill for a minimum of 4 hours, but preferably overnight. Chilling is non-negotiable for cheesecake bars; it allows them to firm up properly, makes them much easier to slice cleanly, and vastly improves their texture and flavor.
Caramel Drizzle and Finishing Touches
The final flourish for our Caramel Apple Cheesecake Bars is the irresistible caramel drizzle. This adds another layer of flavor and makes these bars look absolutely gorgeous and bakery-worthy. It’s the perfect sweet and gooey complement to the spiced apples and rich cheesecake.
- Once your Caramel Apple Cheesecake Bars are thoroughly chilled (after at least 4 hours in the refrigerator, or ideally overnight), it’s time to prepare them for serving.
- Carefully lift the entire cheesecake out of the baking pan using the parchment paper or foil overhangs that you thoughtfully left as “handles.” Place the cheesecake block onto a cutting board.
- Using a sharp, clean knife, slice the cheesecake into individual bars. I usually go for 3 cuts lengthwise and 4 cuts crosswise to yield 12-15 generous bars, but you can adjust the size to your preference. For the cleanest cuts, wipe your knife clean with a damp cloth after each slice. This prevents the cheesecake from dragging and tearing.
- Now for the caramel! Take your ½ cup of good quality caramel sauce. If it’s too thick, warm it gently in the microwave in a microwave-safe bowl for about 15-30 seconds, stirring until it’s pourable but not too hot or runny. Alternatively, you can warm it in a small saucepan over very low heat.
- Arrange your cut bars on a serving platter or individual plates. Using a spoon or a squeeze bottle, generously drizzle the warm caramel sauce over the top of each bar. Don’t be shy here – the caramel is a key component of these delightful treats!
- For an extra touch of gourmet sophistication and to beautifully balance the sweetness, sprinkle a tiny pinch of flaky sea salt over the caramel drizzle on each bar. This is optional, but I highly recommend it; the salt truly enhances the caramel flavor.
- Serve your glorious Caramel Apple Cheesecake Bars immediately, or store them in an airtight container in the refrigerator for up to 3-4 days. While they are best enjoyed within the first two days, their flavors deepen beautifully over time. Enjoy every single mouthwatering bite!
Conclusion:
I truly believe that if there’s one dessert recipe you absolutely must add to your baking repertoire this season, it’s these incredible Caramel Apple Cheesecake Bars. They are more than just a sweet treat; they’re a harmonious blend of everything wonderful about autumn baking and rich, creamy indulgence. Imagine the crisp sweetness of fresh apples, softened and infused with warm spices, nestled over a velvety, tangy cheesecake filling, all resting on a sturdy, buttery graham cracker crust. And then, as if that weren’t enough, it’s all crowned with a luscious swirl of golden caramel. It’s a dessert that speaks of comfort, celebration, and pure joy, making it utterly irresistible. The complexity of flavors, from the tartness of the apples to the richness of the cheesecake and the sticky sweetness of the caramel, creates an unforgettable experience with every single bite. These bars truly encapsulate the essence of fall in a delightfully decadent package that’s both impressive to serve and surprisingly straightforward to prepare. They strike that perfect balance between homely comfort food and sophisticated dessert, ensuring they’ll be a hit at any gathering, or even just for a quiet evening treat for yourself. Trust me, once you taste that first bite, you’ll understand why I’m so enthusiastic about them.
Serving Suggestions & Creative Variations:
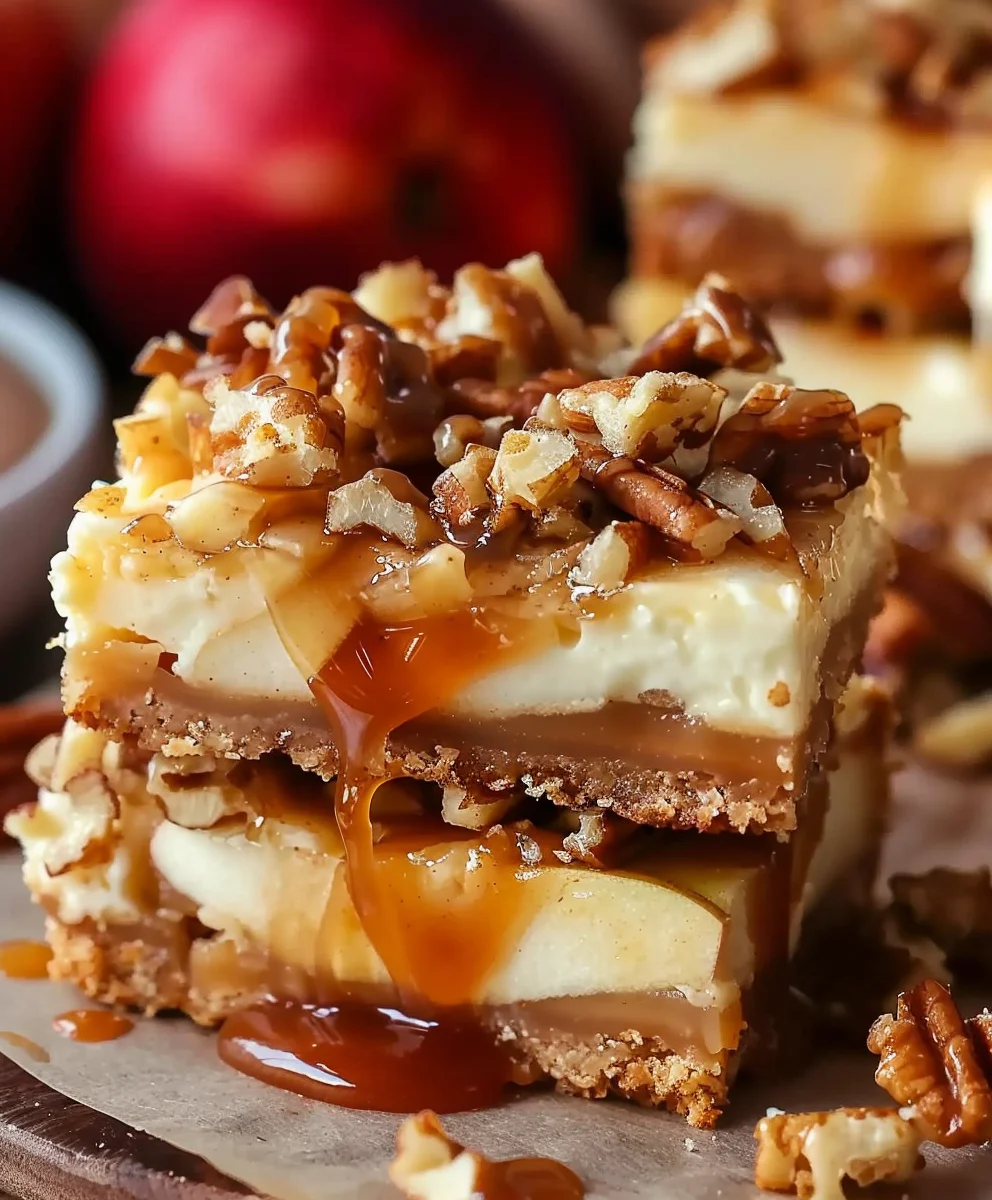
Now, let’s talk about how to enjoy these masterpieces and make them truly your own. While these bars are absolutely perfect straight from the pan, perhaps slightly warmed, I love to serve them with a scoop of premium vanilla bean ice cream. The cold, creamy ice cream melting into the warm, spiced apple and cheesecake layers is pure bliss, adding another dimension of texture and temperature. A generous dollop of freshly whipped cream, perhaps infused with a hint of cinnamon or maple syrup, also elevates the experience beautifully, offering a light, airy contrast to the rich bar. For an adult twist, a drizzle of bourbon caramel sauce instead of regular caramel can add an extra layer of sophistication and warmth. Don’t be afraid to experiment! If you’re feeling adventurous, try swapping out a quarter of the graham cracker crumbs for crushed Biscoff cookies in the crust for a ginger-spiced variation that brings a lovely, unexpected warmth. You could also sprinkle a handful of chopped pecans or walnuts over the caramel swirl before baking for added texture and a nutty complement that pairs wonderfully with the apples and caramel. For an extra touch of autumnal flair, a pinch of allspice or ground cloves can be added to the apple mixture alongside the cinnamon, deepening those warm, comforting flavors. Consider trying different apple varieties too – while Granny Smiths offer a lovely tart counterpoint, a mix of Honeycrisp and Fuji could bring more sweetness and a slightly different texture to the apple layer, catering to different palates.
My friends, I genuinely hope you’re feeling inspired to roll up your sleeves and bring these delightful bars to life in your own kitchen. There’s a unique satisfaction that comes from baking something so visually appealing and incredibly delicious from scratch, especially when you know it’s going to bring smiles to faces. Whether you’re making them for a special gathering, a holiday feast, or simply to treat yourself to a moment of pure indulgence, these Caramel Apple Cheesecake Bars are guaranteed to be a showstopper. Don’t hesitate to dive in; the process is incredibly rewarding, and the results are truly spectacular. Once you’ve baked your batch, please, please come back and share your experience with me! I’m always thrilled to hear how my recipes turn out for you. Did you add any unique twists? What did your family and friends think? Snap a photo and share it – I love seeing your culinary creations and hearing about your successes. Your feedback, your stories, and your clever adaptations inspire not just me, but our entire community of fellow bakers, and help others find new ways to enjoy their treats. So go ahead, embrace the joy of baking, and get ready to fall in love with these utterly divine bars. Happy baking, everyone!
Caramel Apple Cheesecake Bars
A delightful celebration of autumn, these Caramel Apple Cheesecake Bars combine the nostalgic charm of a caramel apple with the sophisticated indulgence of a rich, creamy cheesecake. Featuring a buttery graham cracker crust, a silky smooth cream cheese filling, and tender spiced apple topping, these bars offer a harmonious blend of textures and flavors, perfect for any fall gathering.
Ingredients
-
2 cups graham cracker crumbs
-
½ cup unsalted butter, melted
-
¼ cup granulated sugar
-
¼ tsp cinnamon
-
16 oz cream cheese, softened
-
½ cup granulated sugar
-
2 large eggs
-
1 tsp vanilla extract
-
3 medium Granny Smith apples, peeled and diced
-
2 tbsp lemon juice
-
¼ cup brown sugar
-
1 tsp cinnamon
-
¼ tsp nutmeg
-
½ cup all-purpose flour
-
¼ cup brown sugar
Instructions
-
Step 1
Preheat oven to 350°F (175°C). Line a 9×13-inch pan with parchment paper. In a medium bowl, combine graham cracker crumbs, ¼ cup granulated sugar, ¼ tsp cinnamon. Stir in ½ cup melted unsalted butter until moistened. Press firmly into the prepared pan. Bake for 8-10 minutes, then cool completely. -
Step 2
Ensure cream cheese, eggs, and vanilla extract are at room temperature. In a large bowl, beat 16 oz softened cream cheese on medium speed until smooth (2-3 minutes). Gradually add ½ cup granulated sugar, beating until light and fluffy (2-3 minutes). Beat in 1 tsp vanilla extract. Add 2 large eggs one at a time, beating on low speed until just combined after each. Pour filling over the cooled crust and gently tap the pan to level. -
Step 3
Toss 3 medium diced Granny Smith apples with 2 tbsp lemon juice to prevent browning. In a medium skillet, melt 2 tbsp unsalted butter over medium heat. Add apples, ¼ cup brown sugar, 1 tsp cinnamon, and ¼ tsp nutmeg. Cook, stirring occasionally, for 8-12 minutes, or until apples are tender but still hold their shape. Cool slightly. -
Step 4
Spoon the slightly cooled apple topping evenly over the cheesecake filling. Bake at 350°F (175°C) for 15 minutes. Reduce oven temperature to 325°F (160°C) without opening the door, and bake for an additional 35-45 minutes, or until edges are set and the center slightly jiggles. Turn off the oven, prop the door open, and cool in the oven for 1 hour. -
Step 5
Remove from oven and cool completely at room temperature for 1-2 hours. Cover tightly with plastic wrap and refrigerate for a minimum of 4 hours, preferably overnight, for proper setting and clean slicing. -
Step 6
Lift the cheesecake from the pan using the parchment overhangs. Place on a cutting board and slice into 12-15 bars using a sharp, clean knife, wiping it after each cut. Serve chilled.
Important Information
Nutrition Facts (Per Serving)
It is important to consider this information as approximate and not to use it as definitive health advice.
Allergy Information
Please check ingredients for potential allergens and consult a health professional if in doubt.
Leave a Comment