
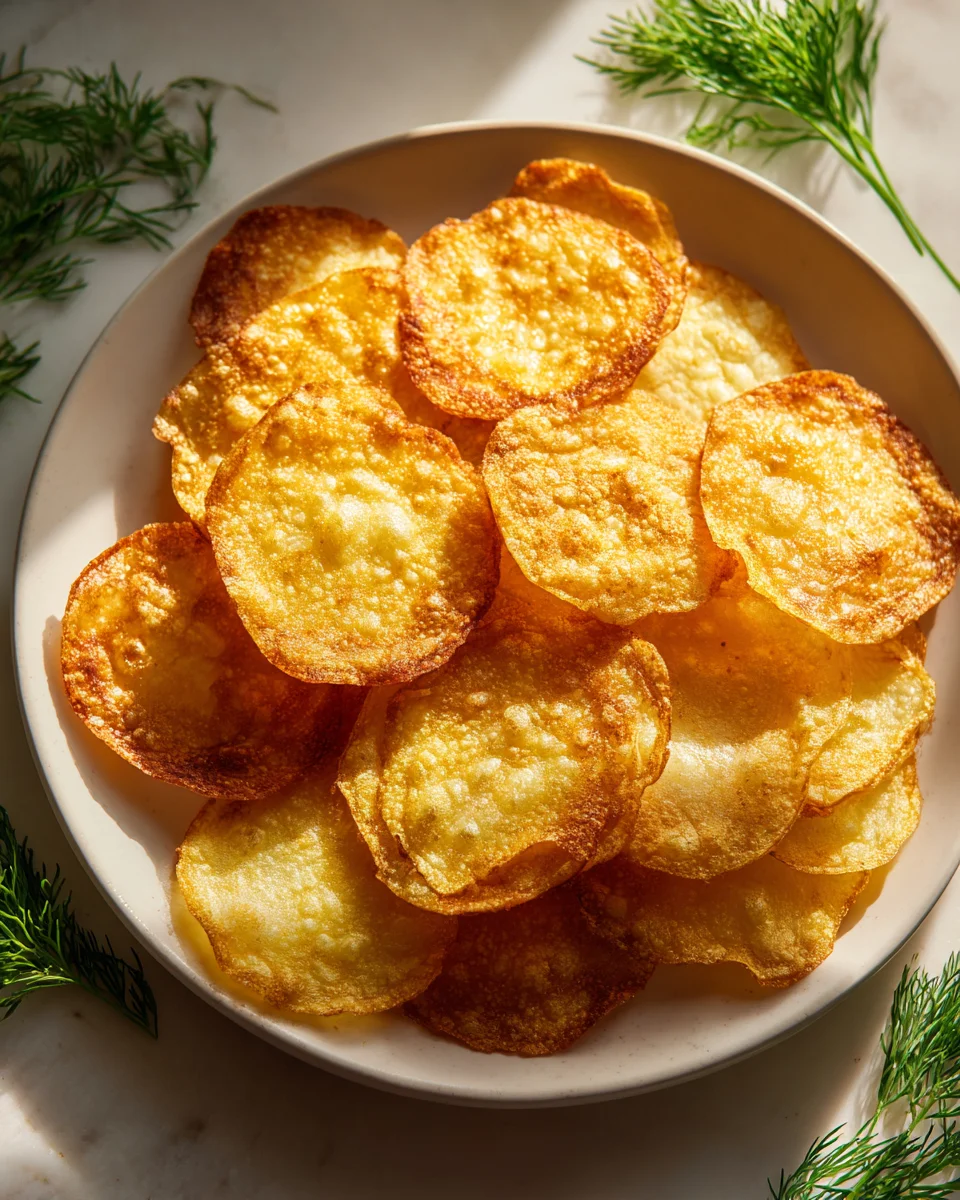
Cottage Cheese Chips
Hello fellow snack lovers! If you’re anything like me, you’re always on the hunt for that perfect crunchy bite, something satisfying and full of flavor, but maybe a little bit healthier than your average bag of chips. Well, get ready to have your mind blown, because I’m about to introduce you to a snack that checks all those boxes and more: Cottage Cheese Chips!
Now, I know what you might be thinking – cottage cheese? Chips? Trust me on this one. What makes this recipe so incredibly special is its sheer ingenuity. We’re taking that humble, creamy curd and transforming it into something gloriously crisp, savory, and utterly addictive. It’s a low-carb, high-protein marvel that will completely revolutionize your snacking game. You’ll be amazed at how such a simple ingredient can yield such a satisfying crunch.
You are absolutely going to love these because they deliver that irresistible crunch we all crave, without any of the guilt. Imagine thin, golden crisps, perfectly seasoned, that are fantastic on their own or robust enough to stand up to your favorite dip. They’re unbelievably easy to whip up with just a few ingredients, mostly just cottage cheese and your chosen spices, baked or air-fried until they reach peak crispiness. Forget about boring diet snacks; these Cottage Cheese Chips are a game-changer for anyone looking for a smart, delicious way to satisfy their munchies. Get ready to fall in love with your new favorite go-to snack!

Ingredient Notes
Creating crispy, satisfying cottage cheese chips might sound like a magic trick, but with the right foundational ingredients and a little know-how, it’s incredibly achievable. The key here isn’t just to mix and bake; it’s about understanding how each component contributes to that coveted chip texture and flavor. Let’s dive into what you’ll need to make these crunchy delights.
Cottage Cheese – The Star of Our Show
- Full-Fat Cottage Cheese: This is my absolute top recommendation for the best results. The higher fat content lends itself beautifully to crisping up in the oven, giving you a more substantial and satisfying chip. While lower-fat versions can work, they often require a bit more attention to prevent them from becoming brittle or rubbery. If you opt for reduced-fat, be prepared for a slightly different texture and perhaps a need to bake a little longer at a lower temperature to properly dehydrate.
- Curd Size: I typically use small-curd cottage cheese because it’s easier to spread thinly and evenly, which is crucial for chip formation. Large-curd varieties work too, but you might need to gently mash them a bit before mixing to ensure a smooth, spreadable consistency. The most critical factor, regardless of fat content or curd size, is drainage. More on that in the instructions!
Seasonings – Your Flavor Canvas
This is where you can truly personalize your cottage cheese chips. The basic combination I love provides a savory, umami-rich base, but feel free to experiment!
- Salt: Essential for bringing out all the flavors. I usually start with a generous pinch and adjust after tasting the mixture.
- Black Pepper: Freshly ground is always best for that little kick and aromatic warmth.
- Garlic Powder & Onion Powder: These two are non-negotiable in my chip recipes. They provide a foundational savory depth that mimics many store-bought chips and pairs wonderfully with the subtle tang of cottage cheese.
- Smoked Paprika: A personal favorite! It adds a beautiful smoky flavor and a lovely reddish hue to your chips, making them look and taste even more inviting. Regular sweet paprika works well too for just color.
- Optional Flavor Boosters:
- Nutritional Yeast: If you’re looking for an extra “cheesy” flavor without adding more actual cheese, nutritional yeast is fantastic. It also adds a slight boost of protein and vitamins.
- Chili Powder or Cayenne Pepper: For those who love a bit of heat, a pinch of either can transform these into spicy cottage cheese chips.
- Dried Herbs: Oregano, thyme, or even a blend like Italian seasoning can add an aromatic, herbaceous note.
Binder – For That Extra Crisp and Stability
While cottage cheese itself has some binding properties, a little extra help can go a long way in ensuring your chips hold their shape and achieve maximum crispiness.
- Cornstarch or All-Purpose Flour: A small amount (about a tablespoon for a cup of cottage cheese) helps to absorb any residual moisture and creates a more stable, crisp texture. It acts as a structural enhancer, preventing the chips from crumbling too easily once baked. I find cornstarch gives a slightly crisper finish, but flour is a perfectly good substitute.
Oil or Non-Stick Spray
You’ll need a little something to prepare your baking sheet.
- Cooking Spray or a Thin Layer of Oil: Crucial for ensuring your chips don’t stick to the parchment paper or baking sheet. I usually use avocado oil spray or a light brushing of olive oil.
Step-by-Step Instructions
Alright, let’s turn that humble tub of cottage cheese into a delightful stack of crispy chips! The process is straightforward, but attention to a few critical details will make all the difference between a sad, soggy mess and truly incredible chips. Patience, especially with the drying process, is your best friend here.
Step 1: Drain Your Cottage Cheese – This is CRITICAL!
This cannot be stressed enough: thoroughly draining your cottage cheese is the absolute most important step. Excess moisture will prevent your chips from crisping up and instead lead to a chewy, rubbery texture.
- Prepare for Drainage: Line a fine-mesh sieve with a few layers of cheesecloth or sturdy paper towels. Place the sieve over a bowl to catch the liquid.
- Add Cottage Cheese: Spoon your cottage cheese into the lined sieve.
- Press and Wait: Gently press down on the cottage cheese with the back of a spoon or another piece of cheesecloth to encourage liquid release. Then, let it sit in the refrigerator for at least 30 minutes, or even better, an hour or two. For optimal results, you can place a plate on top of the cottage cheese with a heavy can or two to apply constant pressure. You’ll be surprised how much whey drains out! The more moisture you remove now, the crisper your chips will be.
- Blot Dry: Once drained, transfer the cottage cheese to a bowl and gently blot any remaining surface moisture with paper towels. It should be quite firm and crumbly, not wet.
Step 2: Preheat Oven and Prepare Baking Sheets
- Preheat: Preheat your oven to 300°F (150°C). We’re going low and slow to dehydrate the cottage cheese first.
- Line Baking Sheets: Line two large baking sheets with parchment paper. This is essential for preventing sticking and making removal easy. Lightly spray or brush the parchment paper with a thin layer of cooking oil or non-stick spray, even if it’s “non-stick” parchment.
Step 3: Mix the Cottage Cheese & Seasonings
- Combine: In a medium bowl, combine your thoroughly drained cottage cheese with all your chosen seasonings (salt, pepper, garlic powder, onion powder, smoked paprika, and any optional additions like nutritional yeast or chili powder).
- Add Binder: Sprinkle in the cornstarch or all-purpose flour.
- Mix Well: Using a spoon or spatula, mix everything together until the seasonings are evenly distributed throughout the cottage cheese. It should form a thick, somewhat paste-like consistency that holds its shape.
Step 4: Form the Chips
This step requires a delicate touch and an emphasis on thinness and evenness.
- Dollop: Drop small, approximately half-teaspoon sized dollops of the seasoned cottage cheese mixture onto the prepared parchment paper, leaving about an inch of space between each one.
- Spread Thinly: Using the back of a spoon, a small offset spatula, or even your finger, gently spread each dollop into a very thin, almost translucent disc. Aim for about 1/16 to 1/8 of an inch thick. The thinner you spread them, the crispier they will become. Uneven thickness will lead to some parts being crispy and others chewy, so try your best for uniformity.
Step 5: Bake Low and Slow
- Initial Bake (Dehydration): Place the baking sheets in the preheated oven. Bake for 30-40 minutes at 300°F (150°C). At this stage, the chips should start to dry out and firm up around the edges. They might still be slightly soft in the middle.
- Increase Heat (Crisping): After the initial bake, increase the oven temperature to 350°F (175°C). Continue baking for another 15-25 minutes, or until the chips are golden brown and uniformly crispy. Keep a very close eye on them during this stage, as they can go from perfectly golden to burnt very quickly due to their thinness.
- Rotate if Needed: If your oven bakes unevenly, rotate the baking sheets halfway through the crisping stage for even browning.
- Cool: Once baked to your desired crispness, carefully remove the baking sheets from the oven. Let the cottage cheese chips cool completely on the baking sheets or transfer them to a wire rack. They will crisp up significantly more as they cool.
Tips & Suggestions
Making cottage cheese chips is a rewarding experience, but a few insider tips can elevate your batch from good to absolutely fantastic. Here are my go-to suggestions to ensure you get the best possible results every time.
- Double Down on Drainage: I cannot overstate this enough. If your cottage cheese isn’t sufficiently drained, your “chips” will be more like chewy, seasoned cottage cheese discs. For ultimate crispiness, consider draining it overnight in the fridge. This ensures almost all excess whey is removed, leaving you with a drier, more solid base that’s primed for crisping.
- Spread Them REALLY Thin: When forming your chips, think parchment-thin. The thinner you spread the mixture, the crispier your chips will be. If they’re too thick, they’ll likely remain chewy in the center, no matter how long you bake them. Aim for an almost translucent layer.
- Uniformity is Key: Try to spread your chips to a consistent thickness. This ensures they all bake evenly. If some are thick and some are thin, you’ll have a mix of perfectly crispy, slightly chewy, and potentially burnt chips in the same batch.
- The Low and Slow Method: Resist the urge to crank up the heat too high too soon. Starting at a lower temperature (300°F/150°C) allows the moisture to slowly evaporate and the chips to dry out without burning. The higher heat towards the end is just to achieve that final golden crisp.
- Watch Like a Hawk: Especially during the last 10-15 minutes of baking, stay close to your oven. These thin chips can go from perfectly golden to burnt in a matter of seconds. Different ovens vary, so your exact baking time might differ from mine.
- Flavor Variations Are Endless: Once you master the basic technique, unleash your creativity with seasonings!
- Spicy Nacho: Add extra chili powder, a pinch of cayenne, and a touch of cumin.
- Ranch Inspired: Mix in dried dill, chives, parsley, and a bit of garlic and onion powder (beyond the base).
- Italian Herb: Incorporate dried oregano, basil, and a sprinkle of Parmesan cheese (powdered works best).
- “Cheesy” Onion: Boost the onion powder and add a tablespoon or two of nutritional yeast for an extra savory, umami punch.
- Don’t Overcrowd the Pan: Give your chips space! Crowding the baking sheets can create steam, which is the enemy of crispiness. Bake in batches if necessary.
- Cool Completely on a Rack: As the chips cool, they will continue to crisp up. Allowing them to cool on a wire rack ensures air circulation all around, preventing any trapped moisture that could make them soggy.
- Serving Suggestions: These cottage cheese chips are fantastic on their own, but they also make an excellent vehicle for dips. Think fresh salsa, guacamole, a creamy Greek yogurt dip, or even a simple sour cream and chive blend. They’re also a great low-carb alternative to croutons for salads or a crunchy topping for soups.
Storage
You’ve put in the effort to make these deliciously crispy cottage cheese chips, so let’s make sure they stay that way for as long as possible! Proper storage is key to maintaining their texture and flavor.
- Cool Completely: This is the absolute first and most important step. Do not attempt to store your chips until they have cooled down to room temperature. Any residual warmth will create condensation inside your storage container, leading to soggy chips. I usually let them sit on the baking sheet or a wire rack for at least 30-60 minutes after baking.
- Airtight Container: Once fully cooled, transfer your cottage cheese chips to an airtight container. A plastic container with a tight-fitting lid or a glass jar works perfectly. The goal is to keep out any moisture from the air.
- Store at Room Temperature: Unlike fresh cottage cheese, these chips are essentially dehydrated and are best stored at room temperature in a dry pantry or cupboard. Refrigeration is not recommended as the humidity in a fridge can quickly make them lose their crispness.
- Avoid Humidity: Humidity is the nemesis of crispy foods. Ensure your storage area is dry. If you live in a particularly humid climate, you might consider adding a food-safe desiccant packet (like the ones found in jerky bags) to your container for extra protection, though it’s often not strictly necessary for short-term storage.
- Shelf Life: These cottage cheese chips are at their absolute best within the first 2-3 days of baking. While they can last up to 5 days if stored perfectly, you might notice a slight decrease in crispness over time.
- Re-crisping (If Needed): If your chips have lost a bit of their crunch, don’t despair! You can easily revive them. Spread them in a single layer on a baking sheet and pop them back into a preheated oven at 300°F (150°C) for 5-10 minutes, or until they’re crispy again. An air fryer also works wonderfully for this; a few minutes at 300-325°F (150-160°C) should do the trick. Let them cool completely after re-crisping to achieve maximum crunch.
Final Thoughts
And there you have it! My hope is that you’re now as excited as I am about these incredible Cottage Cheese Chips. They truly are a culinary revelation – crispy, savory, and surprisingly simple to whip up. Forget about your usual snack choices; these chips offer a delightful, satisfying crunch that’s perfect for any occasion. Whether you’re looking for a healthier alternative to traditional fried snacks, a unique appetizer, or just something deliciously different to dip into your favorite salsa, these Cottage Cheese Chips deliver on all fronts. I truly believe that once you try them, you’ll be completely hooked on their unique texture and fantastic flavor. Go on, give these a try; I promise you won’t regret discovering your new favorite snack!

Crispy Cottage Cheese Chips: Healthy, Delicious Snack!
- Total Time: 1 hour 15 minutes
- Yield: 4 servings 1x
Description
These Cottage Cheese Chips are a game-changing snack that delivers a satisfying crunch without the guilt. Perfectly seasoned and easy to make, they are a low-carb, high-protein alternative to traditional chips.
Ingredients
- 1 cup Full-Fat Cottage Cheese
- Salt
- Black Pepper
- Garlic Powder
- Onion Powder
- Smoked Paprika
- 1 tablespoon Cornstarch or All-Purpose Flour
- Cooking Spray or a Thin Layer of Oil
- Optional: Nutritional Yeast
- Optional: Chili Powder or Cayenne Pepper
- Optional: Dried Herbs (Oregano, Thyme, Italian seasoning)
Instructions
- Step 1: Drain Your Cottage Cheese – This is CRITICAL! Prepare for Drainage: Line a fine-mesh sieve with cheesecloth or paper towels over a bowl. Add Cottage Cheese: Spoon cottage cheese into the sieve. Press and Wait: Gently press down on the cottage cheese and let it sit in the refrigerator for at least 30 minutes. Blot Dry: Transfer to a bowl and blot any remaining moisture with paper towels.
- Step 2: Preheat Oven and Prepare Baking Sheets. Preheat: Set your oven to 300°F (150°C). Line Baking Sheets: Line two baking sheets with parchment paper and lightly spray or brush with oil.
- Step 3: Mix the Cottage Cheese & Seasonings. Combine: In a bowl, mix the drained cottage cheese with salt, pepper, garlic powder, onion powder, smoked paprika, and any optional additions. Add Binder: Sprinkle in cornstarch or flour. Mix Well: Stir until the mixture is thick and paste-like.
- Step 4: Form the Chips. Dollop: Drop half-teaspoon sized dollops onto the parchment, leaving space between each. Spread Thinly: Spread each dollop into a thin disc, about 1/16 to 1/8 of an inch thick.
- Step 5: Bake Low and Slow. Initial Bake: Bake for 30-40 minutes at 300°F (150°C). Increase Heat: Raise the temperature to 350°F (175°C) and bake for another 15-25 minutes until golden brown and crispy. Rotate if Needed: Rotate baking sheets if your oven bakes unevenly. Cool: Let the chips cool completely on the baking sheets or transfer to a wire rack.
- Prep Time: 15 mins
- Cook Time: 1 hour
- Category: Snack
- Method: Baking
- Cuisine: American
Nutrition
- Serving Size: 1 serving
- Calories: 120
- Sugar: 3 g
- Sodium: 200 mg
- Fat: 5 g
- Saturated Fat: 2 g
- Unsaturated Fat: 3 g
- Trans Fat: 0 g
- Carbohydrates: 10 g
- Fiber: 1 g
- Protein: 10 g
- Cholesterol: 20 mg
Keywords: Ensure your cottage cheese is thoroughly drained for maximum crispiness. Spread the mixture very thin for the best texture, and keep an eye on them while baking to prevent burning.
Leave a Comment