
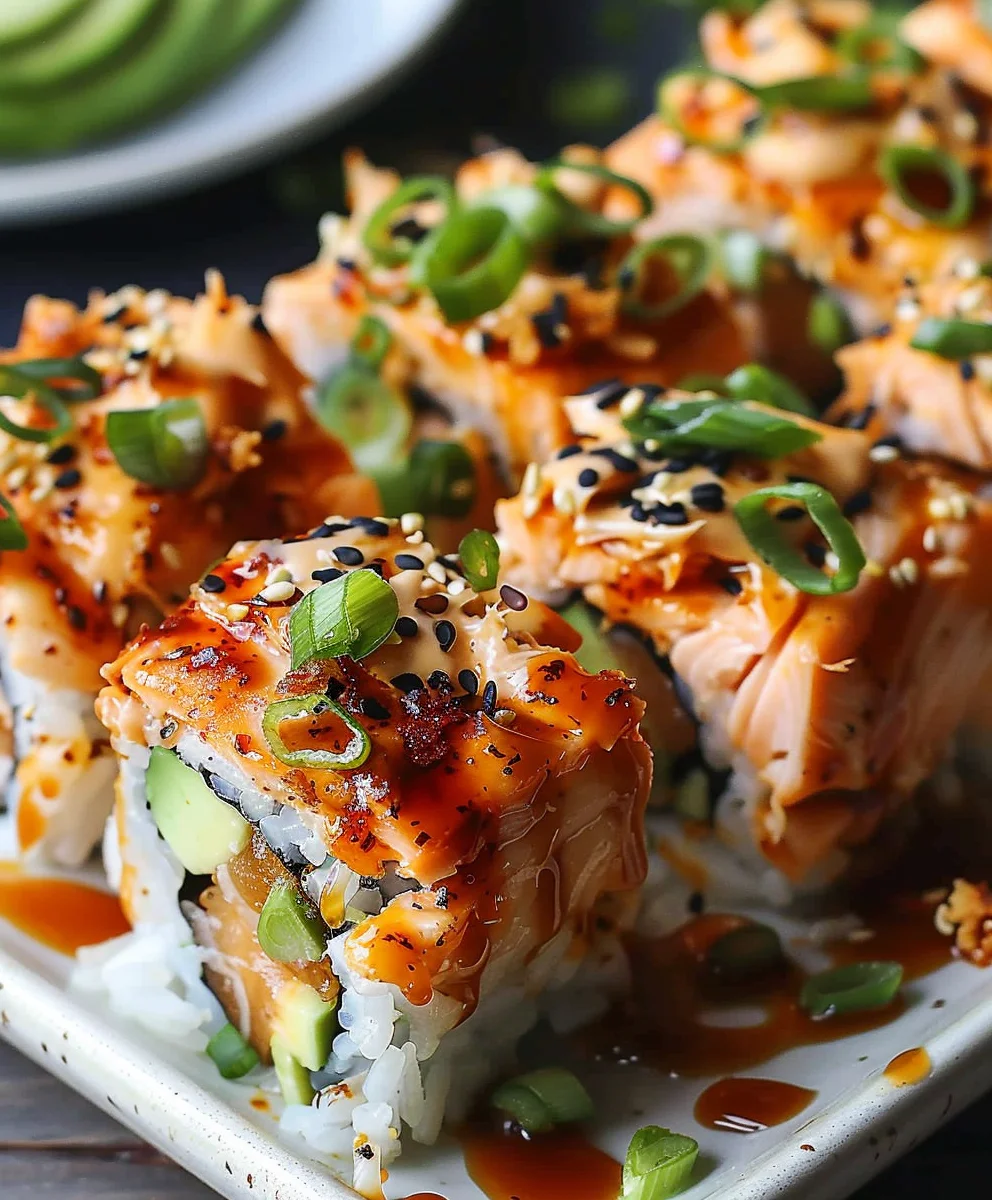
Spicy Salmon Sushi Bake has taken the culinary world by storm, offering a revolutionary way to enjoy the beloved flavors of sushi without the intricate rolling. If you, like me, adore the fresh, vibrant taste of a classic spicy salmon roll but sometimes wish for a simpler, more shareable format, then you are in for an absolute treat. This innovative dish beautifully blends the creamy texture of seasoned salmon with fluffy rice, often topped with a medley of delightful ingredients, all baked to a golden perfection. It truly is the ultimate crowd-pleaser for any gathering or a fun weeknight meal.
The rise of the sushi bake, while not a traditional Japanese dish, respectfully pays homage to the incredible flavors and ingredients central to Japanese cuisine. It gained immense popularity during recent years, becoming a beloved home cooking trend, especially when takeout sushi options were limited, or people simply sought a fun, interactive meal to prepare. What makes this Spicy Salmon Sushi Bake so universally adored is its irresistible combination of textures and tastes: the rich, savory salmon, the comforting warmth of the rice, the optional crunch of nori wraps, and that unforgettable spicy kick. This dish is wonderfully versatile, incredibly satisfying, and surprisingly easy to assemble, transforming complex sushi into an accessible, family-friendly feast. Prepare to be delighted!

Ingredients:
-
For the Sushi Rice:
- 2 cups (approx. 400g) Japanese short-grain sushi rice
- 2 ¼ cups (approx. 530ml) water, plus extra for rinsing
- ½ cup (approx. 120ml) rice vinegar (unseasoned is fine, but seasoned adds a nice touch)
- 2 tablespoons granulated sugar
- 1 teaspoon salt
- 1 tablespoon mirin (optional, for extra depth)
-
For the Spicy Salmon Filling:
- 1 ½ pounds (approx. 680g) skinless, boneless salmon fillets (fresh or thawed frozen)
- 2 tablespoons olive oil or neutral cooking oil
- Salt and freshly ground black pepper to taste
- ½ cup (approx. 120ml) Japanese mayonnaise (like Kewpie mayo, for its richer flavor)
- ¼ cup (approx. 60ml) Sriracha sauce (adjust to your spice preference, I like it fiery!)
- 1 tablespoon soy sauce or tamari (for a gluten-free option)
- 1 teaspoon sesame oil
- 1 tablespoon fresh lemon juice
- 2 green onions (scallions), thinly sliced, plus more for garnish
-
For the Creamy Drizzle (Optional but highly recommended!):
- ¼ cup (approx. 60ml) Japanese mayonnaise
- 1 tablespoon Sriracha sauce (or to taste)
- 1 teaspoon rice vinegar
- ½ teaspoon sugar
-
For Toppings and Serving:
- 4 sheets roasted seaweed snacks (nori), cut into small rectangles or squares, or a pack of larger sushi nori sheets, cut for individual servings
- ¼ cup furikake seasoning (Japanese rice seasoning), plus extra for garnish
- 2 tablespoons toasted sesame seeds, plus extra for garnish
- Additional sliced green onions for garnish
- Thinly sliced avocado (optional, but a lovely creamy counterpoint)
- Cucumber, julienned (optional, for a refreshing crunch)
- Spicy Salmon Sushi Bake – your finished masterpiece!
Preparing the Sushi Rice
- Rinse the Sushi Rice Thoroughly: My first step for any amazing sushi dish, and especially our Spicy Salmon Sushi Bake, is always to meticulously rinse the rice. Place the 2 cups of Japanese short-grain sushi rice in a large bowl. Add cold water, swirling the rice with your hand, until the water turns cloudy. Drain the water and repeat this process at least 5-7 times, or until the water runs mostly clear. This removes excess starch, which is absolutely crucial for achieving that perfect sticky-but-separate texture that defines great sushi rice. Trust me, this step makes all the difference!
- Soak the Rice: Once rinsed, drain the rice well and place it in a medium saucepan or a rice cooker pot. Add 2 ¼ cups of fresh cold water. Let the rice soak for at least 30 minutes. This pre-soaking allows the grains to absorb water evenly, ensuring a more tender and uniformly cooked rice. It’s a small step that pays off big time in the final texture.
- Cook the Rice: If using a saucepan, bring the water to a boil over medium-high heat. Once boiling, reduce the heat to the lowest setting, cover the pot tightly, and simmer for 15 minutes. Do not lift the lid during this time! After 15 minutes, remove the pot from the heat and let it rest, still covered, for another 10-15 minutes. This resting period allows the steam to finish cooking the rice and ensures the grains are plump and fluffy. If using a rice cooker, simply follow your rice cooker’s instructions for white rice.
- Prepare the Sushi Vinegar Mixture: While the rice is cooking and resting, let’s prepare our seasoning. In a small microwave-safe bowl or saucepan, combine the ½ cup rice vinegar, 2 tablespoons granulated sugar, 1 teaspoon salt, and the optional 1 tablespoon mirin. Heat gently (either in the microwave for 30-60 seconds or on the stovetop over low heat) until the sugar and salt have fully dissolved. Stir well to ensure everything is completely incorporated. Let this mixture cool slightly.
- Season the Rice: Once the rice has rested, gently transfer it to a large, wide, non-metallic bowl or a traditional wooden hangiri (if you have one!). Pour the cooled sushi vinegar mixture evenly over the hot rice. Using a cutting motion with a rice paddle or a large flat spoon, gently fold the seasoning into the rice. Avoid mashing or stirring vigorously, as this can break the rice grains. Continue folding and fanning the rice (a small handheld fan works wonders, but a piece of cardboard will do!) to cool it down quickly. This fanning process helps the rice become glossy and separates the grains, giving it that signature sushi rice texture. Your goal is to get the rice to room temperature, or slightly warm, before assembling your Spicy Salmon Sushi Bake. This step is critical for flavor and texture!
Preparing the Spicy Salmon Filling
- Cook the Salmon: Preheat your oven to 400°F (200°C). Line a baking sheet with parchment paper for easy cleanup. Place the skinless, boneless salmon fillets on the prepared baking sheet. Drizzle with 2 tablespoons of olive oil, and season generously with salt and freshly ground black pepper. Roast the salmon for 12-15 minutes, or until it’s cooked through and flakes easily with a fork. The cooking time will vary depending on the thickness of your fillets. I like to keep an eye on it to ensure it doesn’t overcook and dry out.
- Flake the Salmon: Once the salmon is cooked, remove it from the oven and let it cool slightly. Using two forks, gently flake the salmon directly on the baking sheet or transfer it to a large mixing bowl. Break it into small, bite-sized pieces. We want some texture here, not a mush! This flaked salmon will be the star of our “Spicy Salmon Sushi Bake.”
- Prepare the Spicy Mayo Mixture: In a separate medium bowl, combine the ½ cup Japanese mayonnaise, ¼ cup Sriracha sauce (adjust this to your preferred spice level – I often add a little extra because I love the heat!), 1 tablespoon soy sauce or tamari, 1 teaspoon sesame oil, and 1 tablespoon fresh lemon juice. Whisk everything together until the mixture is smooth and creamy. Taste it and adjust the seasoning if needed; you might want more Sriracha or a touch more lemon. This is where the “spicy” in our “Spicy Salmon Sushi Bake” truly comes alive!
- Combine Salmon and Spicy Mayo: Pour the creamy spicy mayonnaise mixture over the flaked salmon in the large mixing bowl. Add the 2 thinly sliced green onions. Gently fold everything together until the salmon is thoroughly coated. Be careful not to overmix, as we want to maintain the flaked texture of the salmon. Set this delicious filling aside while we prepare for assembly.
- Prepare the Optional Creamy Drizzle: If you’re opting for an extra layer of deliciousness (and I highly recommend it!), in a small bowl, whisk together the ¼ cup Japanese mayonnaise, 1 tablespoon Sriracha sauce, 1 teaspoon rice vinegar, and ½ teaspoon sugar until smooth. Transfer this to a squeeze bottle or a small Ziploc bag with a corner snipped off for easy drizzling later. This adds a beautiful finishing touch to our Spicy Salmon Sushi Bake.
Assembling the Spicy Salmon Sushi Bake
- Preheat the Oven (Again!): Preheat your oven to 400°F (200°C) again. We’re going to bake this just long enough to get a lovely golden crust and warm everything through.
- Prepare Your Baking Dish: Lightly grease a 9×13-inch baking dish with a bit of neutral oil. This helps prevent sticking and makes serving easier. I find a glass dish works great as you can see the layers.
- Create the Rice Base: Gently transfer all of the seasoned sushi rice into the prepared baking dish. Using a rice paddle or the back of a spoon, evenly press the rice into a flat, compact layer at the bottom of the dish. Make sure it’s firm and uniform, as this forms the stable base for our Spicy Salmon Sushi Bake. Don’t skip pressing it down well; it helps it hold together when serving.
- Sprinkle with Furikake and Sesame Seeds: Sprinkle about half of the ¼ cup furikake seasoning and half of the 2 tablespoons toasted sesame seeds evenly over the pressed rice layer. This adds an initial burst of umami and texture right beneath our salmon. These seasonings are incredibly important for that authentic flavor profile in your Spicy Salmon Sushi Bake.
- Add the Spicy Salmon Layer: Carefully spoon the entire spicy salmon mixture over the furikake and sesame seed layer. Using the back of a spoon or a spatula, gently spread the salmon out evenly across the entire surface of the rice. Make sure the salmon is in a consistent layer, covering the rice completely. This is the heart of our Spicy Salmon Sushi Bake, so ensure it looks inviting!
- Top with More Furikake and Sesame Seeds: Sprinkle the remaining furikake seasoning and toasted sesame seeds generously over the top of the salmon layer. This adds another layer of flavor, texture, and a beautiful visual appeal.
Baking the Spicy Salmon Sushi Bake
- Bake to Perfection: Place the assembled baking dish into the preheated 400°F (200°C) oven. Bake for 15-20 minutes, or until the top is lightly golden brown, the salmon is heated through, and the edges of the rice start to get just a little crispy. Keep an eye on it so the toppings don’t burn. What we’re looking for is a lovely warmth throughout and a slight textural contrast from the oven’s heat. This short bake time is what transforms it into a true “bake” rather than just layered sushi.
- Broil for Extra Crisp (Optional): For an even more glorious finish, if you desire a truly crispy top, you can turn your oven to the broiler setting for the last 1-2 minutes. Watch it extremely closely, as broilers can brown things very quickly! You want a nice golden-brown crust, not a burnt one. This step elevates the texture of your Spicy Salmon Sushi Bake.
Serving Your Spicy Salmon Sushi Bake
- Rest Before Serving: Once out of the oven, let the Spicy Salmon Sushi Bake rest for 5-10 minutes. This allows the layers to set slightly, making it easier to portion and serve. While it’s resting, I usually get all my garnishes ready.
- Add the Creamy Drizzle and Garnishes: Now comes the fun part! If you prepared the creamy drizzle, artfully zig-zag it over the entire surface of the baked sushi. Garnish liberally with additional thinly sliced green onions and a sprinkle of toasted sesame seeds. If you’re using avocado or cucumber, arrange those slices on top as well. The fresh garnishes really brighten up the dish.
- Serve with Nori Seaweed: To serve, you can cut the Spicy Salmon Sushi Bake directly in the pan into individual squares or rectangles. The traditional way to enjoy this is to scoop a portion onto a piece of roasted seaweed (nori) and eat it like a mini taco or wrap. The crispness of the nori perfectly complements the warm, soft rice and creamy, spicy salmon. It’s an interactive and utterly delicious experience!
- Enjoy Immediately: This dish is best enjoyed warm, straight out of the oven. The combination of warm, seasoned rice, the rich, spicy salmon, and the fresh toppings is simply irresistible. Get ready for a flavor explosion with every bite of your homemade Spicy Salmon Sushi Bake! You can also offer extra Sriracha on the side for those who like an even spicier kick.
Tips for the Best Spicy Salmon Sushi Bake:
- Quality Ingredients Matter: Since salmon is the star, opt for high-quality, fresh salmon fillets.
- Don’t Overcook the Salmon: A slightly undercooked, flaky salmon is better than dry, tough salmon.
- Adjust Spice to Taste: Sriracha levels are very personal! Start with less and add more if you like it hotter.
- Leftovers: If you have any leftovers, store them in an airtight container in the refrigerator for up to 2 days. Reheat gently in the microwave or a low oven, though the texture of the rice might change slightly.
- Get Creative with Toppings: Feel free to experiment with other toppings like masago (fish roe), pickled ginger, or a sprinkle of Togarashi for extra flavor and visual appeal.
This Spicy Salmon Sushi Bake is a fantastic crowd-pleaser and a fun, deconstructed way to enjoy all the flavors of your favorite spicy salmon rolls without the fuss of rolling. It’s truly a perfect dish for entertaining or a satisfying weeknight meal.
Conclusion:
So, there you have it! We’ve journeyed through the simple steps to create a truly unforgettable dish. I truly believe that this recipe for the Spicy Salmon Sushi Bake isn’t just another meal; it’s an experience waiting to happen in your kitchen. Why is it an absolute must-try, you ask? Well, for starters, it brilliantly encapsulates all the vibrant, fresh flavors we adore in traditional sushi, but without the fuss and intricate rolling techniques. It’s the perfect solution for those times when you’re craving that umami-packed goodness, the creamy texture of rich salmon, and a delightful kick of spice, all baked together into a comforting, easy-to-serve casserole.
It’s a fantastic entry point for anyone intimidated by sushi making, offering all the reward with none of the stress. Imagine serving this glorious bake at your next gathering – the vibrant colors, the irresistible aroma, and the sheer delight on your guests’ faces as they discover this innovative take on a classic. It’s a guaranteed crowd-pleaser, incredibly adaptable to different palates, and frankly, a whole lot of fun to put together. Plus, let’s be honest, who doesn’t love a dish that looks incredibly impressive but is surprisingly straightforward to execute? This recipe perfectly balances gourmet appeal with home-cook accessibility, making it a staple you’ll want to revisit again and again. Its layers of perfectly seasoned rice, tender, flaky salmon, and that signature spicy, creamy sauce come together in a harmony of textures and tastes that will absolutely tantalize your taste buds, solidifying its place as a new favorite in your culinary repertoire.
Elevate Your Dining Experience: Serving Suggestions & Creative Variations
Now that you’ve mastered the art of the Spicy Salmon Sushi Bake, let’s talk about how to truly make it shine on your table. The most classic and perhaps the most enjoyable way to serve this is with crisp sheets of roasted nori (seaweed wraps). Simply take a spoonful of the warm sushi bake, place it on a piece of nori, and enjoy it like a deconstructed sushi roll. The crunch of the nori provides a wonderful textural contrast to the soft rice and creamy salmon. Beyond nori, consider fresh lettuce cups – butter lettuce or romaine hearts work beautifully – for a lighter, refreshing wrapper option. These add a different kind of crunch and a subtle bitterness that complements the richness of the bake, offering a delightful alternative for those who prefer a less traditional approach.
To create a more complete meal, think about pairing your bake with some simple, elegant sides. A bowl of warm miso soup is always a welcome addition, providing a comforting, savory contrast that perfectly balances the rich flavors of the bake. A light cucumber salad, perhaps dressed with a touch of rice vinegar and sesame oil, offers a refreshing palate cleanser, cutting through the richness with its crispness. Steamed edamame, sprinkled with sea salt, makes for a perfect appetizer or side snack, providing a satisfying bite and a touch of vibrant green. You could also serve it alongside a crisp green salad with a ginger-sesame dressing for an extra touch of freshness and a complex flavor profile that elevates the entire dining experience. Don’t forget a sprinkle of thinly sliced green onions or a dash of furikake over the top of the bake just before serving for an added layer of flavor and visual appeal.
But don’t stop there! This recipe is incredibly versatile, inviting you to get creative with variations. Feeling adventurous?
Here are a few ideas to spark your culinary imagination:
- Protein Swaps: While salmon is king here, consider cooked imitation crab (kani), canned tuna (drain well), or even cooked shrimp for a different seafood profile. For a vegetarian twist, sautéed seasoned mushrooms, roasted sweet potatoes, or even baked tofu cubes could be fantastic, offering an equally satisfying and flavorful experience.
- Veggie Boost: Stir in finely diced avocado, cucumber, or even some corn kernels into the rice mixture before baking for added freshness and texture. A sprinkle of chopped green onions or cilantro after baking also adds a lovely pop of color and flavor, enhancing the overall vibrancy of the dish.
- Spice It Up (or Down): Adjust the amount of sriracha to suit your heat preference. For an extra fiery kick, add a pinch of gochugaru (Korean chili flakes) or a dash of chili oil. If you prefer it milder, reduce the sriracha and lean more on the creamy mayonnaise and a touch of sweet chili sauce.
- Flavor Enhancers: A drizzle of unagi sauce (eel sauce) or teriyaki sauce post-bake can add a lovely sweet and savory glaze, creating another dimension of taste. A generous sprinkle of toasted sesame seeds is always a good idea for nutty depth and a delightful crunch.
- Cheesy Twist: For an unconventional but surprisingly delicious twist, consider sprinkling a thin layer of mozzarella or Monterey Jack cheese over the top during the last few minutes of baking for a gooey, cheesy crust that adds a comforting, indulgent element.
Your Culinary Adventure Awaits!
I genuinely hope that this recipe has inspired you to step into your kitchen and give the Spicy Salmon Sushi Bake a try. It’s more than just a meal; it’s an invitation to explore new flavors, experiment with textures, and create something truly special for yourself, your family, or your friends. Trust me when I say, the moment you pull that golden, bubbling tray out of the oven, the aroma alone will be enough to tell you you’ve made an excellent choice. It truly is a dish that delivers on all fronts – taste, ease, and sheer enjoyment.
Don’t be shy! I’m incredibly excited to see your culinary creations. Once you’ve whipped up your own batch, please don’t hesitate to share your experience. Did you stick to the recipe, or did you venture into exciting new variations? What were your favorite serving suggestions? Your insights and feedback are invaluable, not just to me, but to our entire community of food lovers who are always looking for fresh inspiration and delightful new ways to enjoy their meals.
Snap a picture, tell us about your triumphs (and any delicious experiments!), and let us know how much you enjoyed this unique and delightful dish. Happy baking, and happy eating! I can’t wait to hear all about your delicious journey with this incredible sushi bake. Let’s make some amazing food together!
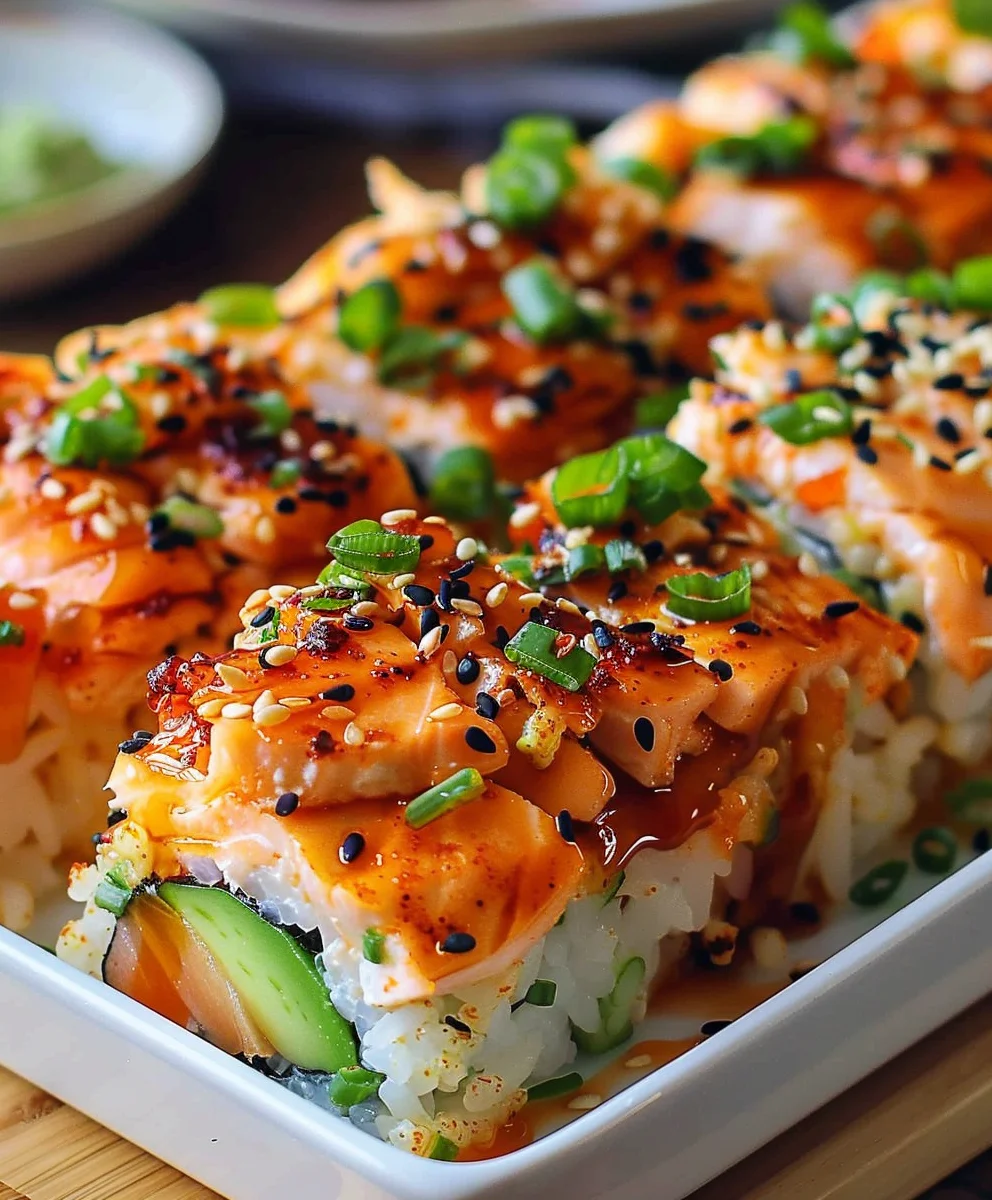
Spicy Salmon Sushi Bake
A revolutionary way to enjoy the beloved flavors of sushi without intricate rolling. This innovative dish blends creamy, seasoned salmon with fluffy rice, often topped with delightful ingredients, all baked to golden perfection. It’s the ultimate crowd-pleaser for any gathering or a fun weeknight meal.
Ingredients
-
2 cups cooked sushi rice
-
1 tablespoon rice vinegar
-
½ teaspoon sugar
-
½ teaspoon salt
-
12 oz skinless salmon fillet, cooked and flaked
-
¼ cup mayonnaise
-
2 tablespoons Sriracha sauce
-
1 tablespoon soy sauce
-
1 teaspoon sesame oil
-
½ cup shredded mozzarella cheese
-
2 sheets roasted seaweed (nori), cut into small squares
-
2 green onions, thinly sliced
-
1 tablespoon toasted sesame seeds
Instructions
-
Step 1
Prepare Rice Base: In a large bowl, combine cooked sushi rice with rice vinegar, sugar, and salt. Gently fold to incorporate. Press the seasoned rice evenly into the bottom of a lightly greased 9×13-inch baking dish, ensuring a compact layer. -
Step 2
Make Salmon Filling: In a separate medium bowl, combine the flaked cooked salmon, mayonnaise, Sriracha sauce, soy sauce, sesame oil, and half of the thinly sliced green onions. Mix gently until the salmon is thoroughly coated. -
Step 3
Assemble Layers: Carefully spoon the spicy salmon mixture over the rice base, spreading it evenly across the entire surface. Sprinkle the shredded mozzarella cheese over the salmon layer. Top with the remaining sliced green onions and half of the toasted sesame seeds. -
Step 4
Bake: Preheat your oven to 400°F (200°C). Place the assembled baking dish into the preheated oven and bake for 15-20 minutes, or until the top is lightly golden brown and the salmon mixture is heated through. For an extra crispy top, broil for the last 1-2 minutes, watching closely to prevent burning. -
Step 5
Serve: Remove from oven and let the sushi bake rest for 5-10 minutes. Garnish with the remaining toasted sesame seeds. Cut into individual squares or rectangles and serve warm with roasted seaweed (nori) squares for wrapping.
Important Information
Nutrition Facts (Per Serving)
It is important to consider this information as approximate and not to use it as definitive health advice.
Allergy Information
Please check ingredients for potential allergens and consult a health professional if in doubt.
Leave a Comment