
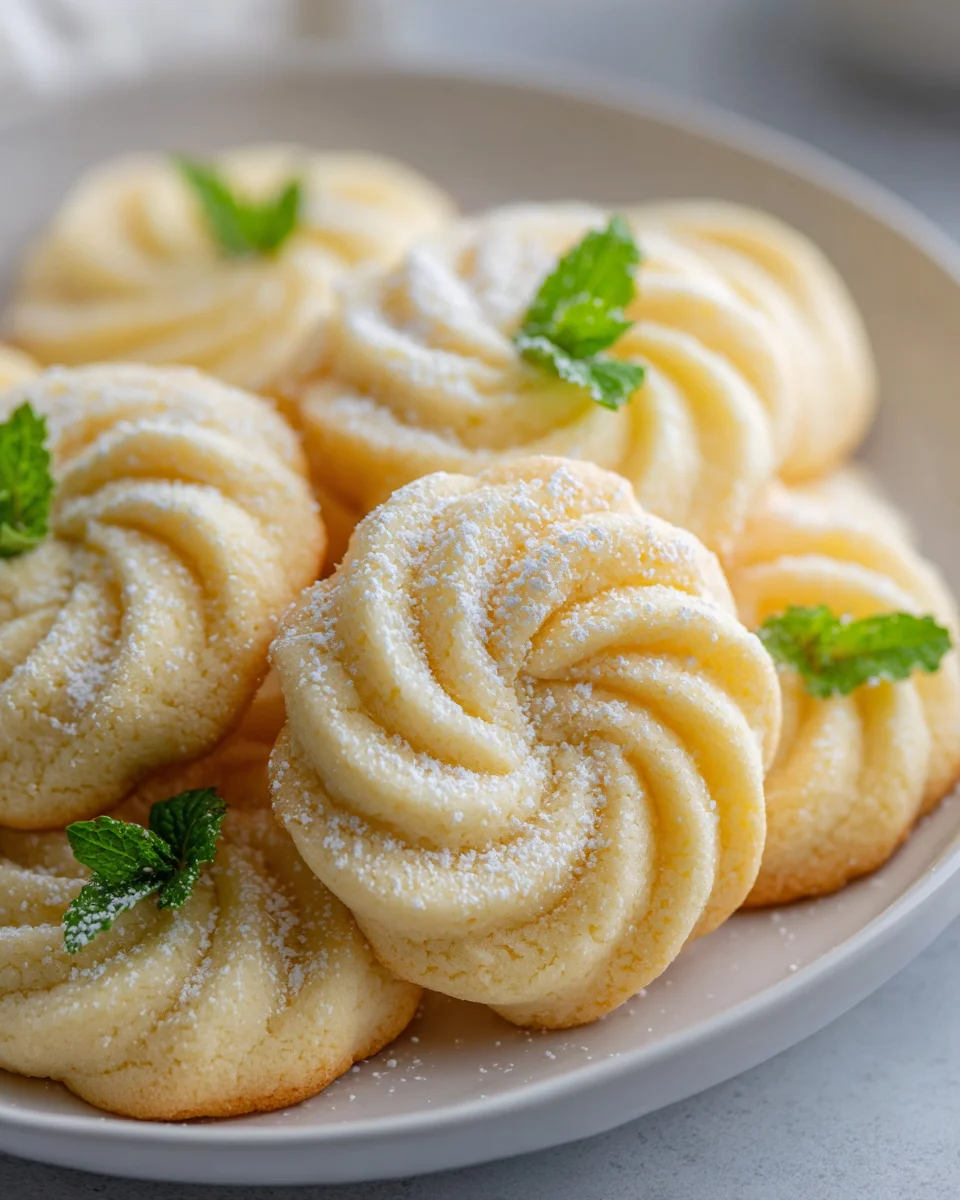
Soft Butter Cookies
Soft Butter Cookies. Oh, get ready to fall head over heels! If you’re anything like me, there’s just something utterly irresistible about a cookie that’s so tender it practically melts in your mouth, leaving behind that rich, comforting buttery flavor. That’s precisely what we’re going to create today with this incredible recipe.
This isn’t just any butter cookie recipe; it’s the recipe for those unbelievably soft, delicate treats that everyone adores. What makes these particular Soft Butter Cookies so special? It’s all in the meticulous balance of simple ingredients, resulting in a cookie that is incredibly tender, delightfully chewy at the edges, and bursting with pure, unadulterated butter goodness. You’ll absolutely love them because they are the ultimate comfort bake – perfect for dunking in your morning coffee, serving alongside an afternoon tea, or simply enjoying whenever a sweet craving strikes. They’re also wonderfully easy to make, so even if you’re new to baking, you’ll feel like a seasoned pro.
In this recipe, we’ll whisk together a few pantry staples to create a dough that comes together quickly and easily. Then, we’ll bake them until they’re lightly golden and incredibly fragrant, filling your home with the most welcoming aroma. The result is a batch of cookies that are timeless, versatile, and guaranteed to put a smile on everyone’s face. Get ready for your kitchen to smell absolutely incredible!

Ingredient Notes
Creating truly soft butter cookies begins with selecting the right ingredients and understanding their roles. While the list might seem simple, each component contributes significantly to that melt-in-your-mouth texture we’re aiming for. Here’s a closer look at what you’ll need to make these delightful treats.
Unsalted Butter
- Why it’s key: Butter is the star of butter cookies, providing their rich flavor and tender texture. Using unsalted butter allows us to control the total salt content in the recipe.
- Temperature is critical: It’s absolutely crucial that your butter is properly softened to room temperature, but not melted. If it’s too cold, it won’t cream properly with the sugar, leading to a dense cookie. If it’s melted, your cookies will spread too much and lack structure. Aim for butter that gives slightly when pressed, like cool play-doh.
- Substitution: For a dairy-free alternative, you can try a high-quality plant-based butter substitute. Be aware that the texture and flavor might vary slightly, but a good quality brand should still yield a tender cookie.
Powdered Sugar (Confectioners’ Sugar)
- Why it’s key for softness: This is a secret weapon for soft cookies! Unlike granulated sugar, which has larger crystals and can make cookies crispier, powdered sugar dissolves more completely and contributes to a much tenderer, meltier crumb. It also helps prevent spread and gives the cookies a smoother appearance.
- Substitution: There’s no direct substitute for powdered sugar if you want to achieve that signature soft texture. Granulated sugar will work but will result in a firmer, crunchier cookie, so I highly recommend sticking to powdered sugar for this recipe.
All-Purpose Flour
- Why it’s key: Standard all-purpose flour provides the structure for our cookies.
- Preparation: I always recommend sifting your flour before adding it to the wet ingredients. This aerates the flour, prevents lumps, and ensures a lighter, softer cookie texture.
- Substitution: A 1:1 gluten-free baking blend can often be used as a substitute, but be mindful that the texture might be slightly different. Some gluten-free blends can absorb more moisture, so you might need to adjust the liquid slightly.
Vanilla Extract
- Why it’s key: A good quality vanilla extract enhances the buttery flavor beautifully, adding warmth and depth to the cookies.
- Substitution: You can experiment with other extracts like almond or lemon for a different flavor profile, but vanilla is classic for a reason.
Pinch of Salt
- Why it’s key: Just a small amount of salt balances the sweetness and brings out the rich flavors of the butter and vanilla. Don’t skip it!
Optional Additions (for ultimate softness and richness)
- Egg Yolk: Adding one large egg yolk can significantly boost the richness and tenderness of your butter cookies, making them even more melt-in-your-mouth. It adds fat and emulsifies the dough, contributing to a smoother texture.
- Heavy Cream or Milk: A tablespoon or two of heavy cream or milk can make the dough more pliable for piping and add a touch more moisture, resulting in an even softer cookie. This is especially helpful if your dough feels a bit too stiff.
By understanding the role of each ingredient, you’re well on your way to baking the perfect batch of soft butter cookies!
Step-by-Step Instructions
Making these soft butter cookies is a straightforward and rewarding process. The key is to pay attention to details, especially when mixing and baking, to ensure that coveted tender crumb. Follow these steps for buttery perfection!
- Prepare Your Ingredients and Oven:
- Take your unsalted butter out of the refrigerator at least an hour before you plan to bake, allowing it to soften to room temperature.
- Preheat your oven to a moderate temperature, usually around 350°F (175°C). Line several baking sheets with parchment paper or silicone mats. This prevents sticking and promotes even baking.
- Cream the Butter and Sugar:
- In a large mixing bowl, using an electric mixer (stand mixer with paddle attachment or a handheld mixer), beat the softened unsalted butter on medium speed until creamy, about 1-2 minutes.
- Gradually add the powdered sugar to the butter. Beat on medium-high speed for 3-5 minutes, scraping down the sides of the bowl occasionally, until the mixture is very light, fluffy, and pale in color. This creaming process incorporates air, which is crucial for the cookies’ soft texture.
- Add Vanilla and Egg Yolk (if using):
- Beat in the vanilla extract until just combined.
- If you’re using an egg yolk for extra richness, add it now and beat until fully incorporated, about 30 seconds. If the dough seems a little stiff, now is also a good time to add a tablespoon of heavy cream or milk and mix until just combined.
- Incorporate the Flour and Salt:
- In a separate small bowl, whisk together the sifted all-purpose flour and salt.
- Gradually add the dry ingredients to the wet ingredients, mixing on low speed until just combined. Be careful not to overmix! Overmixing develops gluten, which can lead to tough cookies rather than soft ones. Stop mixing as soon as no dry streaks of flour are visible.
- Chill the Dough (Optional but Recommended):
- For easier handling and to prevent excessive spreading, I recommend chilling the dough for at least 30 minutes in the refrigerator. You can cover the bowl with plastic wrap or transfer the dough to a piping bag for easier chilling and shaping later.
- Shape the Cookies:
- If you’re piping, fit a piping bag with your desired nozzle (a star tip is classic) and fill it with the chilled dough. Pipe various shapes onto the prepared baking sheets, leaving about 1-2 inches between cookies.
- If you’re rolling and cutting, lightly flour your work surface and roll out the chilled dough to about 1/4-inch thickness. Use cookie cutters to cut out shapes and carefully transfer them to the baking sheets. Alternatively, you can roll the dough into small balls and flatten them slightly with the palm of your hand or a fork.
- For a classic look, you can gently press a sprinkle of colored sugar or a maraschino cherry half into the center of each cookie before baking.
- Bake the Cookies:
- Place the baking sheets in the preheated oven. Bake for 10-14 minutes, depending on the size and thickness of your cookies.
- CRITICAL for softness: Do NOT overbake! These cookies should remain very pale, with only the slightest hint of golden brown around the edges, if any. They might look slightly undone in the center, but they will firm up as they cool. Overbaking is the quickest way to lose their signature soft texture.
- Cool and Serve:
- Once baked, remove the baking sheets from the oven and let the cookies cool on the sheets for about 5 minutes. They will be delicate when warm.
- Carefully transfer the cooled cookies to a wire rack to cool completely.
Once cooled, your soft butter cookies are ready to be enjoyed! They are wonderful on their own or with a light dusting of powdered sugar.
Tips & Suggestions
To ensure your soft butter cookies turn out perfectly tender and buttery every single time, I’ve gathered some of my favorite tips and suggestions. These small details can make a big difference in achieving that desired melt-in-your-mouth texture.
- Master Butter Temperature: This is arguably the most crucial tip! Your butter must be truly softened to room temperature, not cold and firm, and certainly not greasy or melted. When you press it, your finger should make a slight indentation without sinking through. Properly softened butter creams with sugar more efficiently, incorporating more air for a lighter, softer cookie.
- Don’t Skimp on Creaming Time: When beating the butter and powdered sugar, give it ample time – 3 to 5 minutes – until it’s noticeably light, fluffy, and pale. This step creates air pockets, which expand in the oven, contributing to the cookies’ delicate structure and softness.
- Embrace Powdered Sugar: Stick to powdered sugar (confectioners’ sugar) as specified in the ingredient notes. Its fine texture is a key factor in achieving that signature soft, tender crumb, unlike granulated sugar which often leads to a crispier cookie.
- Mix Just Until Combined: Once you add the flour, mix on low speed only until the dry ingredients are just incorporated. Overmixing develops gluten, which can make your cookies tough and chewy, the opposite of what we want for soft butter cookies.
- Avoid Overbaking at All Costs: This is a cardinal rule for soft butter cookies. They should look very pale, almost underbaked, when you pull them from the oven. Even a few extra minutes can turn them from soft to crisp. They will continue to set and firm up as they cool on the baking sheet.
- Chill Your Dough: While you can sometimes skip this step, chilling the dough for at least 30 minutes helps the butter firm up, preventing the cookies from spreading too much in the oven. It also allows the flavors to meld, resulting in a more delicious cookie. Chilled dough is also much easier to handle, especially for piping.
- Consider an Egg Yolk for Extra Richness: As mentioned in the ingredient notes, adding one large egg yolk significantly enhances the richness and tenderness of these cookies. It’s a small addition with a big impact on texture.
- Experiment with Flavor Variations: While classic vanilla is divine, feel free to add a pinch of lemon zest for brightness, a dash of almond extract, or even a tiny amount of non-alcohol rum extract for a different twist. Just remember that strong extracts should be used sparingly.
- Decorating Ideas: Keep it simple to let the buttery flavor shine. A light dusting of powdered sugar, a simple drizzle of melted chocolate, or some colorful sprinkles added before baking can enhance their appeal without overpowering the delicate taste.
By keeping these tips in mind, you’ll be baking batches of perfect, soft butter cookies that everyone will adore!
Storage
Once you’ve gone to the effort of baking these wonderfully soft butter cookies, you’ll want to ensure they stay fresh and delicious for as long as possible. Proper storage is key to maintaining their delightful texture and flavor.
At Room Temperature
- Airtight Container: Your soft butter cookies are best stored in an airtight container at room temperature. A cookie jar with a good seal or a plastic container with a tight-fitting lid works perfectly.
- Separation: If you’ve decorated your cookies with a glaze or icing, allow it to set completely before stacking them. You might also want to place a piece of parchment paper between layers of cookies to prevent them from sticking together.
- Shelf Life: Stored correctly, these cookies will remain soft and delicious for up to 3-5 days. Beyond that, they might start to dry out slightly, though they’ll still be perfectly edible.
- Reviving: If they’ve lost a little softness, you can place a slice of bread in the container with the cookies overnight. The cookies will absorb moisture from the bread, making them softer again. Just remember to remove the bread after a day to prevent mold.
Refrigeration
- Generally Not Recommended: I typically don’t recommend refrigerating baked soft butter cookies. The cold temperature can cause them to become firmer and less tender, and they can also absorb odors from other foods in your fridge.
- Exceptions: If your cookies have a fresh cream-based filling or a highly perishable topping, then refrigeration might be necessary. In such cases, store them in an airtight container and allow them to come to room temperature for about 15-20 minutes before serving to soften up slightly.
Freezing Baked Cookies
- Excellent for Longevity: Baked soft butter cookies freeze beautifully, making them a great option for meal prep or if you want to make a large batch ahead of time.
- Preparation: Ensure the cookies are completely cooled before freezing.
- Method: Arrange the cooled cookies in a single layer on a baking sheet and flash freeze them for about 30 minutes, or until solid. This prevents them from sticking together. Once solid, transfer them to a freezer-safe airtight container or a heavy-duty freezer bag, removing as much air as possible.
- Shelf Life: Frozen butter cookies can be kept for up to 2-3 months without a significant loss in quality.
- Thawing: To enjoy, simply take them out of the freezer and let them thaw at room temperature for an hour or two. They will return to their soft, tender glory.
By following these storage guidelines, you can ensure your delicious soft butter cookies stay fresh and enjoyable for days or even months!
Final Thoughts
There’s something truly magical about a simple recipe that delivers extraordinary results, and these Soft Butter Cookies are the perfect embodiment of that magic. I promise you, once you try them, you’ll understand why they’re such a beloved classic. Their melt-in-your-mouth tenderness, combined with that rich, pure buttery flavor, creates an irresistible treat that’s perfect for any occasion – from a cozy afternoon tea to a festive holiday gathering.
Making these Soft Butter Cookies isn’t just baking; it’s creating little moments of pure joy. They’re incredibly easy to whip up, yet they taste like something straight out of a high-end bakery. I truly believe everyone deserves to experience the simple pleasure of biting into one of these perfectly soft, deliciously buttery cookies. So, go ahead, give this recipe a try, and prepare to fall in love with your new favorite cookie!
Crave-Worthy Soft Butter Cookies: Easy & Perfect Every Time
- Total Time: 29 minutes
- Yield: 24 cookies 1x
Description
These soft butter cookies are irresistibly tender and bursting with rich buttery flavor. Perfect for any occasion, they are easy to make and guaranteed to satisfy your sweet cravings.
Ingredients
- 1 cup unsalted butter, softened
- 1 1/2 cups powdered sugar (confectioners' sugar)
- 2 1/2 cups all-purpose flour, sifted
- 1 teaspoon vanilla extract
- Pinch of salt
- 1 large egg yolk (optional)
- 1–2 tablespoons heavy cream or milk (optional)
Instructions
- Prepare Your Ingredients and Oven: Take your unsalted butter out of the refrigerator at least an hour before you plan to bake, allowing it to soften to room temperature. Preheat your oven to a moderate temperature, usually around 350°F (175°C). Line several baking sheets with parchment paper or silicone mats.
- Cream the Butter and Sugar: In a large mixing bowl, using an electric mixer, beat the softened unsalted butter on medium speed until creamy, about 1-2 minutes. Gradually add the powdered sugar to the butter. Beat on medium-high speed for 3-5 minutes until the mixture is very light, fluffy, and pale in color.
- Add Vanilla and Egg Yolk (if using): Beat in the vanilla extract until just combined. If you’re using an egg yolk, add it now and beat until fully incorporated, about 30 seconds. If the dough seems a little stiff, add a tablespoon of heavy cream or milk and mix until just combined.
- Incorporate the Flour and Salt: In a separate small bowl, whisk together the sifted all-purpose flour and salt. Gradually add the dry ingredients to the wet ingredients, mixing on low speed until just combined. Be careful not to overmix!
- Chill the Dough (Optional but Recommended): Chill the dough for at least 30 minutes in the refrigerator for easier handling and to prevent excessive spreading.
- Shape the Cookies: If you're piping, fit a piping bag with your desired nozzle and fill it with the chilled dough. Pipe various shapes onto the prepared baking sheets. If you're rolling and cutting, roll out the chilled dough to about 1/4-inch thickness and cut out shapes.
- Bake the Cookies: Place the baking sheets in the preheated oven. Bake for 10-14 minutes, depending on the size and thickness of your cookies. Do NOT overbake!
- Cool and Serve: Once baked, remove the baking sheets from the oven and let the cookies cool on the sheets for about 5 minutes. Carefully transfer the cooled cookies to a wire rack to cool completely.
- Prep Time: 15 mins
- Cook Time: 14 mins
- Category: Dessert
- Method: Baking
- Cuisine: American
Nutrition
- Serving Size: 1 cookie
- Calories: 120
- Sugar: 8 g
- Sodium: 50 mg
- Fat: 7 g
- Saturated Fat: 4 g
- Unsaturated Fat: 2 g
- Trans Fat: 0 g
- Carbohydrates: 12 g
- Fiber: 0 g
- Protein: 1 g
- Cholesterol: 20 mg
Keywords: Ensure your butter is softened to room temperature for the best texture. Avoid overbaking to maintain the cookies' softness. Consider adding an egg yolk for extra richness.
Leave a Comment